|
|
Post by brotherbanzai on Nov 17, 2008 23:37:13 GMT
That's looking great Cris! Very clean and crisp, especially considering what you started with.
|
|
Deleted
Deleted Member
Posts: 0
|
Post by Deleted on Nov 18, 2008 2:18:58 GMT
Forging is the most fun part of the whole blademaking process. Sometimes it is more fun to use stock that is completely dimensionally different from what you turn it into just to prolong the forging steps. After all, doing it this way really illustrates the freedom afforded by forging your blades; the shapes you can produce from your stock are limited by your imagination! Agree completely Matt =). That's looking great Cris! Very clean and crisp, especially considering what you started with. Thanks BB...like I said before...it was both easier and harder than I thought lol...it's been a sort of wierd project. I mean, I really shouldn't know how to make one of these things...but each step flows into the next and it's just working. Hard to explain. Everytime I think it's screwed up (bent, pitted, twisted...etc)...I move on to the next step and it just works. I mean, I filed on my two knives for DAYS to clean them up lol. This...I've got 12hrs forging total, an hour and a half filing yesterday, and three hours in today, and it's cleaned. Now it just needs smoothed and trued up with a single cut file, sanded to 120 or so...and it should be ready for heat treat. It's just left me with sort of a wierd feeling lol. I mean, I know I've learned a lot since I made my knives...and I do have a better anvil, which I can't say enough for...but that in and of itself shouldn't have improved my skill set by this large an amount. Maybe I'm onto something with shutting my brain off and just doing it lol. Anyhow, here's some updated pictures from my work today:     Some good, and not so good shots of the kissaki/yokote. The upcurve of the shinogi is still rough, but I didn't want to form it with a file and take too much off...I figure I'll do that with stones to make a nice crisp line, and still leave meat in the kissaki for proper niku. I also moved the yokote line back about 1/8" from where it was yesterday. I think it looks nicer that way...and may end up moving it even more, depending on how the shinogi ji shapes up in that area. Some good, and not so good shots of the kissaki/yokote. The upcurve of the shinogi is still rough, but I didn't want to form it with a file and take too much off...I figure I'll do that with stones to make a nice crisp line, and still leave meat in the kissaki for proper niku. I also moved the yokote line back about 1/8" from where it was yesterday. I think it looks nicer that way...and may end up moving it even more, depending on how the shinogi ji shapes up in that area.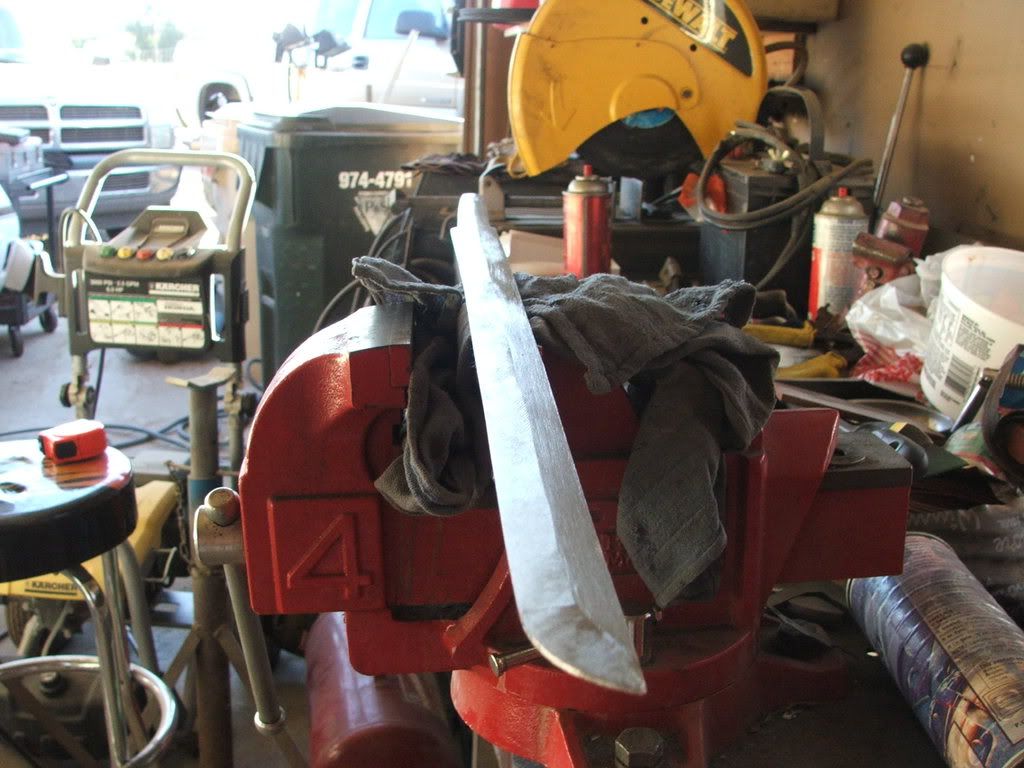   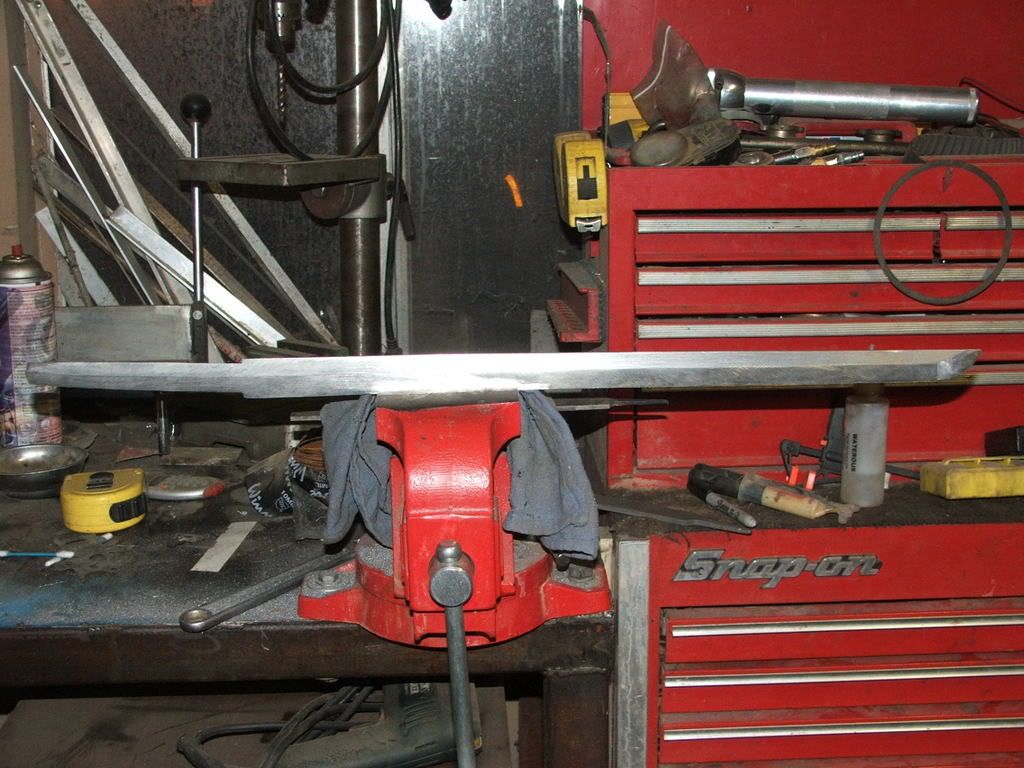 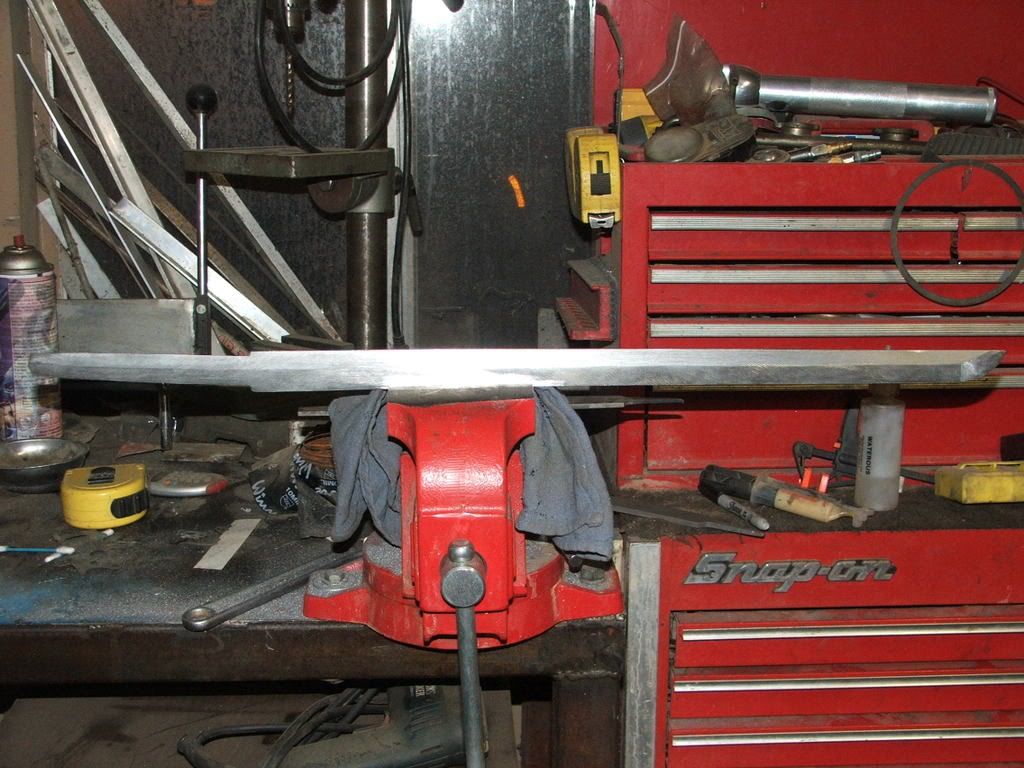  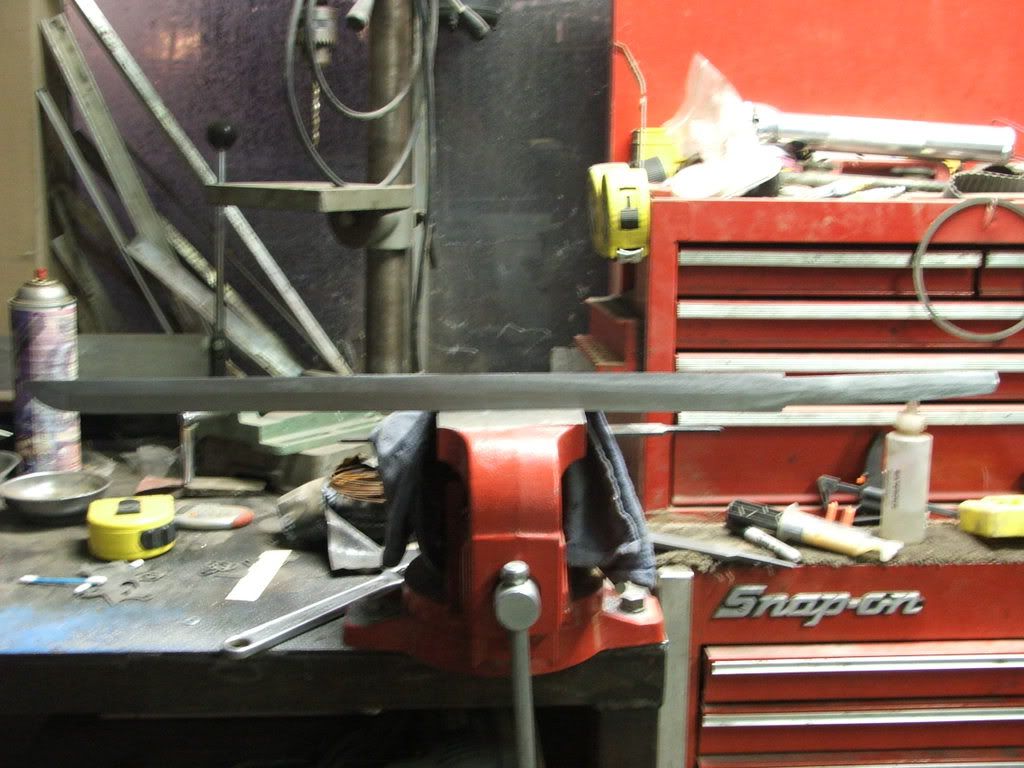  Here you can see a bit more of the shinogi ji. As you can see there's a bit of waviness...but I plan on truing that up with the single cut file. Overall I think the shaping worked well. I actually tried to put fumbari into this blade...but I'm not sure if I did it properly, or overdid it. You can see it pretty clearly in the first few pictures in this set, on the edge side. I'm hoping it doesn't turn out poorly in the heat treat. Here you can see a bit more of the shinogi ji. As you can see there's a bit of waviness...but I plan on truing that up with the single cut file. Overall I think the shaping worked well. I actually tried to put fumbari into this blade...but I'm not sure if I did it properly, or overdid it. You can see it pretty clearly in the first few pictures in this set, on the edge side. I'm hoping it doesn't turn out poorly in the heat treat.As I mentioned above, overall I think it's turning out. On problem I've run into, is when sighting down the edge, there's some spots that are very wavy (I'll try to get some pictures up later). The blade itself is straight however. I'm hoping I can heat it up to 450* or so with a torch, and use a few 2x4's in a vise to straighten just the edges where it's wavy. If that doesn't work...I'll try a hammer and the 2x4's. If that fails...I guess it'll be back to the forge, and I'll try to straighten the edges just before normalizing prior to clay application and heat treat. Anyhow, thanks again for following along, and as always...advice and critique will be extremely appreciated!! Cris |
|
Deleted
Deleted Member
Posts: 0
|
Post by Deleted on Nov 18, 2008 2:32:22 GMT
hey how are u planning on getting all the file markings out?
|
|
Deleted
Deleted Member
Posts: 0
|
Post by Deleted on Nov 18, 2008 2:59:59 GMT
hey how are u planning on getting all the file markings out? Well, I just reduce grits basically. I used a double cut bastard file first for major removal, next I'll use a single cut to smooth the lines of the double cut, then 80 grit until complete, then 120 grit until complete. Hopefully it works out ok...cause it would really suck BAD to have filing marks in this thing when it's done =p. Cris |
|
Deleted
Deleted Member
Posts: 0
|
Post by Deleted on Nov 18, 2008 3:06:32 GMT
0.o by hand with the sand paper?
|
|
Deleted
Deleted Member
Posts: 0
|
Post by Deleted on Nov 18, 2008 3:15:36 GMT
0.o by hand with the sand paper? Yes, well, sand paper wrapped around a file or sharpening stone. The file gives a bit better grip on things. I use water as well...seems to smooth things up better. Cris |
|
Deleted
Deleted Member
Posts: 0
|
Post by Deleted on Nov 18, 2008 3:36:14 GMT
|
|
|
|
Post by Dan Davis on Nov 19, 2008 13:52:28 GMT
Hey Cris,
I forgot to say nice job; it looks good so far.
|
|
Deleted
Deleted Member
Posts: 0
|
Post by Deleted on Nov 19, 2008 18:54:46 GMT
Hey Cris, I forgot to say nice job; it looks good so far. Thanks Dan, I appreciate it =). The last few evenings I've spent some time raising the shinogi ji as I'd first intended. I've got a friend who cuts in competitions, and he said the almost middle height ridge lines make for relatively poor cutters. They work ok for very soft targets due to the lack of drag but even then, the blade has to be used with a lot of force. Raising the shinogi ji will compromise some soft target cutting ability (more in line with cutting multiple or very thick soft targets with one cut, up to two mats or so should be butter), but it will increase the ability to cut harder targets substantially, as well as reduce the amount of effort it takes to cut any target. The theory is, a wide angle flat with a short width will cause less surface drag through the cut, but requires more force due to the fact that it has to separate the pieces a farther distance as it travels through the piece being cut. A higher shinogi ji, with a wider flat, will create a bit more surface drag when travelling through the cutting medium for a longer period of time, but because the entry angle is narrower, the blade cuts more easily. Greater force is only required when cutting through multiple or very thick targets. Another thing I did was took the edge flats down to 80 grit. They were looking nice...but there were persistent waves when I sighted down the flat towards a light source in a dim room. I never understood why the Japanese mostly polished from the edge to the blade ridge (particularly during foundation polishing). Now I do. In frustration I set up a long sand paper block at an angle between my chair and my chest (to hold it steady), and began pulling the blade up towards me edge first, holding it in both hands. It was a surprisingly comfortable feeling, and affords a LOT of control...which I didn't expect. I always thought it would be an awkward position to work a blade, and very easy to screw up your lines that way, but it's actually working out well. Doing the foundation polish from point to shoulder (or vice versa) is great for setting up the base ridge line...but sucks for getting flat surfaces. Pulling across the blade with a 3" wide piece of abrasive works much, much better. I can't wait to order my supplies for a pitch lap to start the real polish on this thing. I think it's going to work beautifully. I'll try try to get some pictures up this afternoon. Cris |
|
Deleted
Deleted Member
Posts: 0
|
Post by Deleted on Nov 20, 2008 0:23:37 GMT
Well, I got the 'final' shaping done this afternoon. The good news...I think it turned out well. The bad news...I think I wiped out my yokote geometry lol =/. We'll see when the finish work comes with the stones. Anyhow, here's some pictures of the work that was done:     Pretty self explanatory. The pictures outside were difficult to catch. I tried to put the reflection of the tree (which is not straight...wish I'd had a telephone pole handy lol) in the blade so you could see the surface appearance. Not the 'finish' perse, but the actual shape of the flat. It's still too wavy for my likes, but it's actually flatter than my PPK...so I suppose I'm ahead of the curve. The small waves in the ridge will be removed with a flat stone once heat treat is finished...so I'm not to worried about them (although I did try to get them out as much as possible lol). Anyhow, let me know what you think, and if you have any advice on getting the blade flatter I'd be happy to have it lol. Cris |
|
Deleted
Deleted Member
Posts: 0
|
Post by Deleted on Nov 20, 2008 0:57:25 GMT
A file will make things flatter, but too late now. leave it.
|
|
Deleted
Deleted Member
Posts: 0
|
Post by Deleted on Nov 20, 2008 1:19:14 GMT
A file will make things flatter, but too late now. leave it. For me, actually, I think the file was causing the problem lol. What I finally did to get it as flat as it is, was put a hand held belt sander (80 grit belt 3"x21") in a vise, and used it without power in a similar manner to a stone. It worked better than the board I had yesterday because it was at chest height. By dragging the blade perpindicular to the paper, it leveled off the waves pretty well. That's why you see all the slightly different sanding patterns in the profile pictures. Those aren't dips or changes in the geometry, they're simply sanding scratches. It's too bad they don't make files in the 3"-6" wide range lol...I'd use it the same way. Cris |
|
Deleted
Deleted Member
Posts: 0
|
Post by Deleted on Nov 20, 2008 1:59:25 GMT
Nice car, my neighbor has one just like that.
The blades lookin' good my man, PM sent.
|
|
Deleted
Deleted Member
Posts: 0
|
Post by Deleted on Nov 20, 2008 3:53:12 GMT
Nice car, my neighbor has one just like that. The blades lookin' good my man, PM sent. Thanks...lol. As for the car, it used to be pretty quick. The motor's out of it now though. The one time I had it to the track they teched it for 11.50's (you can see it in the window), it ran a 9.96, letting off at 1000'. They didn't let me run again =D. Pump gas, no power adders, on those tires, daily drivable...oh and it was only running on 347ci lol. Cris |
|
Deleted
Deleted Member
Posts: 0
|
Post by Deleted on Nov 20, 2008 4:05:01 GMT
Actually I think my neighbors race theirs, they've been away for several days and I overheard them talking about it once...overheard <.< There's also a guy that lives down the street from my grandma's house that has one...exactly like that  It's almost like fate is asking me to buy one. |
|
Deleted
Deleted Member
Posts: 0
|
Post by Deleted on Nov 20, 2008 4:14:55 GMT
Actually I think my neighbors race theirs, they've been away for several days and I overheard them talking about it once...overheard <.< There's also a guy that lives down the street from my grandma's house that has one...exactly like that It's almost like fate is asking me to buy one. LOL this one's for sale...but it's a bit pricey. It's been converted to EFI, comes with a 10pt roll cage, can run automatic or manual...lots of stuff. We just never did any bodywork or paint to it lol. |
|
Deleted
Deleted Member
Posts: 0
|
Post by Deleted on Nov 20, 2008 6:19:58 GMT
Well I don't think fate wants me to buy it THAT bad   |
|
|
|
Post by Dan Davis on Nov 20, 2008 13:27:38 GMT
Cris,
Get a 14" long-angle lathe file, wrap both ends in duct tape, wire a brick onto the top of it, and then use it as a draw file to get your lines set.
If you look in "The Craft of the Japanese Sword" by Yoshihara-san you will see that he uses a very heavy, broad drag with a broken piece of katana blade mounted in it. It is the weight of the drag that allows a steady hand when draw filing and it is the "wobble" side to side that causes your lines to waver about.
Also, "practice practice practice"
|
|
Deleted
Deleted Member
Posts: 0
|
Post by Deleted on Nov 21, 2008 4:36:26 GMT
Cris, Get a 14" long-angle lathe file, wrap both ends in duct tape, wire a brick onto the top of it, and then use it as a draw file to get your lines set. If you look in "The Craft of the Japanese Sword" by Yoshihara-san you will see that he uses a very heavy, broad drag with a broken piece of katana blade mounted in it. It is the weight of the drag that allows a steady hand when draw filing and it is the "wobble" side to side that causes your lines to waver about. Also, "practice practice practice" I'll definately have to try that. It's funny...I learn equally well I suppose, either by reading or by doing...and I do best with a mixture of both. Who'd have ever thought that such a physical craft would require so freaking many reference books!! I try to buy a new one every couple weeks, and man...at this rate I'll still be buying them (not to mention reading them....and textbook style literature puts me out like a light...) when I'm 90! Good thing I've got guys like Dan to help me out when I'm in a pinch...or I'd never get the hang of this stuff. Who knows when I'll finally get the book that has the answer to my question lol, whichever question it is this minute anyhow =p. So on another note I built myself a sword sized heat treat forge tonight, with an integral quench tank lol. Well, mostly built it anyhow...still need to do a few things. Think...oversized Lively washtub forge out of a half 55gal drum. What I basically did was made a two part stand out of 2x4's, split a drum on three planes...bent it over backwards on itself, and laid it into the openings on the stand. I know I probably should have used metal for the stand...but I didn't have enough angle iron, and I figure if I can touch my working forge housing while using it, this one (with more insulation) shouldn't get anywhere near hot enough to burn 2x4's. Here's some pictures:   And yes...the drum was used for Methanol originally lol. We use it to fuel the dirt late model. Should have seen my wife when I took the sawzall to the drum lol. She didn't know I'd filled it with water the night before and run off what floated to the top an hour or so before cutting. She's seen methanol fires at the track...and was so freaked out she took the kids to the other side of the property and watched me cutting it from 100' lol. Once she realized I wasn't going to blow myself to pieces she came to investigate why not. Needless to say I made my own dinner tonight. It was worth it though lol. Anyhow though...just need to pipe the tuyer, pack the insulation, cut slots to make accessing the forge and quench tank easier, dress the edges, and hopefully I'm normalizing by tomorrow night =). Cris |
|
Deleted
Deleted Member
Posts: 0
|
Post by Deleted on Nov 21, 2008 5:03:01 GMT
T.V dinner rocks.
|
|


 It's almost like fate is asking me to buy one.

