

Rail Anchor Wakizashi/Ko-Katana
Nov 10, 2008 6:59:30 GMT
Post by Deleted on Nov 10, 2008 6:59:30 GMT
Well guys, I've put my Uncle's dagger on hold until I can get used to working on the new post anvil. I'd also been working on a really cool single edged knife, but somehow I managed to get cracks through the whole damn thing for no apparent reason. I don't mean small cracks either, or the kind you get from forging too cold, I mean long, gently curving cracks that sometimes intersect each other. They seem pretty deep too...it's the wierdest thing. Two separate billets had this problem.
Anyhow, after wasting two bags of charcoal on the above issues, I decided that there was nothing keeping me from making a wakizashi/ko-katana out of one of the rail clips.
First I normalized the clip by bringing it up to critical (non magnetic), then letting it air cool above my forge on a brick shelf. Once it was just a bit too warm to touch, I brought it back up to critical, then put it in a bucket of ash to anneal overnight.
This morning (well around noon lol) I decided to get to drawing out the rail clip. As some of you guys know...these things are a SERIOUS bear. You have to get them HOT, and you can't do any major work below a very low orange heat. I've learned however to work into dull red almost black with 'finishing' blows. This has really smoothed up my forgings as I hope is apparent from the pictures below.
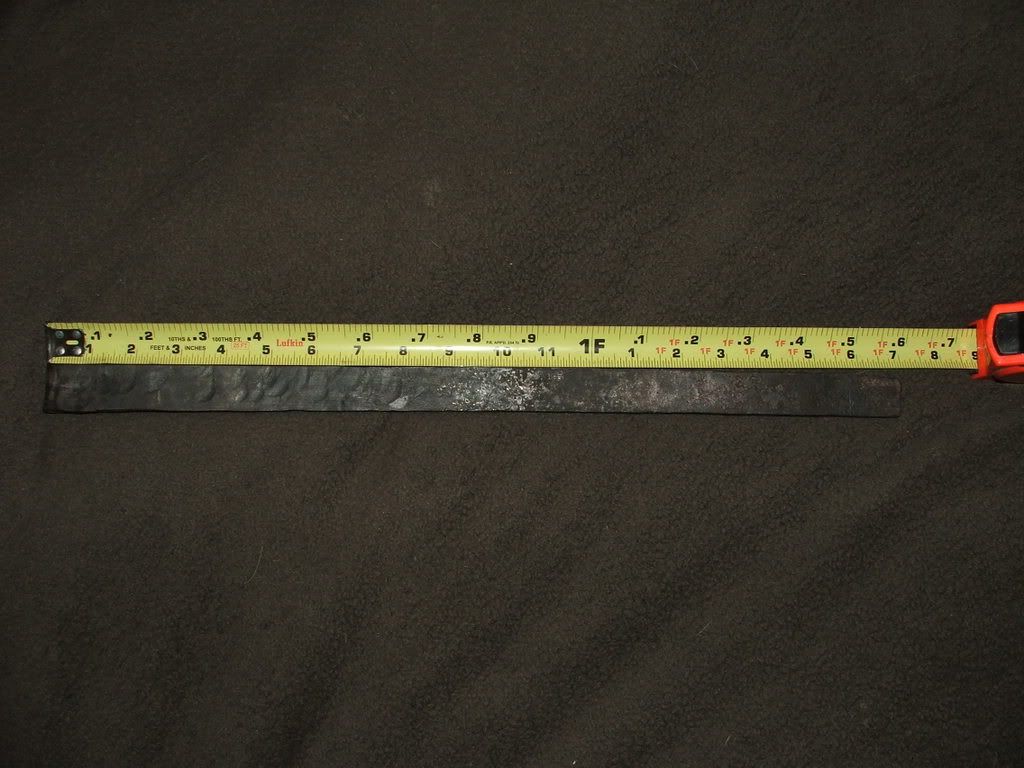
Here's the partially drawn out billet. I've got it to 19"x1", with about 11" more minimum to draw out still. Luckily there's still a good amount of meat left on the left end in the picture. As you can see, the finished forging to the right is relatively smooth, while the part I'm still working on drawing out shows massive dings (you have to hit this stuff HARD lol). Once it gets closer to the thickness I need, I'll reduce the force of my blows and begin smoothing things out more. Also please ignore any curves in the profile. Right now I'm just concentrating on getting the thing drawn out. What you see is nearly three 8lb bags of charcoal!

Here you can see the 1" blade width.

This picture shows the 'meat' left for drawing out. It's approximately 9/16" in thickness, for about 3 1/2" (the thickness then begins to taper, but I have a full 9/16" for that distance). In comparison, the 19" I have gotten so far is about 7" of the original clip. So some basic math, subtract the 3 1/2" from 19 to get 15 1/2", divide that by the 7" used to make it and you get about 2 1/4. Multiply that by our 3 1/2" to get an additional 7 7/8" of length. Now it doesn't take a rocket scientist to realize that almost 8" is not 11"+ lol, but remember, the thickness tapers from that point, giving me more meat. I also have to shape my nakago, as well as profile and distal taper the sunobe. I think I'll get pretty close to my 30" desired sunobe length, if not a bit further.

Here you can see the 1/4" thickness I'm shooting for before I begin profiling and tapering things. I figure starting out with a 27"x1"x1/4" billet to begin making my sunobe will give me a good solid base. Finished sunobe dimensions are 30" OAL (or longer if the steel wants to give it to me), 1" motohaba (width at the base of the blade), 3/4" sakihaba (width at the upturn of the kissaki/tip), 1/4" motokasana (thickness at the base of the blade), and 3/16" sakikasane (thickness at the upturn of the kissaki/tip). The nakago (tang length) will be somewhere between 7" and 8" long, allowing me a 10" tsuka if I want, and tapering from 1" to approximately 5/8" on the very butt end. This should give me a very solid base for my finished blade measurements.
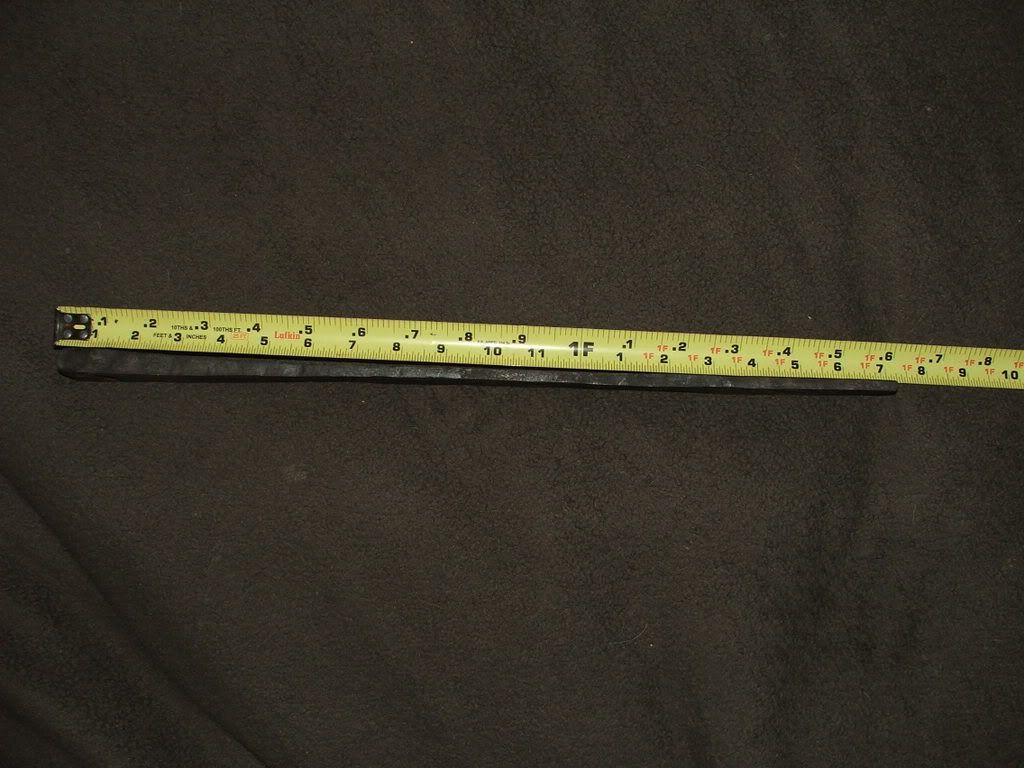
Just a distal picture to show you how far the thicker end actually tapers. There's still a good bit of meat there for drawing out. On a separate note, one of these clips weighs exactly 2lbs 1oz from the factory. The current billet, after drawing out, weighs 1lb 12oz. That means I've lost 5oz to scale! Kind of crazy, that's 3oz short of half a pound. If I had a press, mill, or power hammer I wouldn't have lost NEARLY as much =/.
The goal is as long a blade as I can get out of these 10 1/2" long clips. Probably close to 25" nagasa (if I'm lucky, and depending on how much I want to dedicate to the nakago), 1 1/4" motohaba, and 1" sakihaba. There probably won't be much, if any distal taper. Perhaps as littls as 1/16".
I figure a Japanese blade is good practice, as they're single edged (even though you're forging two sets of bevels for shinogi zukuri), and take real attention to detail to get right. I have some fittings laying around that I made way back when I got my PPK that I might use to finish this...or possibly I may make new ones. I may even buy some, but that's not really likely. My intent is to finish this blade completely completely, including furniture and polish. At that point, if it lives that long =), it'll go up for sale.
So there you have it, a good days work...about 5hrs, with a 3lb hammer and a REALLY responsive anvil. I didn't use any tricks to beat the thing up...just hitting it on the face, then the edge, and pretty continuous straightening. I tried using the cross pein for drawing out on another clip previously, and just can't seem to get the hang of it lol. I really can't wait to build a press or tire hammer.
Anyhow, I'll update some more when I get a chance to work on it. Hopefully tomorrow but we'll have to see.
Cris
Anyhow, after wasting two bags of charcoal on the above issues, I decided that there was nothing keeping me from making a wakizashi/ko-katana out of one of the rail clips.
First I normalized the clip by bringing it up to critical (non magnetic), then letting it air cool above my forge on a brick shelf. Once it was just a bit too warm to touch, I brought it back up to critical, then put it in a bucket of ash to anneal overnight.
This morning (well around noon lol) I decided to get to drawing out the rail clip. As some of you guys know...these things are a SERIOUS bear. You have to get them HOT, and you can't do any major work below a very low orange heat. I've learned however to work into dull red almost black with 'finishing' blows. This has really smoothed up my forgings as I hope is apparent from the pictures below.
Here's the partially drawn out billet. I've got it to 19"x1", with about 11" more minimum to draw out still. Luckily there's still a good amount of meat left on the left end in the picture. As you can see, the finished forging to the right is relatively smooth, while the part I'm still working on drawing out shows massive dings (you have to hit this stuff HARD lol). Once it gets closer to the thickness I need, I'll reduce the force of my blows and begin smoothing things out more. Also please ignore any curves in the profile. Right now I'm just concentrating on getting the thing drawn out. What you see is nearly three 8lb bags of charcoal!
Here you can see the 1" blade width.
This picture shows the 'meat' left for drawing out. It's approximately 9/16" in thickness, for about 3 1/2" (the thickness then begins to taper, but I have a full 9/16" for that distance). In comparison, the 19" I have gotten so far is about 7" of the original clip. So some basic math, subtract the 3 1/2" from 19 to get 15 1/2", divide that by the 7" used to make it and you get about 2 1/4. Multiply that by our 3 1/2" to get an additional 7 7/8" of length. Now it doesn't take a rocket scientist to realize that almost 8" is not 11"+ lol, but remember, the thickness tapers from that point, giving me more meat. I also have to shape my nakago, as well as profile and distal taper the sunobe. I think I'll get pretty close to my 30" desired sunobe length, if not a bit further.
Here you can see the 1/4" thickness I'm shooting for before I begin profiling and tapering things. I figure starting out with a 27"x1"x1/4" billet to begin making my sunobe will give me a good solid base. Finished sunobe dimensions are 30" OAL (or longer if the steel wants to give it to me), 1" motohaba (width at the base of the blade), 3/4" sakihaba (width at the upturn of the kissaki/tip), 1/4" motokasana (thickness at the base of the blade), and 3/16" sakikasane (thickness at the upturn of the kissaki/tip). The nakago (tang length) will be somewhere between 7" and 8" long, allowing me a 10" tsuka if I want, and tapering from 1" to approximately 5/8" on the very butt end. This should give me a very solid base for my finished blade measurements.
Just a distal picture to show you how far the thicker end actually tapers. There's still a good bit of meat there for drawing out. On a separate note, one of these clips weighs exactly 2lbs 1oz from the factory. The current billet, after drawing out, weighs 1lb 12oz. That means I've lost 5oz to scale! Kind of crazy, that's 3oz short of half a pound. If I had a press, mill, or power hammer I wouldn't have lost NEARLY as much =/.
The goal is as long a blade as I can get out of these 10 1/2" long clips. Probably close to 25" nagasa (if I'm lucky, and depending on how much I want to dedicate to the nakago), 1 1/4" motohaba, and 1" sakihaba. There probably won't be much, if any distal taper. Perhaps as littls as 1/16".
I figure a Japanese blade is good practice, as they're single edged (even though you're forging two sets of bevels for shinogi zukuri), and take real attention to detail to get right. I have some fittings laying around that I made way back when I got my PPK that I might use to finish this...or possibly I may make new ones. I may even buy some, but that's not really likely. My intent is to finish this blade completely completely, including furniture and polish. At that point, if it lives that long =), it'll go up for sale.
So there you have it, a good days work...about 5hrs, with a 3lb hammer and a REALLY responsive anvil. I didn't use any tricks to beat the thing up...just hitting it on the face, then the edge, and pretty continuous straightening. I tried using the cross pein for drawing out on another clip previously, and just can't seem to get the hang of it lol. I really can't wait to build a press or tire hammer.
Anyhow, I'll update some more when I get a chance to work on it. Hopefully tomorrow but we'll have to see.
Cris


