Deleted
Deleted Member
Posts: 0
|
Post by Deleted on Aug 1, 2008 18:23:10 GMT
This is my first forged tanto. i started with 1085 steel and forged the kissaki as well as the taper down to the tip. i really tried to keep the use of power tools to a minimum on this project. most of the shaping was done either on the anvil or with my files. this was how it looked after i was finished using the angle grinder.  after most of the file work 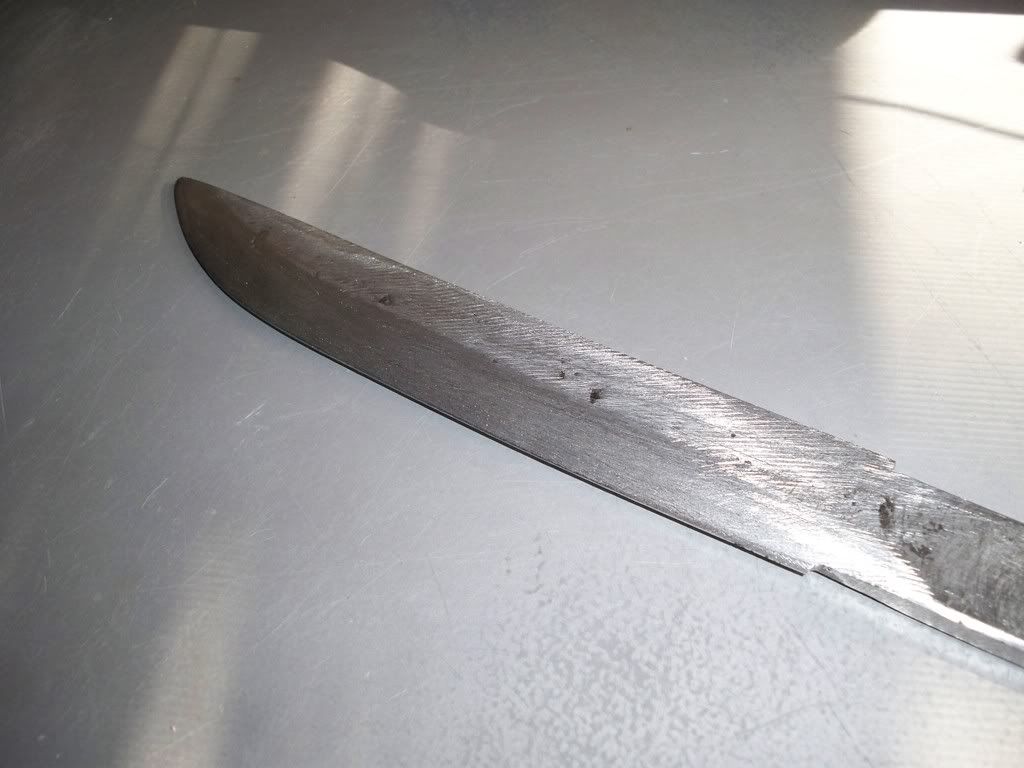 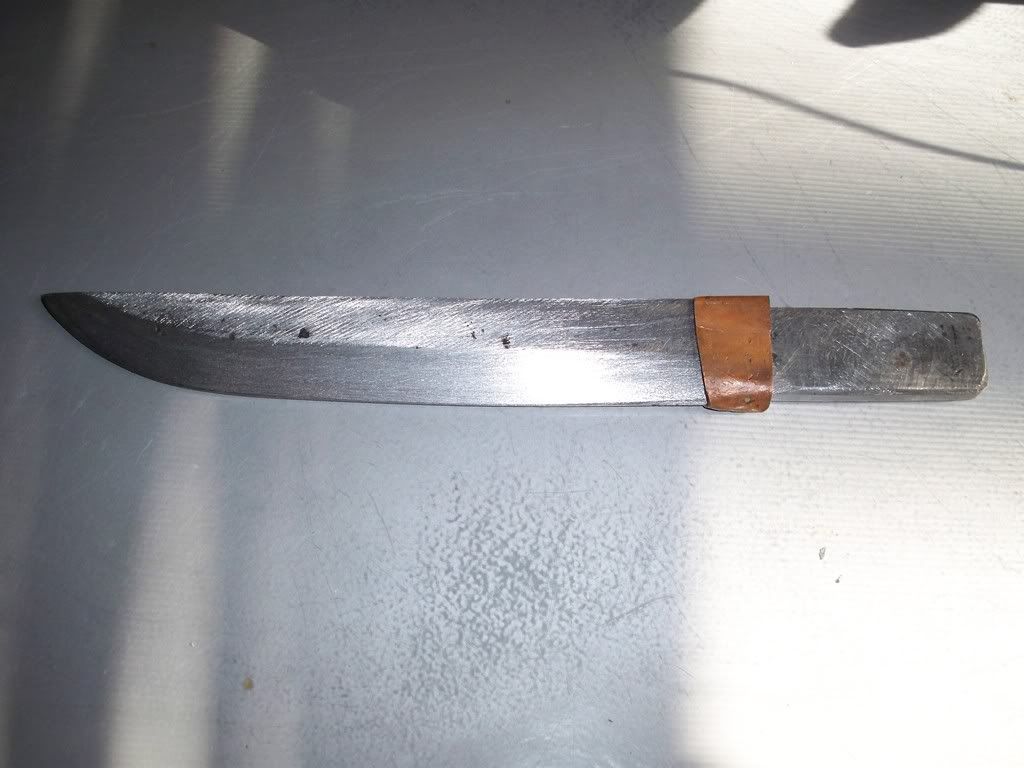 habaki i made to see if i could and now I'm getting ready for the heat treat i have normalized the blade twice and now I'm ready for the heat treat and praying that nothing goes wrong. i used 2 different types of Rutland cement. i put a thinner layer down that will hopefully make a nice and unique hamon line with ashi lines and then i put a thicker layer right behind it. my thought is that it will ease the transition between the two hardnesses of steel and make a cool shadow hamon but then again i have never tried this so i have no idea. 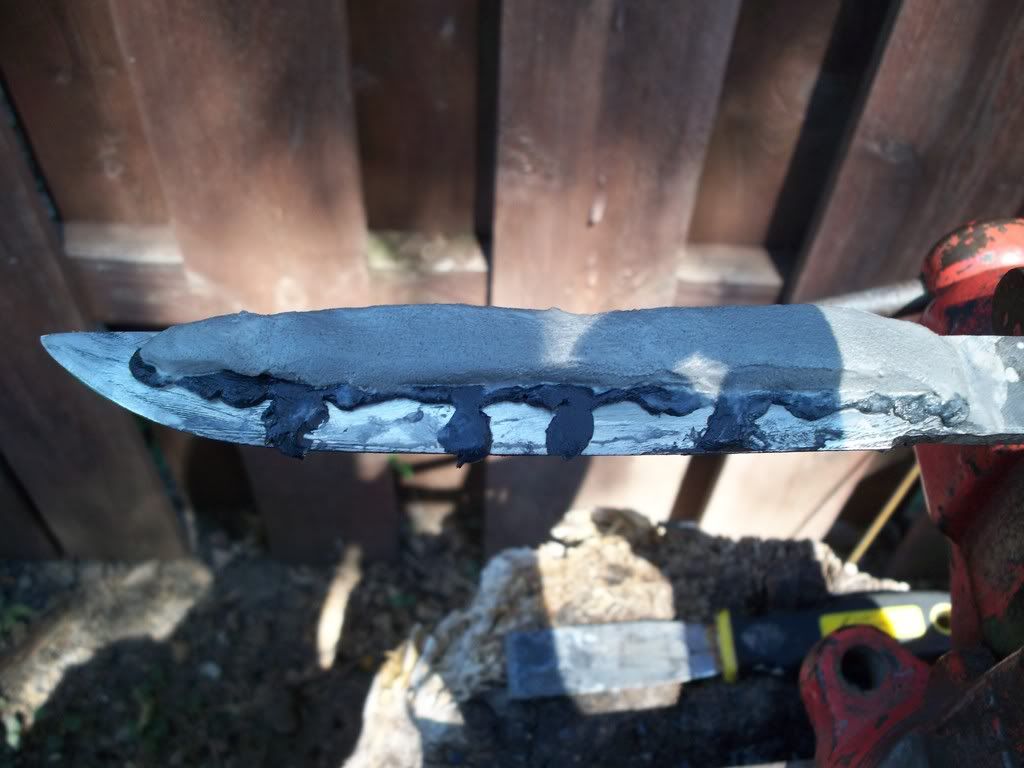 i think i will wait until tomorrow to heat treat so i can hear a few peoples input and make sure I'm not doing anything stupid. (which i have a tendency to do every now and then  ) |
|
|
|
Post by Matt993f.o.d on Aug 1, 2008 20:24:20 GMT
You will have trouble forming a hamon until you sort out your scaling issues. If the blade is getting too hot, as I suspect it is, the temperatures will be all wrong for hamon formation.
Also, the lumps of clay you have laid in for ashi formation are too thick. They will create blobby areas of non hardened edge as they are. Clay lines used to create ashi are really thin, usually about the width of a pencil line. I personally wouldnt opt for ashi on a tanto, for functional reasons; a tanto is not likely to encounter the sort of use that would make it need ashi (ashi are used to create softer lines in the steel that act as cut off points to minimise damage caused by blows that would chip the edge).
The thinner layer of clay you have layed below the thick top layer to create utsuri may sort of work, I don't know for sure. The way I know will work is through careful temperature control. This is to the tune of a couple of hundred of degrees each way, so will be almost impossible to do without professional assistance.
Other than that, I wish you luck. It looks fine so far. I am liking the evenness of your bevel formation. Fine work.
|
|
Deleted
Deleted Member
Posts: 0
|
Post by Deleted on Aug 2, 2008 1:21:47 GMT
well i quenched and im about 90% sure it cracked twice but im going to polish it up and hope for the best. im thinking that even if it is fataly cracked i can just have it for show. the hamon is quite visible. 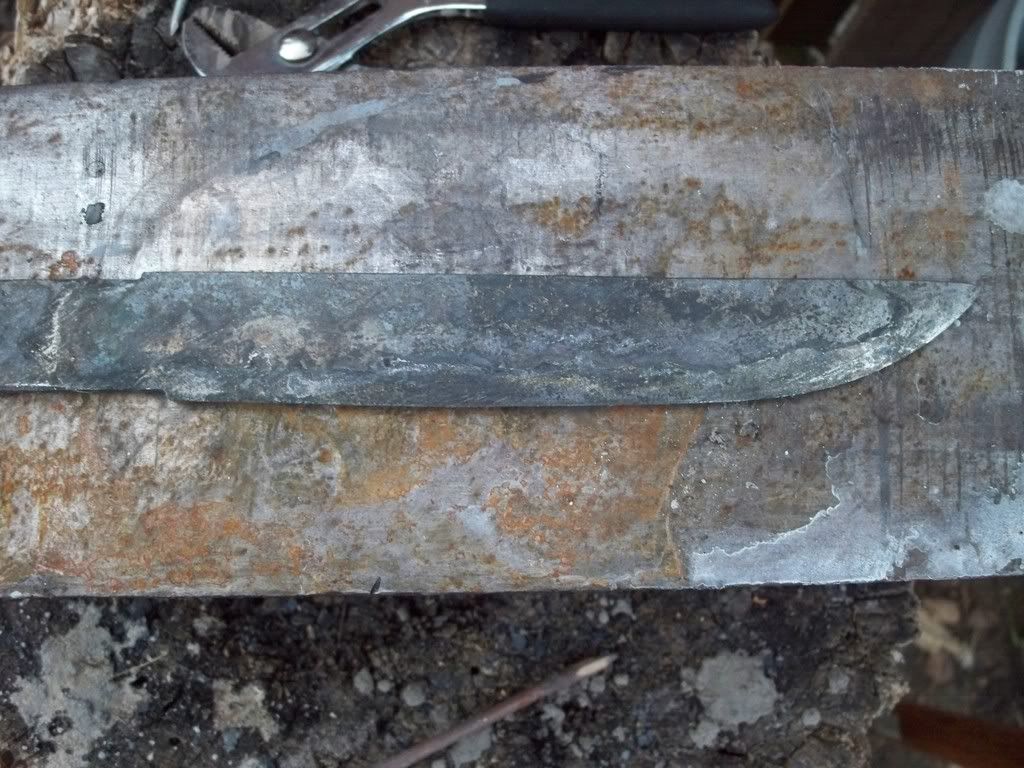 not much else to say |
|
|
|
Post by Brendan Olszowy on Aug 2, 2008 1:47:29 GMT
What did you quench in? Why would it have cracked? It was looking promising.
|
|
Deleted
Deleted Member
Posts: 0
|
Post by Deleted on Aug 2, 2008 2:07:13 GMT
brine, one of my many info web sites said it was the best for the steel im using. im pretty sure i felt it crack once if not twice when it was in the solution and it warped. i want to start using oil but im worried about it starting fire and burning down my back yard.
|
|
|
|
Post by Brendan Olszowy on Aug 2, 2008 12:05:27 GMT
haha, just use vegetable oil in a tube. It will flare up for about 10 seconds, but will stay contained. There is a critical temp where oil will self perpetuate, but one tanto quench or two should be absolutely fline.
Sam has been Crying the joys of this stuff called Parkes 50 or something. Its a proper quenching solution. Many use Auto Trans fluid. I've heard of it gotten freely from Auto Trans mechanics (used).
I just use vege oil. I made a tube from a guter downpipe, and a stand for it out of wood.
|
|
|
|
Post by Dan Davis on Aug 2, 2008 12:33:24 GMT
Sorry I missed this, guys. I've been away for a while. I see at least 3 areas which appear to have ha-giri. - How long did you hold the blade in the brine? It should have been in for 1 second, out for 3, in for 1 second, out for 5, in for 3 seconds, out for 5, in until cold.
- How long did the clay coating last on the blade? It should have blown off the blade immediately during the first quench. If it lasts any longer it becomes detrimental, not helpful
- Your ashi were far too thick and far too few; for that blade I would have placed ashi roughly every 3/4 inch along the ha.
- Your clay coating should taper down to the edge of the blade about 1/2 to 3/4 inch in front of the ha-machi, you never want the area underneath the habaki to be hardened if you can help it.
- utsuri is created by having the blade remain just above critical when you make the second quench. The clay coating blows off during he first quench, the outer body of the blade remains just above critical, and so on the second quench you get additional subsidiary hardening above the original hamon. This is accomplished by a controlled superheat of the steel to approximately 100 degrees above A1; but the steel has to be able to take this and survive. 1085 typically will not survive this process.
- warping to the left or right is not uncommon in this process. It is typically caused by residual stresses not removed during normalization, uneven grind from left to right, or the clay coating remaining on the blade too long and causing uneven cool down from left to right.
|
|
|
|
Post by Dan Davis on Aug 2, 2008 12:45:31 GMT
Also, if you are heating in a coal forge get a piece of 2-inch black iron pipe and split it down the middle. Weld a metal shield onto one end and cut a slot in it to hold the nakago of your tanto. Dig a trough in your coals, put the iron pipe in the trough, and then put your tanto into the half-pipe. The fire will heat the pipe, the pipe will keep the coals off your blade (preserving the coating) and help to heat the blade more evenly, and you can get a far easier read on when the blade goes above critical.
If you close off both ends of the pipe and add a handle, you can slide it back and forth as needed to ensure even heating. Of course, that puts a limit on the size of blade you can put into the tool, so you may need a couple of them.
|
|
|
|
Post by Matt993f.o.d on Aug 2, 2008 14:57:56 GMT
Tap the spine of the blade along the edge of your 'anvil'. A light ringing sound should indicate a lack of internal cracking. A dull note indicates a crack. This isnt a foolproof test, though.
I hope it hasnt cracked. It would be a lot of wasted work for you.
|
|
Deleted
Deleted Member
Posts: 0
|
Post by Deleted on Aug 2, 2008 20:08:41 GMT
yea it is cracked but im still going to polish up the blade to see the hamon. i did chip off the ashi clay before the quench . even tho i didnt get a nice blade in the end i did leard alot from this one and you guys will be seeing another one from me soon. im sure the next one will turn out much better. also could you include a picture of that pipe tool you were describing im having a hard time picturing it.
thanks for the help!
|
|
|
|
Post by Matt993f.o.d on Aug 2, 2008 20:18:46 GMT
Better luck next time.
|
|
Deleted
Deleted Member
Posts: 0
|
Post by Deleted on Aug 6, 2008 5:02:08 GMT
*polishing*
|
|
|
|
Post by Dan Davis on Aug 6, 2008 12:44:20 GMT
I do not have one of the pipe tols handy as I use propane almost exclusively now. In the next few days I will try to get one made up and take a picture.
|
|
Deleted
Deleted Member
Posts: 0
|
Post by Deleted on Aug 7, 2008 6:40:38 GMT
well im up to 800 grit and still no sign of a hamon. is there a way to bring it out other than polishing? 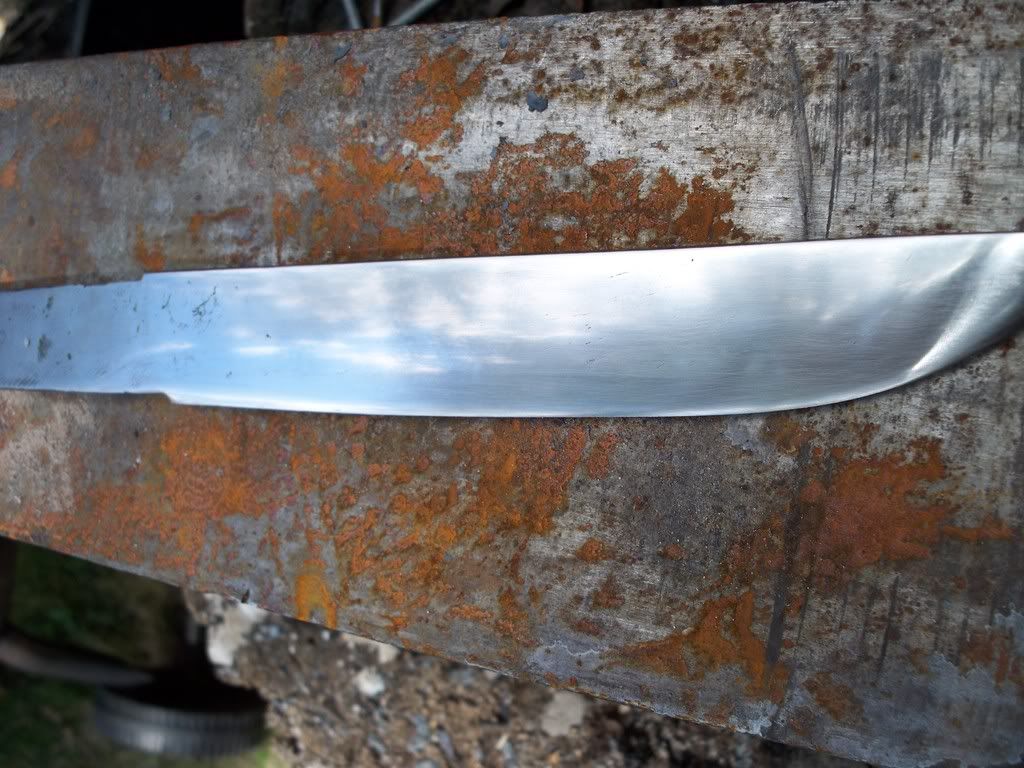 |
|
|
|
Post by Dan Davis on Aug 7, 2008 11:38:02 GMT
when you reach 1000 grit start dipping your paper in vinegar and then polish slowly, keeping the paper wet as you go. Every few minutes let the blade sit in the air and dry.
After 1000 grit, let the blade soak edge-down in a vinegar bath for 5 minutes, then slowly clen off the oxides (grey stuff) using 1200 grit paper. If there is a hamon (should be one) it will show up, and then you can clean the grey stuff down to bare metal using 1200 grit. Repeat this process at 1500 and 2000 grits.
|
|
Deleted
Deleted Member
Posts: 0
|
Post by Deleted on Aug 7, 2008 21:39:15 GMT
heat treat it right, that's the best way to get a hamon:D.
|
|
|
|
Post by Matthew Stagmer on Aug 7, 2008 21:56:57 GMT
Try heating your water up a bit or using an oil. If you go in water you will loose half your blades.
|
|
Deleted
Deleted Member
Posts: 0
|
Post by Deleted on Aug 7, 2008 22:01:09 GMT
Thanks for the advise Sam! have a karma point ;D
|
|
Deleted
Deleted Member
Posts: 0
|
Post by Deleted on Aug 7, 2008 22:44:05 GMT
Thanks for the advise Sam! have a karma point ;D Atleast you got the joke hehe:D. Are you sure what the steel you had was 1085? Did you check the temperature with a magnet before quenching? |
|
Deleted
Deleted Member
Posts: 0
|
Post by Deleted on Aug 7, 2008 23:05:08 GMT
sadly i destroyed my magnet on the last knife (stuck to the hammer face and i smashed it) so no i didnt but i got some new ones yesterday. i get my stuff from admiral steel and its advertised as being 1075-1080 so yea im getting my the 1095 and the stuff im using now mixed up but im not off my that much. i heated it up close to night so i could get the low lighting conditions that matt told me i should try to get and i used the color system to see if it was ready.
|
|


 )
)


 Unfortunately I'm an edge-perfectionist. Also one wrong move when unsheathing and the throat nicks the edge on either side.