Penobscot bow build
Mar 19, 2015 1:44:20 GMT
Post by ineffableone on Mar 19, 2015 1:44:20 GMT
So a little history.
Cable-backed bow en.wikipedia.org/wiki/Cable-backed_bow
Being that is wiki, I am not sure about the accuracy of that statement. There are unverified claims online that I have come across that say there is history of these bows going back into at least the 1500's. I don't know and really it doesn't matter to me. The bow design is just awesome, it is like a primitive compound bow. It is something different eye catching and unique, something I like in my weapons.
I first became aware of this style bow from the Canadian TV show Crusoe. The character who played Friday used a Penobscot inspired bow.

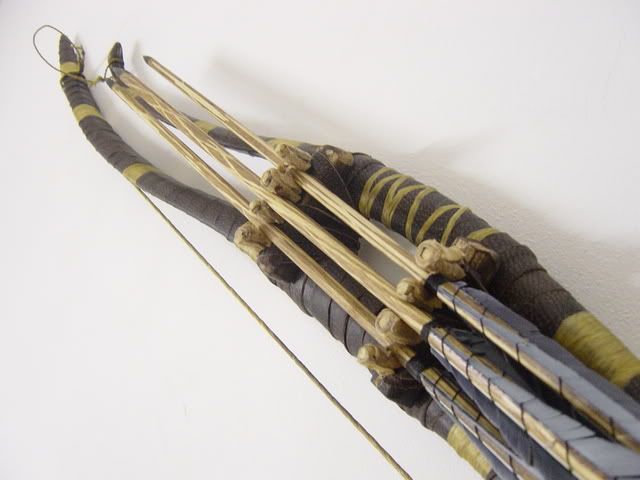
I really fell in love with this style, however quickly found there were very few bow makers offering this style in any commercial sense. The pool of choices was extremely limited, and the pricing well most of the prices were not in my budget. The one good thing, all the Penobscot type bows I did find were all very decent to high quality. So at least there was no junk versions of the bow I could find. Well except maybe the PVC ones, but I just ignore PVC bows n general so don't count those.
White Wolf Archery

Krackow Company

Both of the above are over $1000 for the bows, not really my price range for a bow.
Rudder Bows

This was getting reasonable, but it was still in the $300+ range depending on which seller you buy from. However they did also offer a Penobscot bow kit a little over $100. Which really appealed to me, since the Rudder bows Penobscot was kinda plain. But with a kit, I could mod it a bit and make it my own.
This review of the Rudderbows Penobscot really sealed the deal for me peteward.com/test.penobscot.html
A few years went by, too many other items that were more important to purchase kept taking my money.
Finally I decided it was time to order the Penobscot bow kit. You can't order direct from Rudder bows, you have to find a shop who sells their stuff. I had Crow's Head bookmarked as the best deal for these bows, and for the kits. They are a decently known archery supply shop and one I knew I could trust. So I go on their site, and the bow kit is not there! I look more and the built bow isn't either. Ack!! I was too late. No. Panic sets in.
I frantically search around online and no one else has the kits and only Kult of Athena was selling the built bows. I emailed Crow's Head asking if the had stopped carrying the bow kit or if it was just out of stock. I am desperate now fearing Rudder Bows might have discontinued the Penobscot bow. I get a response the same night. "Yes we still carry the kits, sorry it isn't on the site, it will be posted back up soon, thanks for letting us know it wasn't there." or something to that effect. Next day it was back on the site and I put my order in. Bonus, the price had gone down a bit from the previous listing. Maybe $10 or so less than before, and the built bows were now less also.
So I patiently waited, or at least tried to patiently wait. Maybe a week goes by, and then I was notified the bow had shipped. Just the other side of the state from me. So fairly quickly I received my Penobscot bow kit.
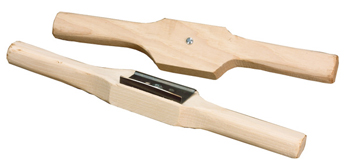
The basic kit unpacked from the box. (Includes, main bow, upper bow, upper bow strings, tillering stick (cling wrap removed so you could see it), scraper (cling wrap removed), main bow string/tillering string/nstructions (all wrapped in one tight small package)
![]()
![]()

Worth noting the instructions are generic longbow tillering instructions. Nothing pertaining to the special construction of a Penobscot bow. Nothing about how to attach the two bows. Nothing about the string grooves needing to allow strings in both directions. But it is ok, I am not completely clueless, and the lack of specific instructions isn't a hindrance to me. Though I would have been curious to find out what the instructions might have said if there was specific instructions.
Some assembly is required (the screw that came with the kit was too short to hold the tillering stick, so I grabbed my own and used that)

Tillering stick assembled and items laid out again

The upper bow is already tillered, and need no work from me other than finishing it and attaching it to the main bow.
The main bow is a rough floor tiller. Meaning they roughed out the shape enough to get it to bend slightly when pushed on with the tip on the floor.
Hard to really show the roughness of the main bow but I tried.

If it looks like it is bent, it is just an optical illusion from the camera angle, freaked me out seeing this picture and I spent about 15 minutes after taking it to make sure there was no bend.

Part of me wanting the kit rather than a prebuilt bow is I want to make a few modifications. Mainly to build up the handle with some other woods, and to build up the bow nocks so I can safely use a Fast Fight string. Well and reinforced bow nocks just add a little extra flare to a bow too.
![]()

I picked up some 1/4" Wenge the darker wood (probably can't tell but there is some stripping pattern in this), and some 1/8" Zebrawood the lighter stripped wood.
I cut the strips and this is a dry fit of how I plan to place them.

Though I am considering going back and getting a little more Wenge to add one more piece in the middle sanwiching the Zebrawood between two Wenge pieces. I don't need to decide right away, it is something that I don't need to worry about till after I finish tillering the main bow.
Today was mainly just gluing the Wenge and Zebrawood pieces together.
Add plenty of glue, I am using Titebond 3 (water "proof" wood glue, I treat it as a good water resistant glue)

(Note the smaller pieces are going to be used to reinforce the bow nocks)
smooth glue over entire surface of the two pieces to be glued together

put together, and I wrapped with painters blue tape to help keep the glue from getting too messy and to keep them from slipping apart

Added some clamps to keep the pieces together tight, but not too tight to push all the glue out of the joint

Nope not done, more clamps, yes there is some wood under there somewhere being clamped.

Now those have to sit and dry. Instructions say 4 hours, but I will leave over night.
Now that is done. What else can I do? Well there is this bow that needs working on.
Seems the tillering stick has more of a gap than the bow is wide. Thankfully with the wood piece used to cover the scrapper's blade the bow fits in with out too much wiggle. (see the piece sticking out a bit, that shimmed it up nice)

Time to exercise the bow limbs
First stretch of the limbs, not getting too far.

Keep flexing the limbs, over and over and over and over......wheeew. 20 stretches later.

I will do a bit more stretching of the limbs over the night. But that is enough for today. The floor tiller looks pretty good, fairly even flex, and symmetrical. Look like I don't have to worry about correcting too much unless I put it in there.
Next I will start on scraping the limbs and tillering as far as I can get to. As well as checking on the glued wood and hopefully having them nice and well glued together.
Thanks for following along. If I don't get to tillering tomorrow, I have a Ham Radio class Fri-Sun, so I might not get to do much bow work over the weekend.
Cable-backed bow en.wikipedia.org/wiki/Cable-backed_bow
One variety of cable-backed bow is the Penobscot bow or Wabenaki bow, invented by Frank Loring (Chief Big Thunder) about 1900.[1] It consists of a small bow attached by cables on the back of a larger main bow.
Being that is wiki, I am not sure about the accuracy of that statement. There are unverified claims online that I have come across that say there is history of these bows going back into at least the 1500's. I don't know and really it doesn't matter to me. The bow design is just awesome, it is like a primitive compound bow. It is something different eye catching and unique, something I like in my weapons.
I first became aware of this style bow from the Canadian TV show Crusoe. The character who played Friday used a Penobscot inspired bow.


I really fell in love with this style, however quickly found there were very few bow makers offering this style in any commercial sense. The pool of choices was extremely limited, and the pricing well most of the prices were not in my budget. The one good thing, all the Penobscot type bows I did find were all very decent to high quality. So at least there was no junk versions of the bow I could find. Well except maybe the PVC ones, but I just ignore PVC bows n general so don't count those.
White Wolf Archery
Krackow Company

Both of the above are over $1000 for the bows, not really my price range for a bow.
Rudder Bows

This was getting reasonable, but it was still in the $300+ range depending on which seller you buy from. However they did also offer a Penobscot bow kit a little over $100. Which really appealed to me, since the Rudder bows Penobscot was kinda plain. But with a kit, I could mod it a bit and make it my own.
This review of the Rudderbows Penobscot really sealed the deal for me peteward.com/test.penobscot.html
A few years went by, too many other items that were more important to purchase kept taking my money.
Finally I decided it was time to order the Penobscot bow kit. You can't order direct from Rudder bows, you have to find a shop who sells their stuff. I had Crow's Head bookmarked as the best deal for these bows, and for the kits. They are a decently known archery supply shop and one I knew I could trust. So I go on their site, and the bow kit is not there! I look more and the built bow isn't either. Ack!! I was too late. No. Panic sets in.
I frantically search around online and no one else has the kits and only Kult of Athena was selling the built bows. I emailed Crow's Head asking if the had stopped carrying the bow kit or if it was just out of stock. I am desperate now fearing Rudder Bows might have discontinued the Penobscot bow. I get a response the same night. "Yes we still carry the kits, sorry it isn't on the site, it will be posted back up soon, thanks for letting us know it wasn't there." or something to that effect. Next day it was back on the site and I put my order in. Bonus, the price had gone down a bit from the previous listing. Maybe $10 or so less than before, and the built bows were now less also.
So I patiently waited, or at least tried to patiently wait. Maybe a week goes by, and then I was notified the bow had shipped. Just the other side of the state from me. So fairly quickly I received my Penobscot bow kit.
The basic kit unpacked from the box. (Includes, main bow, upper bow, upper bow strings, tillering stick (cling wrap removed so you could see it), scraper (cling wrap removed), main bow string/tillering string/nstructions (all wrapped in one tight small package)

Worth noting the instructions are generic longbow tillering instructions. Nothing pertaining to the special construction of a Penobscot bow. Nothing about how to attach the two bows. Nothing about the string grooves needing to allow strings in both directions. But it is ok, I am not completely clueless, and the lack of specific instructions isn't a hindrance to me. Though I would have been curious to find out what the instructions might have said if there was specific instructions.
Some assembly is required (the screw that came with the kit was too short to hold the tillering stick, so I grabbed my own and used that)

Tillering stick assembled and items laid out again

The upper bow is already tillered, and need no work from me other than finishing it and attaching it to the main bow.
The main bow is a rough floor tiller. Meaning they roughed out the shape enough to get it to bend slightly when pushed on with the tip on the floor.
Hard to really show the roughness of the main bow but I tried.

If it looks like it is bent, it is just an optical illusion from the camera angle, freaked me out seeing this picture and I spent about 15 minutes after taking it to make sure there was no bend.

Part of me wanting the kit rather than a prebuilt bow is I want to make a few modifications. Mainly to build up the handle with some other woods, and to build up the bow nocks so I can safely use a Fast Fight string. Well and reinforced bow nocks just add a little extra flare to a bow too.

I picked up some 1/4" Wenge the darker wood (probably can't tell but there is some stripping pattern in this), and some 1/8" Zebrawood the lighter stripped wood.
I cut the strips and this is a dry fit of how I plan to place them.

Though I am considering going back and getting a little more Wenge to add one more piece in the middle sanwiching the Zebrawood between two Wenge pieces. I don't need to decide right away, it is something that I don't need to worry about till after I finish tillering the main bow.
Today was mainly just gluing the Wenge and Zebrawood pieces together.
Add plenty of glue, I am using Titebond 3 (water "proof" wood glue, I treat it as a good water resistant glue)

(Note the smaller pieces are going to be used to reinforce the bow nocks)
smooth glue over entire surface of the two pieces to be glued together

put together, and I wrapped with painters blue tape to help keep the glue from getting too messy and to keep them from slipping apart

Added some clamps to keep the pieces together tight, but not too tight to push all the glue out of the joint

Nope not done, more clamps, yes there is some wood under there somewhere being clamped.

Now those have to sit and dry. Instructions say 4 hours, but I will leave over night.
Now that is done. What else can I do? Well there is this bow that needs working on.
Seems the tillering stick has more of a gap than the bow is wide. Thankfully with the wood piece used to cover the scrapper's blade the bow fits in with out too much wiggle. (see the piece sticking out a bit, that shimmed it up nice)

Time to exercise the bow limbs
First stretch of the limbs, not getting too far.

Keep flexing the limbs, over and over and over and over......wheeew. 20 stretches later.

I will do a bit more stretching of the limbs over the night. But that is enough for today. The floor tiller looks pretty good, fairly even flex, and symmetrical. Look like I don't have to worry about correcting too much unless I put it in there.
Next I will start on scraping the limbs and tillering as far as I can get to. As well as checking on the glued wood and hopefully having them nice and well glued together.
Thanks for following along. If I don't get to tillering tomorrow, I have a Ham Radio class Fri-Sun, so I might not get to do much bow work over the weekend.


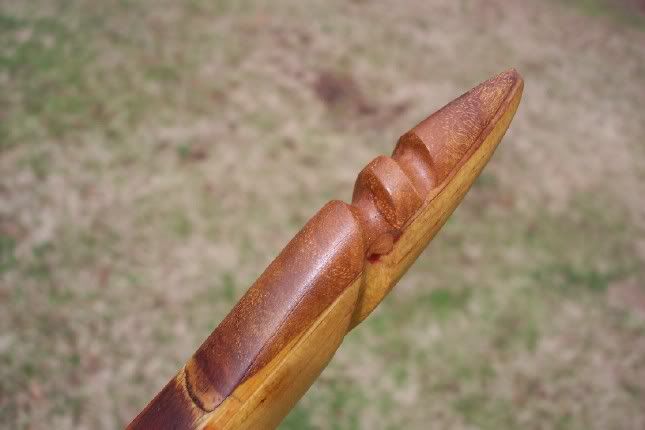




 - I figured you'd fill the blanks too and if I recall correctly you and I have previously talked about Poor Folk Bows. I also used several references but not the Rudderbows one - have to check that out. Don't forget that the bow will likely lose some weight once it's broken in; of course as you've mentioned, with the 2nd bow you'll be able to adjust the weight and dial in just what you like regardless.


