

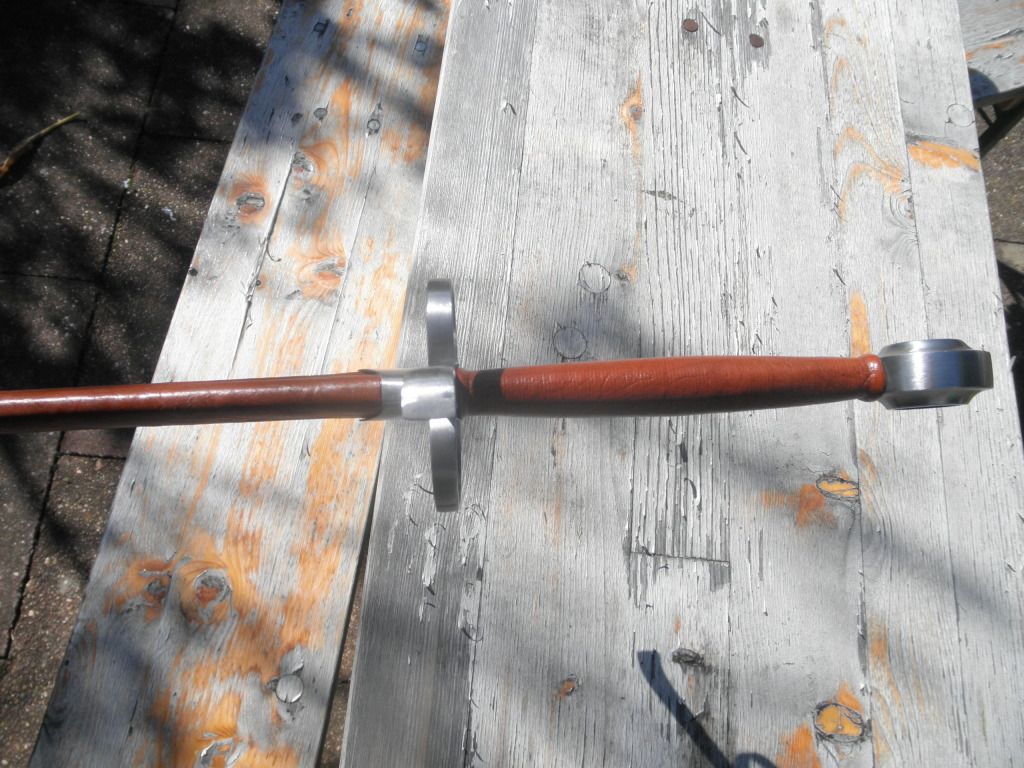
Scabbard for XVIIIa bastard sword
Sept 28, 2012 8:24:36 GMT
Post by Lukas MG (chenessfan) on Sept 28, 2012 8:24:36 GMT
Hey folks
Some of you might remember the latest piece from my workshop, a type XVIIIa bastard sword. (for those wanting more detail, go here: viewtopic.php?f=15&t=12310)
After I had finished the sword, I really needed to take a break from metal working, so making a scabbard was right up my alley. This is my first attempt at constructing one and it turned out to be quite a bit more work than I imagined (honestly, I figured after hours and hours spent on the blade, that bit wood and leather stuff should be children‘s play ).
).
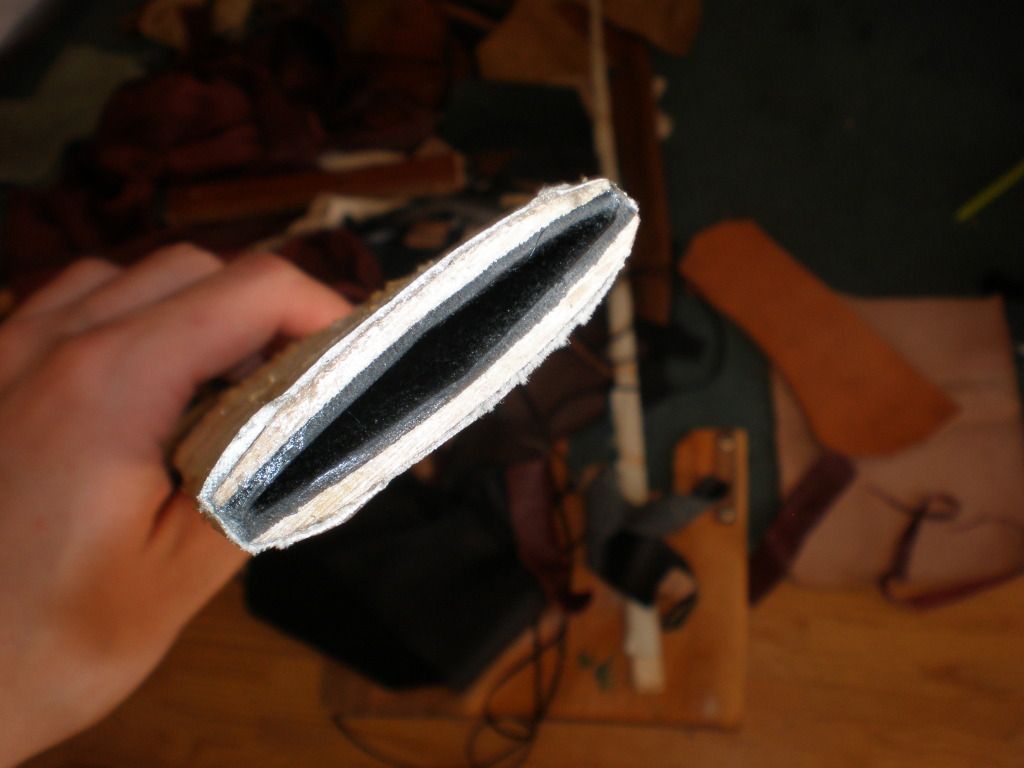
When I began researching about medieval scabbards, I quickly realized that I‘d rather not spend hours carving a wooden core. So I was relieved when I found a method that utilizes thin wooden slats bent to form the scabbard core. I also decided I wanted to line the core with fur as it was usually done back in time.
I was lucky to get suitable goat fur and 1mm maple slats from a fellow sword smith, along with plenty good tips and information. I also lucked out when paying the local leather store the next visit as I found a big piece of the exact same leather I had bought there earlier to wrap the sword grip with! I‘m quite taken with this leather, it is thin, works well and has a beautiful texture that adds character.
This time I remembered to take some in progress shots... not of all steps as I sometimes just didn‘t enough hands and lacked a camera man but I hope the pics I did manage to get are helpful for others wanting to try this.
Without further talk, here are the pics in hopefully correct order.
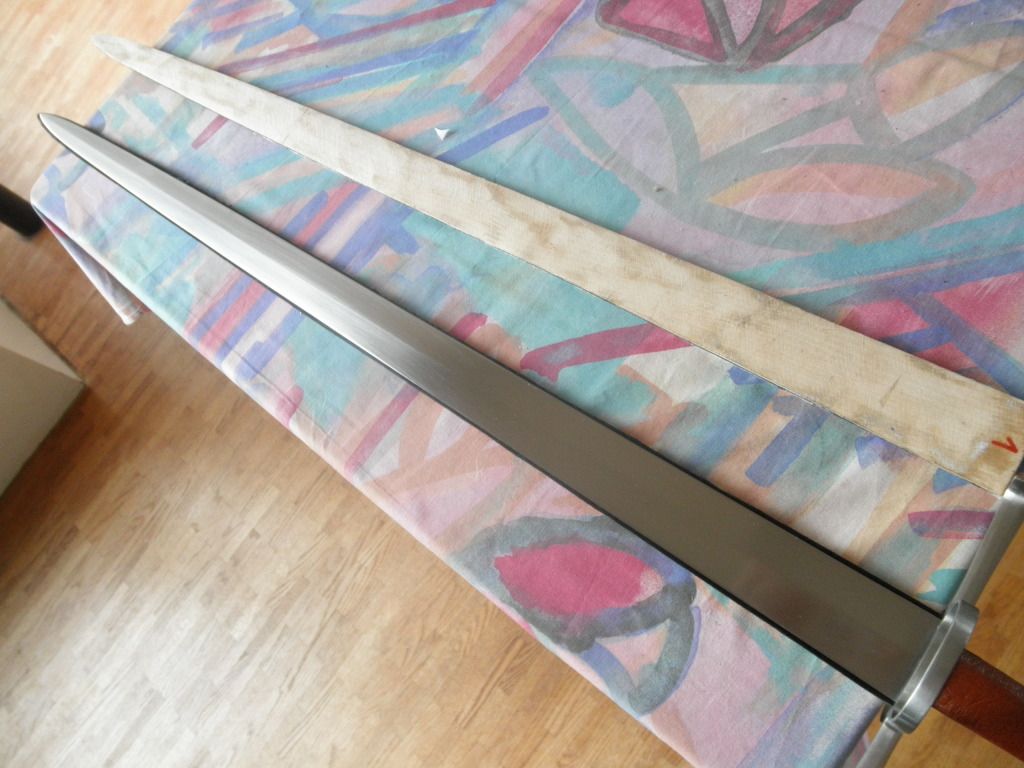
First I made a wooden dummy for the scabbard outline. This step isn‘t really necessary but I didn‘t feel comfortable tracing the blade shape directly onto the maple slats. I don‘t have any pics of that, I‘ll start with the cut out slats with the fur already glued on:
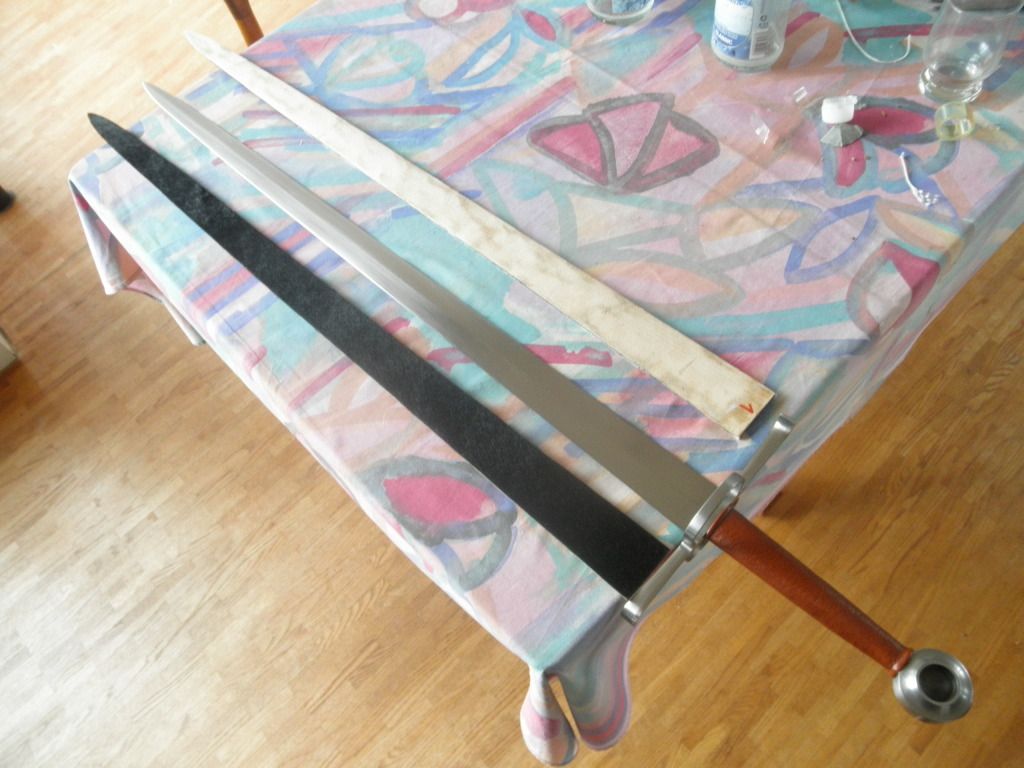
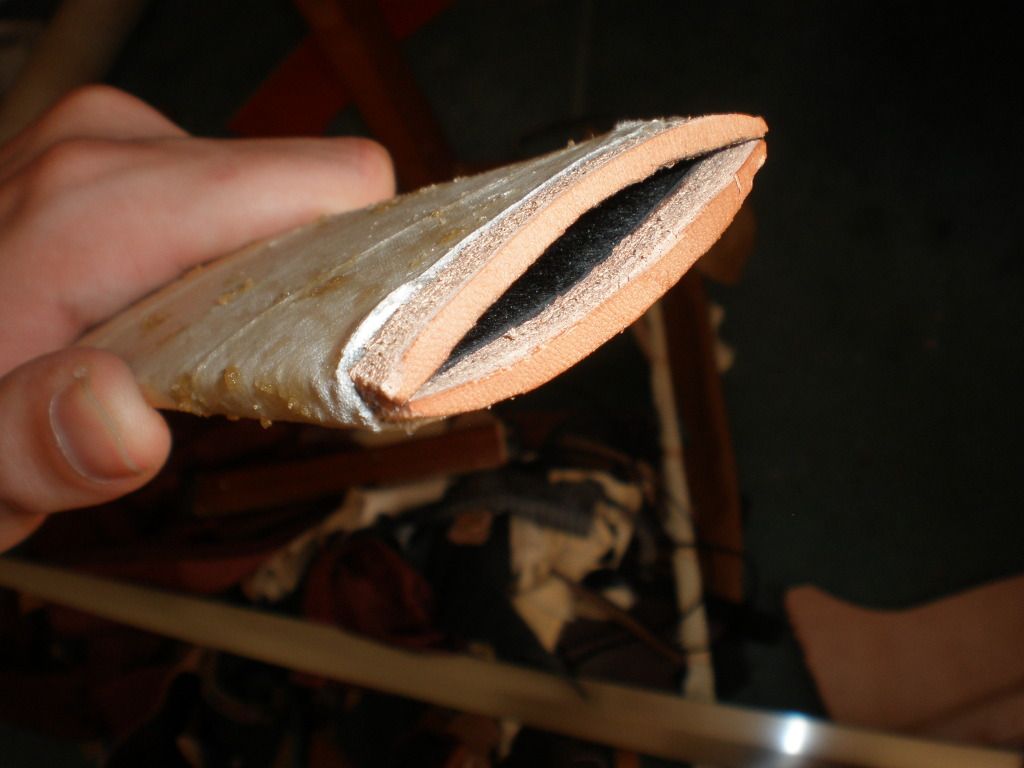
As the core isn‘t glued together but held solely by the linen wrap, I didn‘t have to leave much room on either side of the blade‘s edge, 2mm were enough. This makes for a core that follows the blade shape very closely and adds little bulk.
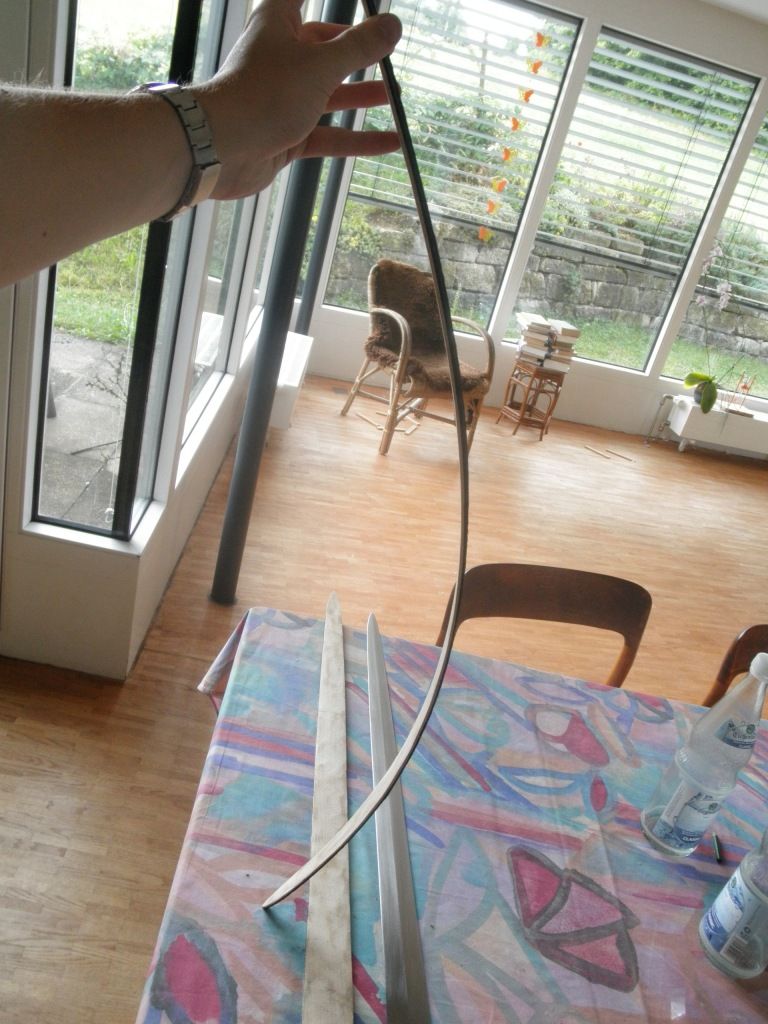
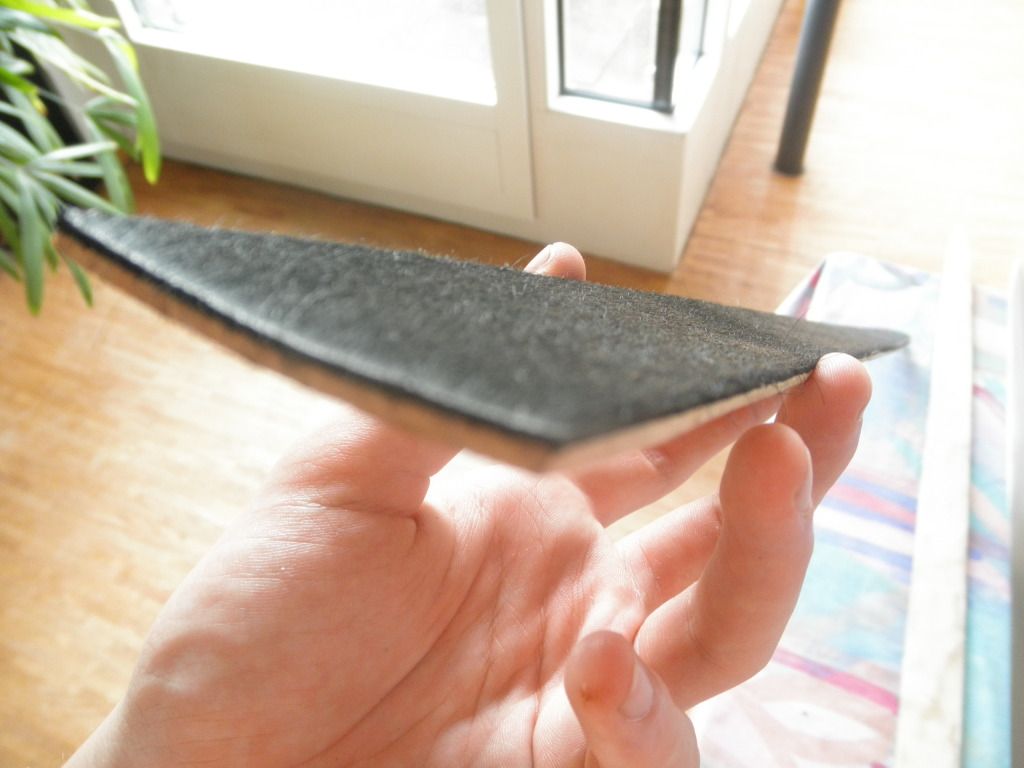
The 1mm maple slats are very flexible and can absorb shock quite well, a good thing should the scabbard ever encounter stress (falling on, etc). The combination of fur on the inside and linen plus leather on the outside makes for a very light yet durable construction. With the hide glue soaking through linen and wood and irreversibly combining them it‘s really kind of a medieval composit material.
After I had both slats formed, I wrapped them with tape and inserted the sword. Left it in there for two weeks or so (simply because I went on holiday, after what I read a few days are usually enough). Afterwards it was still a bit too tight so instead of the blade I pushed a thicker dummy in there. I was a bit afraid the slats would break but fortunately that wasn't the case. Usually the slats are watered a bit before bending them to shape but as I got the slats with the fur already glued on, I couldn't do that without ruining it.
Here are some pics of someone else using the same method: blog.mittelalter-manufaktur.de/?p=474
Only difference was that I used tape instead of string during the bending. Don't think it really matters.
Of course, I also left the blade in the scabbard during the glue and later during the leather drying process (both 1-2days) . Interestingly, after I had the wet leather around the core, the fit loosened up somewhat but once it was dry, the fit was back to where it was beforehand. No idea what happened there :?:
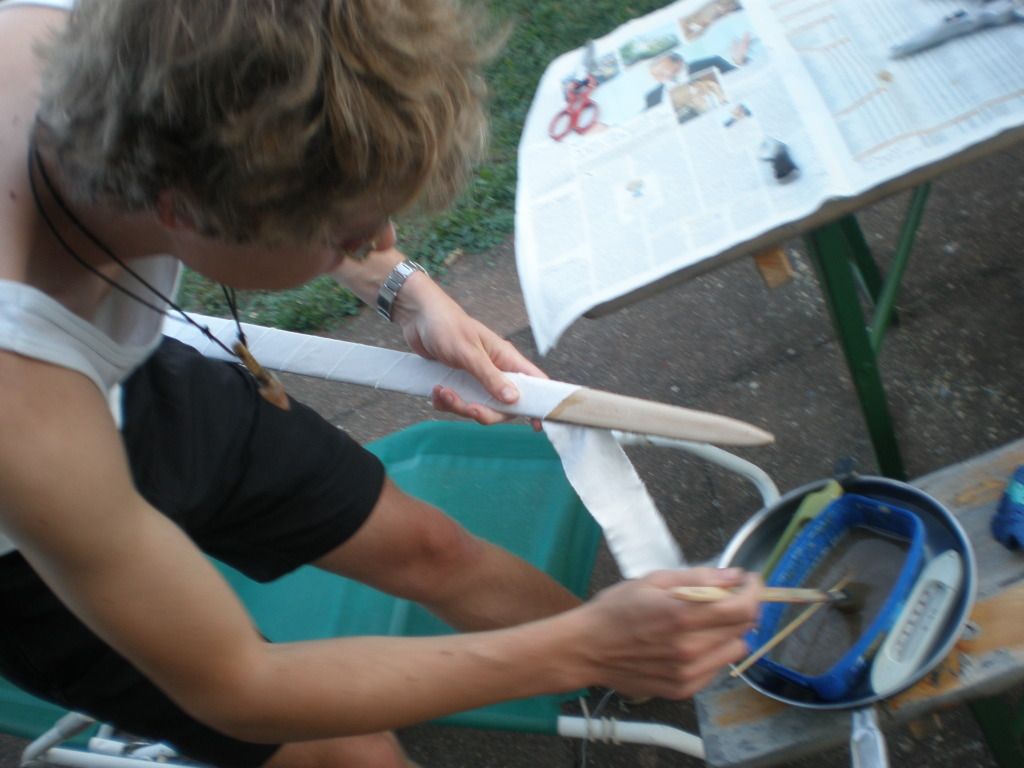
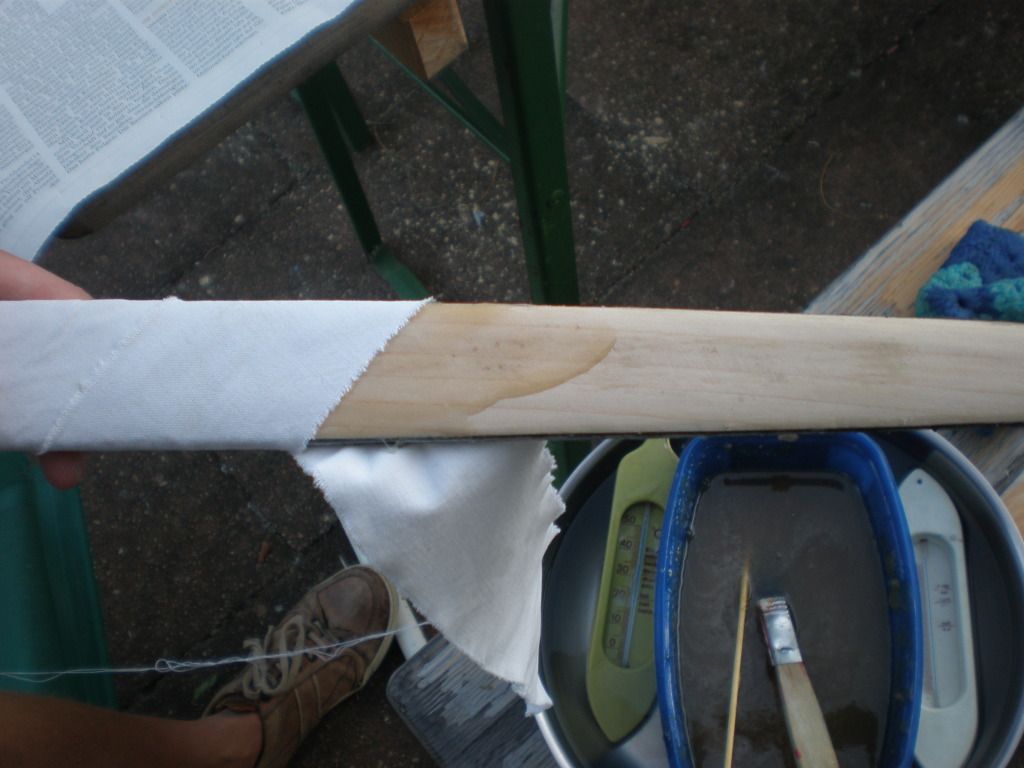
Glueing the linen is an incredibly messy process. The glue sticks to everything, especially fingers it seems (this is why I had my sister take the following pics). It is also only usable when heated to a honey like consistence and one needs to work rather quickly before it cools down too much. Once dry it forms an extremely strong bound, one I can‘t break by hand (tried it on a piece of linen and wood beforehand). Once hard it can be ground and sanded like modern epoxy. I should be entirely possible to make some period accurate micarta this way :lol:
I reinforced the scabbard mouth with a thick piece of leather, hide glue and a linen strip turning everyting into one single piece. After letting the glue dry for a day, I sanded down the core until it was nice and even, then glued down the middle riser (note that on the pic there‘s still the riser around the scabbard mouth which was later taken off when I decided on a metal locket).
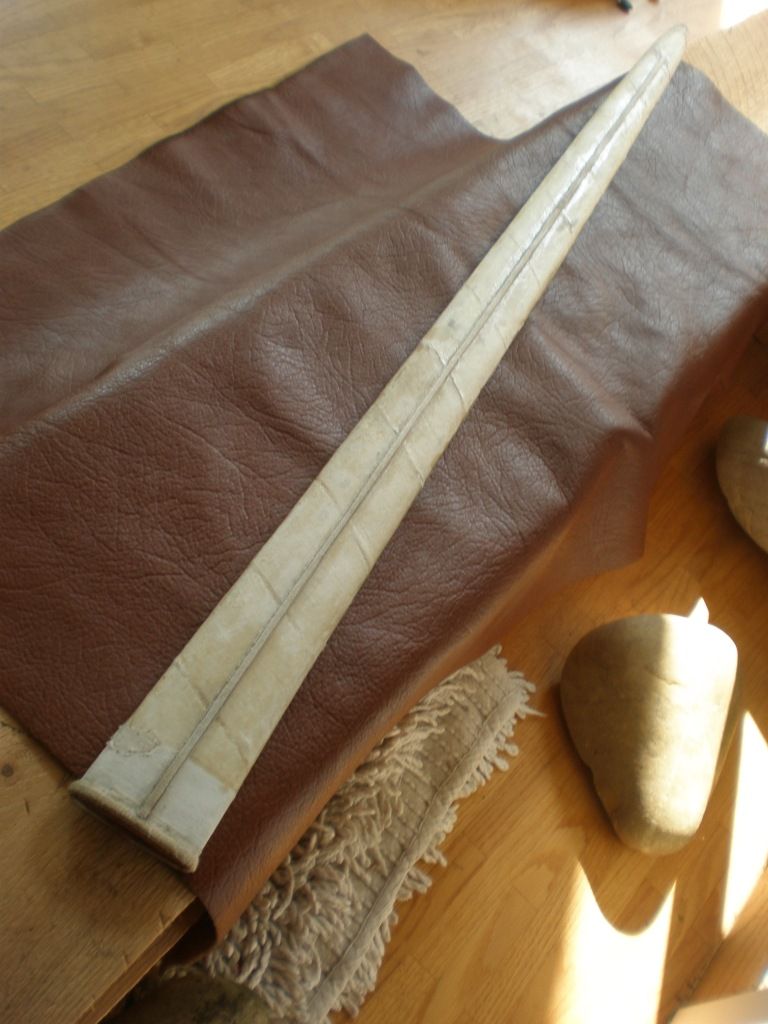
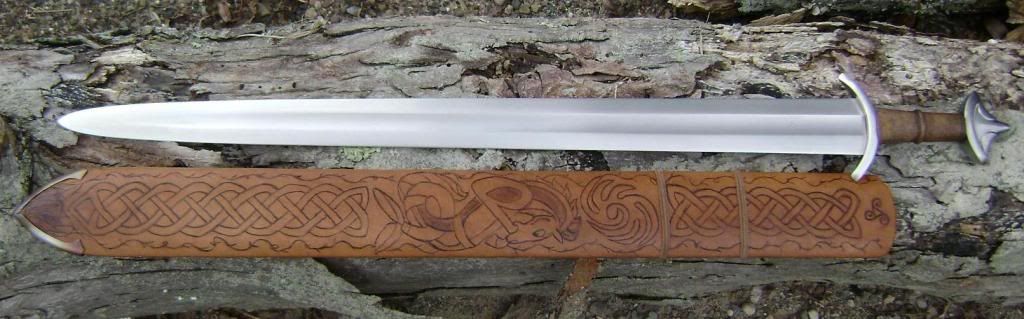
Afterwards, the core was wrapped with wet leather and the riser worked out. I didn‘t stitch the seam, just glued it down. There is historical evidence for both methods and I really appreciate not having to spend hours stitching.
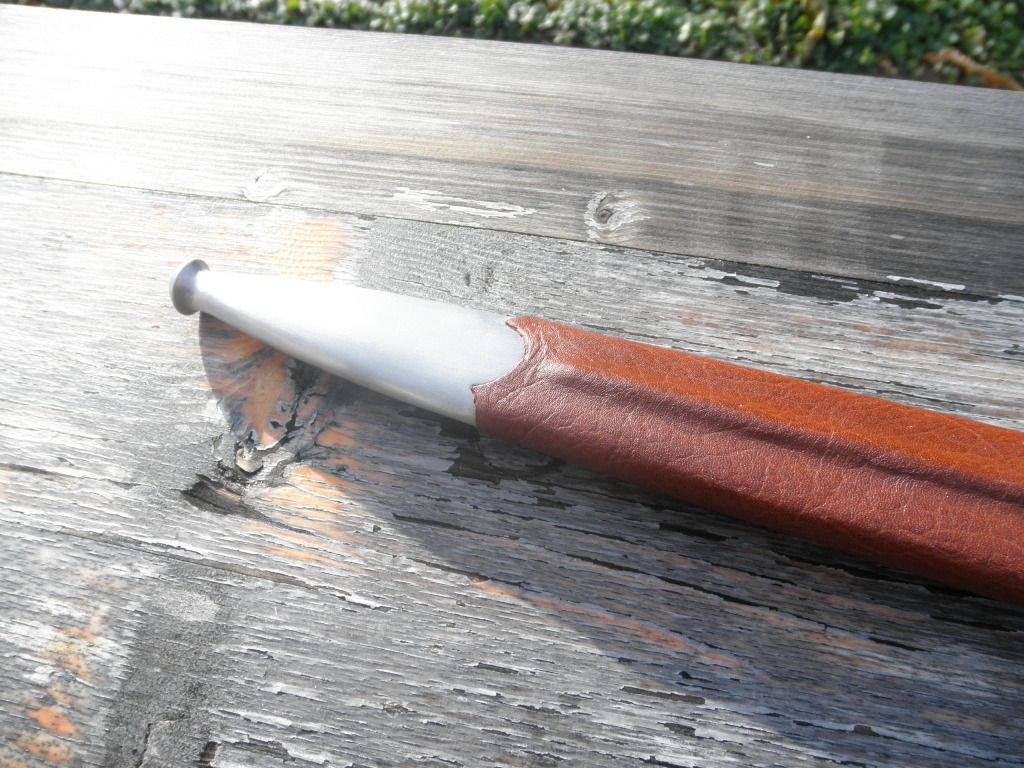
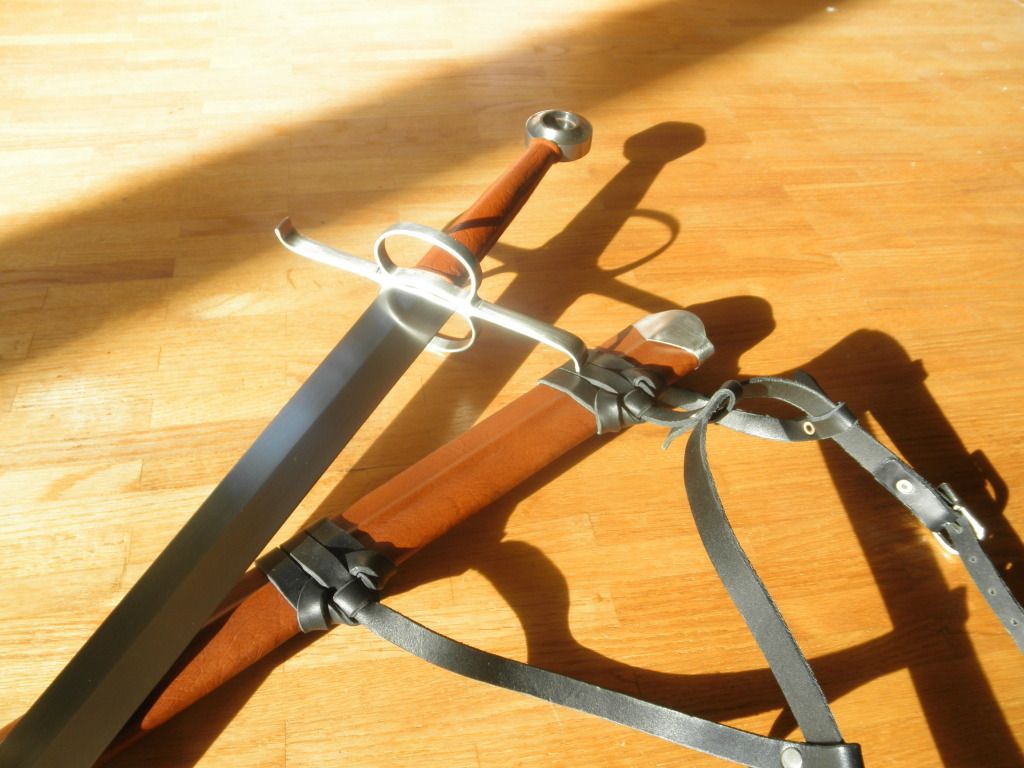
Unfortunately, the windlass chape I had taken of a different sheath and reworked slightly didn‘t fit over the leather so I glued it in place first and then trimmed the leather to fit around. I was unsure how it would look but am completely happy with how it turned out.
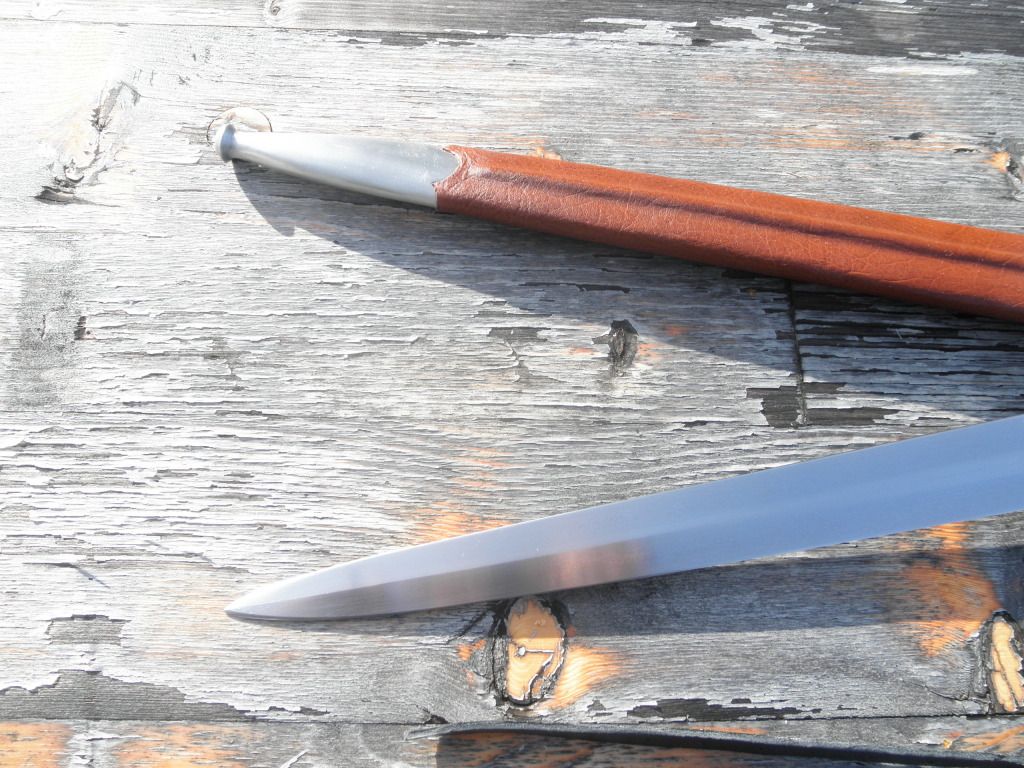
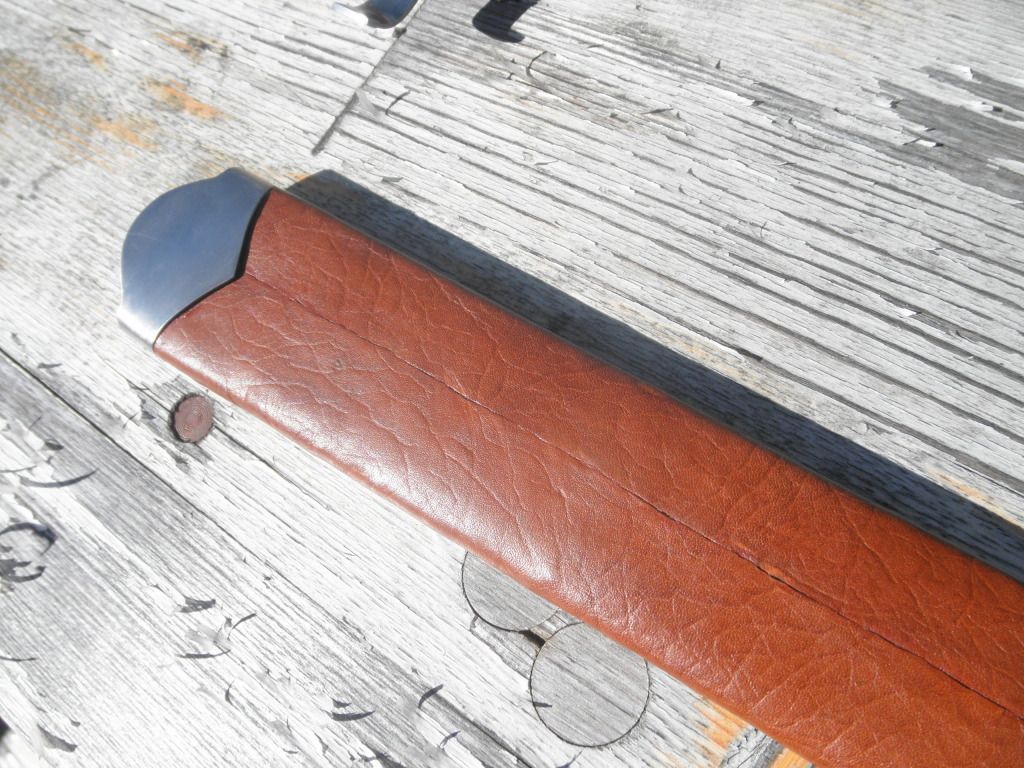
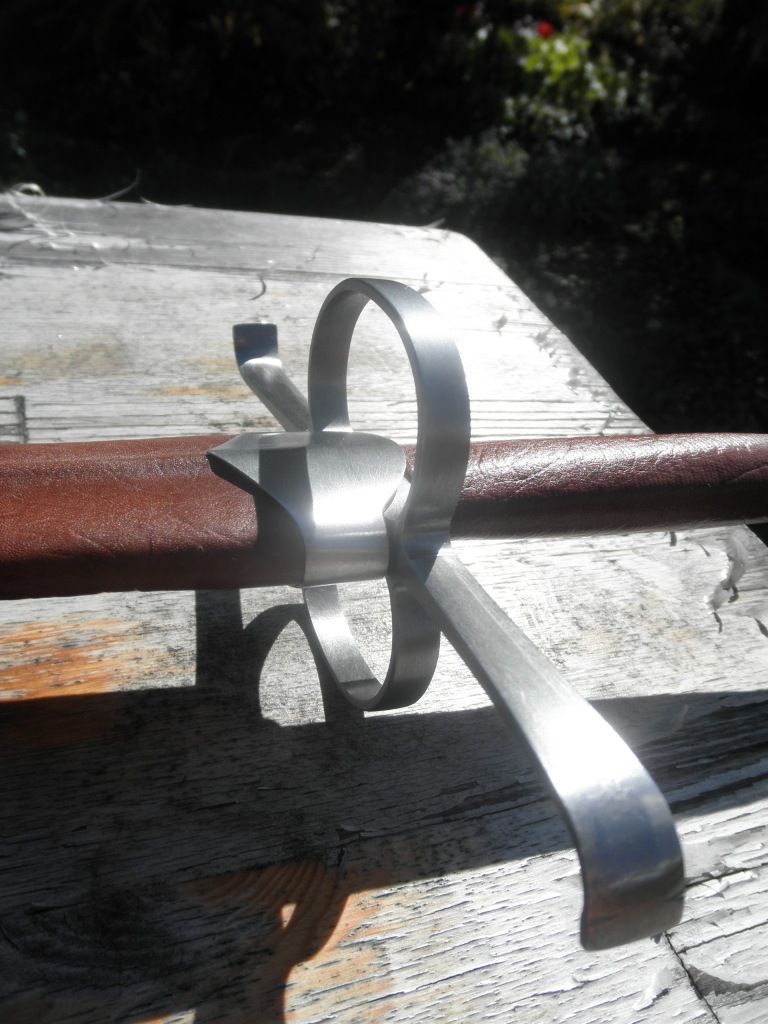
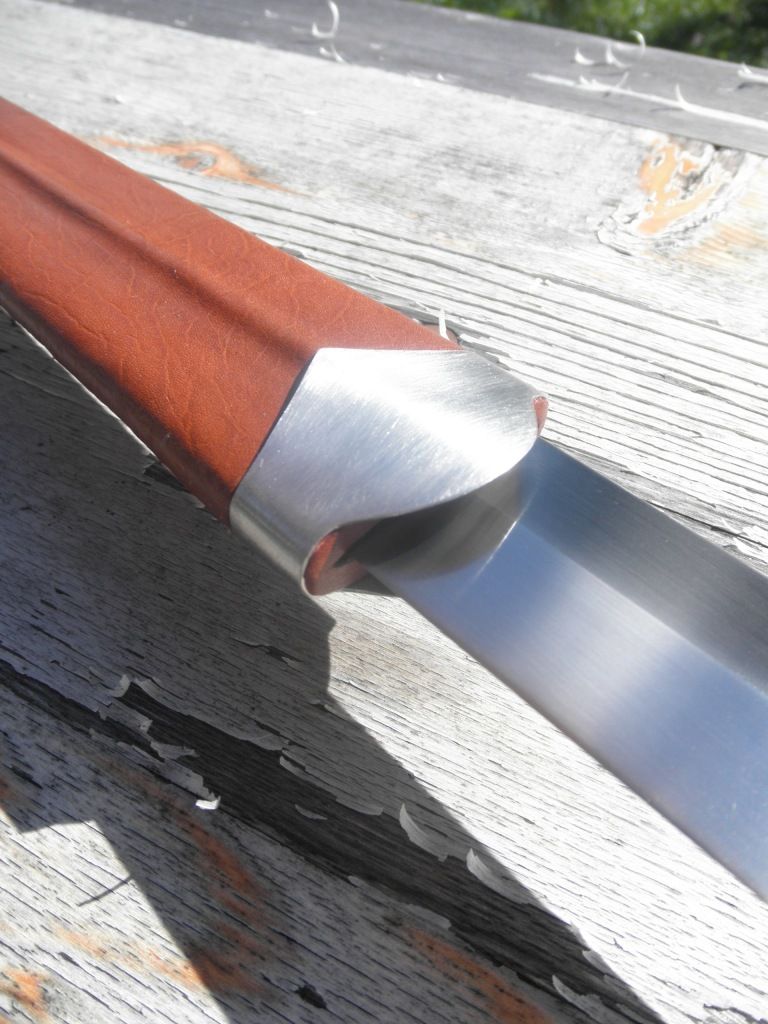
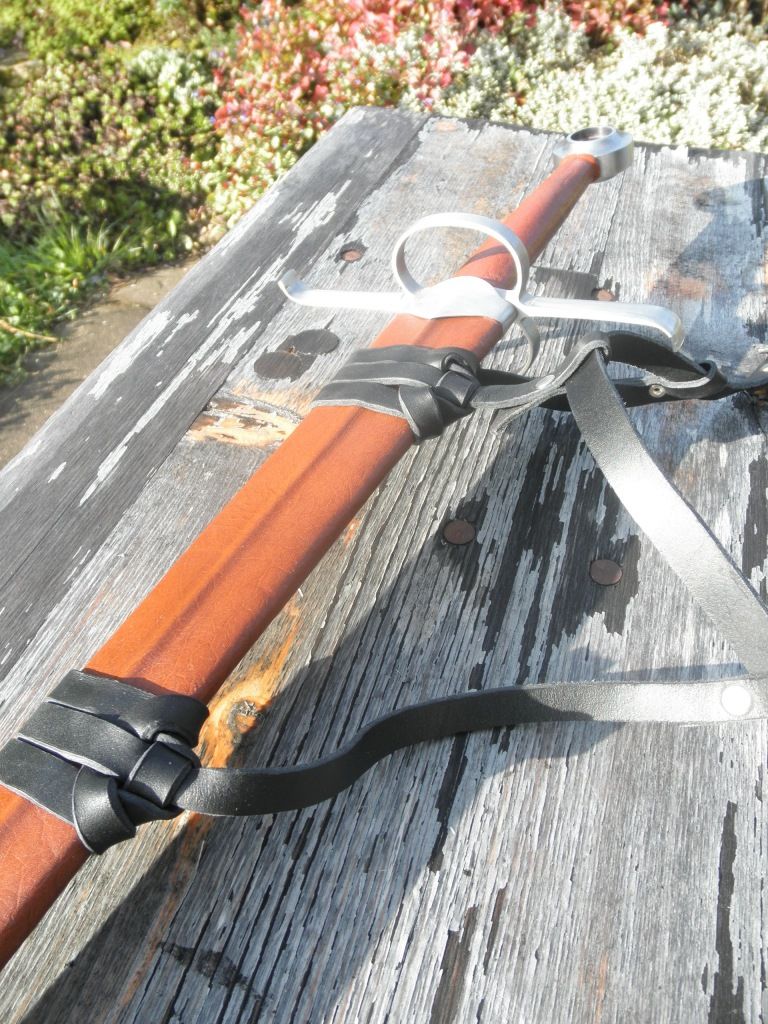
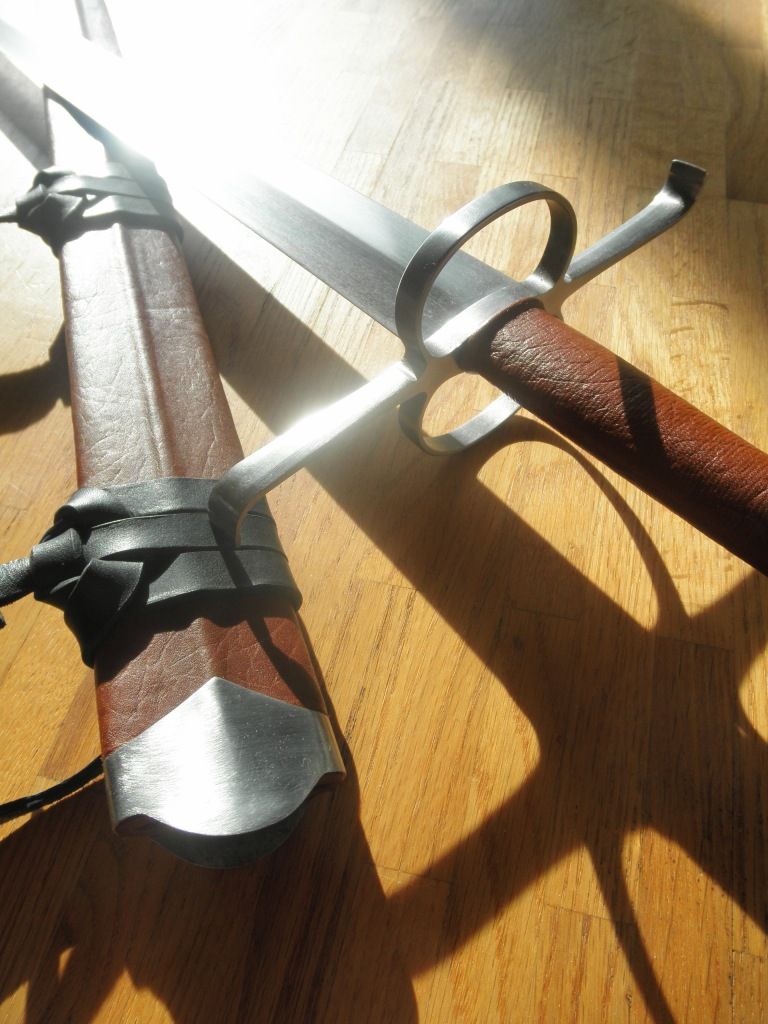
I‘ve never liked how a scabbard mouth with risers is thicker than the guard and since I felt the metal chape at the tip needed something likewise metallic at the other end to balance out visually, I decided to craft a metal locket that covers the scabbard mouth, tightly hugging the guard. I doubt our ancestors used such a design but historical accuracy has never been my primary concern with this sword. Aesthetically anyway, the locket is very important as it makes scabbard and sword seem like one single unit. The construction is simple, just two pieces of 1mm sheet steel soldered at the sides.
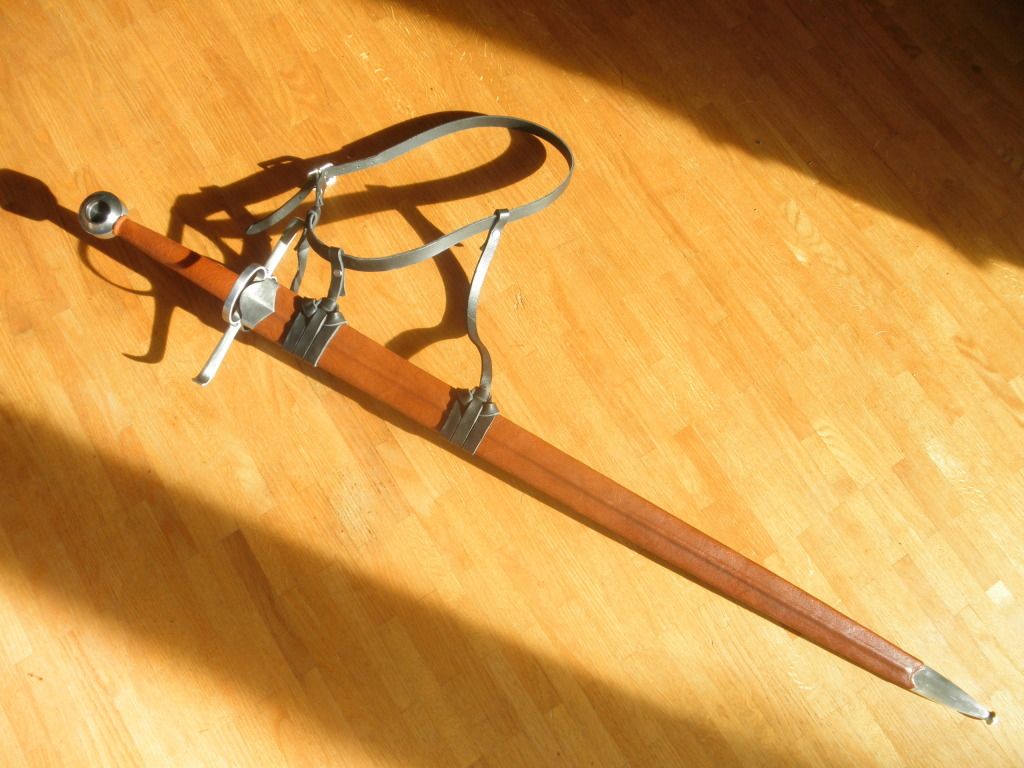
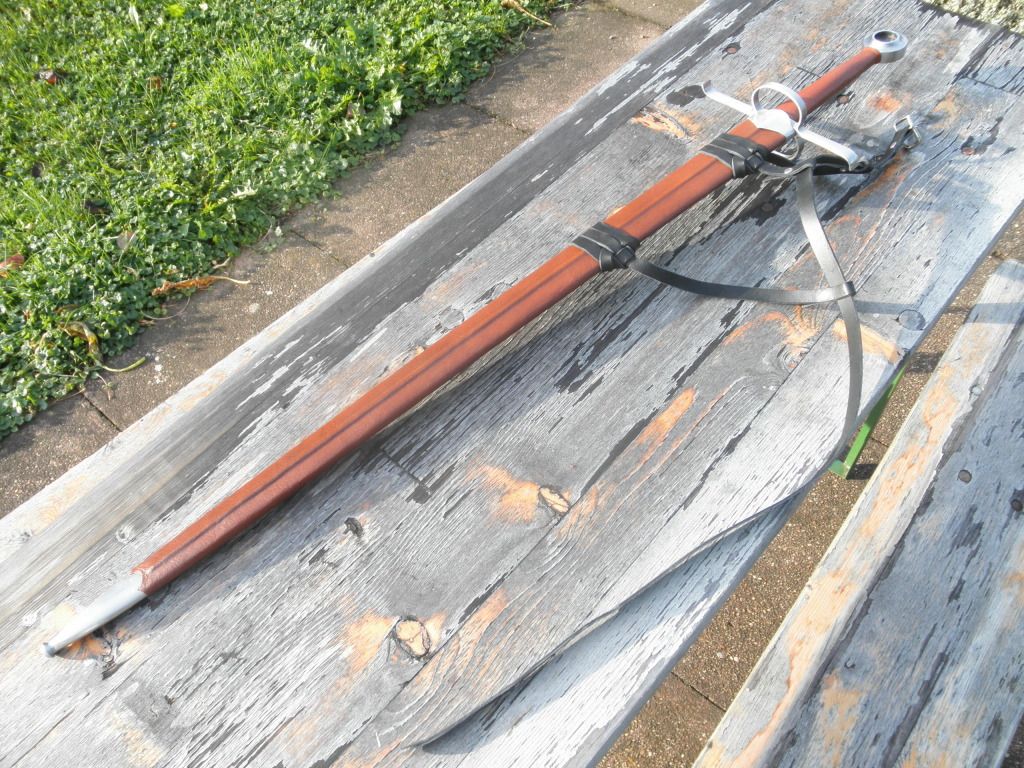
The supposedly period accurate belt buckle was bought together with suitable black leather strips for the suspension. I decided a little contrast with the brown scabbard and grip couldn‘t hurt and really like this combination. Simple yet elegant is what I was going for with the whole sword and I think I succeded. I thought about adding some carving but decided it didn‘t need anything and was perfect as is.

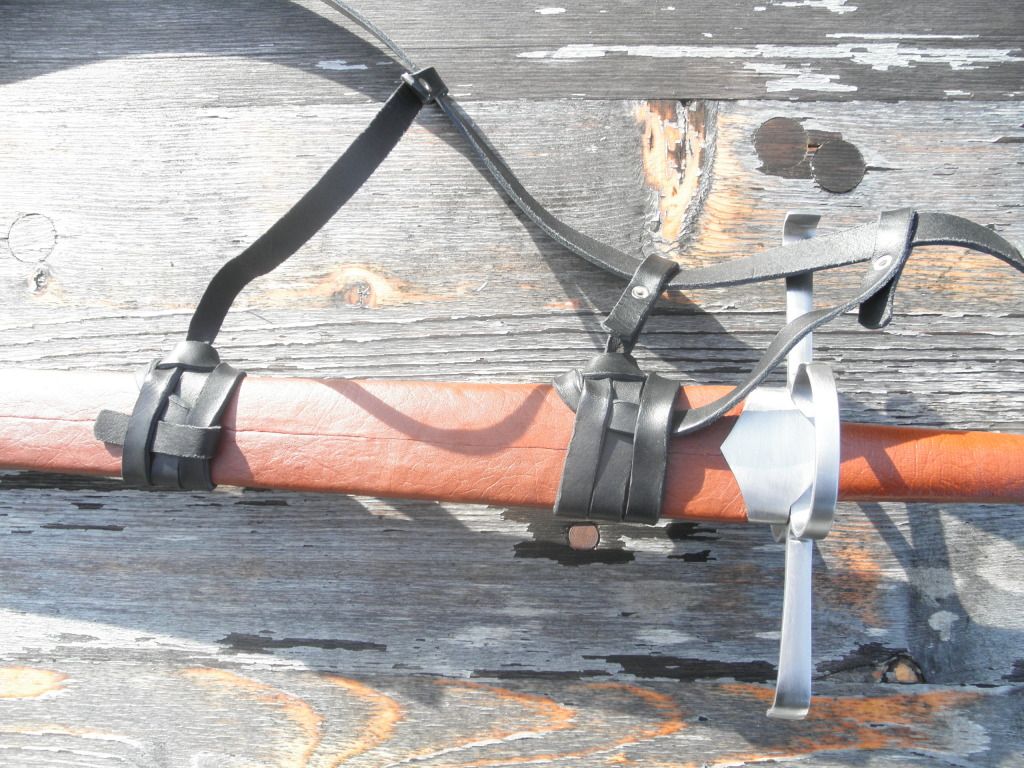
Making the knots was actually very simple as I was relieved to find out. While it looks quite complex, it really isn‘t hard to figure out with the good tutorial on myarmoury.
I‘m very happy with how comfortable the sword feels on the hip. Even when running, there is no extensive flopping around. It does take some getting used to, especially sitting poses unexpected difficulties but I‘m sure with practice it‘ll go better (and right now I‘m reluctand to even take it off when eating so I figure I‘ll get used to it rather quickly :lol: ).
The scabbard fit is very tight and secure. Holding it up side down and shaking is no problem at all. To unsheath the blade, it takes a firm little pull then slides out smoothly and without resistance. I probably won‘t win any quick drawing competition but this is unheard of in the HEMA (very much unlike in japanese swordmanship) and I personally desire a secure fit that allows activity without fear of impaling myself on my own sword. It should also be rather difficult for idiots on renfaires to grab the blade without me noticing it...

Well, I guess this it it. After a whole year of planning and working on this sword, it‘s finally done. I might at some point add replica coins to the pommel but otherwise, it‘s mission accomplished. This project has been huge for me and occupied most of my shop time over the last 12 months. Now it feels somewhat strange to see it completed.
Anyway, comments, critics, etc all welcome!!
Some of you might remember the latest piece from my workshop, a type XVIIIa bastard sword. (for those wanting more detail, go here: viewtopic.php?f=15&t=12310)
After I had finished the sword, I really needed to take a break from metal working, so making a scabbard was right up my alley. This is my first attempt at constructing one and it turned out to be quite a bit more work than I imagined (honestly, I figured after hours and hours spent on the blade, that bit wood and leather stuff should be children‘s play
 ).
). When I began researching about medieval scabbards, I quickly realized that I‘d rather not spend hours carving a wooden core. So I was relieved when I found a method that utilizes thin wooden slats bent to form the scabbard core. I also decided I wanted to line the core with fur as it was usually done back in time.
I was lucky to get suitable goat fur and 1mm maple slats from a fellow sword smith, along with plenty good tips and information. I also lucked out when paying the local leather store the next visit as I found a big piece of the exact same leather I had bought there earlier to wrap the sword grip with! I‘m quite taken with this leather, it is thin, works well and has a beautiful texture that adds character.
This time I remembered to take some in progress shots... not of all steps as I sometimes just didn‘t enough hands and lacked a camera man but I hope the pics I did manage to get are helpful for others wanting to try this.
Without further talk, here are the pics in hopefully correct order.
First I made a wooden dummy for the scabbard outline. This step isn‘t really necessary but I didn‘t feel comfortable tracing the blade shape directly onto the maple slats. I don‘t have any pics of that, I‘ll start with the cut out slats with the fur already glued on:
As the core isn‘t glued together but held solely by the linen wrap, I didn‘t have to leave much room on either side of the blade‘s edge, 2mm were enough. This makes for a core that follows the blade shape very closely and adds little bulk.
The 1mm maple slats are very flexible and can absorb shock quite well, a good thing should the scabbard ever encounter stress (falling on, etc). The combination of fur on the inside and linen plus leather on the outside makes for a very light yet durable construction. With the hide glue soaking through linen and wood and irreversibly combining them it‘s really kind of a medieval composit material.
After I had both slats formed, I wrapped them with tape and inserted the sword. Left it in there for two weeks or so (simply because I went on holiday, after what I read a few days are usually enough). Afterwards it was still a bit too tight so instead of the blade I pushed a thicker dummy in there. I was a bit afraid the slats would break but fortunately that wasn't the case. Usually the slats are watered a bit before bending them to shape but as I got the slats with the fur already glued on, I couldn't do that without ruining it.
Here are some pics of someone else using the same method: blog.mittelalter-manufaktur.de/?p=474
Only difference was that I used tape instead of string during the bending. Don't think it really matters.
Of course, I also left the blade in the scabbard during the glue and later during the leather drying process (both 1-2days) . Interestingly, after I had the wet leather around the core, the fit loosened up somewhat but once it was dry, the fit was back to where it was beforehand. No idea what happened there :?:
Glueing the linen is an incredibly messy process. The glue sticks to everything, especially fingers it seems (this is why I had my sister take the following pics). It is also only usable when heated to a honey like consistence and one needs to work rather quickly before it cools down too much. Once dry it forms an extremely strong bound, one I can‘t break by hand (tried it on a piece of linen and wood beforehand). Once hard it can be ground and sanded like modern epoxy. I should be entirely possible to make some period accurate micarta this way :lol:
I reinforced the scabbard mouth with a thick piece of leather, hide glue and a linen strip turning everyting into one single piece. After letting the glue dry for a day, I sanded down the core until it was nice and even, then glued down the middle riser (note that on the pic there‘s still the riser around the scabbard mouth which was later taken off when I decided on a metal locket).
Afterwards, the core was wrapped with wet leather and the riser worked out. I didn‘t stitch the seam, just glued it down. There is historical evidence for both methods and I really appreciate not having to spend hours stitching.
Unfortunately, the windlass chape I had taken of a different sheath and reworked slightly didn‘t fit over the leather so I glued it in place first and then trimmed the leather to fit around. I was unsure how it would look but am completely happy with how it turned out.
I‘ve never liked how a scabbard mouth with risers is thicker than the guard and since I felt the metal chape at the tip needed something likewise metallic at the other end to balance out visually, I decided to craft a metal locket that covers the scabbard mouth, tightly hugging the guard. I doubt our ancestors used such a design but historical accuracy has never been my primary concern with this sword. Aesthetically anyway, the locket is very important as it makes scabbard and sword seem like one single unit. The construction is simple, just two pieces of 1mm sheet steel soldered at the sides.
The supposedly period accurate belt buckle was bought together with suitable black leather strips for the suspension. I decided a little contrast with the brown scabbard and grip couldn‘t hurt and really like this combination. Simple yet elegant is what I was going for with the whole sword and I think I succeded. I thought about adding some carving but decided it didn‘t need anything and was perfect as is.
Making the knots was actually very simple as I was relieved to find out. While it looks quite complex, it really isn‘t hard to figure out with the good tutorial on myarmoury.
I‘m very happy with how comfortable the sword feels on the hip. Even when running, there is no extensive flopping around. It does take some getting used to, especially sitting poses unexpected difficulties but I‘m sure with practice it‘ll go better (and right now I‘m reluctand to even take it off when eating so I figure I‘ll get used to it rather quickly :lol: ).
The scabbard fit is very tight and secure. Holding it up side down and shaking is no problem at all. To unsheath the blade, it takes a firm little pull then slides out smoothly and without resistance. I probably won‘t win any quick drawing competition but this is unheard of in the HEMA (very much unlike in japanese swordmanship) and I personally desire a secure fit that allows activity without fear of impaling myself on my own sword. It should also be rather difficult for idiots on renfaires to grab the blade without me noticing it...
Well, I guess this it it. After a whole year of planning and working on this sword, it‘s finally done. I might at some point add replica coins to the pommel but otherwise, it‘s mission accomplished. This project has been huge for me and occupied most of my shop time over the last 12 months. Now it feels somewhat strange to see it completed.
Anyway, comments, critics, etc all welcome!!


 .
.


