Deleted
Deleted Member
Posts: 0
|
Post by Deleted on Jan 17, 2012 22:22:20 GMT
Okay this is gonna come at ya in two parts lol. 1. I am wondering if it is possible to practice sharpening/polishing katanas on old kitchen knives. I plan on buying a musashi bamboo katana for cutting and practicing sharpening/polishing purposes but I read that the first few blades you learn on you will ruin the blades. What I had in mind was I would practice on old kitchen knives and after getting that experience in I would graduate to the bamboo katana and see if I can't polish and sharpen it correctly. The only thing that makes me second guess this is that stainless steel is different from high carbon steel. Basically to sum up this question is is it possible to practice sharpening and polishing katanas on stainless steel kitchen knives? If not what would be a suggested knife that is super cheap to practice on? To add further note I bought the book "The Art of Japanese Sword Polishing" to learn how to polish swords. Does anyone have any other books that I could learn from? 2. I am going to buy the Masahiro sword sharpening kit (the one that comes with the sandpaper, 2 stones, the water bucket, and box to house all of the materials) Does anyone know if I can polish swords just using sandpaper? I looked at the different grits that sandpaper offers and in my mind (still learning mind you lol) sandpaper is basically like disposable whetstones. I would like to start off using sandpaper instead of shelling out a large sum of money on whetstones just so that I can get the hang of polishing and sharpening katanas. After a while I would like to graduate to the whetstones and just use the whetstones. So what would be the bare minimum list of various grits of whetstones would I need to acquire to polish/sharpen katanas? I am a little bewildered at the vast amounts of different whetstones companies provide and the very fact that there is natural vs synthetic. So to sum up this huge thread lol. 1. Is it possible to practice polishing/sharpening katanas on kitchen knives and what other polishing books should I acquire to learn this art more proficiently. 2. What are the bare minimum of whetstones would I need to acquire to polish and sharpen katanas? And for starting out in the noob world would it be okay to use sandpaper due to financial and beginner's reasons. Thank you so much for your time!!!  |
|
|
|
Post by Adrian Jordan on Jan 17, 2012 23:41:28 GMT
Hello, and welcome to the forum. Any practice is good, but the geometry of a Japanese sword and a kitchen knife is very different, as kitchen knives generally have a secondary bevel. Katana's don't(or shouldn't) have a secondary bevel, so the sharpening/polishing process is a bit more challenging. Sand paper is generally what is used by members here, as traditional water-stones are fairly pricey. Here is a series of videos by TomK, a very well respected forum member and one of the go to guys for sharpening swords. forum.sword-buyers-guide.com/viewtopic.php?f=18&t=84 |
|
Deleted
Deleted Member
Posts: 0
|
Post by Deleted on Jan 19, 2012 2:18:00 GMT
A secondary bevel? I heard of this but I never understood where it lies. Is the secondary bevel where the face of the blade meets the cutting edge and the cutting edge drops off and has a "face" of it's own? Thank you for the links I plan on looking at them this weekend as college has a strangle hold on me mon-wed and friday.
|
|
|
|
Post by Adrian Jordan on Jan 19, 2012 3:15:57 GMT
Yeah. The shinny part of the edge here is a secondary bevel. 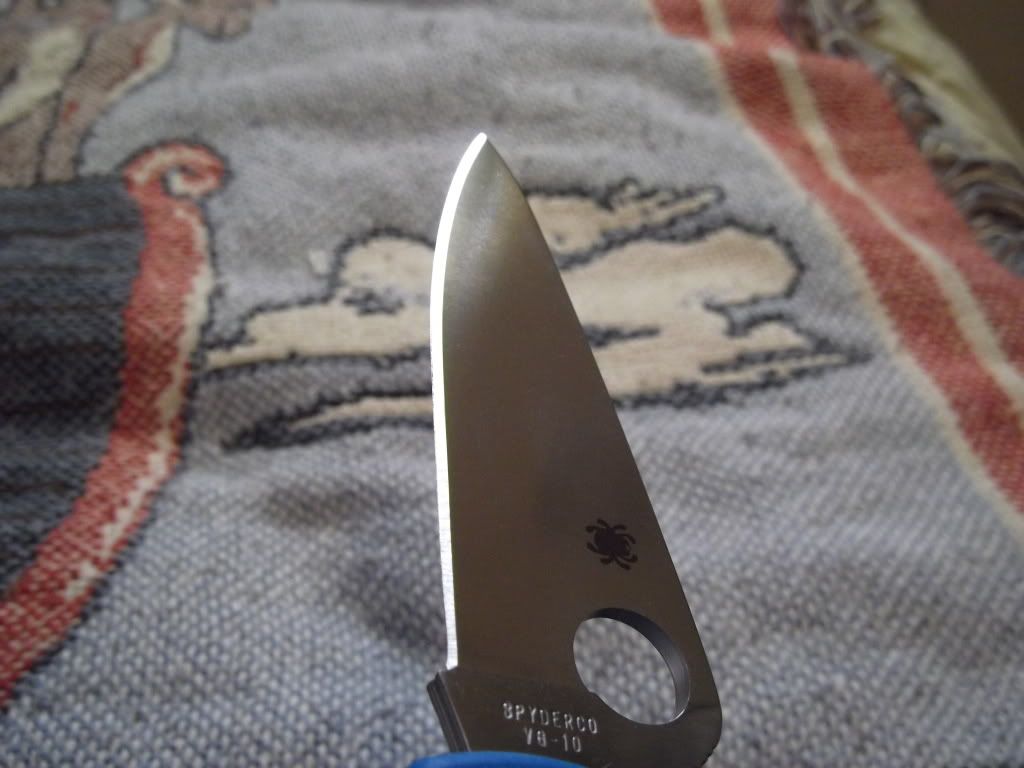 Katana are not supposed to have one, but most do. I've heard it referred to as a "safety bevel." When you polish a katana, which is actually what you do, not sharpen it, you need to include the entire blade from the shinogi down. This creates an edge that encompasses the whole blade, thus allowing it to handle the stresses of cutting. Here is a graph of Japanese blade terms. 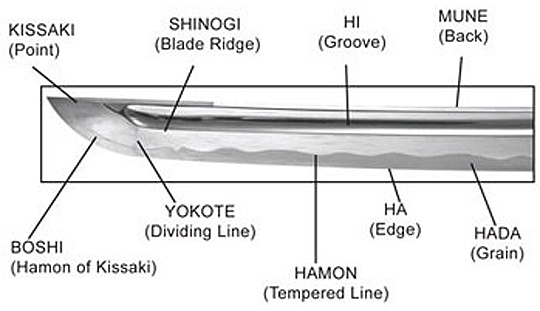 |
|
|
|
Post by Jakeonthekob on Jan 19, 2012 3:40:38 GMT
To answer your first question, yes it is actually possible to practice how to establish an appleseed geometry on a kitchen knife. However it would be a lot of work because almost all kitchen knives have a secondary bevel and you can only do a partial appleseed geometry on most knives (mostly due to the width of the actual cutting plane). www.ar15armory.com/forums/lofive ... 59651.html This website gives images on bevels. What Adrian means is that many knives have a standard curved bevel or a standard bevel. This is fine for most knives that aren't professional chef quality and of a certain kind of knife. However a correct katana's geometry has a semi-clamshell (appleseed) bevel or clamshell (appleseed) bevel as portrayed in the website. What I find the hardest to do, is to maintain a really nice clamshell bevel (appleseed) as you go from sharpening to polishing the blade. The whole purpose for this kind of edge geometry is to maximize edge reinforcement while maintaining a sharp edge. So while you practice on sandpaper and stones, be careful and take it slow. Also, it may be better to at least wet the sand paper/stones as you are working with the sword constantly so that you can reduce friction and heat. (Also add some sodium bicarbonate to the water to prevent the blade from oxidizing as you polish the blade). |
|
Deleted
Deleted Member
Posts: 0
|
Post by Deleted on Jan 19, 2012 4:34:30 GMT
adrian Thank you for describing what the bevel is and thank you for adding a photo of the katana as well. By the way nice knife!  Jakeonthekob Jakeonthekob Thank you for providing the website! I am really only interested in polishing right at the moment. But..forgive me if I am wrong but I thought I read somewhere that polishing katanas and sharpening katanas are really the same thing. So when you go to polish a katana you are also sharpening it. Did I understand this correctly? Because it seems that people will say that you should let the blade find its own geometry when you are sharpening it and polishing it otherwise if you force the geometry you will ruin the blade. I guess I am confused on the difference between sharpening and polishing. This is definitely a different step from just sharpening the edges of pocket knives! LOL. Also thank you for the tips of adding water on the sandpaper and adding sodium bicarbonate! That would have been fatal to my bamboo musashi lol. Also, is there a specific ratio of how much sodium bicarbonate I should put in my water? Such as I have 1 gallon of water I should put in x amount sodium bicarbonate.
|
|
|
|
Post by Jakeonthekob on Jan 19, 2012 16:03:06 GMT
Well by sharpening you only go to a certain grit such as 2000 grit and establish a proper geometry. Polishing brings out the characteristics of the blade such as the hamon, folding pattern (if there is any), and kissaki. Really polishing is a progression of sharpening. It serves to bring a sword's aesthetic properties out but it also practically closes the pores so that it doesn't rust as quickly. I guess it would also refine the edge on a microscopic level XD.
Concerning bicarb, maybe a couple spoonfuls of sodium bicarb will do the trick. Depends on how fas you work as well as what grit you are working on.
I have a vid showing how to polish a sword from 1000 grit and up. If I find it I will PM you.
|
|
|
|
Post by Jakeonthekob on Jan 19, 2012 16:15:32 GMT
Also many chinese made swords don't come with proper geometry, as in the ji is very flat right up to the ha then it curves sharply so it's like a semi-clamshell bevel. Sorry I'll PM you more in detail later.
|
|
|
|
Post by lamebmx on Jan 19, 2012 17:53:43 GMT
2 cents, I find I need more than a couple spoonfulls of baking soda. All stuff to learn on a starter blade, stainless dont need the baking soda.
|
|
Deleted
Deleted Member
Posts: 0
|
Post by Deleted on Jan 19, 2012 18:55:00 GMT
@jakeonthecob I would be extremely grateful if you could pm me the video and more details when you have more time! I guess I just need to watch a video that shows how to sharpen/polish a blade from start to finish without skipping steps. I watched the video that Adrian provided and that really helped me out. I just wonder how people know when to stop sharpening a sword and to begin polishing and vice versa. A lot of people seem to roll the shinogi line over and I can understand how that happens I just don't want to be sharpening the sword thinking that I am doing everything right and then strip away all of the metal. lol. lamebmx So probably several spoonfuls then huh? lol Thank you for your input! |
|
|
|
Post by lamebmx on Jan 19, 2012 20:12:06 GMT
its not that you stop one and begin another. they are the same process and the same way (unless you are doing a secondary bevel) the only real change is when you start. if you like the geometry, start at like 1000 grit and just polish. if you want to change geometry you will start at a lot lower grit, say 320, and use that and the same methods to create the edge profile you want, by using different pressures. after that first stone you just polish away the scratches from the previous stone. NEXT: say you have a nasty scratch or chip, you may start at 320 and use that until scratch or chip is gone and the follow out the polish, without changing the geometry.
it is alway why they say the uneducated can mess up the geometry by polishing their swords. extreme example would be someone that constantly touches up just the edge of their blade on a 2000 grit stone. and after a while they find they put a secondary bevel on their sword.
as for the spoonfulls, if you see rust after a break, add more soda.
|
|
Deleted
Deleted Member
Posts: 0
|
Post by Deleted on Jan 21, 2012 6:19:39 GMT
Ohhh okay so when you are grinding away on the blade you are using the 320 stuff and lower but once you establish the geometry you start to polish and that is when it also starts to sharpen the blade.
Yeah I would say if you constantly touched up a sword you would put a secondary bevel on lol.
Really? Rust forms that quickly?
|
|
|
|
Post by Jakeonthekob on Jan 22, 2012 2:53:53 GMT
Yes especially when working in lower grits. 1000 and below I say forms rust really quickly because the pores of the metal are really open. Sorry I don't have comp access for most of this weekend so I maybe send you a pm tomorrow or next week
|
|
|
|
Post by lamebmx on Jan 22, 2012 14:08:59 GMT
320 would be for an extreme change. Like changing a lot of niku into a no Niku light cutting machine. Really shoud stay in the 600 or 800 range. Better to take metal off slow and check often, since metal can't be put back on.
Yep sharpening and polishing are one in the same. If you do the same process without changing the geometry, you sword will become sharper. So after it get some scuffs and scratches. you polish them away and you will notice the balde is sharp again. If you changing geometry you should be able to have a good feel for the sharpness in the 800 range. The polishing after that primarily strengthens the edge by making it less and less seratted. For comparison, the final couple stages i use for a sword, are the same stones I use to hone my straight razor. DMT EEF & Chinese guaxin 12k.
|
|
|
|
Post by sceraxn on Jan 22, 2012 16:00:53 GMT
I usually go straight to my lighter grit stones and then on to 1000+ grit paper when polishing a sword. The only times ive had to use heavier grits were on severely damaged swords that needed reshaping. Typically, id rather start with lighter grits and work slowly checking my progress often. It takes a lot more time to do it this way, but it also drastically reduces the chances of a catastrophic mistake. Also, its not traditional at all, but when i have to use heavier grits i always use oil stones instead of traditional Japanese whetstones. The oil protects the blade from rust so you dont have to worry about that while youre taking a break. Not to mention that oil stones are usually cheaper, easier to find in large sizes, and dont wear away as fast as traditional whetstones. I dont use whetstones or paper until im in the higher grits where rust wont form as rapidly. If you do it this way just make sure to thuroughly clean the surface of the blade to get all the oils off before you start with water. For big jobs i usually break out my Norton IM-313 oil stones. Theyre expensive, but ive been using the same stones for over 15 years now and i probably have atleast another 15 years worth of sharpening left before i have to replace them. That $250+ price tag doesnt seem so big when you take its longevity into consideration. 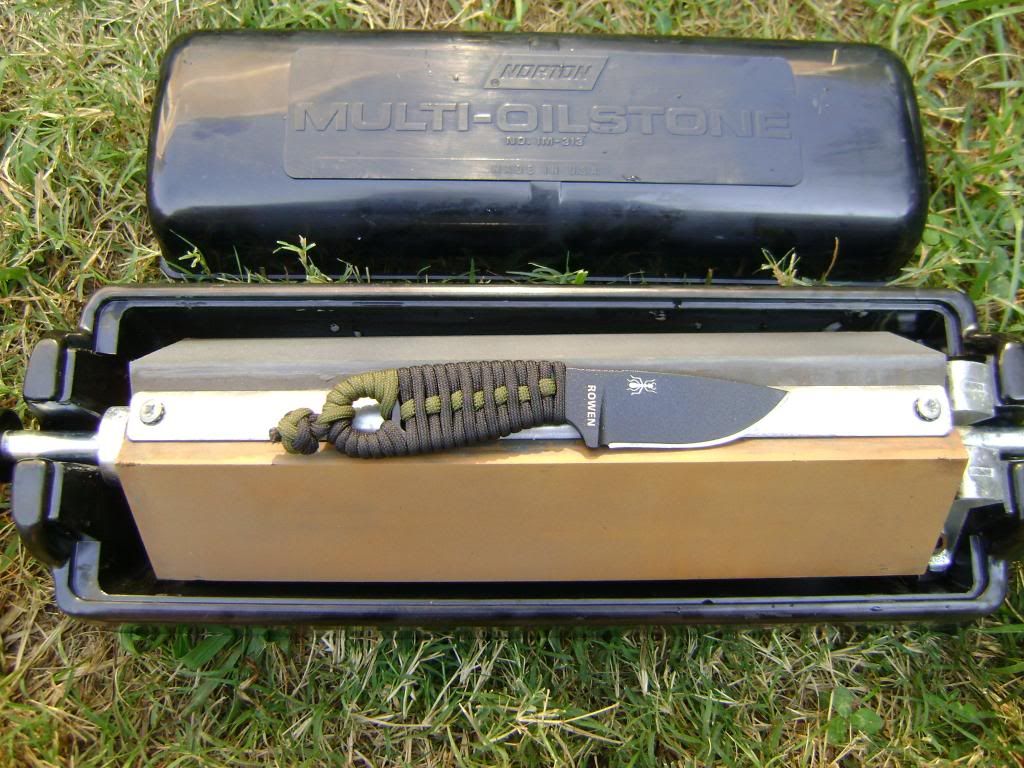 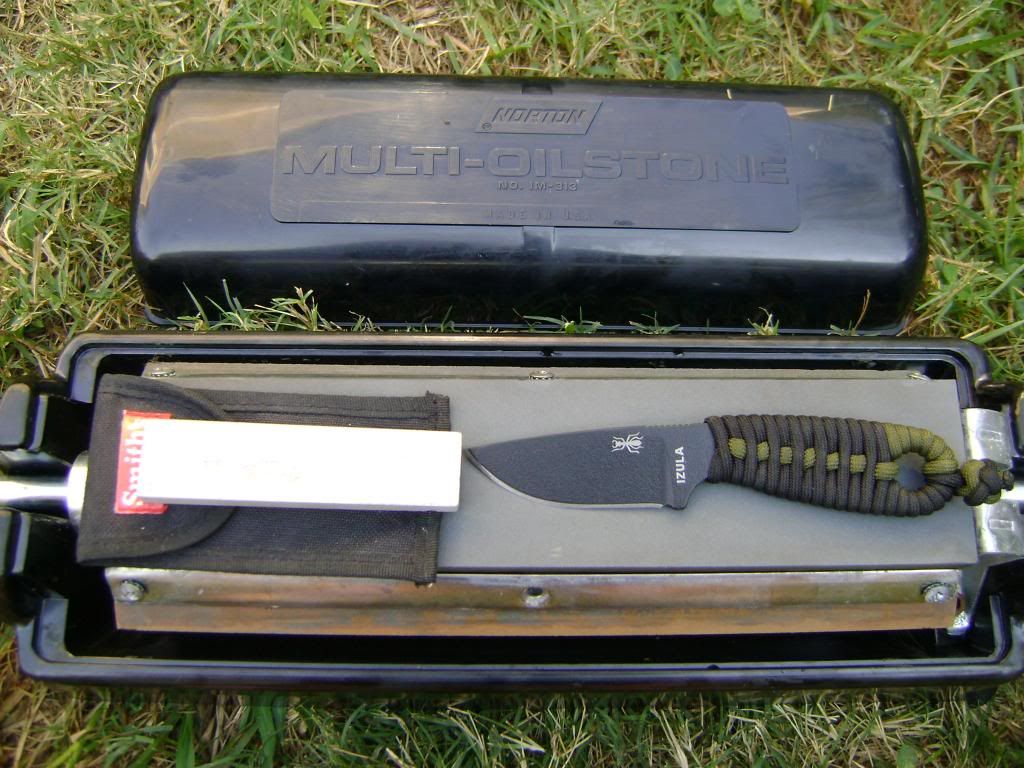 |
|
Deleted
Deleted Member
Posts: 0
|
Post by Deleted on Jan 24, 2012 4:46:33 GMT
Jake Makes sense now that I think about it. Just like in woodworking class you can sand the pores of wood so tightly that stain won't penetrate through. That's okay I understand not having the time to get to a computer! lamebmx Oh I don't plan on jumping between grits too fast. I read that people do that to "save" on their sandpaper but all they do is eat more at the finer sandpaper to make up for the grits they skipped over. I would like to buy every kind of grit size they offer and experiment on old knives so that I can get the feel of polishing. What I am trying to understand now is how do you make the kissaki? Don't you polish the entire blade up to the kissaki point and then polish that small area separately? And how do you not roll over the shinogi line and polish that? I imagine when you polish the shinogi you just lay it flat on the shinogi's face and start polishing away. However what about that limbo land between the edge of the shinogi and the face of the katana? Do you slightly rock the blade back and forth a tiny bit? sceraxn I am really trying to decide on buying water stones or oil stones. I remember reading that oil stones are harder to use than water stones but water stones are also much more expensive. I also remember several people who claim when they are sharpening their knives that you shouldn't use oil on the stone because it lifts the metal filings up off the stone and the oil transports them up to the surface so when you are sharpening your blade the edge is being driven into all of those metal filings thus dulling your blade. I don't know if that's true or not though. That's a nice set you have there. That's the reason why I would like to invest in some good whetstones because they last longer than paper lol. Thanks for posting the pics!
|
|
|
|
Post by lamebmx on Jan 24, 2012 11:54:38 GMT
Avoid the shinogi Ji. It will get worn quick and look soft instead of crisp. I am still working on the kissaki myself, if i had stones id chip off a corner and use the small piece on it, but i purchased diamond plate, and dont work on a sword with a real yakote. You would polish to the yakote, and then deal with yakote to kissaki on its own. What I have done on is a serious pain. There is a little bit of roll in the polish, but that's just to cover the niku, don't roll it into the shinogi-ji and the shinogi itself normally don't need polished. Pardon my terms, and check out more later in this post. Mune and hi get burnished with a metal bar. but this kissaki is like a 3D niku of the sword mapped at 90 degrees to the niku of the sword. So instead of polishing the width of the stone, you polish this small part that is in contact. Personally, id stick with water stones or diamond plates, oil is a bad mess to clean. But I hear oil stones last longer. As for swarf (the metal pieces the stones take off) I wouldn't worry that much with larger blades. With the straight razor i will do a final pass on a dry stone, normally an edge that would take damage from that is a very weak edge. Dmt diamond plates are nice, but the feedback of a wetstone is the best. Water clears the swarf on a wetstone, so you will get the same metal on edge with them. Stones are a lot easier to work with than paper though. They stay where paper moves. You do have to lap them back flat, but it atill lasts longer than a portion of paper. Start a tiny bit shy of this angle, more into niku:  IMAG0256 IMAG0256 by LameBMX, on Flickr During your stroke roll through this area:  IMAG0258 IMAG0258 by LameBMX, on Flickr And finish just ever so slightly shy of this angle:  IMAG0257 IMAG0257 by LameBMX, on Flickr I say just shy of those angle because believe it or not they will get worked at the area right at them gets worked. And since they are pointy areas of metal they will work very very very fast. If you try to work the edge you will increase the cutting angle faster than the rest of the niku. same thing applies to the shinogi-ji and you will go from nice crisp shinogi-ji to bland soft one with very little work. Lastly, some experimentation will be helpful. More so if you can find stuff to work on with a convex edge. Now the plane jane knife secondary bevel will help with learning the feel, learning about a burr on the edge and playing with the slurry. Though I would still suggest a sword to practice on, as you dont really have to train yourself to hold the knife level lengthwise through the stroke, to the same level as a sword. Its all about getting used to the weight of the nakago area being a ways away from the area you are trying to work on. On top of all the stuff to pay attention to in the stroke. And dont forget you still have a long blade and a point to pay attention to. A long blade that is at its very sharpest and ready to punish for so much as brushing against it. |
|
Deleted
Deleted Member
Posts: 0
|
Post by Deleted on Jan 26, 2012 16:47:45 GMT
Munie and Hi gets polished with a metal bar? I wouldn't have thought of that lol. Would any metal bar do to polish? Also...If I am supposed to stay away from the shinogi areas while polishing should I burnish those areas with the metal bar as well? I have practiced sharpening swords before and believe me some of them were a pain lol. Like the spartan 300 sword replica. That one was a beast to try and sharpen. I have some metal stock that I bought from a hardware store that I could try and polish. It didn't say anything about it being high carbon just "simple steel" which I Don't think is high carbon anyway. If I remember correctly it had 4060 or some kind of number printed on the tag as well. I would think that one could make up a jig to hold the nakago for you so that you wouldn't have to carry the weight on your own. Thanks for the pictures those were extremely helpful!
|
|
|
|
Post by lamebmx on Jan 26, 2012 17:15:17 GMT
jig == no. unless you can build a crazy complicated 3d jig. you need back n forth, left to right and rolling motions. (simultanously and all that) all this while following curves in the blade. I am not that knowledgable on the burnishing process, but I would assume it would need to be a metal similar to the blade. too soft and it wont work, too hard and may cause bad scratching. I think you will fine the shinogi basically gets blended in nicely on its own. might need a bit of sandpaper to touch up, oh and leave a hair more room on the lower grits so the higher grits can extend past. but thats more of a practice thing.
|
|
|
|
Post by sceraxn on Jan 26, 2012 18:18:22 GMT
Note that i said i only use oil stones when i need to do some heavy grinding. Ive got three finer grit Japnese stones that i use for most tasks, and finishing up any major work i did with oil stones. I also use a lot of really fine grit automotive sandpaper wrapped around a block thats the same size as my whetstones. Unless youre repairing major damage or removing rust i wouldnt suggest oil stones.
One of the good things about using oil is that it suspends the shavings in a slurry that doesnt deposit on the stone or blade. If those shavings are being transfered anywhere it will be to the stone, but if you keep the stone well oiled and make sure to clean it before and after each use(by running a more aggressive stone over it) then you shouldnt have problems.
|
|


