

How to wrap a saya in Rattan.
Jun 18, 2011 18:56:36 GMT
Post by william m on Jun 18, 2011 18:56:36 GMT
Hi all,
Just thought I would share some knowledge with a project I did a while back.
If your saya is of the bulky modern type, then you will want to reduce the mass as the rattan may make the saya too bulky.
Step 1: You will need;
Two coarse pieces of sandpaper
Some tape (or anything else to cover up the horn parts)
Wood glue
A Clamp
About 30ft of rattan for a katana sized saya

Rattan!

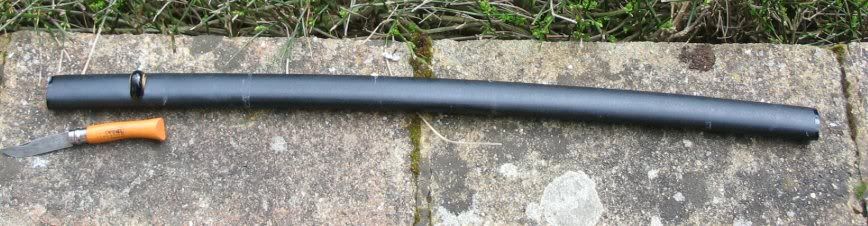
Step 2: Get saya and unwrap the sageo.
Step 3: Cover the horn parts of the saya in tape or something else to protect them from the sanding process. You may want to remove the kurikata to create a smoother transition. I recommend this option if you are able.
Step 4: Sand off the paint being weary that you are not sanding off the wood. This part took me about 1 hour 30 min, as the paint on my saya was on quite thick. I personally did not take off every piece of paint, but enough so that the rattan would be able to latch onto the wood. As I mentioned before, if you have a bulky saya, you may want to spend more time on this part.


Step 5: If your rattan is tough and non flexible you may need to soak it in warm water to make it soft and pliable first. My rattan however was very good and I thank Mr Montanari for the supply
When wrapping remember to cut away some rattan as to create a slope so that you have no gaps when wrapping.
Use glue sparcely as otherwise the glue will be pressed out onto your hands.

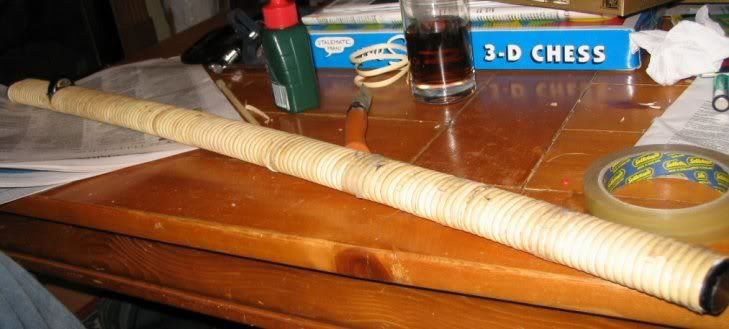
I used tape to keep the rattan from becoming loose while the glue was drying, and I used the clamp as my stop-gap measure during the wrapping process. While wrapping make sure that the rattan is on TIGHT, otherwise you will not have a strong bond.

Half way there!! As my rattan was not in one huge spool, I had to join the ends of the rattan many many times, and what I did was to trim the end of one strip with a sharp knife, as to have it fit under the other piece making it look as if you have one long piece of rattan.

And there we have it, finished at long last!!! While wrapping the saya I managed to get though 2.5 star wars movies, so make sure you have something to listen to or watch while wrapping!
If you want, you can stop here and not paint or fully wrap the whole saya.
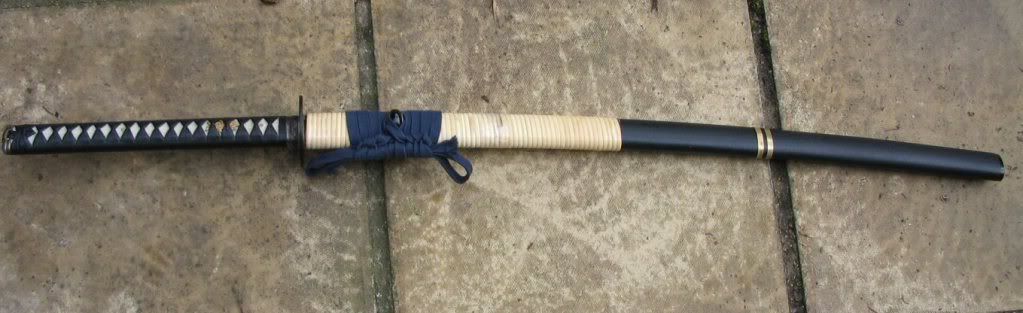
Right, well it is now time to spray the saya a nice glossy black.
The paint I used was a gloss black spray canister you can buy from any hardware shop. There are loads of different ways to paint the saya, so I will not go into it in detail.

First off I sand as much rattan as I can using very fine sandpaper. The aim is to remove the enamel like skin of the rattan so that the paint will go on more easily.

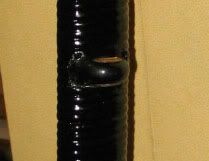
After you have done this you may want to cover up the horn parts. I used selotape but pretty much anything will do.
When spraying make sure you spray lightly as otherwise the paint will tend to slip down to the underside and form clumps while drying. It is best to take your time, and spray lightly every 10 min. Once dry you may want to use a clear lacquer, be careful though as I have found that some of my clear lacquers tend to crack and damage the paint underneath.


I have finished at long last, and all that is left is to wrap the sageo and tidy up a few loose ends as some ends of rattan did not stay down properly. I used superglue for the fixes.

Just thought I would share some knowledge with a project I did a while back.
If your saya is of the bulky modern type, then you will want to reduce the mass as the rattan may make the saya too bulky.
Step 1: You will need;
Two coarse pieces of sandpaper
Some tape (or anything else to cover up the horn parts)
Wood glue
A Clamp
About 30ft of rattan for a katana sized saya
Rattan!
Step 2: Get saya and unwrap the sageo.
Step 3: Cover the horn parts of the saya in tape or something else to protect them from the sanding process. You may want to remove the kurikata to create a smoother transition. I recommend this option if you are able.
Step 4: Sand off the paint being weary that you are not sanding off the wood. This part took me about 1 hour 30 min, as the paint on my saya was on quite thick. I personally did not take off every piece of paint, but enough so that the rattan would be able to latch onto the wood. As I mentioned before, if you have a bulky saya, you may want to spend more time on this part.
Step 5: If your rattan is tough and non flexible you may need to soak it in warm water to make it soft and pliable first. My rattan however was very good and I thank Mr Montanari for the supply
When wrapping remember to cut away some rattan as to create a slope so that you have no gaps when wrapping.
Use glue sparcely as otherwise the glue will be pressed out onto your hands.
I used tape to keep the rattan from becoming loose while the glue was drying, and I used the clamp as my stop-gap measure during the wrapping process. While wrapping make sure that the rattan is on TIGHT, otherwise you will not have a strong bond.
Half way there!! As my rattan was not in one huge spool, I had to join the ends of the rattan many many times, and what I did was to trim the end of one strip with a sharp knife, as to have it fit under the other piece making it look as if you have one long piece of rattan.
And there we have it, finished at long last!!! While wrapping the saya I managed to get though 2.5 star wars movies, so make sure you have something to listen to or watch while wrapping!
If you want, you can stop here and not paint or fully wrap the whole saya.
Right, well it is now time to spray the saya a nice glossy black.
The paint I used was a gloss black spray canister you can buy from any hardware shop. There are loads of different ways to paint the saya, so I will not go into it in detail.
First off I sand as much rattan as I can using very fine sandpaper. The aim is to remove the enamel like skin of the rattan so that the paint will go on more easily.
After you have done this you may want to cover up the horn parts. I used selotape but pretty much anything will do.
When spraying make sure you spray lightly as otherwise the paint will tend to slip down to the underside and form clumps while drying. It is best to take your time, and spray lightly every 10 min. Once dry you may want to use a clear lacquer, be careful though as I have found that some of my clear lacquers tend to crack and damage the paint underneath.
I have finished at long last, and all that is left is to wrap the sageo and tidy up a few loose ends as some ends of rattan did not stay down properly. I used superglue for the fixes.


 )
)
 Unfortunately I'm an edge-perfectionist. Also one wrong move when unsheathing and the throat nicks the edge on either side.
