|
|
Post by Lukas MG (chenessfan) on Nov 8, 2010 21:55:19 GMT
Makes sense, Jeffrey. I'll try those fiber disks on my next blade, hope to get my bevels as nice and smooth as you do.
What kind of belt grinder have you got? I think someone (Brenno?) said you built yourself one...
|
|
|
|
Post by brotherbanzai on Nov 10, 2010 3:27:17 GMT
Hey cook79, You can use new tranny fluid if you like it nice and clean, but I expect if you were going to spend that much money on it, you might as well just buy a commercially made quenchant  I got mine used so it was free, which is good because it takes quite a lot to fill a tank that big. Get it from a transmission shop so that it doesn't have motor oil and who knows what else mixed in with it. Hey chenessfan, I just finished building a grinder based on the Bader III.   I used plans (with a few modifications that I had seen done by others) that are very kindly made available online here blindhogg.com/eerfgrinder.html Be sure and send him an email thanking him if you use his plans  Finish work— As mentioned in the last step, try to get your blade tempered as soon as you can after it’s been hardened. I usually do the first tempering cycle right after the quench and then let the blade sit overnight. Next I’ll clean the blade off to get it ready for the second tempering cycle. Here’s a pic of the little moat blade with one half of the scale cleaned off after the tempering.  I use a coarse fiber disc (I mean really coarse like 50 grit or even 24 grit if I’ve left a lot of thickness on the blade) for the cleanup and then back to filing again. I’ll use a disc for cleanup that I’ve already used when I was grinding the flats so it will be a little dull and won’t cut too deep. The scale seems to crud up the discs, so I prefer not to waste a new one for this operation. I leave a fair amount of thickness on the blades before they go into the heat treat so that I can be sure I have plenty of hard steel left when they come out. The outer surface tends to lose hardness and needs to be removed and if the edge is too thin it will be prone to warping. I’ll be using the fine cut file at this point to get out the marks from the coarse disc. Lots of filing again at this point, about an hour on each flat. Once again, even if you want an apple seed edge, aim for very flat at this point. After I’m done filing there will be about 1/32 left on the edge. Now it goes back into the kiln for the second tempering cycle. Here’s our old blade out of the kiln after the second tempering.  Nice and blue. Now we’re ready for the finishing work. Lots and lots of hand sanding. At this point we can finish out the tip and remove the metal we left on there from before. I’ll use the fine file to bring it into line with the rest of the blade and then finish the whole thing by hand sanding. I start with a very coarse paper to remove the file marks, 120 or even 80 grit. I use a flat aluminum bar as a backing for the sandpaper and use it much like I would for draw filing, except it will cut in both the push and pull.  (click the picture to go to a short vid) There are a couple different ways to see when you’re done with a particular grit. Some people use a marker or dye to color the flat they’re working on before they start sanding, and when the color is all sanded off they know they have removed all the sanding or filing lines from the previous step. You can also sand at a 45 degree angle to the previous step which will make it easier to see when the marks from the previous step are gone.  (click the picture to go to a short vid) You can also put water on the blade and watch for where it spreads out rather than beading off, where the blade holds water rather than running off is where there are coarser marks still on the surface. The steel will rust very quickly at this point though, so I don’t like that method. This is where you start to add your apple seed edge. As you sand the flats, begin to blend them very slightly into the edge. The idea is to have the flat flow smoothly into the edge with no trace of any secondary bevel. This edge is created as an extension of sanding the flats rather than being added on separately. The work done with the hand sanding is what can separate a perfectly good usable blade from a superb usable blade. I spend on average 8 – 12 hours or more hand sanding the flats. You don’t have to do that if you don’t want to; you can use finer and finer discs to sand the flats by machine rather than by hand. This will leave the blade very slightly wavy and will round over any straight lines from a central ridge or fuller, but you’ll still have a good blade if everything else was done well. The sanding starts with 120 grit then moves to 240, then 320. At that point, I’ll switch to a rubber sanding block behind the paper, rather than the aluminum bar, which will help to blend the edge smoothly into the flat. The sanding then continues with 400, and 600 grit. I don’t generally go beyond 800 grit for the flats, and I’ll do that with a bit of thin oil as a lubricant. On the edges, I might go up to 1200 or 1500 so that they are nicely polished. At this point, the sanding is done and I’ll use a small amount of polish to finish off the blade.  Some people prefer to mount the blade and then do the edges so that they’re less likely to cut themselves while attaching the hilt components. This is reasonable advice, but I find the blade easier to work with before the fittings are attached and while I can still firmly clamp it down by the tang. Just depends on what you’re more comfortable with. Next up, the hilt (not going into the cross and pommel too much but will cover the grip). |
|
|
|
Post by Orion on Nov 11, 2010 19:30:59 GMT
This is an AWESOME tutorial BB! Can't wait for the next section!
|
|
|
|
Post by brotherbanzai on Nov 16, 2010 15:19:30 GMT
Thanks Orion, I'm glad you like it I won’t go into the guard and pommel too much since most do-it-yourselfers won’t be making bronze parts and since it’s considerably more involved than making a stock removal blade is. I had a sticky that briefly explained making bronze parts on the old forum, if anyone wants to go back for more info. I will touch on a few important points however. First the pommel; It’s pretty important that on most any western blade that is made for more than just thrusting that the pommel not just be screwed on with a simple round hole drilled into it. For a cutting or a cut and thrust sword, the pommel should be keyed to fit the tang. There is a great deal of stress at that point and a screw on pommel is dangerously weak in that area. Screw on fine for this kind of movement.  Weak for this kind of movement, where a lot of stress is concentrated during a cut or swing which impacts a resisting surface (like a shield, another sword, a training pell, or a dragon to dense to cut all the way through).  The pommel doesn’t have to be peened to be strong. A pommel nut or a recessed pommel nut can secure the pommel to the tang.   Just having a peened pommel doesn’t necessarily mean that it’s well attached. Some manufacturers have begun “peening” their pommels in response to consumer demand; however a poorly peened pommel can be worse than a well done screw on pommel. Peened is only useful if the tang is keyed to the pommel and there is a reasonable amount of metal in the peen rather than a tiny metal bur holding the pommel on. This is how not to do a peen or a pommel nut.  The pommel should fit snugly onto the tang as should the guard. The shoulder of the blade should fit down inside the guard rather than sitting on top of it. The blade being made in this thread is a fantasy sword so the guard is more elaborate and heavy than you would normally make, but these little rules of thumb still apply. Here’s our blade with the guard and pommel test fitted (not wedged all the way on yet) in place.  I like to banzaipeen the pommel and guard as well. After the pommel is peened, I’ll peen the metal of the pommel into the tang on the grip side of the pommel so it is tightly held from both directions. Same goes for the cross. Some designs won’t allow the guard to be fitted in this way, which is ok. The pommel is going to be experiencing a lot more strain than the guard. If you end up with a little freeplay in the guard due to the design of the blade, shoulder, or guard, it’s not going to hurt anything. It will keep the blade from ringing though. Tightly fit parts will let the blade ring. Here is the peen on the backside of the pommel.  You might also want to etch your makers mark somewhere on this thing. I often put mine on the tang if I don’t want to mar the blade with my signature.  Next we’ll start on the grip. |
|
Deleted
Deleted Member
Posts: 0
|
Post by Deleted on Nov 17, 2010 18:26:13 GMT
Jeffery, that blade is looking beautiful. You do amazing work. Great diagrams explaining peening the pommel. I would have never thought to peen the backside of the pommel. Do you use a round punch to get in there?
|
|
|
|
Post by aronhk_md on Nov 18, 2010 4:22:46 GMT
Wonderful tutorial Jeffrey. I'm the one who just spoke to you by email about your Atlantean type blade. I noticed a couple of opinions on how to get a distal taper on a blade. My solution is a combination of your methods.
When I have cut blades from a blank (and believe me I'm an amateur...having done it only a couple of times), I cut 70% of the profile first, leaving the tip of the blade at least 3" wide, and not cutting out the tang.
I have a clamp welded to an old 4" wide steel hinge.....with a hole through the hinge. I have a threaded rod mounted vertically from my work bench top, and I place a nut on the threaded rod at the height above the tabletop I desire. Then the hinge side with the hole goes over the rod, and another nut over that tightened down holds my hinged clamp tight at that desired height (the height is determined by the height of my belt sander and the angle I want to give my distal taper).
I do a very similar scribe on the END of my bar (and the sides later too) as you have indicated. This lets me know when I reach my desired depth of cut.
This hinged clamp is used to hold the tanged end of the blade/bar of steel. Now with the blade/bar clamped I bolt my belt sander in front of it to the tabletop. The current one I am using sits 8" off the tabletop. So the tanged end of the blade/bar on my adjustable hinged clamp sits at a desired height above the sander (and behind it), and the blade itself "dangles" or will essentially "drag" on the sander when it is turned on. By adjusting the nuts holding the clamp I can raise/lower the blade......height and angle will be determined by blade length and how much of a distal taper I want.
Not sure if I've painted a very clear picture, and I know this wont work if you dont have a belt sander, but it works very well if you do. Turn up the speed to grind fast....put some pressure on the bar to grind faster....or turn down the speed and let the weight of the bar do it slowly and with barely any warmth at all even on a tempered blade. You can sit and watch TV if you want and check on the blade every few minutes.
I'm a big believer in making jigs....too often have I made errors grinding and I usually make the mistakes hours and hours into a build, which is very frustrating (I make other stuff too)...but thats just me probably.
If I can get the stuff out sometime soon (I packed it away when I moved last Sept) I'll take pics of it and make a separate post. I also have a pretty neat sharpening setup capable of evenly putting an edge on a sword or knife and able to remove hefty amounts of material using files, sandpaper and stones. Its very similar to the Edge Pro system for knives that runs around $400 but on a bigger scale.
|
|
|
|
Post by Brendan Olszowy on Nov 19, 2010 10:38:36 GMT
Hey BB, this is an epic thread you've made. Good job mate! Karma  |
|
|
|
Post by John Greybeard on Nov 19, 2010 15:32:41 GMT
Second that, Brendan! One more time - Thanks, Jeff!!!
|
|
|
|
Post by brotherbanzai on Nov 19, 2010 16:14:49 GMT
Thanks cook79 I use a punch that I have ground into a rounded wedge to do the peening on the backside.  Thank you aronhk_md, that's clear as mud :lol: Actually, I think I see the basic idea of what you're describing, though from the description, it sounds like you are only sanding one short section of the blade at a time? Please do put up a post with some pictures when you get a chance. Thanks a lot Brendan You're welcom John  The hilt components are attached before the grip goes on. In the case of this sword, that means that the guard gets a patina and is then wedged and banzaipeened to the tang. Then the pommel is hot peened and banzaipeened to the other end of the tang and receives its patina afterward (the heat from the hot peen would ruin the patina). The hilt components are each firmly attached on their own and don’t rely on any of the other components to stay in place. I personally prefer this method of construction, but of course it’s permanent and doesn’t allow the hilt to be disassembled. Once these parts are in place, it’s time to start on the grip. I start with two flat pieces of wood ½ inch thick, 1 ½ inches wide, and as long as the exposed portion of the tang. How you get to these two pieces depends on where you start. If starting with a block of wood, I would cut it in half with a table saw so that the cut is straight. A large block can be cut into several ½ inch pieces to do more than one grip. Starting with an unevenly shaped hunk of wood or a round piece can be a pain in the butt to work with. It’s much easier to make cuts and carve out the slot for the tang if starting with flat rectangles. Once you have your two pieces, lay them against each other to make sure they lay flat, do some sanding if they don’t, it will make the fitting easier. Once cut to length, I put them in place one at a time and mark them.  Each piece will have two sets of lines. One set will trace the outline of the tang; the other set will mark how wide I want the wood core to be from where it meets the guard to where it meets the pommel. Then it’s time to hollow out the two halves to the inner set of lines that mark where the tang will go. If the tang was ¼ inch thick, each half will be hollowed out to 1/8 inch. A complex tang design will require more effort to match the slot in the wood core. On this sword, the tang is flat with an even profile taper so the hollowing out is very simple. This picture shows the two halves hollowed out to the first set of lines.  There are lots of ways to make the slot. A nice set of woodworking chisels and files will do the job just fine. A dremmel or router can be used as well if you know what you’re doing with them. It’s important to work slowly and carefully here so that you get a good fit. Keep test fitting as you work until the core parts fit nicely on the tang with the wood touching evenly on both sides but not being loose on the tang. Mark each half of the core and the corresponding side of the tang; any slight irregularity will mean that each part fits better on one side than the other. Once the core halves fit properly, we can remove the excess width outside of the second set of lines. If there is a lot of wood to remove here, I’ll use the band saw. If there is just a small amount of wood, I’ll use my little bench-top belt sander. Before I had the band saw, I used a coping saw for this. It works just as well but takes longer since you’re sawing by hand. Here’s a picture on one half with the excess removed next to the other half.  When the extra width has been removed from both halves, I reassemble them on the tang again. Now I’ll take a pencil and trace around the pommel and guard onto the wood, this will show the cross-sectional outline on either end of the wood core. Sorry, forgot to take a picture of this. When you take the core halves off and put them together off the sword, there will be an oval on one end that is the same shape as the guard where it meets the grip and a circle on the other end where the pommel meets the grip. I hope that was clear, it would make more sense with a picture. If I was going to do a plain wood grip, I would leave the marks as they were and begin sanding down to them. Most of the time, the grip will get a leather and/or cord wrap, so the wood core needs to be smaller than the outer dimensions of the pommel and guard. In this way, the outside of the leather grip will line up with the outside of the guard and pommel, giving the hilt a nice flow from one component to the next. To do this, I’ll make a second oval and circle just inside the original ones. I just do this by eye to make them however much smaller I think I’ll need them to be to make space for whatever grip wrap I’m planning. Once you have the outer dimensions of the wood core marked on either end of the core, you can begin removing the wood down to those marks. This can also be done with whatever tools you prefer. A belt sander works nicely, or even a disc grinder, or files and sandpaper. I do the final hand sanding on the core with it sitting in place on the tang so that I can get everything to match up properly. When everything is properly fitted, the core can be epoxied in place. I hold it together with clamps while it sets and when done, each part of the hilt is firmly attached on its own with no compression or strain on any of the other parts. If one part should fail, the rest of the sword is still together. If the pommel were to shear off, the grip is still held in place on its own. If the grip cracked and fell apart, the guard and pommel will still be in place. You don’t have to do it this way, but it’s how I prefer it. There are some definite benefits to being able to disassemble a sword; makes it much easier to sharpen and do any work on the blade if it should get damaged or accidentally get rusty. If doing a pommel nut construction, you would only epoxy the edges of the wood core that touch each other and not the tang. In that way, the core is epoxied together but not epoxied to the tang. Here is what we have at this stage. Notice that the wood core is smaller in its outer dimension than the guard and pommel to leave room for the grip wrap. It’s several hours of work to get the grip core to this point, but working with the wood is much easier than working with the steel.  Next time, grip wrap. |
|
Deleted
Deleted Member
Posts: 0
|
Post by Deleted on Nov 19, 2010 21:57:35 GMT
Wow!  Very nice. Thanks for the photo of the punch you use. |
|
|
|
Post by Lukas MG (chenessfan) on Nov 20, 2010 13:15:52 GMT
That banzaipeen is a very smart idea. I've used it with great succes. Thanks again, Jeffrey!!
|
|
|
|
Post by brotherbanzai on Nov 21, 2010 21:49:15 GMT
Thanks, and you're welcome cook79 Thanks and you're welcome too chenessfan And thanks for helping me coin the term, sweet, my own term :mrgreen: Grip wrap: The last thing we have to do to finish out our sword is to wrap the grip. Some swords will have a cord wrap under the leather, others will have leather over the plain wood, and some may have a cord wrap with no leather covering. When doing cord under leather, I use a natural cord that will absorb the glue and bond securely to the wood and leather. When I have the space, I use cotton Seine Twine which I find to be of better quality than the cotton packaging twine available at my local hardware store. However, I doubt you’re going to ruin your sword by just using whatever cotton twine you find available locally. On swords that have a very small grip or when, for whatever reason, I want the wood core thicker, or if the guard and pommel are very narrow, I’ll use linen cord which is much thinner than cotton cord. An overly thick grip will look out of proportion to the other hilt components and can be uncomfortable to use. On this particular sword, I’m doing a spiral cord wrap under the leather so that the finished grip will have a pronounced pattern in the leather. Here is the grip with the spiral cord wrap.  To accomplish this kind of wrap, you use two different thicknesses of cord. There is a smaller cord which will make the spiral wrap/riser and a thicker cord that will create the space in between. I start by putting a drop of super glue at the end of the thinner cord and letting it dry. Then I’ll trim the end at an angle and super glue that end to the grip, just below the guard. Then I’ll hold the thinner cord and the thicker cord together and wrap them around the grip together. When I get to the pommel end, the thinner cord will again be super glued to the wood core. Now, when the thicker cord is unwound from the core, the thinner cord remains, with perfect spacing. *Thanks to Peter Johnsson for demonstrating the idea for this technique*. Next we get to the leather. Cut your piece bigger than it needs to be. You can always trim more away later. It needs to be a bit longer and a bit wider than you would think. I like to overlap the seam by about ½ inch. If doing a spiral wrap like the one here, you’ll need enough extra leather to make up for the length that will be lost by pulling the leather into the groove of the spiral. That will be close to ½ inch on this grip.  You’ll want very thin leather for the grip, like 1-2 oz. I have a piece of leather the perfect color for what I want, but unfortunately it’s too thick. In order to be able to use this piece, I had to skiv down the entire back side to make the piece thinner. If you start out with the right thickness, you’ll still need to skiv down all four sides. Some people use a very sharp, small knife for this. I just use a cheap skiver I got from Tandy www.tandyleatherfactory.com/home/department/Tools/Knives-Cutters-Splitters/3001-00.aspx?feature=Product_14 www.tandyleatherfactory.com/search/searchresults/3025-00.aspx?feature=Product_1&kw=skiver The blades don’t last terribly long and will need to be sharpened or replaced to keep cutting cleanly.  You want to try to skiv right down to nothing on the edges that will overlap. This will make the seam nearly invisible.  Here is a comparison of the skived leather and edge next to an unskived piece.  Next I’ll wet down the two ends and fold them over to the length needed to fit on the grip properly. I’ll let them sit for a while with a flat weight on them to hold them in this shape. On a grip that’s just a simple oval, the ends can be glued down to make them easier to deal with. However, most of the time, the grip has some complex curves to it and may also mate to the guard or pommel with a curved rather than straight line. Because of this, I don’t usually glue the little fold on the ends down so that I can adjust it if needed.  You don’t have to fold the ends over, you can just overlap the guard and pommel a little bit with the leather, but I think that looks sloppy and then you have to be concerned with the ends catching and peeling up. However, getting the folded ends to line up perfectly with the guard and pommel can be tedious and time consuming. It’s especially difficult on longer grips with complex shapes, so if you’ve never done a grip wrap before, you might be better off planning on doing it the easier way without the neatly folded ends. In any case, for this grip, once the ends are folded, I’ll trim the corners off. Otherwise, they will end up sticking up at the edges.  Now comes the most difficult part, actually getting the leather to properly lay on the grip. I usually test fit and trim the leather wrap a few times before I’m ready to glue it in place. Once you start attaching it, you can’t really stop and make adjustments, so it needs to be right the first time. To attach the leather, we’ll first get it thoroughly wet, but not dripping. Then it gets coated with weatherproof glue, I like “Titebond II”. It can be thinned with water, but when dry is water resistant. If you apply the glue by itself, without wetting the leather, you would have to work very fast to get the core wrapped before it dries. Wetting the leather accomplished two things; it gives you more working time with the glue, and it allows the leather to form to the shape of the core and cord wrap. The leather is now placed on the grip and will have cord wrapped around it on the outside to hold it in place (the cheap cord is fine for this). I start by wrapping a bit of cord around either end. This will keep the leather from pulling away from the ends as you wrap it. Then I will pull the leather into the spiral wrap by winding the outside cord around so that it falls into the valleys that were created by the spiral cord under wrap. Because my leather is still a bit thick, I had to pull pretty hard to get it to lie inside the spiral. You can see in the pic where I pulled too hard and snapped the cord and had to tie it together to continue. Oops.  Now I’ll continue the wrap by going around the pommel a few times so that I can turn the cord around and wrap it back the other way (following the spiral riser/wrap) toward the guard.  It will then get wrapped around the guard so I can turn it around and wrap it back up to the pommel, once again following the spiral riser. If doing a standard wrap rather than spiral, you don’t have to mess with the added complexity of turning the outer wrap and going back and forth. You can just start from one end and wrap it all the way around to the other end. If you have one or more concentric risers, you’ll want to stop your outer cord wrap at the riser and restart it on the other side; otherwise, the outer cord will leave an impression where it crossed over the riser. The only reason to work back and forth with the outer wrap is to avoid crossing over the spiral riser, which would make for a very unattractive pattern on the finished grip. Now we let the whole thing sit like this overnight to give the glue and leather a chance to dry. |
|
Deleted
Deleted Member
Posts: 0
|
Post by Deleted on Nov 22, 2010 12:18:05 GMT
Very nice tutorial BB. I do like how smooth your angle grinding turns out. Very smart!
|
|
|
|
Post by aronhk_md on Nov 23, 2010 0:56:38 GMT
Following this thread as I can....very nice Jeffrey. I know my post about the distal taper jig wasn't well written...lol. Sorry. Don't know if I'll be any clearer this time but I'll try. I havent had a chance to see if I can dig my jig out yet, but here is the basic idea in a simple pic. The flat line is my bar stock and it is clamped to the hinge mounted on my threaded rod sticking up from the table top. It then "drags" across the surface of my 48" belt sander. I didnt go to the effort to try to draw the clamp but its a simple C clamp welded to my 4" hinge. Honestly it just needs to be clamped, not necessarily welded to hold the bar stock...I just did it for convenience. The angle on the bar stock vs. the surface of the belt sander is exaggerated to show it better. The angle of the bar stock is adjusted using the nuts holding the hinge on the rod. 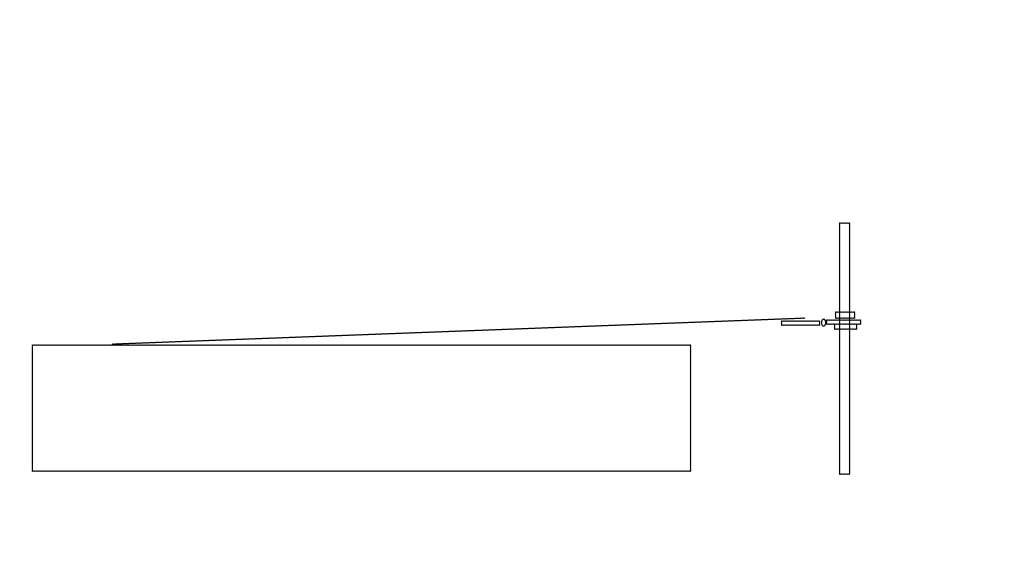 Now if you want to lets say remove 1/16" over a 4" distal taper it is easiest to measure along 16" of the bar stock looking for a 1/4" drop when compared to the surface of the sander. If I was looking to do that same 1/16" taper over an 8" span I'd look for 1/8" over that same 16". My sander can be set to go VERY slowly, but if yours doesnt there are speed controllers out there used for routers and other electrical tools that can be used. I can set mine so slowly I'm not worried about affecting temper on heat treated steel...it barely gets the metal warm to the touch. I use a heavy magnet on the tip just to add a bit of weight and smooth out the ride. IF you are looking to remove material rapidly use more aggressive grits, speed it up a bit, and put some weight on it. Obviously dont press in the middle of the bar as it will flex...put the weight/force at the tip. Now I BELIEVE I could also devise a similar SIDE jig to remove the metal evenly from the edges without the need for a hand held grinder. Set the thing to run and check on it every few minutes. I think this would be easiest to do on blades where a section of the middle of the blade will remain flat or fullered, and most difficult to do on a diamond cross section blade, but could still be done. The major difference for a side jig of this type would be that I would not use a hinge to hold it. The hinge used with a long blade for a distal taper drops so insignificantly it doesnt appreciably change the angle. But if we are talking about a 2" wide blade....removing material from the blade edge would change the angle a bit. So instead I think I'd use a floating mount.......the design of which is in my mind and I'll bugger up my own thread with it instead of yours at some point....LOL. See....I know myself, and I'm not the artist Jeffrey is. I KNOW that if I continue grinding for hours with a hand held grinder I'm going to say "Oh SH*T!" at some point, and it will likely be after many hours have already been invested...lol. Actually, I have been using a grinder for the edges so far with fairly good result, but I just know its going to happen. |
|
|
|
Post by aronhk_md on Nov 23, 2010 1:04:52 GMT
Am I correct that wetting the leather also causes it to shrink a bit as it dries....giving a tighter end result?
|
|
|
|
Post by brotherbanzai on Nov 23, 2010 18:28:48 GMT
Thanks matt993fod I feel the key to getting the blade nice and smooth is to be patient and really take my time and not try to rush through the tedious parts. That and lots and lots of hand work. Hey aronhk_md thanks, your illustration looks more or less like what I was picturing. Would be nice to let the machine do the work for you while you can be off doing something else . I don't know that I'd feel secure leaving a belt grinder running while I wasn't around to monitor it though. I'm wondering how that setup works for distal taper along the entire length of the blade? Seems like it would work for a short section but doesn't seem like it would work well for doing the whole blade. Do you do a short section at a time and then move to another section? Looks like the steel would need to be perfectly straight as well, or one side would end up more tapered than the other. I look forward to reading your thread on the method whenever you get a chance to start it up, it's interesting. Wetting the leather allows it to stretch and shrink, helps it form to the shape of the grip and the cord. It shrinks less than it stretches. It will stretch around all the contours and then shrink a little bit as it dries to tighten the fit slightly. After drying overnight, the grip is ready to have the outer cord removed. Then we end up with this  You can see how the leather wrap has formed to the shape of the spiral cord underwrap.  This side view shows a bit more of the complex grip shape.  In this picture the hot peen on the pommel is just visible.  And here are a couple pictures of the completed sword, Dragonspear 2.0   This last pic shows the smoothness of the blade, it's a bit hard to photograph clearly. I hate to see ripples or waviness when sighting down a blade, just makes a blade look poorly done.  |
|
|
|
Post by aronhk_md on Nov 23, 2010 20:17:46 GMT
That grip turned out great.
Ok, I have an old sander that uses a 106" belt on a 48" bed, so I could do whatever length I wanted up to 44" or so. And yes, I have used straight metal the couple of times I tried it, and it was THICK too, so it didnt flex. I did only do about 8" of taper though at the time. It moves very slowly at low setting, but I never did actually walk away from it...lol
Another interesting concept would be to make a jig that holds the angle of your grinder (adjustably) so you can concentrate on just moving it back and forth...in fact I just pictured how I think.....
.....my friends are probably right....I'm nuts......lol
|
|
|
|
Post by Brendan Olszowy on Nov 24, 2010 12:44:16 GMT
Another real masterpiece mate. Well done. A proper blade!
|
|
|
|
Post by Lukas MG (chenessfan) on Nov 24, 2010 17:30:31 GMT
Awesome sword, Jeff. Looking forward to stats, etc. Truly nice work, the sword aswell as this thread. Jeez, one more +1, you deserve it.
Aronhk, interesting concept. I see one major problem with it though... you can only do completely straight (linear) distal taper. Now I can't speak for other makers but from my limited experience I rarely use that, normally it's either concave (more on cutting blades) or convex (more on stiff cut and thrusts). Not to look down on linear taper, many antiques feature it and sometimes it really comes in handy (if concave isn't stiff enough but convex too heavy) but I just don't use it normally. That's why your setup wouldn't work for me I think.
|
|
|
|
Post by aronhk_md on Nov 24, 2010 21:56:43 GMT
Chenessfan, you are right, it is linear. It does not have to be the end result though...if it gets you part of the way there in excess material removal it serves a purpose. Jeffrey's method of obtaining distal taper by using the narrowing of the blade toward the tip wouldn't work well for a blade that DOESN'T narrow much toward the tip...as in a slashing type blade. I guess how you go about obtaining the profile you want comes down to personal preference and the actual style of the blade, as most of these methods have their pros and cons.
I think the real solution here is pooling our resources and buying a CNC milling machine........LOL.
|
|


 I got mine used so it was free, which is good because it takes quite a lot to fill a tank that big. Get it from a transmission shop so that it doesn't have motor oil and who knows what else mixed in with it.


 Very nice. Thanks for the photo of the punch you use.