Marble Ghost Fish Tanto (walk-through)
Aug 7, 2023 5:37:36 GMT
Post by steveboy on Aug 7, 2023 5:37:36 GMT
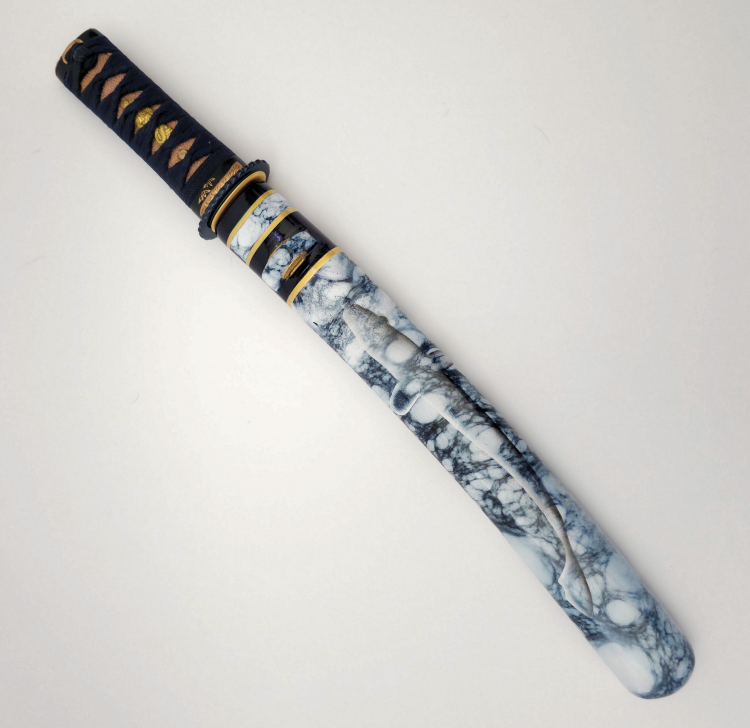
===============BACK STORY===============
This is literally the third iteration for this tanto. I don't even remember what the first attempt was. The second was eventually what ended up being the Naval Diplomat Tanto (on another tanto). Thing was, I just couldn't get paint to stick to this thing. Some chemical had got into the wood, or it had cooties, or something. I worked on it for months until I finally got something I could live with. Then I put on a 2K clear coat -- and found that the clearcoat had gone bad and was never gonna cure.
So I did the Naval Diplomat design on another tanto and stared at this one for a couple of weeks.
========================================
I wanted to do a tanto for my friend Adrian. He's a black belt in Iaido & Aikido, he's a diver, & his wife was a career Navy JAG. I wanted a design that reflected these things.
I had already done the tsuka when I'd meant for this one to be the Naval Diplomat design, and I did not want to redo it. So that kinda set my color scheme with navy colors anyhow.
I had already done the tsuka when I'd meant for this one to be the Naval Diplomat design, and I did not want to redo it. So that kinda set my color scheme with navy colors anyhow.
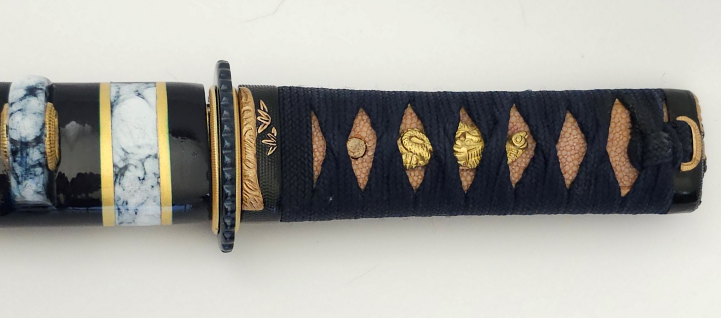
I wanted an Art Nouveau look and I sketched out a bunch of stuff, but I wasn't happy with anything I came up with. But a lot of the curvilinear shapes were very fishlike, so I decided on a fish design.
Then I thought of the sculpted & beveled look in the Carved Flame katana I'd recently done:
Then I thought of the sculpted & beveled look in the Carved Flame katana I'd recently done:


I thought that a fish shape carved into a blue-veined marble background might look really cool -- beveled in relief on one side and carved out on the other. Plus, it would combine almost everything I've learned to do with airbrushing so far and be something I'd never done before. Reason enough!
The seppa & tsuba were glued in place; the tsuka was cracked. Removal, repair, & painting were nearly identical to the process for the Naval Diplomat Tanto. Since that's all detailed there, I won't duplicate it here.
For the saya, I sanded off the sticky mess that was many layers of paint & clearcoat and took it all back down to the wood. Did I feel bad about this? I did not. This thing was cursed, I tell you. Buh-bye, Felicia.
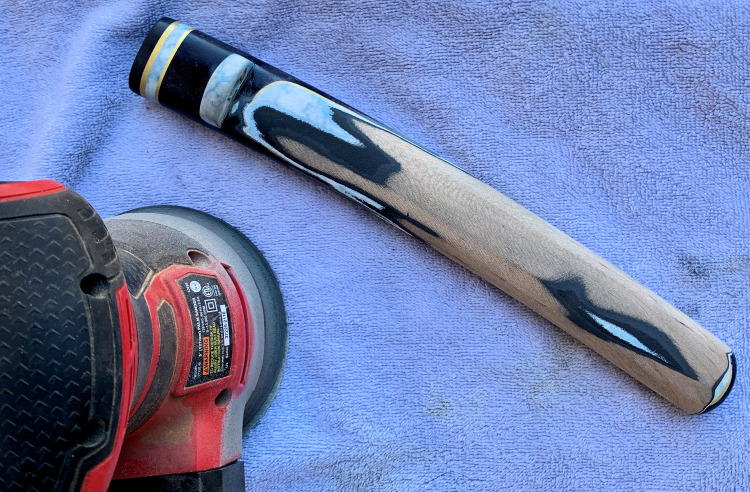
I sponged it with TSP in the hope it would get rid of whatever the hell was keeping the paint from adhering. I should have brushed on two coats of watered-down PVA glue -- I think the paint would've stuck to it & the PVA would act as a barrier to whatever was in the wood. But I didn't think of it, so naturally some hilarity ensued.
I primered opaque white, then airbrushed a lot of coats of Createx Wicked Blue darkened with opaque black until I got the navy blue I wanted. I forgot to take pictures of this part, sorry.
I pulled dried baby wipes till they were cobwebby, then tightened them around the saya to act as stencils. This is also deailed in the Naval Diplomat Tanto walk-through if you're curious; the only difference here is that I marbled the entire saya, from the kurigata down. Here's the result after removing the baby wipes (my iPhone & bad lighting make the marble veins look black, but they're navy blue):

I found a koi fish shape that I liked and elongated the image until I liked how it worked with the curve of the saya.
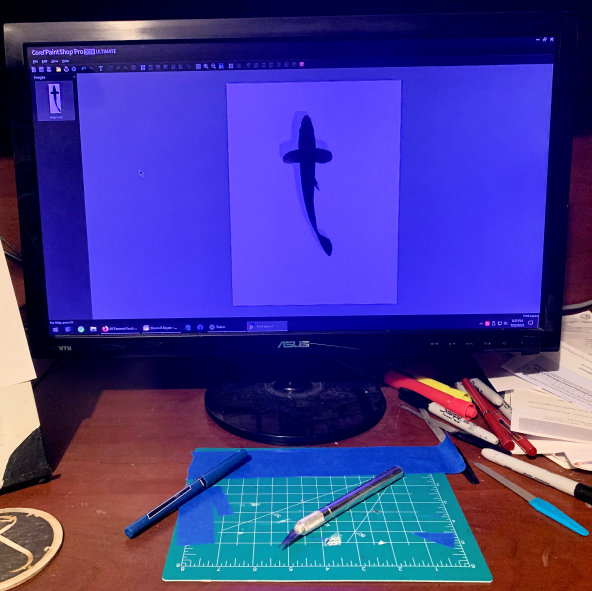
I printed it out and X-acto'd out the shape. I'd be using the positive and negative shapes as stencils.
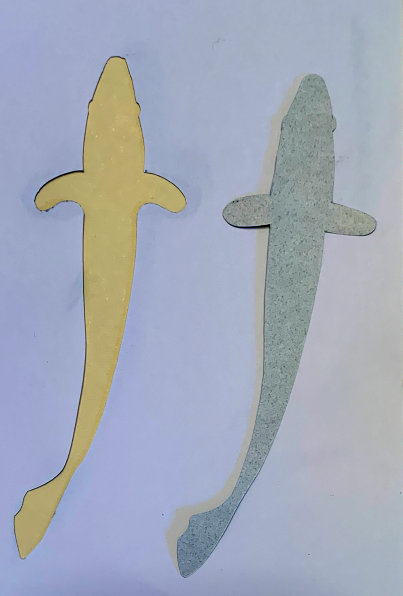
I cut the stencil in half, positioned the left side on the saya, and secured it with rubber bands:
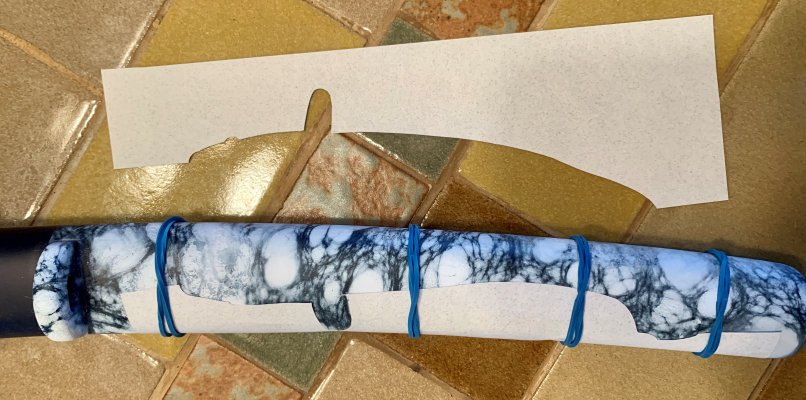
Then I airbrushed a fine line of white along the edge of the stencil. This would end up looking like light reflecting from the sculpted surface of the fish.
I removed the left half, positioned the right half, and rubber-banded it in place. Then I sprayed black along the edge of this half. This would look like the shadowed underside of the sculpted fish. You can see here how the gradient fade of the white outline already starts to give the illusion of dimension:
I removed the left half, positioned the right half, and rubber-banded it in place. Then I sprayed black along the edge of this half. This would look like the shadowed underside of the sculpted fish. You can see here how the gradient fade of the white outline already starts to give the illusion of dimension:


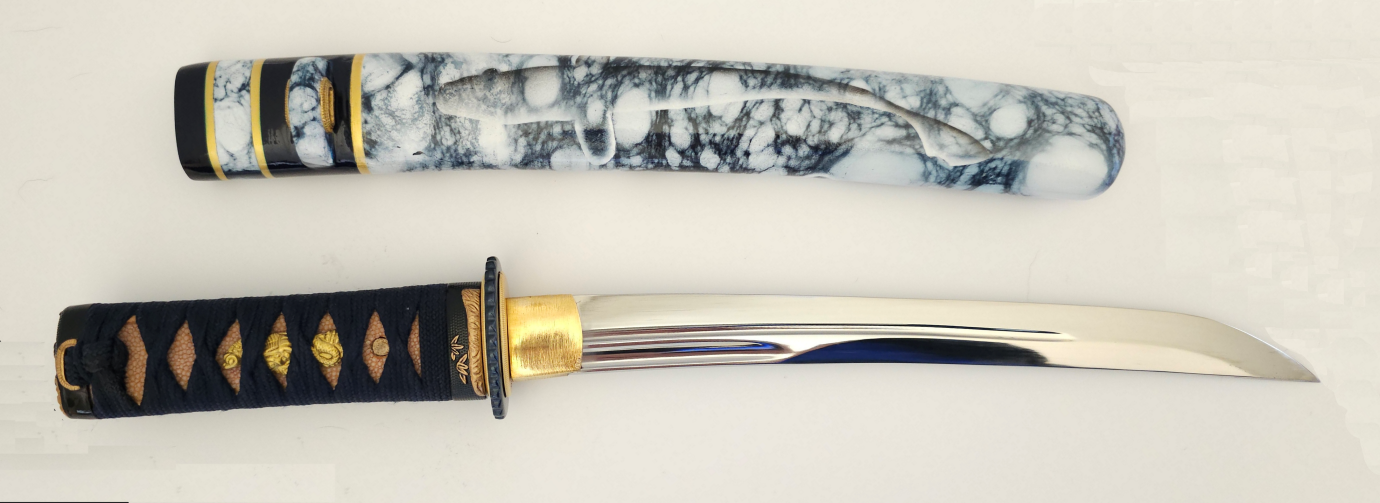
I was going for a beveled look, with a carved fish shape emerging from the marble. What I didn't expect was that it would also look like the ghostly outline of a nearly invisible fish swimming above the marble. This has to be the coolest unanticipated outcome I've ever painted.
For the carved shape on the back side, the process is reversed: the negative stencil (the cutout fish shape) is put in place...
For the carved shape on the back side, the process is reversed: the negative stencil (the cutout fish shape) is put in place...

...and this time black is sprayed on the left edge and white on the right.

Weirdly, to me this side looks beveled instead of carved. But I find that different people see it differently. I guess the optical illusion works a bit like a necker cube.
I taped off the areas I wanted to be banded in marble and gold, and baby-wiped the kurigata to marble it:
I taped off the areas I wanted to be banded in marble and gold, and baby-wiped the kurigata to marble it:
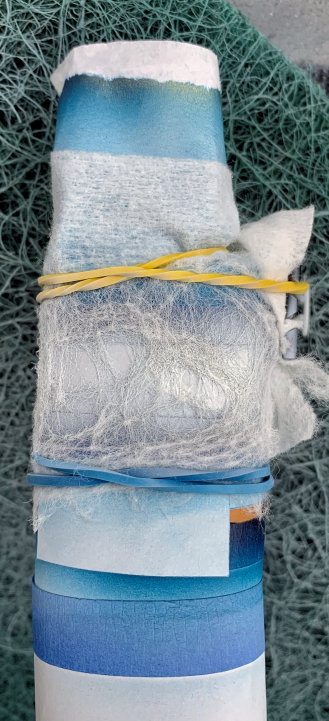
Here's where the tanto curse struck again: I pulled the wipes and tape, and a buttload of paint came up with it -- right down to the wood:
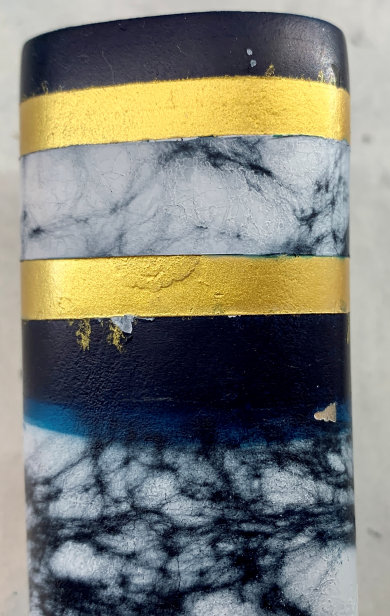
There was also a lot of overspray on the bottom that looked awful. No way was I gonna re-marble this thing, so my only choice was to patch, sand, & retape.This time I used typing paper to mask everything and only the thinnest edge of tape that I stuck to my inner arm to weaken the adhesive. I also had to retape the kurigata, which is a pain because of the way it curves at the base where it meets the saya.
But I took advantage of the opportunity to redo the bands because I wasn't satisfied with them anyway. I lowered the blue to below the kurigata so that the marbled knob would stand out and help unify the design.
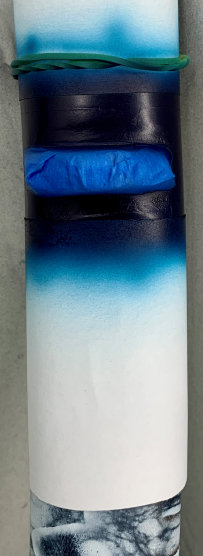
I made the gold bands thinner and redid the marbled band to be a stronger pattern. This was the result:
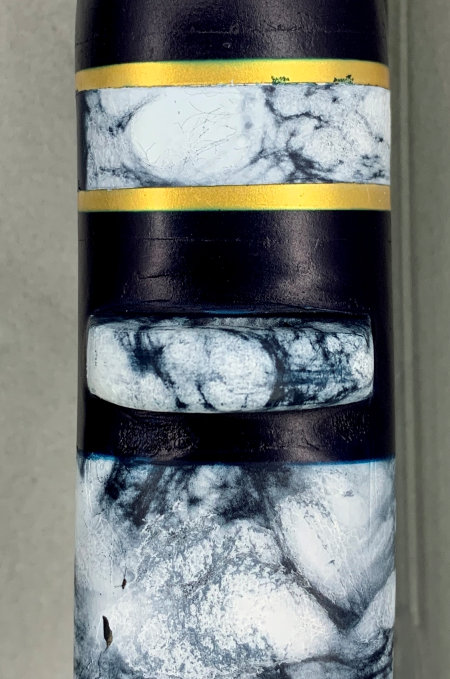
You can see where paint lifted on the top gold band when I removed the tape. Sigh. But not too hard to redo. But then I decided I wanted a bottom gold band to border the navy blue & marble, and to unify the gold-band design. So I masked yet again and added the bottom gold band...
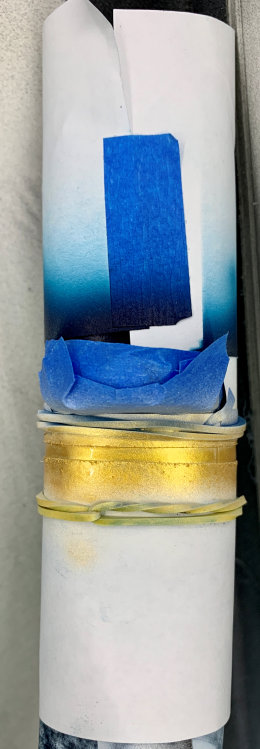
...and pulled everything off -- including even more paint, this time in the areas I'd just repaired. I was now at the point where repairs to repairs needed repairs. I'd say I was not having a satisfactory customer experience.
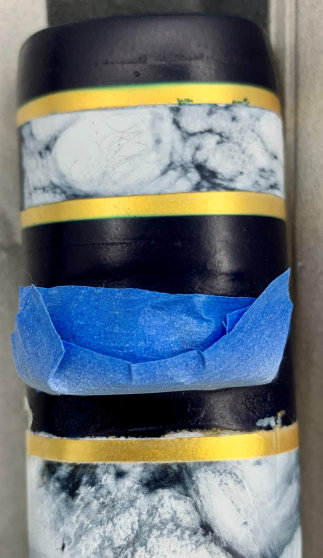
Well, sometimes you get the b'ar, and sometimes the b'ar gets you. I decided to hand-paint the repairs. I'm not very good with a brush, and airbrush paints are very thin and a pain to brush-paint, especially metallics. It takes a lot of layers. But I know when I'm licked, so I shut up and did it. I held my breath a lot. But patience paid off:

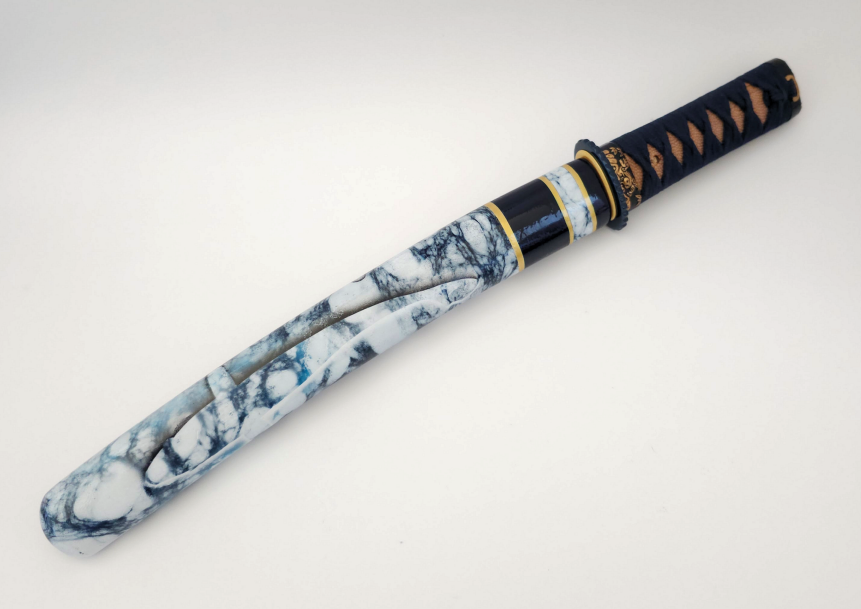
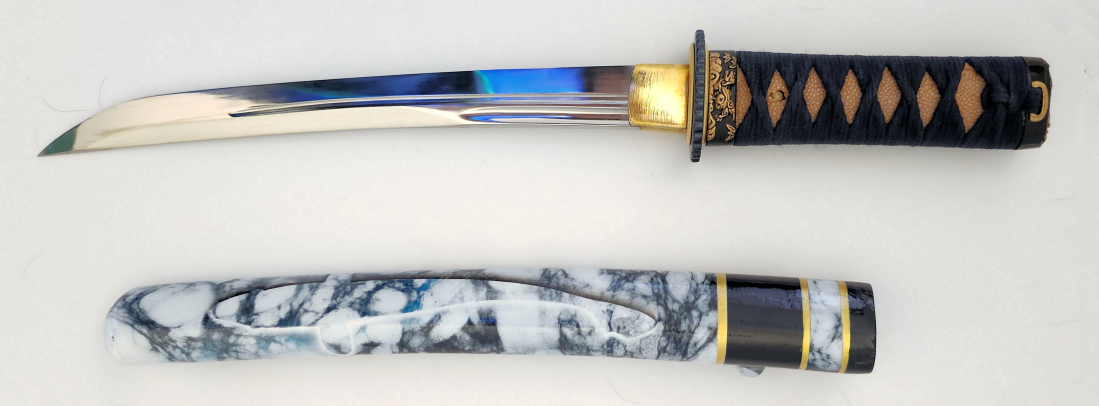
I liked the thinner gold bands, the third gold band, the lowered blue section, and the island jewel of kurigata much more than the previous layout, so ultimately it was worth all the hassle. I had friends telling me they'd have set this thing on fire by now. I totally get it. But the up-side of being mildly obsessive is having an outcome in mind and being willing to undergo ridiculous amounts of repetition and setback to achieve it. (Well, sometimes it's an upside. Sometimes, not so much.)
Apart from some light touch-up, all that remained was to put on three coats of 2K clear, buff it, polish it, and call it a day. I'd already done the tsuka and polished the blade for the intended Naval Diplomat Tanto, so once the saya was polished, all that was left was to sheathe the blade and stare at the finished thing a good long while.
Apart from some light touch-up, all that remained was to put on three coats of 2K clear, buff it, polish it, and call it a day. I'd already done the tsuka and polished the blade for the intended Naval Diplomat Tanto, so once the saya was polished, all that was left was to sheathe the blade and stare at the finished thing a good long while.
So I did. I'm really jazzed at how it turned out.
My friend Gigi did the finished shots. Thank you, Gigi! I packed it up & sent it off, and my friend Adrian loved it, so I'm a pretty happy tantoista. And perhaps the curse is ended. We'll see, I guess!
Thanks for reading!
My friend Gigi did the finished shots. Thank you, Gigi! I packed it up & sent it off, and my friend Adrian loved it, so I'm a pretty happy tantoista. And perhaps the curse is ended. We'll see, I guess!
Thanks for reading!



 But I'm not one of those artists who can create whatever you can imagine. Like those hotrod guys you go to and say, I want a rabbit dressed as the Grim Reaper in Day-Glo surfing on top of Hokusai's "Wave" on my gas tank, and he nods and says, "Sure, I can do that." I totally envy those guys.
