

Slightly Goth Iaito (walk-through)
Feb 16, 2022 21:47:33 GMT
Post by steveboy on Feb 16, 2022 21:47:33 GMT
I posted here about a wakizashi I repaired for an elderly student. Sadly, he had to quit batto, and he gave me the waki and matching katana as a thank-you for the tune-up. My subsequent mock carbon-fiber customization of the wakizashi is detailed in the above link.
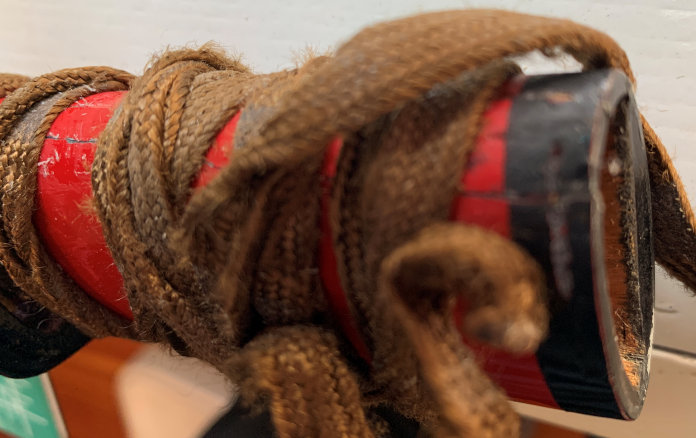
Like the waki, the iaito was a cheap mall-ninja piece in rough shape. The blade was scarred up, the saya was gouged & chipped, and had two long cracks from the koiguchi past the kurigata:

I wanted to try using a hot-rod-customizing technique that uses lace as a stencil for candy metallic paint. I wanted a darker theme so it wouldn't be too garish, and settled on red and black with a gold trim. I knew it was gonna look kinda goth, but what the heck.
I sanded the saya down to the wood, brushed with TSP to remove residue, then brushed on PVA glue thinned 1:1 with water. This helps saturate the wood so that it doesn't suck up the paint, and helps make the surface more even for painting. I lightly sanded it smooth with 400 grit, then airbrushed Autoborne Sealer White as a primer.
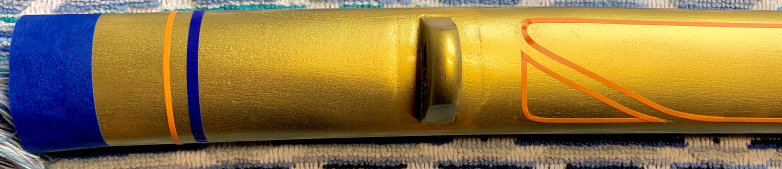
I sprayed two coats of metallic gold as my base coat, then used fineline tape to mark off keylines near the koiguchi and outlining a panel area where the lace pattern would be. I masked the top inch as well:

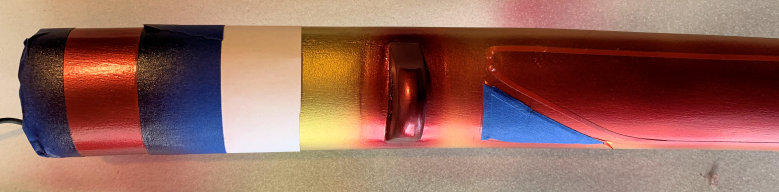
I sprayed four layers of brandywine candy over the metallic gold, then masked off two areas I wanted to remain solid brandywine:

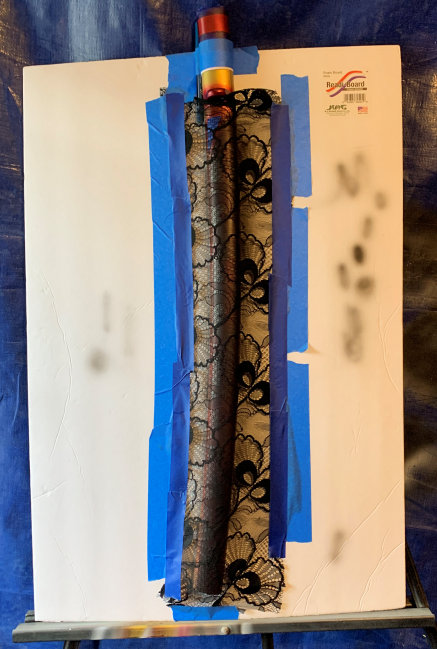
Here comes the crazy part: Normally I'd wrap the lace around the saya and tape or sew it tautly in place. But I simply couldn't get it to stay in place. I needed to spray two coats of black, and any movement in the lace and the pattern would be ruined.
My solution was to tape the saya against a sheet of foam core, stretch a length of lace across the top, and tape it down. The pattern was only going to feature in a panel in the middle of each side of the saya, so I didn't have to worry about how it would look on the narrower sides. I just needed it to be taut and firm against the middle length.
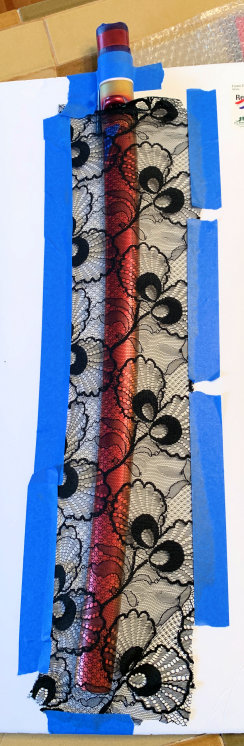
I sprayed two coats of gloss black, and repeated the process on the other side:
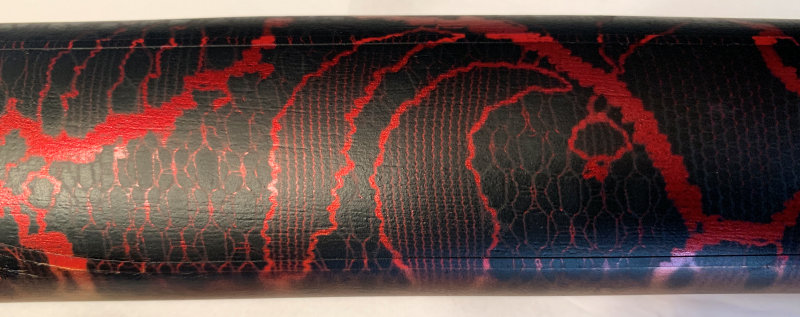
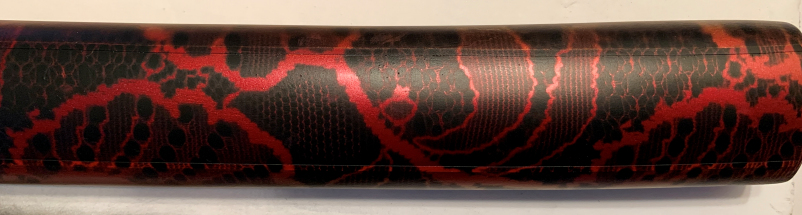
Then I removed the lace:
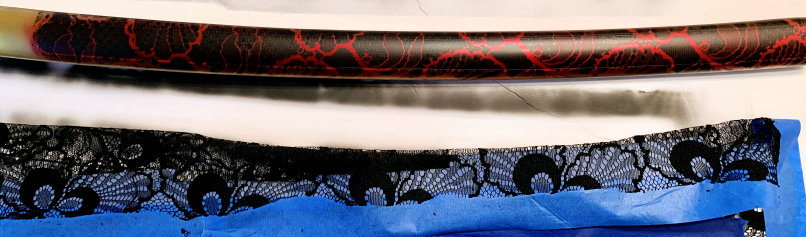

I was super happy with how it turned out! To preserve the fine detail of the lace, you have to spray fairly lightly with lower air pressure (15-20 psi) and spray straight down, trying not to vary your angle as you go. (The horizontal lines you see below are the fineline tape.)
D'oh! I forgot to document this next part: I did a "reverse mask," taping over the panel area marked out by fineline tape, and covered the kurigata. I left the masking on over the parts I wanted to stay brandywine and gold, then sprayed the entire katana with two coats of black.
Then I removed all the masking and pulled off the fineline tape:
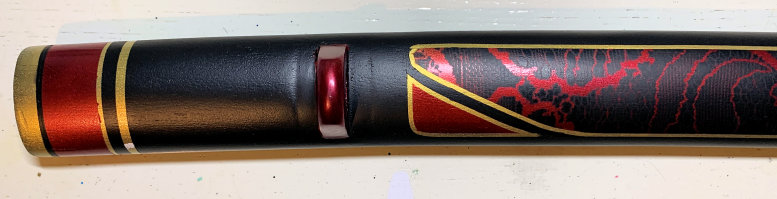
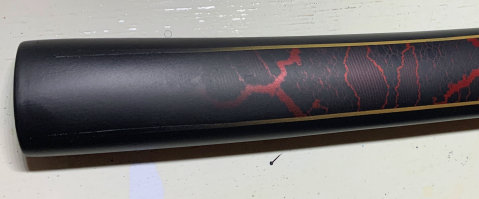
I cleaned up the edges of the gold lines with an X-acto knife. Then I sprayed a black fade from the bottom up, so that it would look as if the lace panel and border gradually appeared onto the saya:
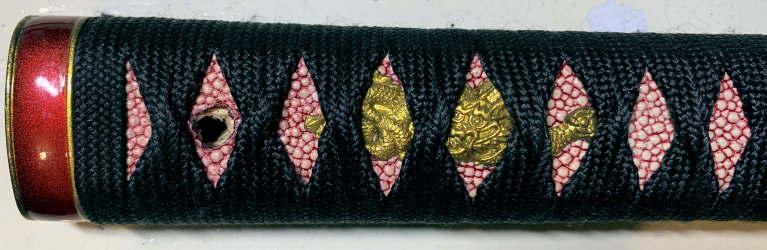
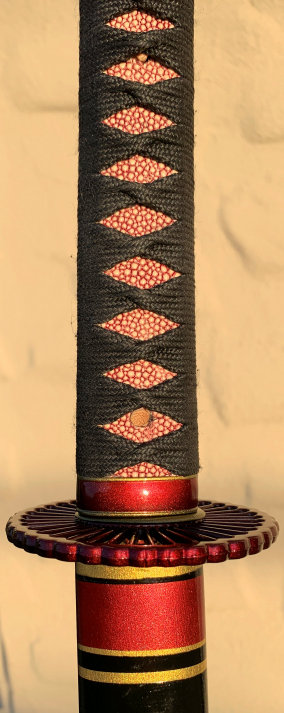
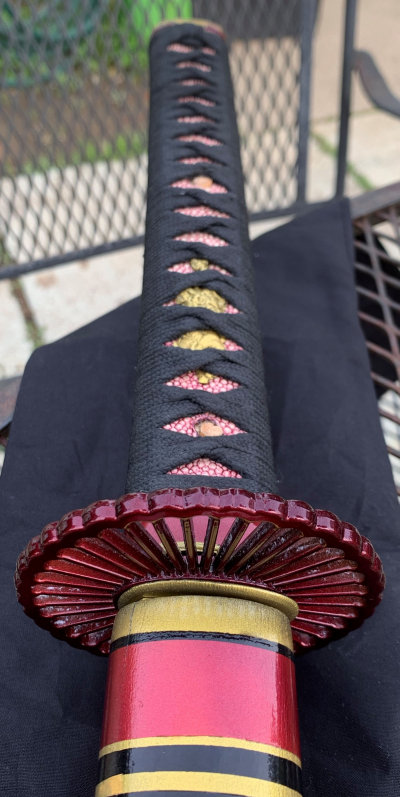
I took the tsuka apart and cleaned adhesive off of the wood with Goof Off. The samegawa was cheap white plastic. I brush-painted it with Brandywine candy and rag-wiped it so that the nodules would be white and their outlines would be dark red.
I sprayed metallic gold on the fittings and menuki, taped the fuchi & kashira for trim, and sprayed them and the tsuba with brandywine candy.
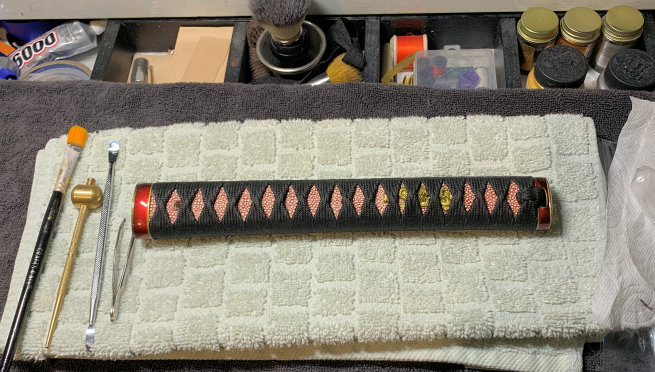
I rewrapped the tsuka with a new black ito and brushed on two coats of gloss polyurethane clearcoat. I sprayed two coats of gloss clearcoat on all the fittings, and three coats on the saya.

I went at the blade with a palm sander with 400, 800, 1500, and 2000 grit, using vegetable oil as a lubricant. I polished it out with Peek metal polish and then Mother's Aluminum polish.
Here's everything before assembly:
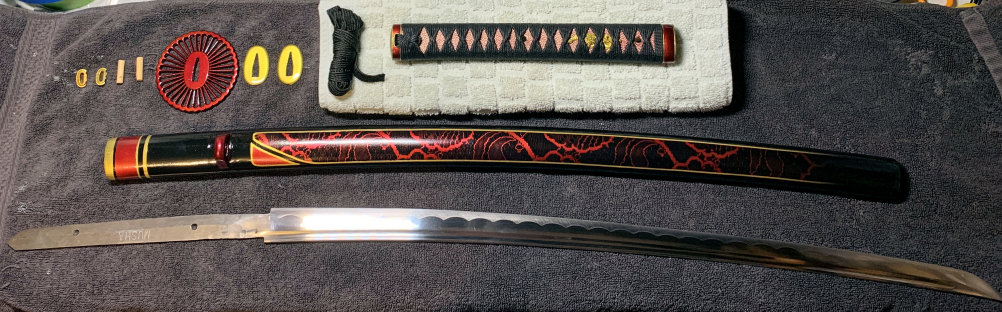
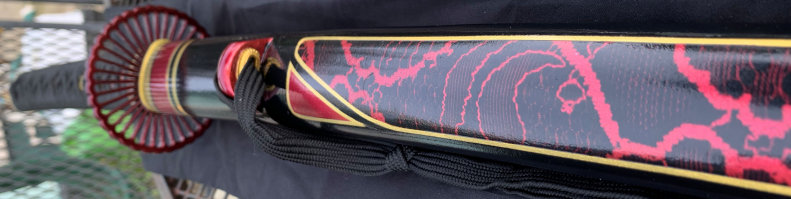
And here's the final assembled & polished iaito:
![]()


Like the waki, the iaito was a cheap mall-ninja piece in rough shape. The blade was scarred up, the saya was gouged & chipped, and had two long cracks from the koiguchi past the kurigata:
I wanted to try using a hot-rod-customizing technique that uses lace as a stencil for candy metallic paint. I wanted a darker theme so it wouldn't be too garish, and settled on red and black with a gold trim. I knew it was gonna look kinda goth, but what the heck.
I sanded the saya down to the wood, brushed with TSP to remove residue, then brushed on PVA glue thinned 1:1 with water. This helps saturate the wood so that it doesn't suck up the paint, and helps make the surface more even for painting. I lightly sanded it smooth with 400 grit, then airbrushed Autoborne Sealer White as a primer.
I sprayed two coats of metallic gold as my base coat, then used fineline tape to mark off keylines near the koiguchi and outlining a panel area where the lace pattern would be. I masked the top inch as well:
I sprayed four layers of brandywine candy over the metallic gold, then masked off two areas I wanted to remain solid brandywine:
Here comes the crazy part: Normally I'd wrap the lace around the saya and tape or sew it tautly in place. But I simply couldn't get it to stay in place. I needed to spray two coats of black, and any movement in the lace and the pattern would be ruined.
My solution was to tape the saya against a sheet of foam core, stretch a length of lace across the top, and tape it down. The pattern was only going to feature in a panel in the middle of each side of the saya, so I didn't have to worry about how it would look on the narrower sides. I just needed it to be taut and firm against the middle length.
I sprayed two coats of gloss black, and repeated the process on the other side:
Then I removed the lace:
I was super happy with how it turned out! To preserve the fine detail of the lace, you have to spray fairly lightly with lower air pressure (15-20 psi) and spray straight down, trying not to vary your angle as you go. (The horizontal lines you see below are the fineline tape.)
D'oh! I forgot to document this next part: I did a "reverse mask," taping over the panel area marked out by fineline tape, and covered the kurigata. I left the masking on over the parts I wanted to stay brandywine and gold, then sprayed the entire katana with two coats of black.
Then I removed all the masking and pulled off the fineline tape:
I cleaned up the edges of the gold lines with an X-acto knife. Then I sprayed a black fade from the bottom up, so that it would look as if the lace panel and border gradually appeared onto the saya:
I took the tsuka apart and cleaned adhesive off of the wood with Goof Off. The samegawa was cheap white plastic. I brush-painted it with Brandywine candy and rag-wiped it so that the nodules would be white and their outlines would be dark red.
I sprayed metallic gold on the fittings and menuki, taped the fuchi & kashira for trim, and sprayed them and the tsuba with brandywine candy.
I rewrapped the tsuka with a new black ito and brushed on two coats of gloss polyurethane clearcoat. I sprayed two coats of gloss clearcoat on all the fittings, and three coats on the saya.
I went at the blade with a palm sander with 400, 800, 1500, and 2000 grit, using vegetable oil as a lubricant. I polished it out with Peek metal polish and then Mother's Aluminum polish.
Here's everything before assembly:
And here's the final assembled & polished iaito:
The fade to black on the sorta Victorian lace made me think of Oscar Wilde's apocryphal last words: "My wallpaper and I are fighting a duel to the death. One or the other of us has to go." So privately I call this my Oscar Wilde Goth Wallpaper iaito. What can I say.
One reason I'm so happy with this project is because it put together almost everything I've learned in the past two years. It's also the first thiing I've done that looked exactly the way I planned it, which is a great confidence booster.
Thanks for walking through this with me!

 Unfortunately I'm an edge-perfectionist. Also one wrong move when unsheathing and the throat nicks the edge on either side.
