Deleted
Deleted Member
Posts: 0
|
Post by Deleted on Sept 19, 2008 5:31:34 GMT
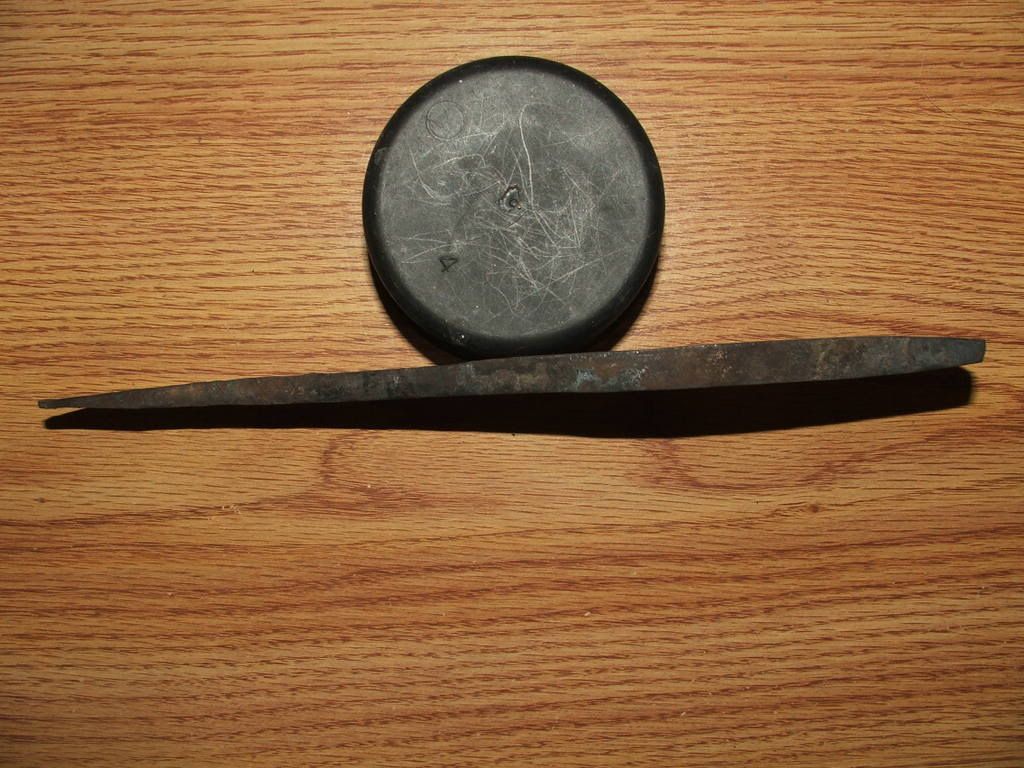
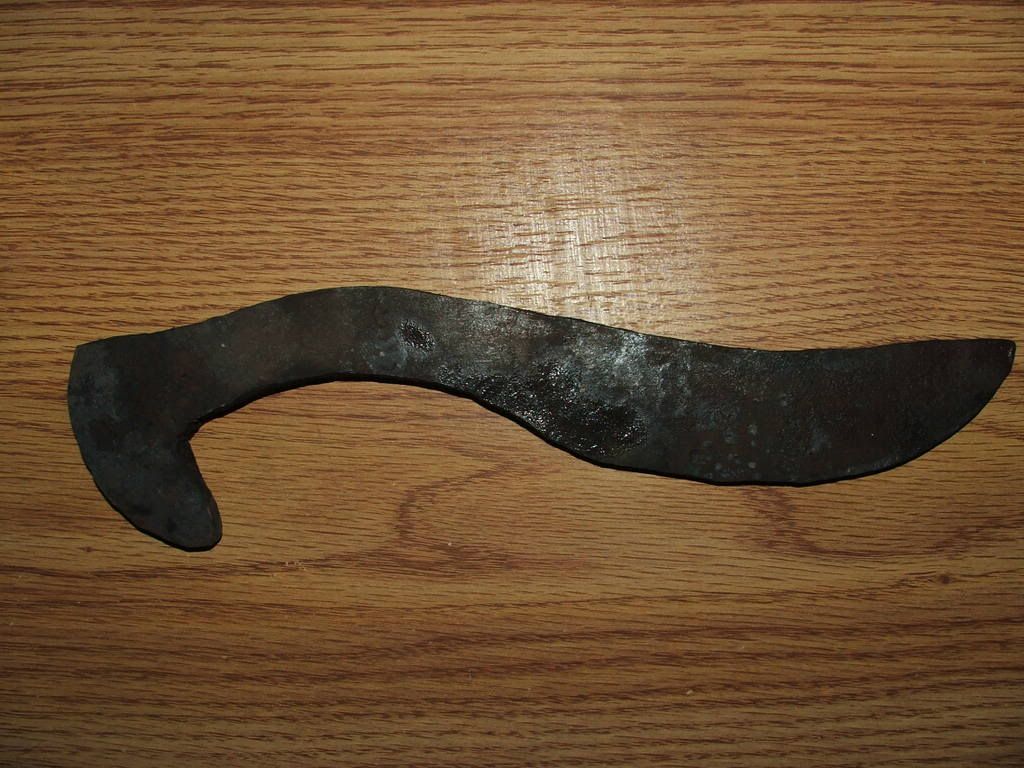
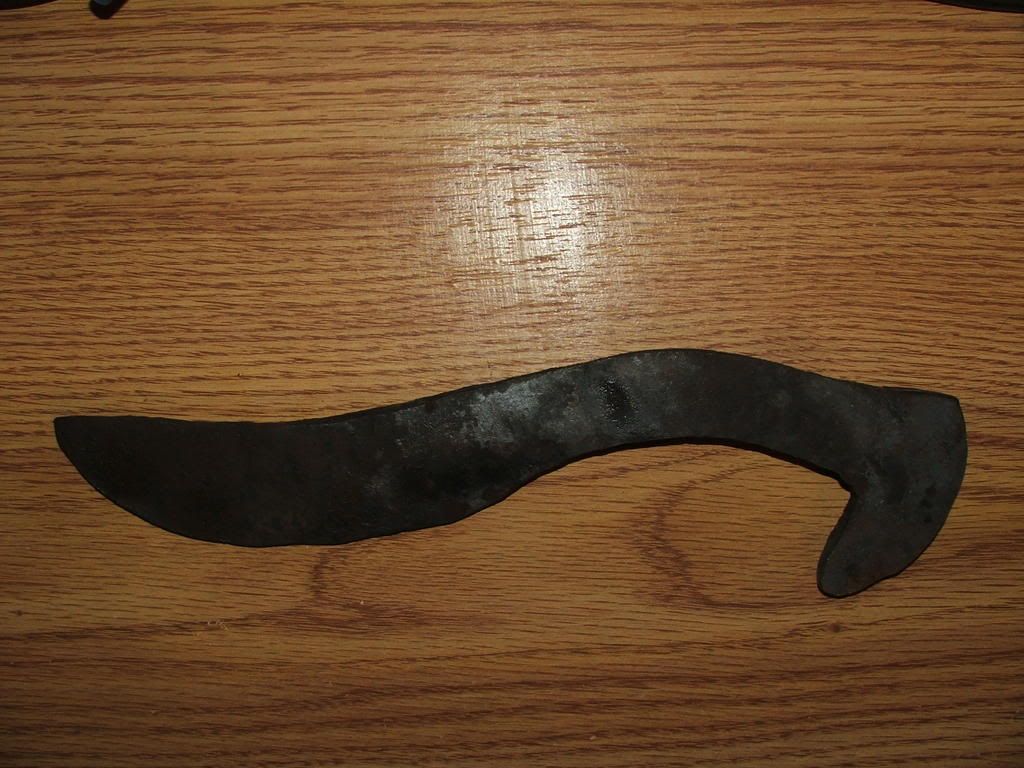
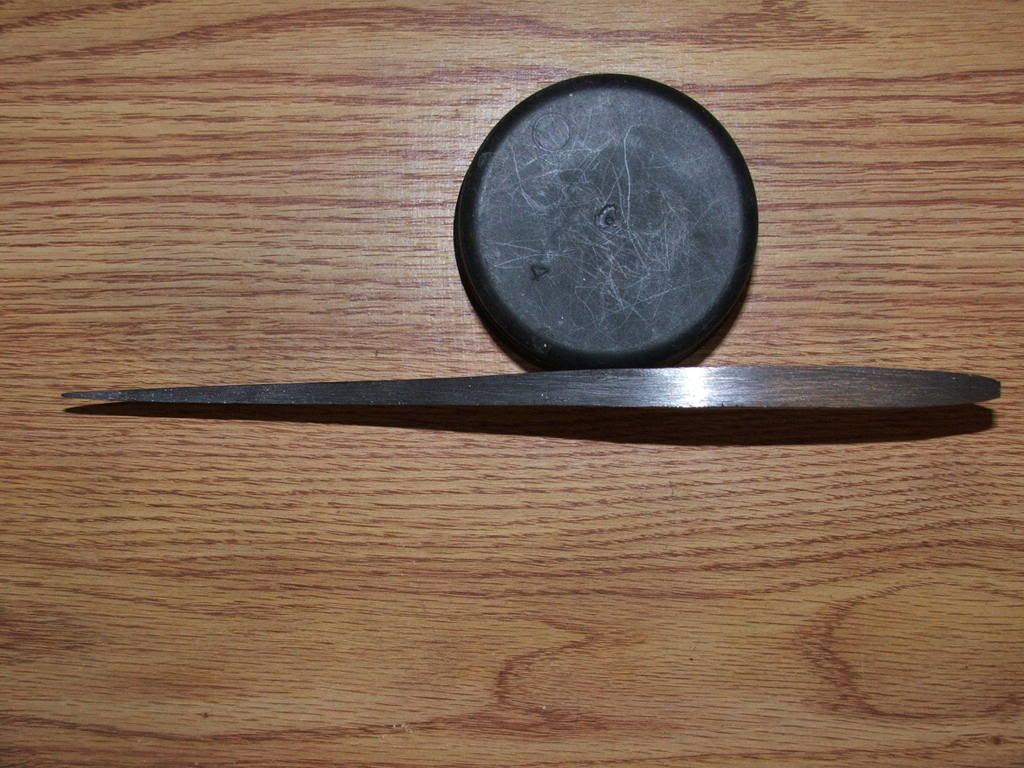
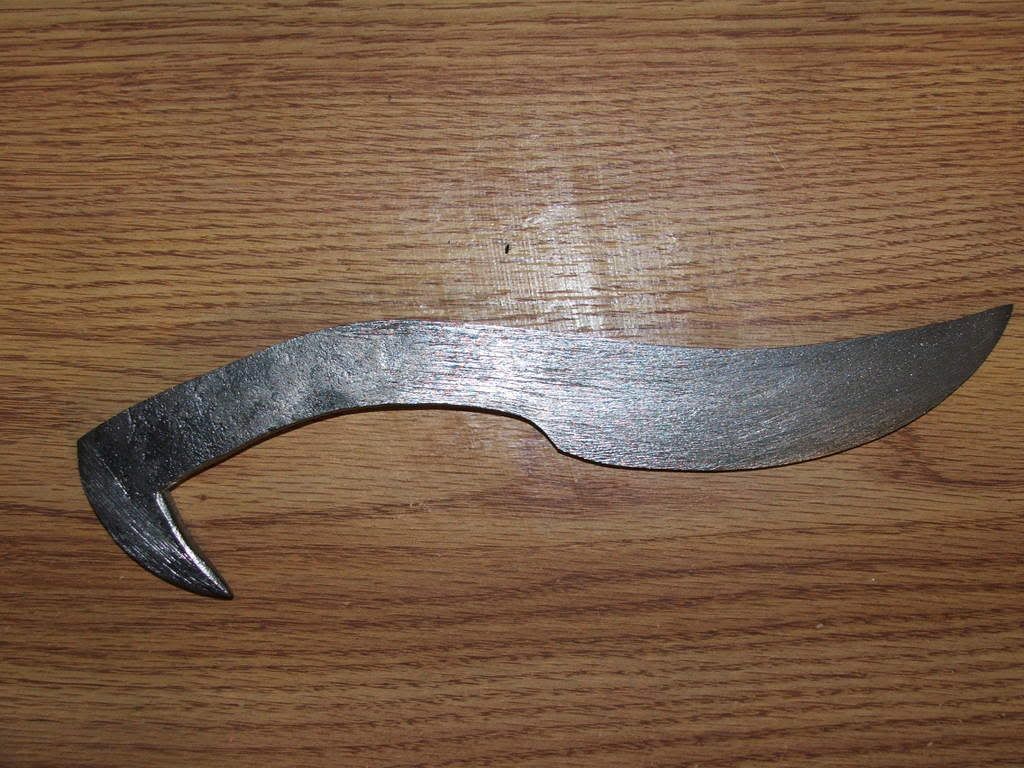
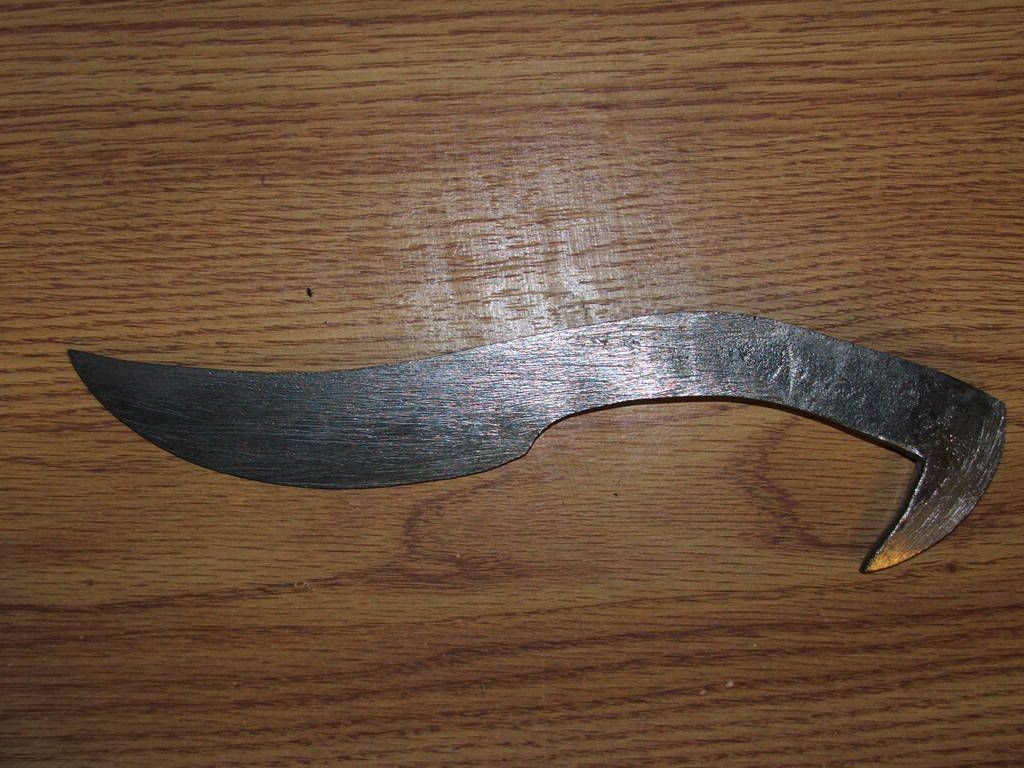
Well guys...here's #2. If this one works out to be as nice as the last...I'll go ahead and promote myself to some better steel lol. Honestly, I think this one is going to turn out substantially nicer. It's sort of a fantasy theme. I will say I'm having a lot less problems with it lol. Anyhow, on to the pictures: (Click to enlarge.) 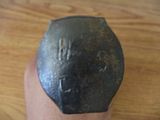 Yep, it's a rail road spike again...this time it is actually stamped 'HC' though. Yep, it's a rail road spike again...this time it is actually stamped 'HC' though.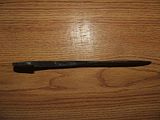 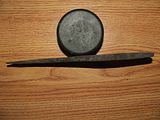 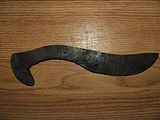  After the forging was complete. I'm much happier with the finish...it's a HUNDRED times smoother. I had the same problem drawing out the blade at the choil though, I wanted more width. Also, I wanted more curvature but it just wasn't happening. I definitely need better tools lol. All in all I had about four hours plus in the forging. After the forging was complete. I'm much happier with the finish...it's a HUNDRED times smoother. I had the same problem drawing out the blade at the choil though, I wanted more width. Also, I wanted more curvature but it just wasn't happening. I definitely need better tools lol. All in all I had about four hours plus in the forging.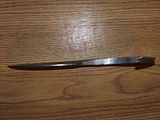   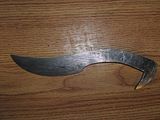 After about two hours of filing. I went with a straight scandanavian edge geometry on this. It sort of fit the theme, and if the heat treat works it's going to really showcase the hamon. I also curved the grip a LOT more on this one...it's surprisingly comfortable in the hand. After about two hours of filing. I went with a straight scandanavian edge geometry on this. It sort of fit the theme, and if the heat treat works it's going to really showcase the hamon. I also curved the grip a LOT more on this one...it's surprisingly comfortable in the hand.So anyhow, what do you all think? I'm pretty happy with it. I'm going to fully sharpen the 'tooth' on the butt...while fully rounding off the inside edge, making it more toothlike lol. I'm debating on whether to add copper bolsters in a sort of 'habaki' format, that are shaped to resemble the quick on a talon. I could do the same at the rear as well. If I can pull it off this one should be pretty nice. I'm thinking of going with a brown leather wrap of some sort...possibly even a similar 'tactical' wrap only using a top grain in the tan/brown. I've got one REALLY cool idea, but it is going to involve a bunch of copper ringlets and I don't know if I can find any...and I sure as hell don't want to make a hundred 1/4" copper rings lol. Anyhow, again let me know what you think...and thanks for looking =). Cris |
|
|
|
Post by randomnobody on Sept 19, 2008 5:39:00 GMT
Well, I'm looking forward to seeing how this one turns out. It's already looking pretty good to me.
|
|
Deleted
Deleted Member
Posts: 0
|
Post by Deleted on Sept 19, 2008 5:40:46 GMT
Thanks =). I'm hoping it outshines the last one by a decent margin lol. I plan on putting a good bit more work into the grip, while maintaining a similar style. Hopefully the plan pans out lol...if it does this will hopefully be pretty nice =).
Cris
|
|
|
|
Post by Matt993f.o.d on Sept 19, 2008 19:20:07 GMT
Fantastic work, Cris. +1 for a good effort, and lots of dedication.
|
|
Deleted
Deleted Member
Posts: 0
|
Post by Deleted on Sept 20, 2008 5:44:13 GMT
ugh u totally beat me to the design  !! but urs will prolly turn out better in end, anywho once again beautiful knife! +1 |
|
Deleted
Deleted Member
Posts: 0
|
Post by Deleted on Sept 20, 2008 6:58:10 GMT
Thanks for the compliments guys...they're much appreciated. Well, I spent most of tonight working out the logistics of putting on bolsters/habaki. Unfortunately I'd already ground the knife for a habaki before realizing I had no way to slide it on lol. Then, my 'billet' of coin mokume ( that was an adventure...trust me...) didn't turn out quite as expected. Apparently copper will fuse...rather easily with mild steel. I spent about two hours grinding the cannister (long story) off of my billet, only to find that I'd got it so hot that everything basically liquified lol. Out of what should have been a 9" billet, I got about 4" of semi usable mokume lol. The good thing is it was a nice 1/4" thick and an inch and a half wide. There were definitely some inclusions and air pockets...but all in all I think I'll be able to make it work. My intentions (once I realized the habaki was a no go) were to channel two plates of mokume to fit the tang of the knife, then solder them together with low temp solder. This turned out to be impossible as well. The 1/4" thick billet was too narrow in some places to get a good clean plate for the bolsters. Plus the place where I need to put the bolsters isn't exactly a simple geometrical shape lol. There's compound angles etc I've got to match. Soooo, I decided to go ahead and make my plates, shape both them and the tang to fit on the area of the blade where I'll be installing them (fore and aft of the grip), clamp them on after the blade's been heat treated...then make a small 'filler' piece exactly the width of the tang to solder in and make it look one piece. Once that's done I'll have to file everything to shape installed on the blade. All this because there was no way to build a freakin habaki out of my coin mokume with the tang styled as it is lol. Bleh. Here's a picture:  The ground blade, coin mokume plates, and my copper ringlets (well 42 of them...I need to make 250 lol) made from the primary power cable concentrics. Too bad some idiot painted the cables...which means I have to hand clean every single strand I wrap =/. I learned the hard way that a 3' length of copper wire plus a 6" wire wheel equals trouble. Normally I wouldn't be stupid enough to try something like that but it was late and I was in a hurry to get a strand wrapped and cut so I could squeeze them shut while watching a movie tonight lol. Anyone feel like spending 6hrs making copper rings and soldering them for me lol...that part is sucking the worst! Anyhow...I'm still confident that it'll all come together. Other than a few 'in process design modifications' lol, it's all working out. Hopefully this one will be worth the extra effort. And darkslyde...sorry bout that bud...if it's any consolation, I was actually shooting for MORE curve in the blade...and was actually going to sharpen the rear 'blade'. Not sure if that would have made it more or less like your idea or not. Turns out though that the curve wasn't cooperating, and the blade on the back has now turned into a 'tooth'. I've decided to call it 'Tooth and Nail'. 'The First Installment in the Railroad Spike Fantasy Series' =p. Or not lol =). Cris |
|
Deleted
Deleted Member
Posts: 0
|
Post by Deleted on Sept 25, 2008 5:28:46 GMT
Well, this thing has been sitting on hold for the last freakin week. I can't seem to find any decent limestone to make my clay from...so I went ahead and ordered a bucket of Rutland furnace cement from Aubuchon Hardware (when asking locally about furnace cement at ANY hardware/home improvement center here in Phoenix I just get a blank look like I just asked what isle the parka's are stocked in). I did this last Friday...and it turns out my cement won't be here until the 29th. Can you freakin believe that??? Anyhow, while waiting I decided to go ahead and work on my wrap. My original idea involved a large quantity of copper ringlets, which I'd planned to weave leather through in order to make an almost chain maille grip out of. I was using a leather necklace I have as inspiration, and when I wrapped the necklace around the tang it worked wonderfully and looked very cool. Well it turns out that soldering these ringlets is a pain in the rear for one, and I also don't have anything to use as a mandrel that's of an appropriate size. So I made a design change and shelved the woven leather/copper wrap for another project. Turns out I kind of like the new idea better anyhow. It's also more comfortable and feels incredibly firm in the hand. On top of that...I've never seen another grip like it =). Not saying there isn't one...but for me this qualifies as an original idea for once lol! The other benefit is that it only requires about 1/3 the amount of those PITA copper ringlets lol. Let me know what you think: 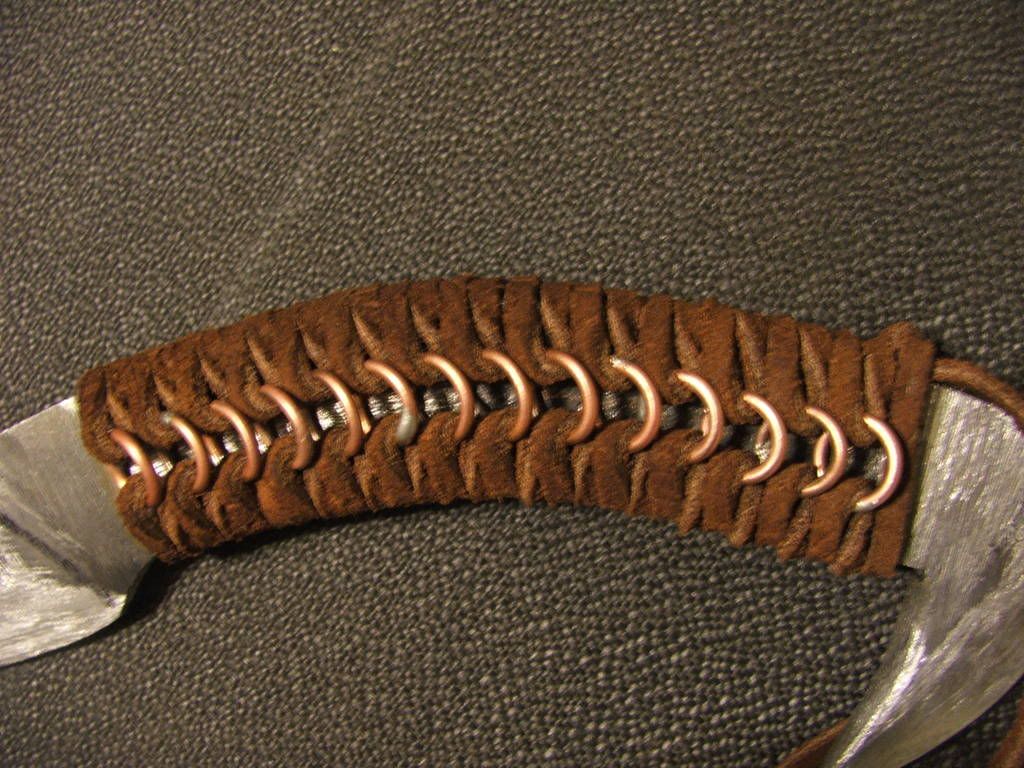 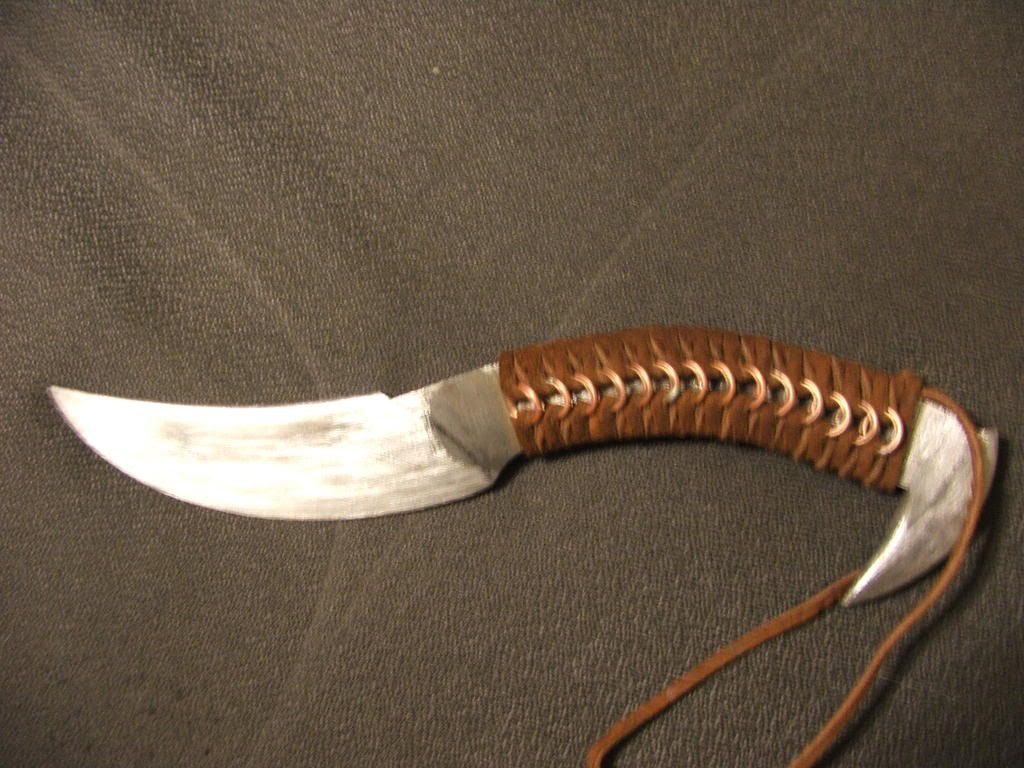 Pardon the blurry pics...for some reason the camera just would not cooperate tonight. Also keep in mind this is simply a rough prewrap to make sure I had enough rings and to try out the style. When I finalize it will have the copper/nickel mokume fore and aft of the grip. I will also be greasing the leather with braiding grease in order to give it a more pleasing texture both visually and for feel. Anyhow...just wanted to post up what little process I've made. Still incredibly torqued that it's going to take two weeks to ship a freakin tub of furnace cement to AZ from...if I recall, Michigan. You'd think it was coming from China or something! Cris |
|
|
|
Post by brotherbanzai on Sept 25, 2008 14:01:33 GMT
Whoa Cris that looks awesome! I like your idea for the grip wrap, it's very cool.
You might want to check and see if there is a grill and barbecue supply store in town as they sometimes carry tubes of furnace cement.
+1 for you.
|
|
|
|
Post by Matt993f.o.d on Sept 25, 2008 14:18:29 GMT
A very clever way of sorting the wrap out. LOVE the copper ringlets.
|
|
Deleted
Deleted Member
Posts: 0
|
Post by Deleted on Sept 25, 2008 16:35:26 GMT
Thanks guys much appreciated =). I'll definitely have to check the phone book for a grill supply store here in town. You can barbecue here year round lol...so there should be something!
Cris
|
|
|
|
Post by Dan Davis on Sept 26, 2008 2:20:43 GMT
Contact Phoenix Brickyard ; they can help you out with mortar and with the limestone. |
|
Deleted
Deleted Member
Posts: 0
|
Post by Deleted on Sept 26, 2008 2:26:33 GMT
Contact Phoenix Brickyard ; they can help you out with mortar and with the limestone. Thanks Dan, I didn't even think to try the more commercial outlets. I'll have to give them a call tomorrow. Maybe I'll be heat treating by tomorrow night =). Cris |
|
Deleted
Deleted Member
Posts: 0
|
Post by Deleted on Sept 27, 2008 0:19:46 GMT
Looking good again Cris, you have a good eye.
|
|
Deleted
Deleted Member
Posts: 0
|
Post by Deleted on Sept 27, 2008 3:04:15 GMT
Looking good again Cris, you have a good eye. Thanks a ton Sam. I really try to think these out as best I can before going to work on them. There's just so much technical knowledge I'm lacking lol. If only I had the experience (and cash flow!) to keep up with my ideas you know? Like right now...while waiting on the furnace cement (it's already paid for I may as well use it lol), I just finished the paper stages of my next ultra secret (and hopefully ultra cool!) project. This one's pretty complicated so I think I'm going to do a wood mockup of all the parts and pieces first to make sure I have everything ironed out. If it works that way...it'll be a go, at which point I'm sure I'm going to butcher through the whole lot of 1075/1080 I ordered from Admiral before I get it right trying to make it out of steel lol. I may need to make a phone call to find out what your experience with Du Sith taught you lol...whatever it is I'm sure it could help me out a ton!! Thanks again bud...and I'll make sure to keep you all posted once the heat treat's finished =) Cris |
|
Deleted
Deleted Member
Posts: 0
|
Post by Deleted on Oct 1, 2008 2:38:27 GMT
Well, my Rutland Cement came in yesterday, so I heat treated last night. I was actually pretty happy with the results. The clay went on smooth right out of the tub, and I believe it definitely hardened. Surprisingly the 'hamon' (more on that in a bit) followed my clay pattern relatively closely. I did make a really dumb mistake of leaving the edge a bit extra wide. A little thicker than a dime....trust me I paid for it lol. I'm sure that these spike knives don't get anywhere near as hard as a knife made of good steel...and it STILL took me hours to find the edge. Not to mention polish out all my file marks lol. Also, just for the record...I heated the steel with two mapp gas torches after claying. Then once things went non magnetic, I quenched in a 5gal tub full of water, pool salt, and dawn dish soap. I didn't have any ice on hand or I'd have added that too lol. Anyhow, here's some pictures of the results: 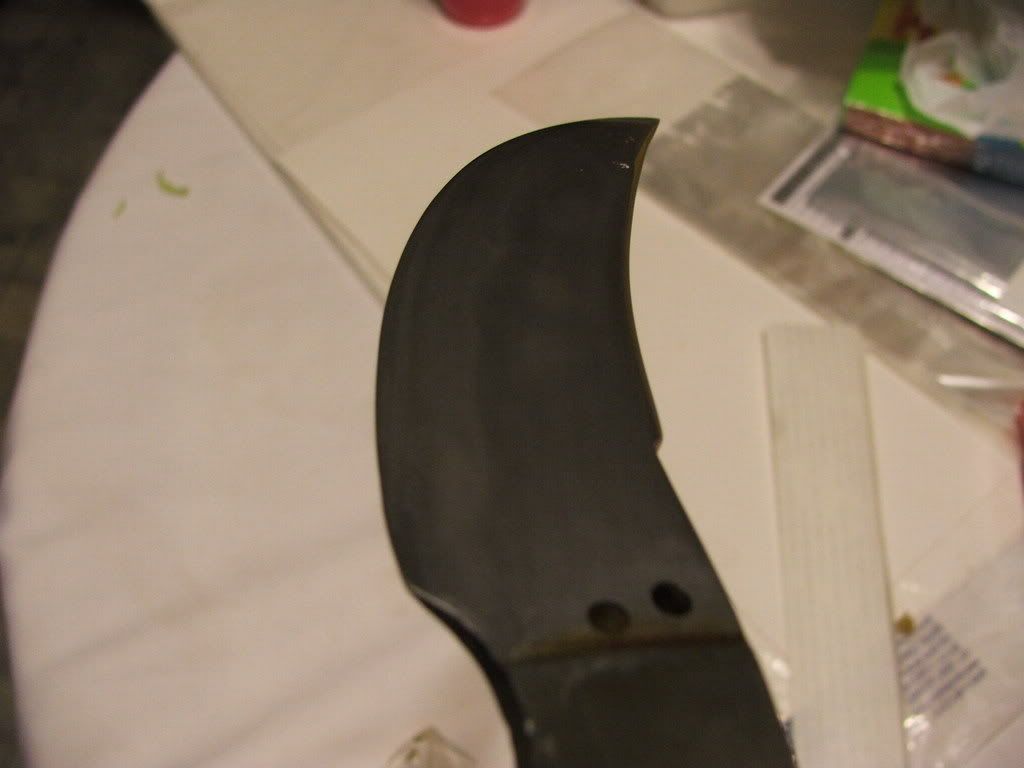 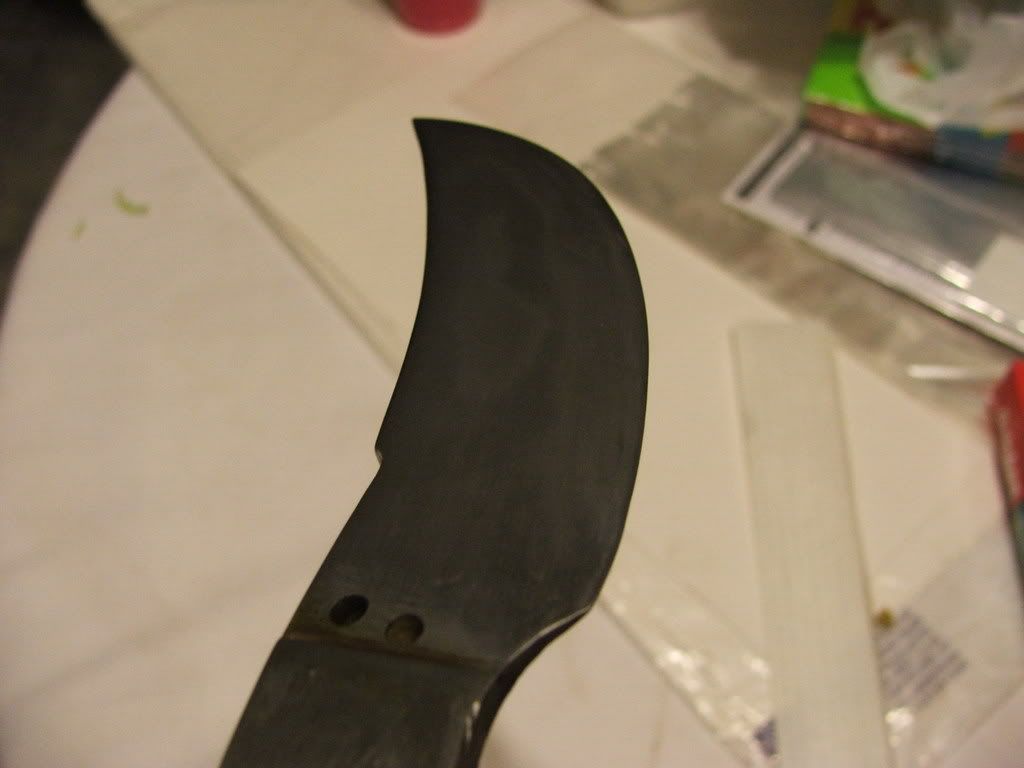 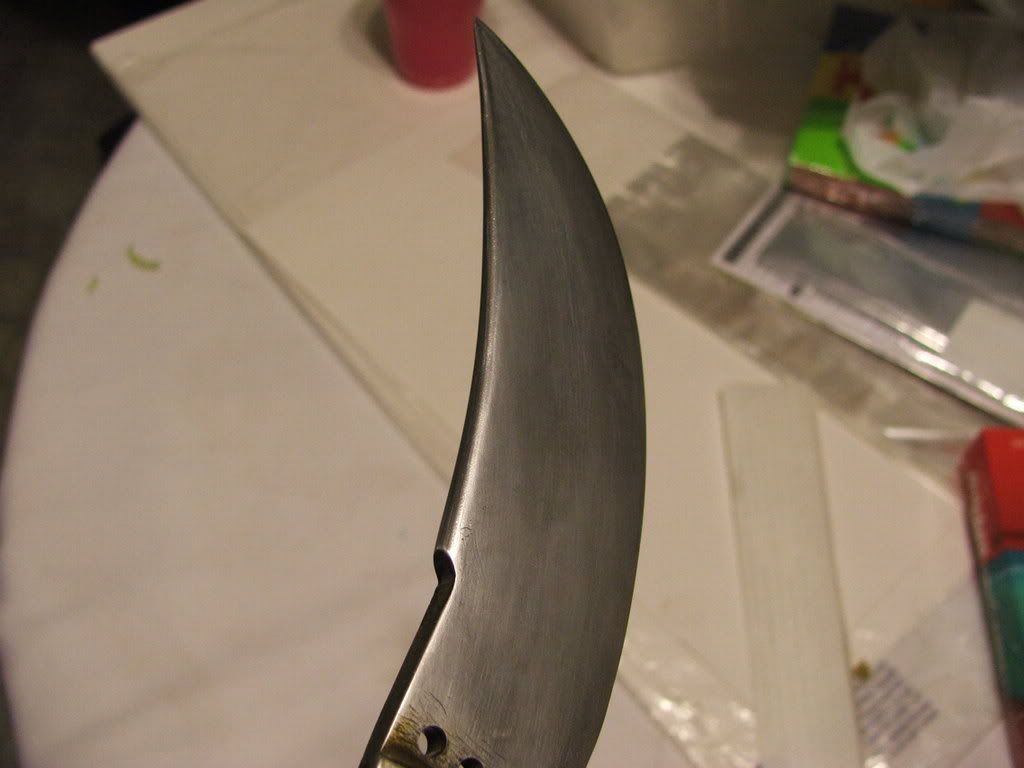 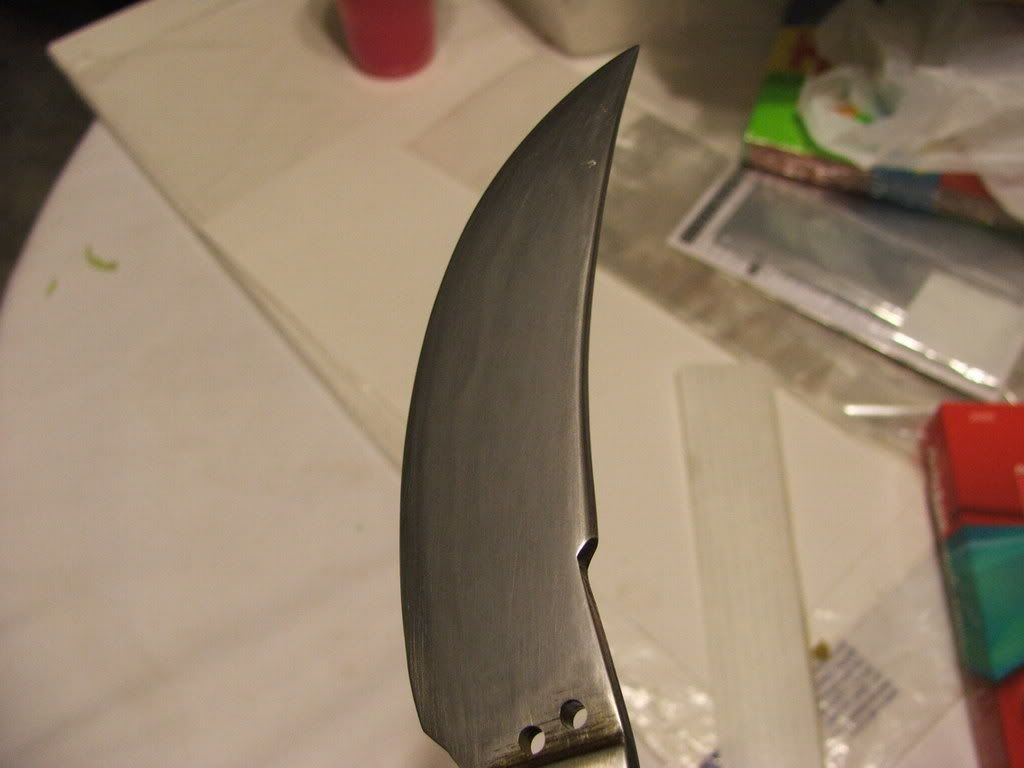 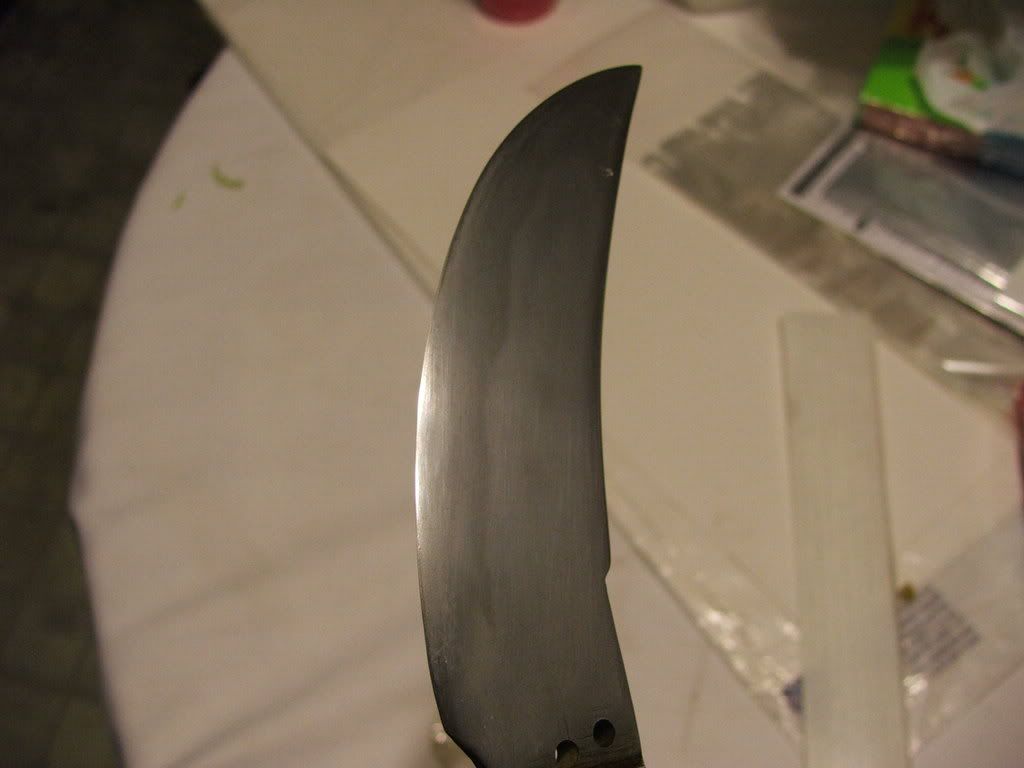 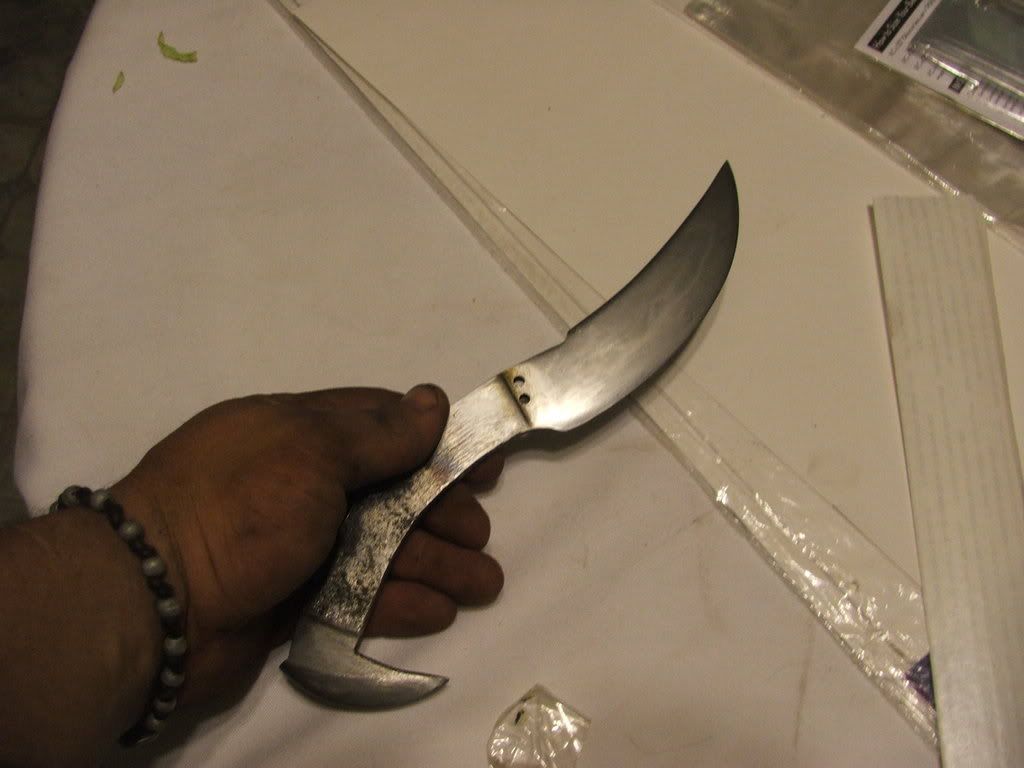  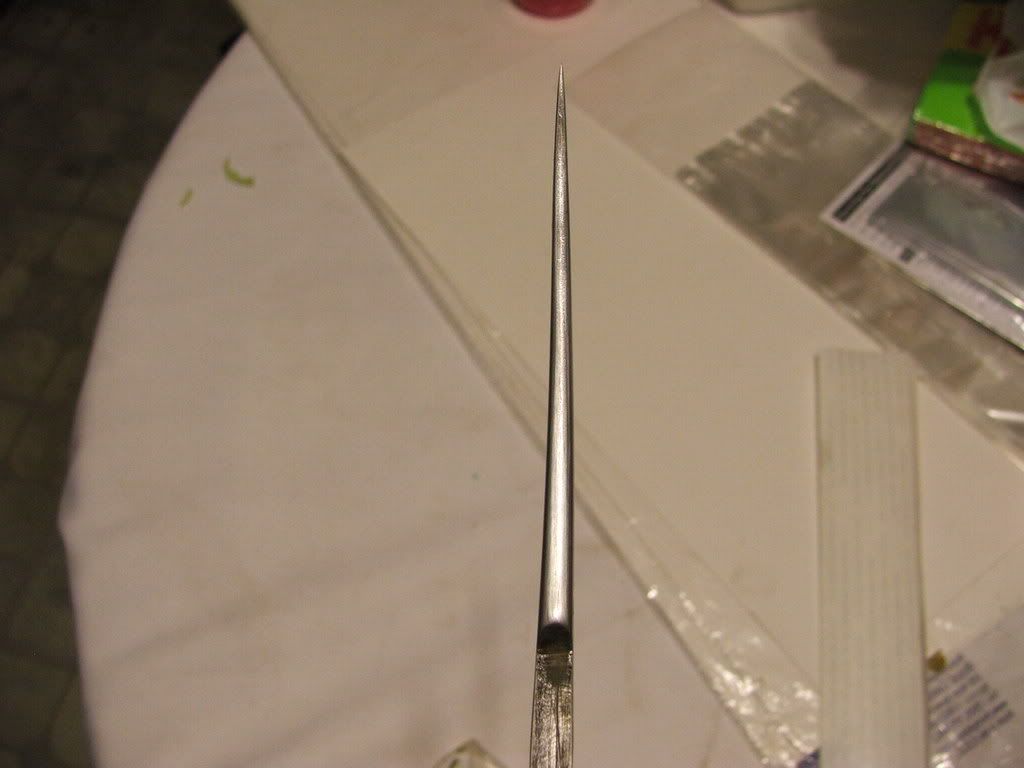 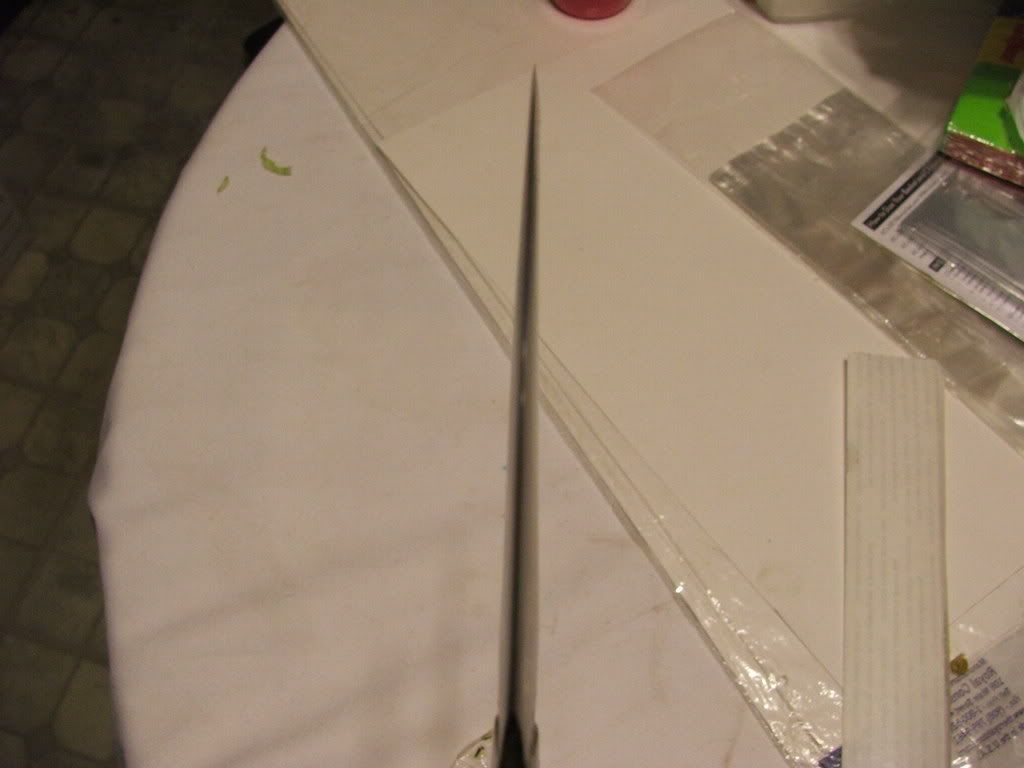 Sam and I were discussing the possible hardening of this knife in another thread (I'm posting a few of these pictures there too), and it really made me wonder if this is a 'real' hamon. He mentioned that it might be 'fine pearlite' instead of martensite, which seems totally possible. My question is whether or not fine pearlite is actually hard at all? The edge and spine (I scraped the clay off the spine) of this blade are now substantially harder than the body. Anyhow, let me know what you guys think about the hamon and whether it's real or not. Please ignore my amateur efforts at polishing lol. Even more than my forging I think that's something I REALLY need to work on lol! Thanks! Cris |
|
|
|
Post by Dan Davis on Oct 1, 2008 12:19:54 GMT
Cris,
Looking at the sixth picture I can readily see both the hamon and the habuchi (that silvery line between the hamon and the body of the blade). I can also see a secondary hamon riding above the first and dipping down to meet it in the middle of the blade. This tells me your rutland was not completely dry and lifted up off the blade in those regions, creating a "ghost" hamon. Both hamon exhibit habuchi.
The habuchi is made up of that fine-grained pearlite Sam was describing, as is the second "ghost" hamon riding above your initial one. These are the transition regions between martensite and ferrite/pearlite, and their presence is a definite indicator that the blade hardened properly.
|
|
Deleted
Deleted Member
Posts: 0
|
Post by Deleted on Oct 1, 2008 13:52:24 GMT
beautiful job. and I love the idea for the handle wrap. Really just looks great!!!
|
|
|
|
Post by Matt993f.o.d on Oct 1, 2008 16:24:59 GMT
Sounds like you got the DH cracked. Looks great. So you used the old rutland cement for the claying, eh?
|
|
Deleted
Deleted Member
Posts: 0
|
Post by Deleted on Oct 1, 2008 19:01:41 GMT
Cris, Looking at the sixth picture I can readily see both the hamon and the habuchi (that silvery line between the hamon and the body of the blade). I can also see a secondary hamon riding above the first and dipping down to meet it in the middle of the blade. This tells me your rutland was not completely dry and lifted up off the blade in those regions, creating a "ghost" hamon. Both hamon exhibit habuchi. The habuchi is made up of that fine-grained pearlite Sam was describing, as is the second "ghost" hamon riding above your initial one. These are the transition regions between martensite and ferrite/pearlite, and their presence is a definite indicator that the blade hardened properly. Thanks Dan...that helps a ton. You were dead on with the not so dry Rutland too lol. I was so excited to get it hardened that I only let it sit 45 minutes, then very slowly brought it up to temp. There were definitely areas that 'bubbled' and they did correspond with all the additional lines and blobs in the body of the blade. The funny thing is the cement didn't 'pop' off in the quench completely as I expected. Likely because I didn't bring the whole blade to critical...just the parts not exposed by clay. Cris |
|
Deleted
Deleted Member
Posts: 0
|
Post by Deleted on Oct 1, 2008 19:07:51 GMT
beautiful job. and I love the idea for the handle wrap. Really just looks great!!! Thanks Nurow! I hope it turns out as nice as it has the potential to. I think it's shaping up well =). Sounds like you got the DH cracked. Looks great. So you used the old rutland cement for the claying, eh? Thanks Matt...I'm just glad the hamon shows lol. I did use the Rutland Cement...and the results are ok. Chris Moss recommended Satinite for differential hardening. It's what he uses to get hamon like these: 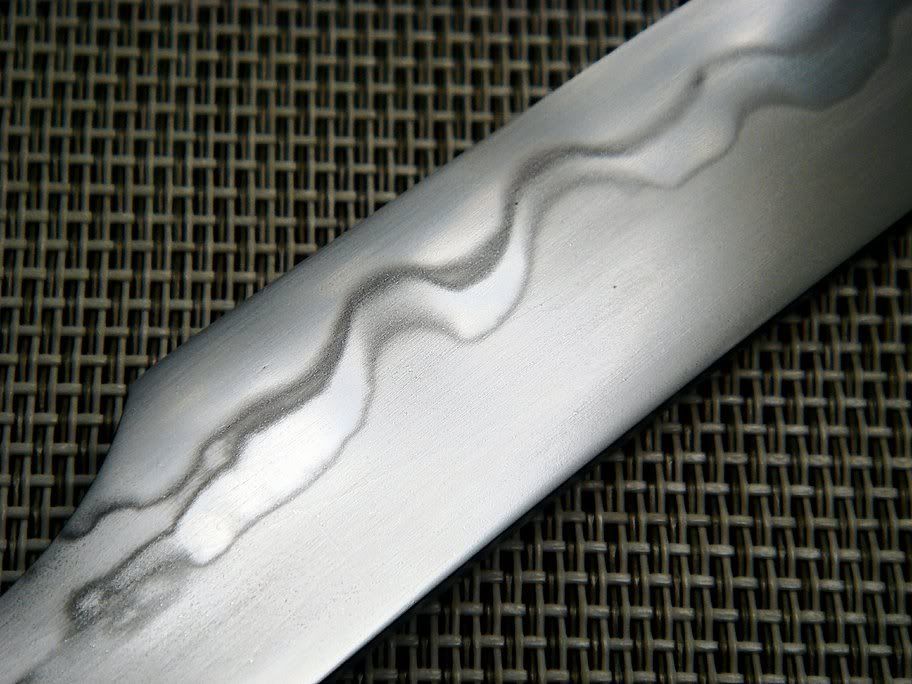 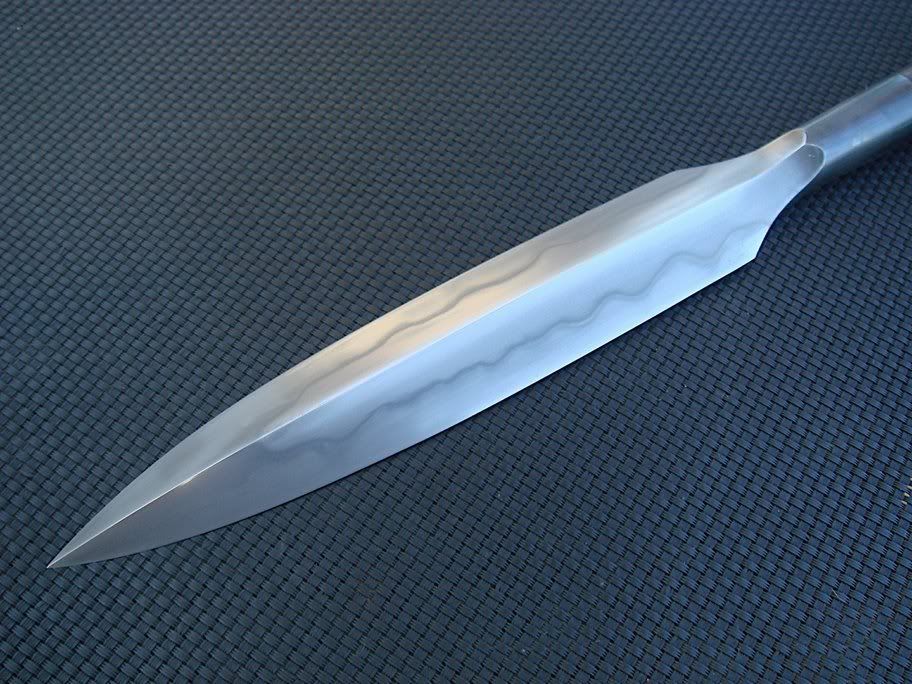 I'm also going to pick up some limestone powder as Dan recommended to make my own clay. I'd like to test them all against each other and see what I end up liking the best. The Satinite seems to be by far the cheapest option, but we'll see when I get them all tested =). Cris |
|


 !! but urs will prolly turn out better in end, anywho once again beautiful knife! +1

 Unfortunately I'm an edge-perfectionist. Also one wrong move when unsheathing and the throat nicks the edge on either side.
