|
|
Post by MLanteigne on Aug 8, 2017 1:20:18 GMT
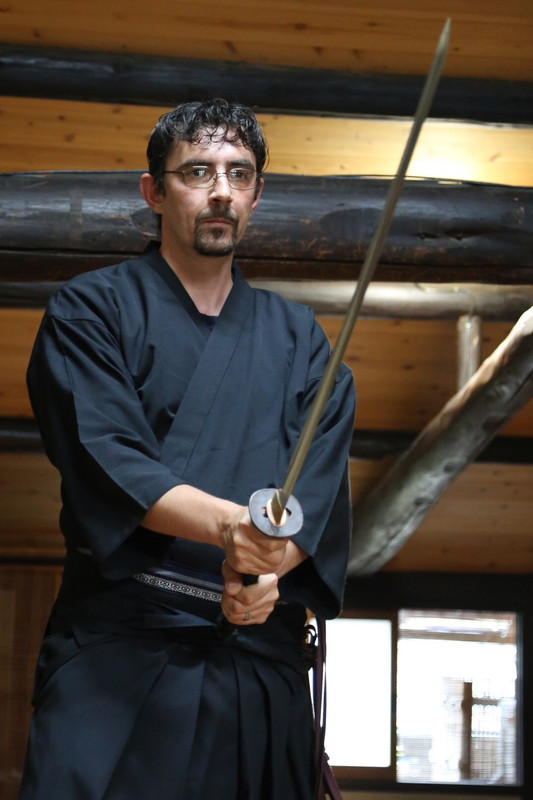
Folks, I bought a Hanwei Gen 1 Mussashi Kat a while ago from the Classifieds here. The blade was not in good shape at all...the shinogi was rounded, there were scratches along a good portion of the hamon area as though it had seen a power tool of some kind. In anycase, I wanted to clean it up, so I started with some 400 grit and worked up to 1500. Two buffs with a medium grit rubbing compound followed by one of autosol. Turned out really good (well better than what it was) though some of the deep scratches are still there. Of course the hamon sort of disappeared, though you could still see it. I've etched two Hanwei PPK's before, and they turned out really well. I used window cleaner with ammonia to clean any oil of the blade, followed by some rubbing alcohol. I used regular vinnegar, mixed with a fair bit of dish soap as my etchant. I used a few squirts of dish soap because the mixture wasn't coating the blade evenly for some reason. So I finally got it coated, and this happened after about 10 minutes:   Oddly, it's like the mixture avoided the damned hamon all together!! So I tried again...I wiped it down with the glass cleaner, hit it with a coat of rubbing alcohol, did a round of autosol to clean all the gunk off. Then window cleaner and alcohol, and I was ready to try again:  This has never happened to me before. First, the etchant didn't turn black...it went orangish. It also didn't seem to attack the hamon at all, instead it started making the rest of the blade a smokey colour! However, after 2 rounds of autosol, it went back to how it was...except it has some stains in the steel now...  So I hit it once more with a good autosol polish, and the stains don't stand out as much, but they are still there!  In this picture, between the reflection of my phone and the light reflection, is a small lighter patch on the shinogi-ji that is like a smushed oval. That's the kind of staining that is all over the blade. Not one bit of darkening over the hamon. What am I doing wrong here? |
|
|
|
Post by LG Martial Arts on Aug 8, 2017 1:57:47 GMT
|
|
|
|
Post by MLanteigne on Aug 8, 2017 2:11:20 GMT
I didn't continuously wipe it...maybe that is where I screwed up...
|
|
|
|
Post by Verity on Aug 8, 2017 2:49:21 GMT
Hard to tell for sure from the pics BUT:
1.) as you say, you need to remove the oxides and properly clean blade between each etching pass.
2.) I also notice that you may want to polish to a higher grit polish before the etch process... I see quite a few scratch patterns there.
|
|
|
|
Post by Croccifixio on Aug 8, 2017 8:04:34 GMT
Happened to me before and I attribute it to leaving droplets of the etchant on the blade for too long. Try to etch, then after a few seconds wipe. Then etch again, then wipe. Be patient with the process because if you leave etchant on one spot it gets way too dark. It really needs to be even and you get that evenness either from immersing the whole blade in the etchant for a fixed amount of time or just continually doing the etch and wipe method. And if you don't like the etch, polish with high grit sandpaper. It's a lot of work but worthwhile in the end!
|
|
|
|
Post by MLanteigne on Aug 8, 2017 9:13:48 GMT
Hard to tell for sure from the pics BUT: 1.) as you say, you need to remove the oxides and properly clean blade between each etching pass. 2.) I also notice that you may want to polish to a higher grit polish before the etch process... I see quite a few scratch patterns there. I went to 1500 grit. Problem too is I am not good at it lol. In anycase that shouldnt affect the etching process like it did right? |
|
|
|
Post by MLanteigne on Aug 8, 2017 9:16:01 GMT
Ill try it again. I have some acetone that Ill try when cleaning the blade. Would the amount of soap in the etchant cause this? |
|
|
|
Post by Croccifixio on Aug 8, 2017 10:14:10 GMT
I don't put soap on the etchant. I just warm the white vinegar prior to use.
|
|
|
|
Post by Verity on Aug 8, 2017 14:09:55 GMT
Hard to tell for sure from the pics BUT: 1.) as you say, you need to remove the oxides and properly clean blade between each etching pass. 2.) I also notice that you may want to polish to a higher grit polish before the etch process... I see quite a few scratch patterns there. I went to 1500 grit. Problem too is I am not good at it lol. In anycase that shouldnt affect the etching process like it did right? It may complicate the etchant as the surface is not AS uniform. Generally I go to 2500 or 3000 prior to an etch pass and ensure all my scratches are going in a uniform direction. |
|
|
|
Post by MLanteigne on Aug 8, 2017 14:30:15 GMT
Ok thanks guys. Ill have at it again soon and see what happens.
|
|
pgandy
Moderator
Senior Forumite
Posts: 10,296
|
Post by pgandy on Aug 8, 2017 14:43:40 GMT
You went to too high of grit too soon. Start again with 220 grit w/oil going in one direction until all of those present scratches are gone. Then go to the next finer grit and repeat, except this time change direction slightly. In example, with the 220 go 90° to edge, then with 340 change the direction by 30° and continue until you see all of the 220’s scratches disappear. Then go to the next finer paper, don’t forget the oil, and change direction again, going back to the original is OK, and continue until all of the previous scratches disappear. By changing directions with each paper you will know where you are in the process. For a katana blade I think 1500 grit is too course, my preference only, to finish with. Continue to 2000 if not 3000 paper, after which bring to a mirror like shine with metal polish. The trick here is avoid dulling the cutting edge with the metal polish. Be patient it's a long process. Can't help you on the etching, but the polish will make a big difference.
|
|
|
|
Post by Verity on Aug 8, 2017 15:23:36 GMT
You went to too high of grit too soon. Start again with 220 grit w/oil going in one direction until all of those present scratches are gone. Then go to the next finer grit and repeat, except this time change direction slightly. In example, with the 220 go 90° to edge, then with 340 change the direction by 30° and continue until you see all of the 220’s scratches disappear. Then go to the next finer paper, don’t forget the oil, and change direction again, going back to the original is OK, and continue until all of the previous scratches disappear. By changing directions with each paper you will know where you are in the process. For a katana blade I think 1500 grit is too course, my preference only, to finish with. Continue to 2000 if not 3000 paper, after which bring to a mirror like shine with metal polish. The trick here is avoid dulling the cutting edge with the metal polish. Be patient it's a long process. Can't help you on the etching, but the polish will make a big difference. pgandy is absolutely right here. Each progressive grit should modify direction (except the caveat of the last two or so grit stages). I tend to etch at 2500 - 3000. I will do 3-4 etch passes and lightly polish out the oxides in between etch pass and reclean the blade. After etching I then generally do two steps... 1st I rub the jihada with a paste made of magnetite which will darken and give the jihada a "Nihonto bluish steel". I will then lightly polish with a paste of SiC powder and mineral oil. Very lightly but this then will make any ashi pop out nicely. |
|
|
|
Post by benvk on Aug 8, 2017 15:30:58 GMT
Autosol is very greasy, make sure you've cleaned the blade thoroughly, then clean again.
One drop of dish soap is plenty for the vinegar/lemon etch solution. Heat it up first so it's hot but not boiling, wipe it on the blade and keep wiping.
|
|
|
|
Post by Verity on Aug 8, 2017 15:44:42 GMT
Autosol is very greasy, make sure you've cleaned the blade thoroughly, then clean again. One drop of dish soap is plenty for the vinegar/lemon etch solution. Heat it up first so it's hot but not boiling, wipe it on the blade and keep wiping. I personally never heat it. It goes a bit slower but is more controlled if you don't heat it. Just a personal preference |
|
|
|
Post by MLanteigne on Aug 8, 2017 15:53:36 GMT
Ok I need sanding advice then. The blade ridge is super rounded. It was lije that when i got the sword. How can I crispen it up? Use a hardwood sanding block?
|
|
|
|
Post by Verity on Aug 8, 2017 16:02:27 GMT
Ok I need sanding advice then. The blade ridge is super rounded. It was lije that when i got the sword. How can I crispen it up? Use a hardwood sanding block? Yep. Or a steel bar. You want a very firm backing surface to reshape the shinogi-ji. Not for the faint of heart |
|
|
|
Post by MLanteigne on Aug 8, 2017 16:13:06 GMT
Autosol is very greasy, make sure you've cleaned the blade thoroughly, then clean again. One drop of dish soap is plenty for the vinegar/lemon etch solution. Heat it up first so it's hot but not boiling, wipe it on the blade and keep wiping. I wonder if that was part of the issue. What can I use instead of autosol? |
|
|
|
Post by MLanteigne on Aug 8, 2017 16:14:46 GMT
Ok I need sanding advice then. The blade ridge is super rounded. It was lije that when i got the sword. How can I crispen it up? Use a hardwood sanding block? Yep. Or a steel bar. You want a very firm backing surface to reshape the shinogi-ji. Not for the faint of heart I wish someone was doing hybrid polishes here exactly for this reason. I found Nihonzashi and Walley Hosteter as a couple options. |
|
|
|
Post by Verity on Aug 8, 2017 16:25:36 GMT
Yep. Or a steel bar. You want a very firm backing surface to reshape the shinogi-ji. Not for the faint of heart I wish someone was doing hybrid polishes here exactly for this reason. I found Nihonzashi and Walley Hosteter as a couple options. Nihonzashi does decent work. There are a couple of folks around here who can do it but don't make a business out of it. (Myself included). Given it is a hobby and competes with other priorities it can be a challenge. I'm currently working on a full polish of a nice 1095 blade that has a fantastic heat treatment. But I've also been working on it on and off for like a year. Lol |
|
|
|
Post by MLanteigne on Aug 8, 2017 16:35:34 GMT
Lol yeah I know what that can be like!
For sharpening up the ridge line...how do I do that? Are there any videos that show that aspect specifically that tou can think of?
|
|