

4790K Liquid Cooled Build (Update 5/19/2015)
May 4, 2015 21:54:31 GMT
Post by Mikeeman on May 4, 2015 21:54:31 GMT
A computer really isn't something I can go without. It's my only form of entertainment as I don't watch my TV, or pay for cable/sattelite for that matter, play my consoles, or have a garage to piddle in (yet). Plus, I need it for work. My old set up was beginning to be unreliable, so I opted to get new things. Since I'm getting new things, I might as well get some good stuff, right? The new gen stuff is insanely expensive, so I got top-of-the-line old stuff. My current set up includes:
4790K i7 4.00Ghz stock
HyperX Red 1333Mhz RAM (32 Gigs) (from my old build)
Asus Maximus VII Formula motherboard
GTX 650 (from my old build)
120 Gb HyperX SSD (from my old build
500 Gb Crucial SSD
650W PSU (from my old build)
eBay liquid cooling kit with red LED stuff
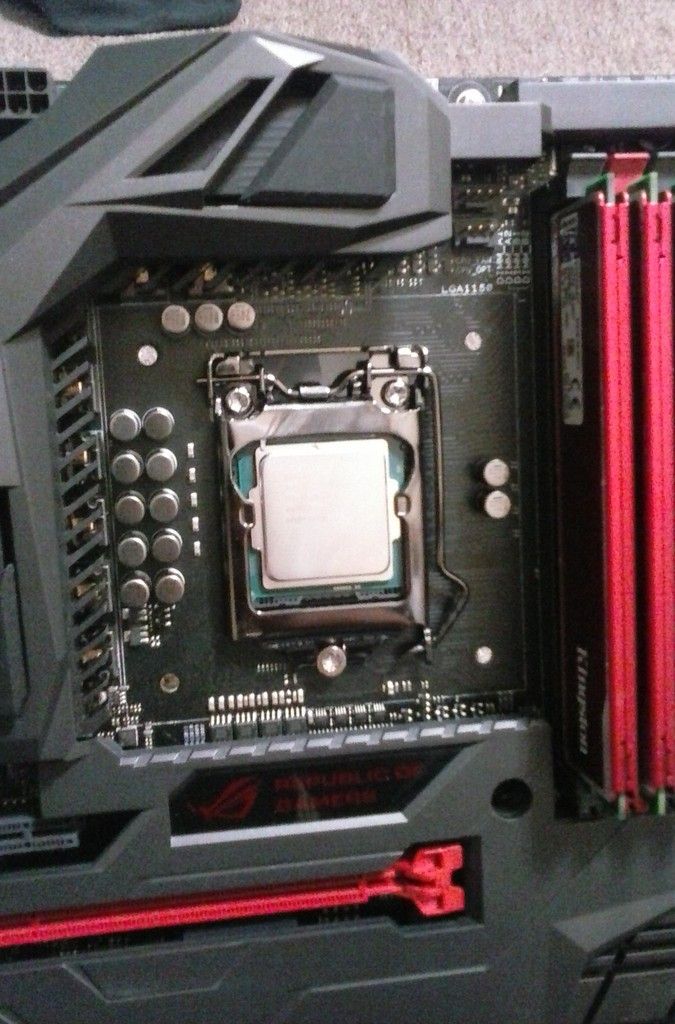
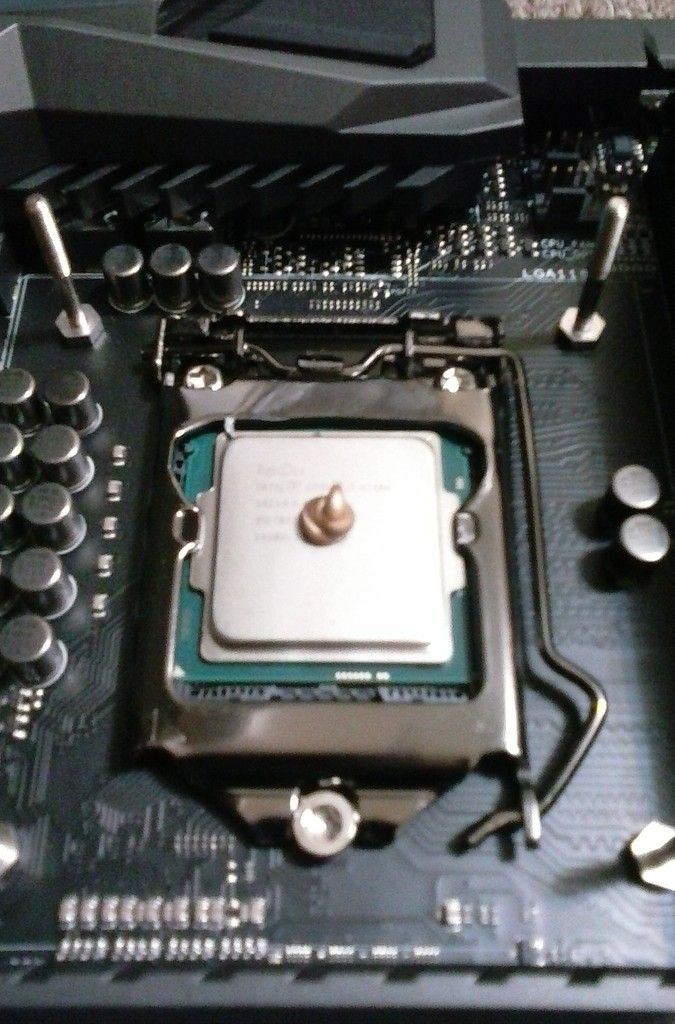
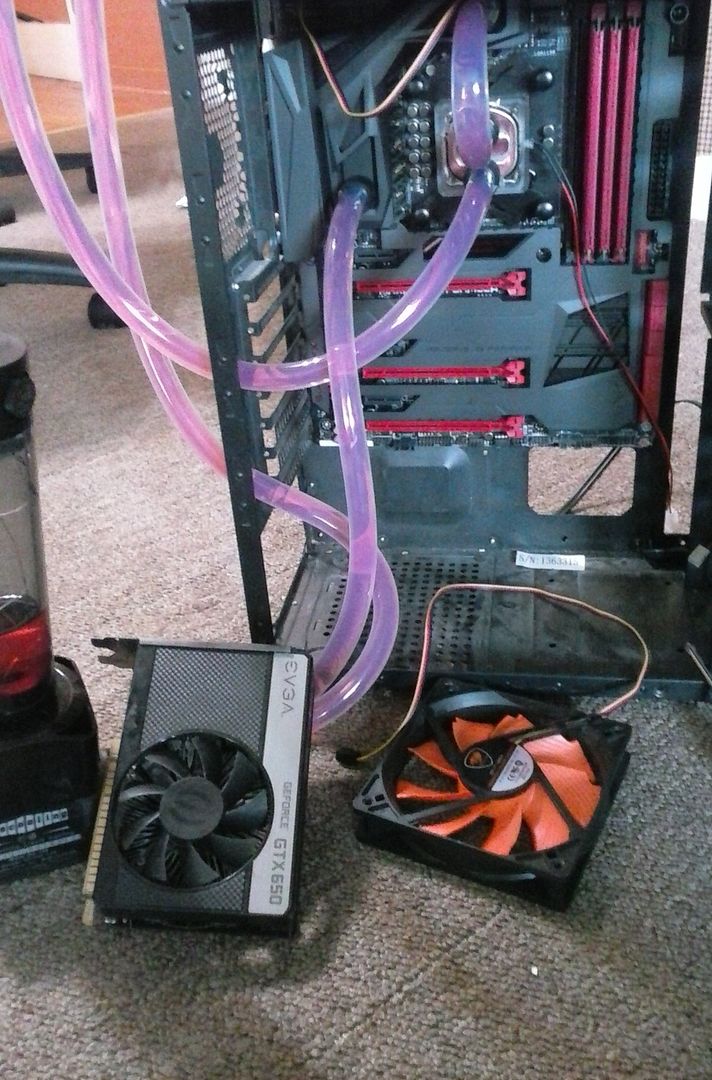
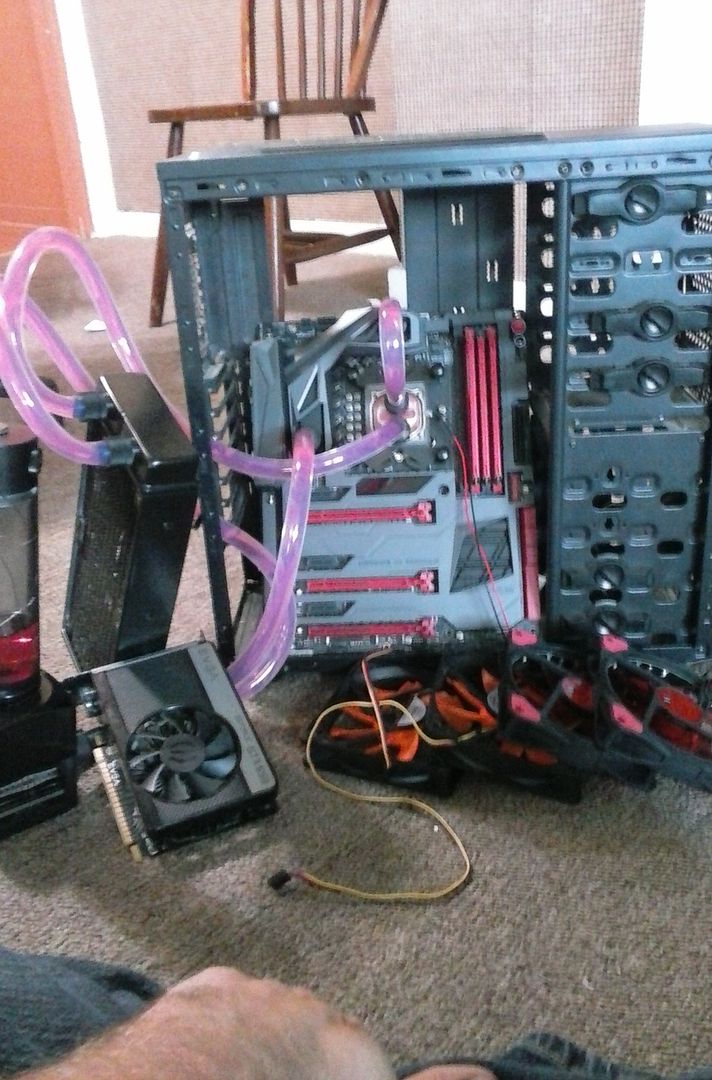
I had just put the processor in the motherboard and hooked it up to all my old stuff, but the stock cooler just wasn't cutting it as the 4790Ks run really hot. So here's what I started with.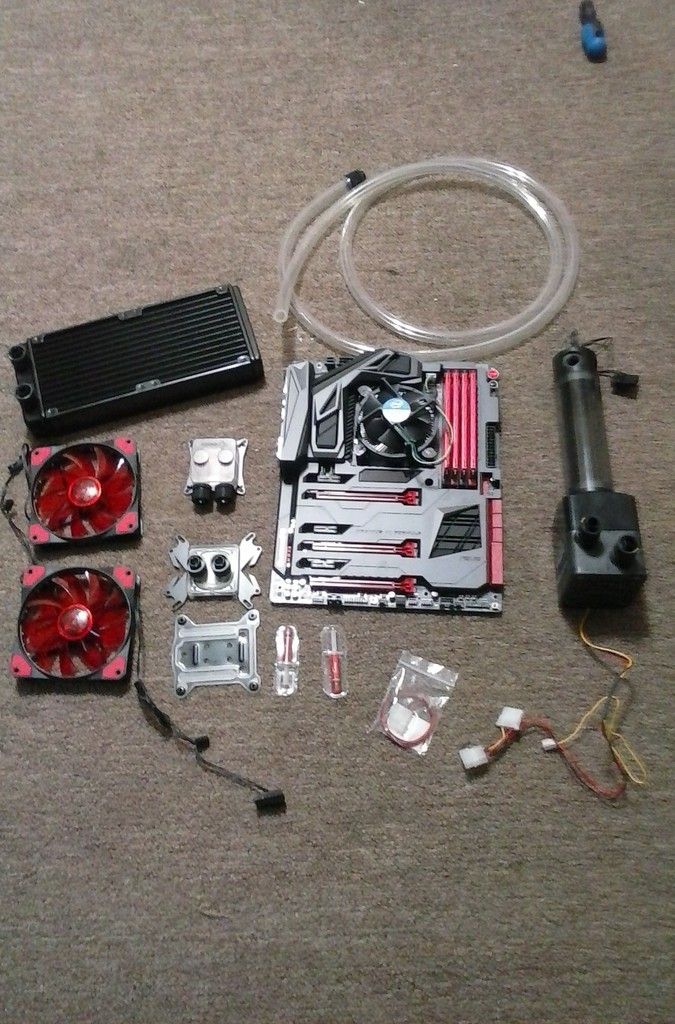
First thing first. The stock cooler had to go.
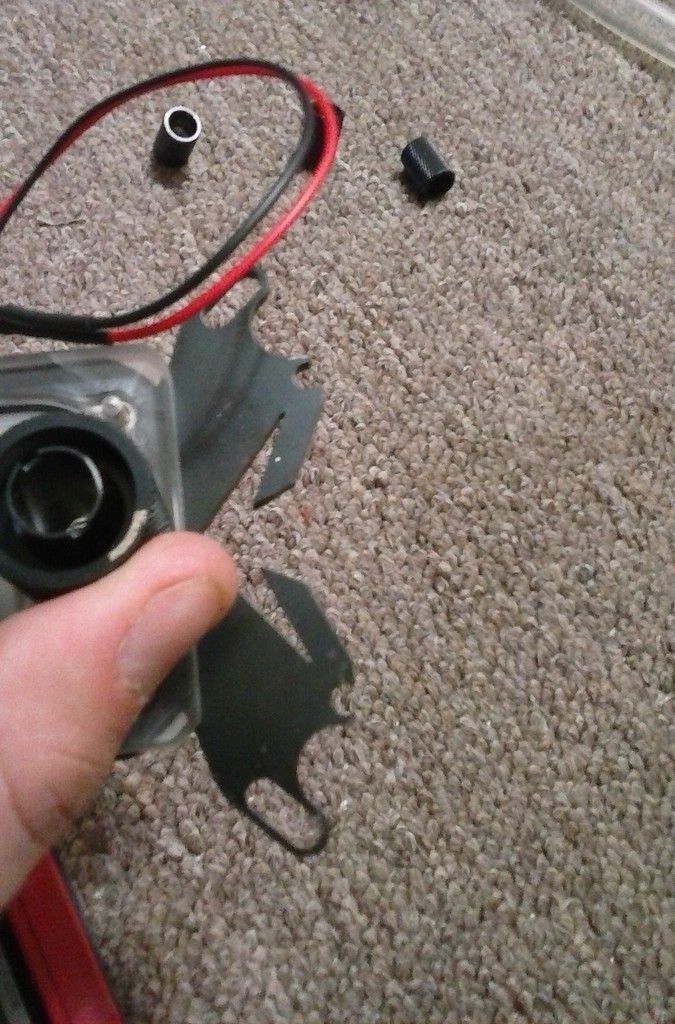
Much better. Next I had to install the new backplate for the water block to hold on to. It fit really nicely around the plate for the processor latch.
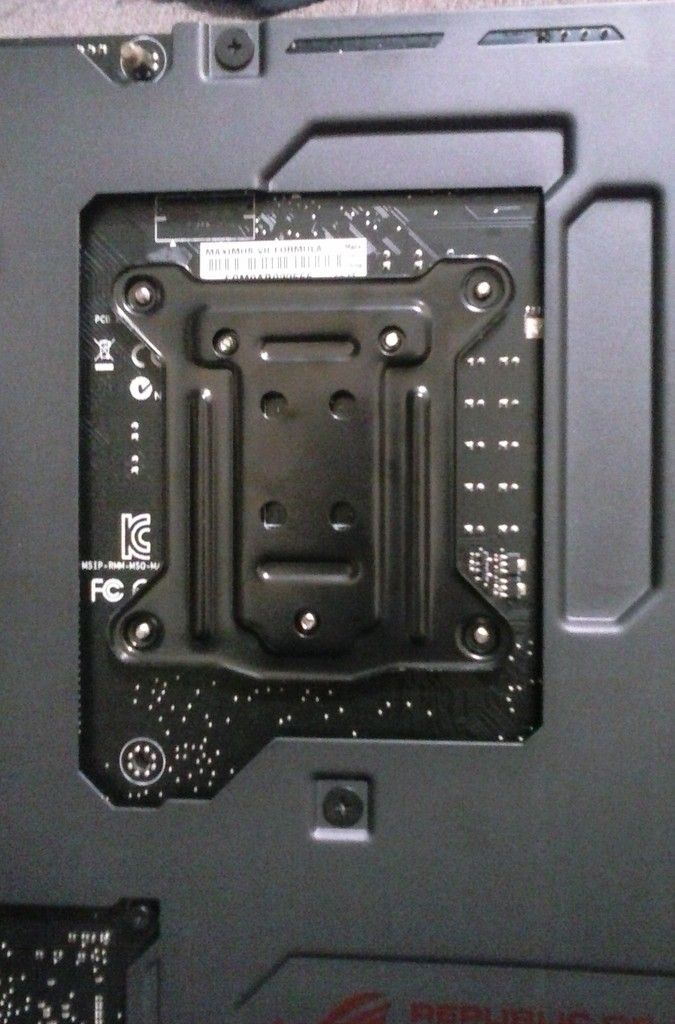
Screwed in the bolts that hold the backplate on.

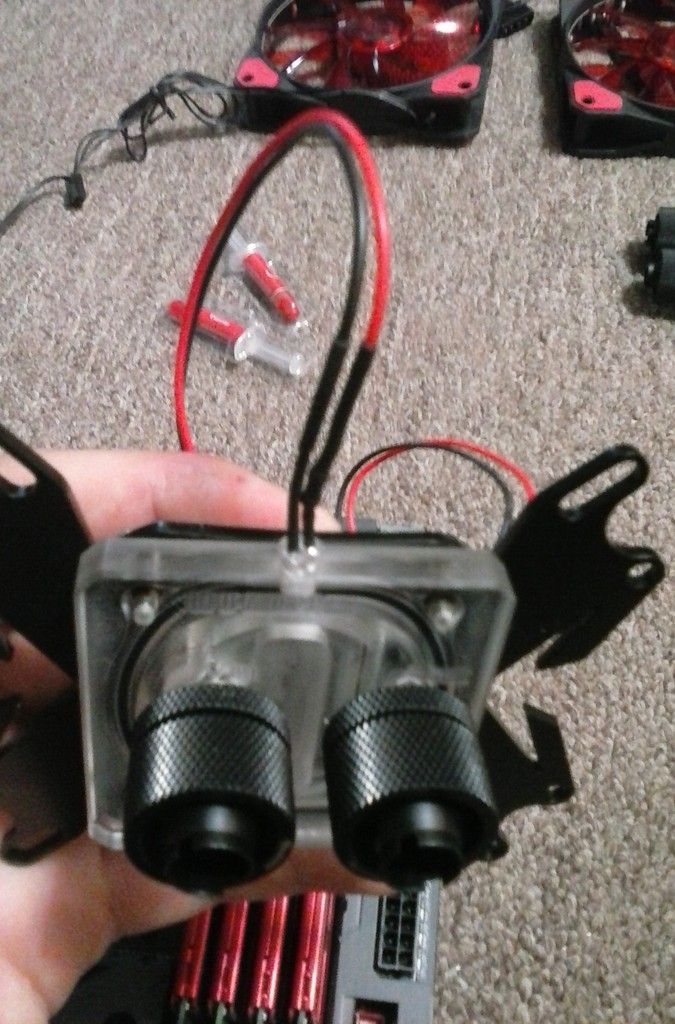
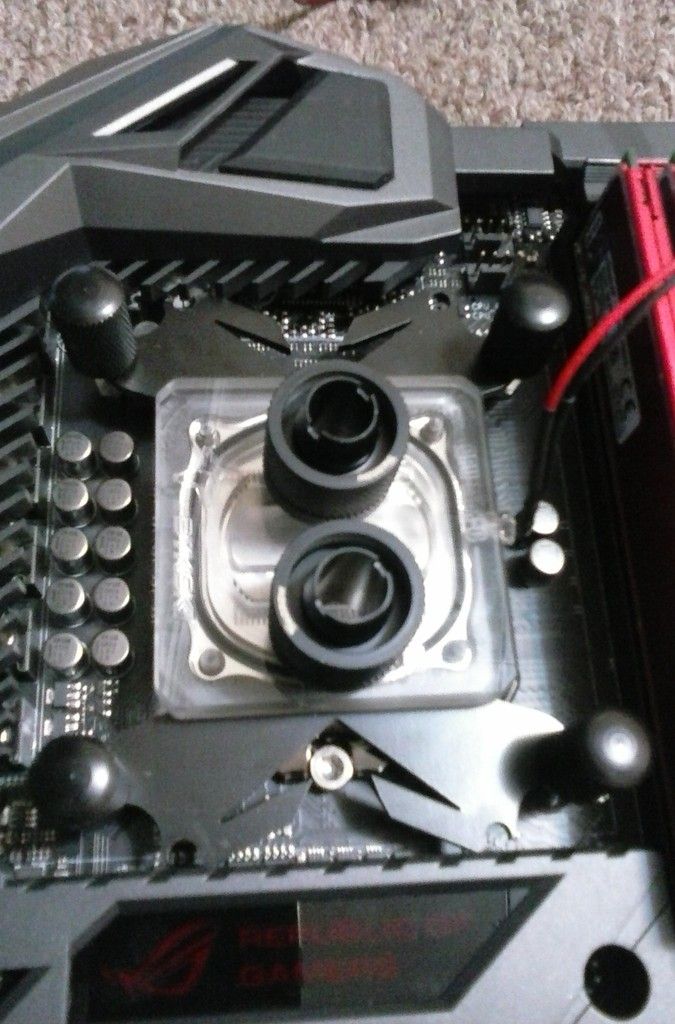
Put the little LED light thing in it's place in the water block
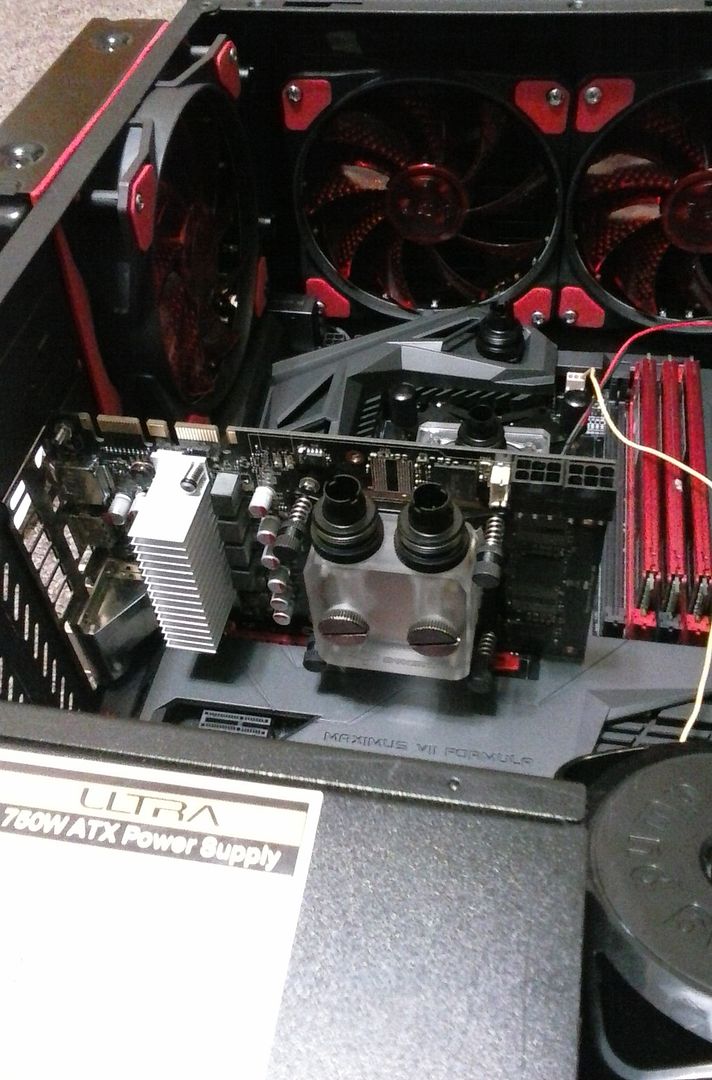
I test fit the water block before putting the thermal paste on. You can see that the water block didn't quite fit right on the motherboard because of it's dust shielding/armor.

Fortunately, I'm pretty handy and convinced the water block to get along with the motherboard better with a little bit of filing.
Ah. Much better.
Added the thermal paste.
The waterblock is held on by these nuts that screw on to the posts that hold the backplate on. It has springs that go between the nuts and the waterblock to avoid overtightening. Sometime between opening the baggie that had all that in it and actually installing it, I lost one of the springs. So I did what any man would do and found a suitable replacement.
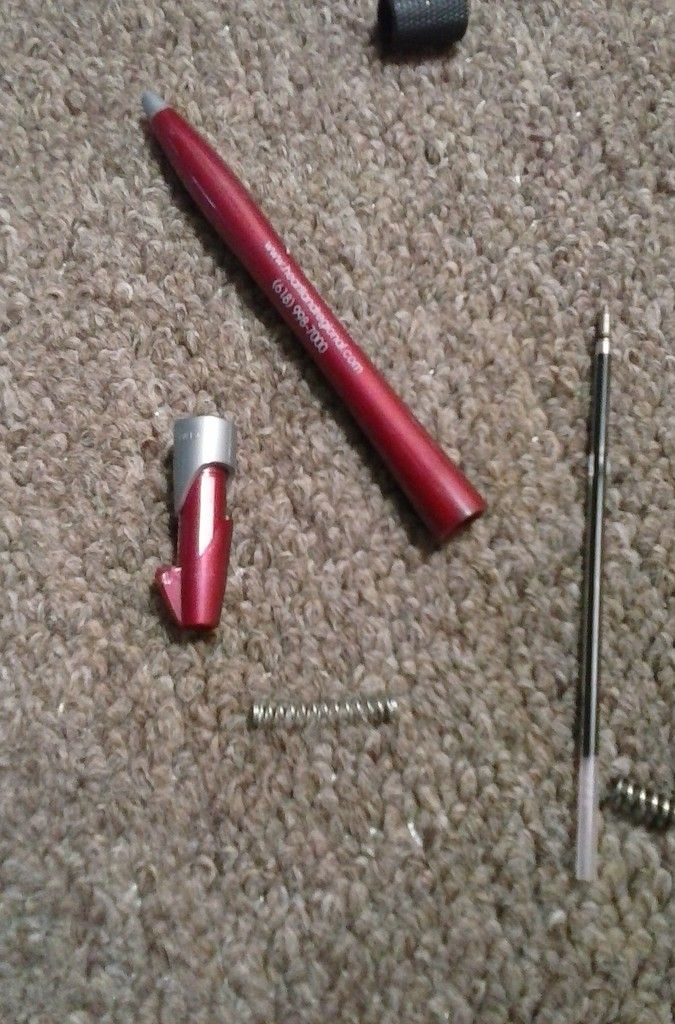
"Ahlike a glove" (Ace Ventura, anyone?)
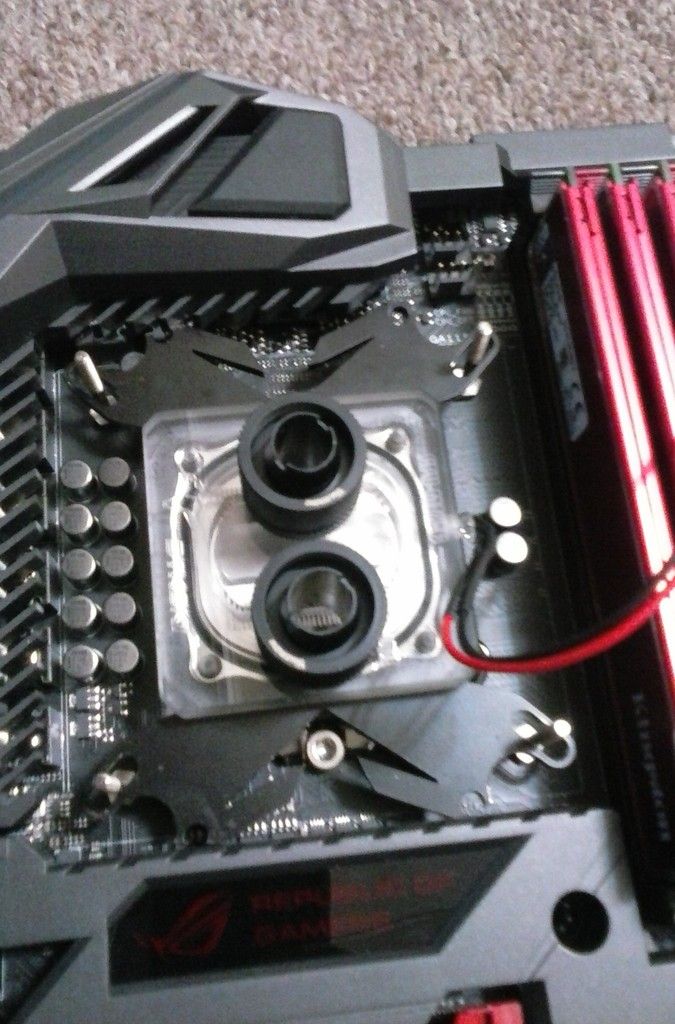
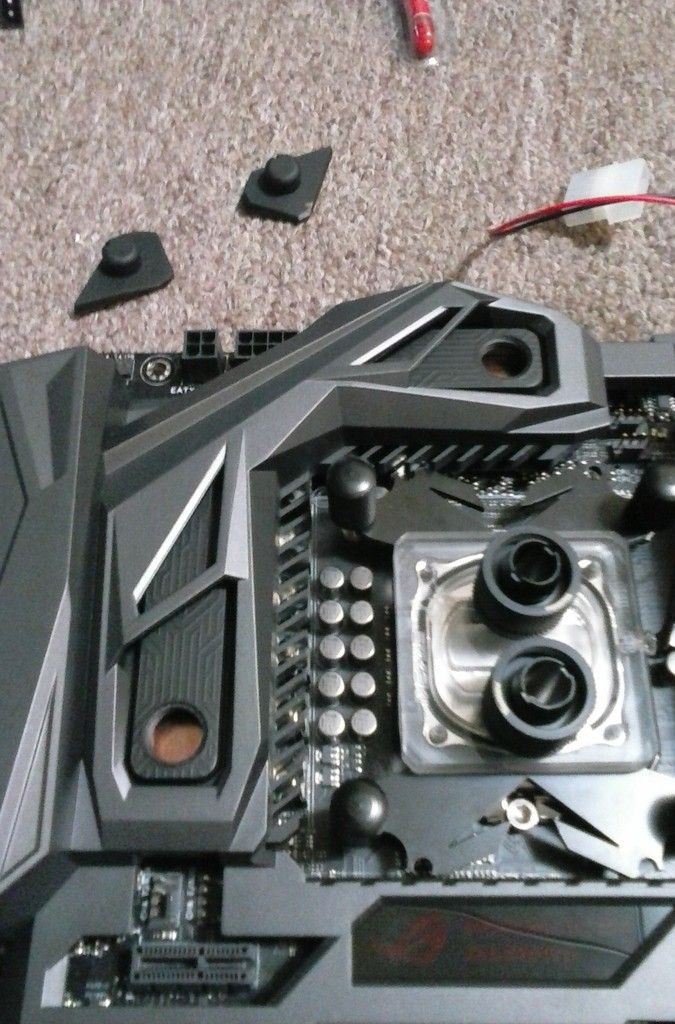
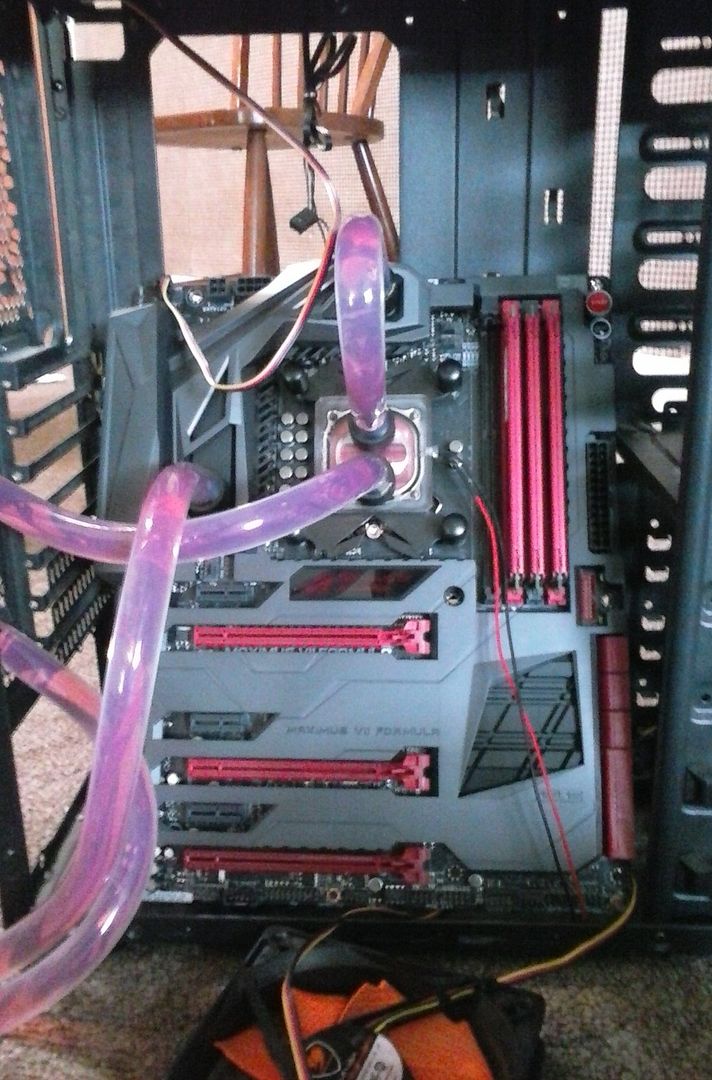
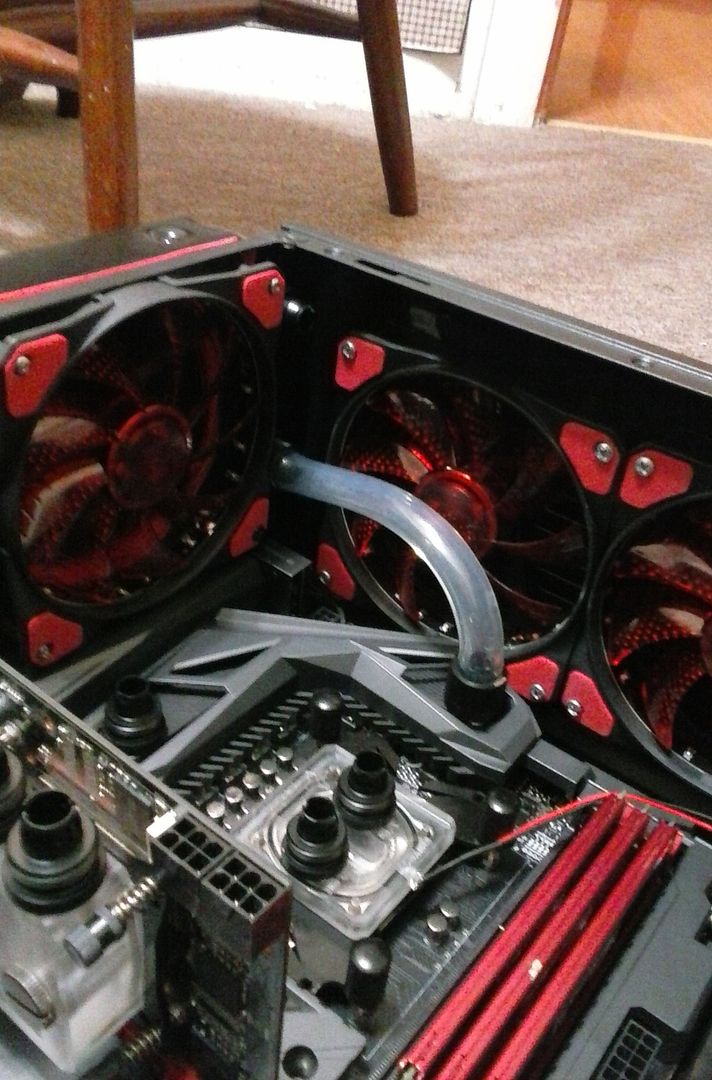
I'm not entirely sure what this particular part is called, but on this motherboard, it can be either liquid or air cooled. Since I'm running an open loop kit, I figured I might as well include it in the system. I took out the rubber stoppers that keep dust out if you are just going air cooled.
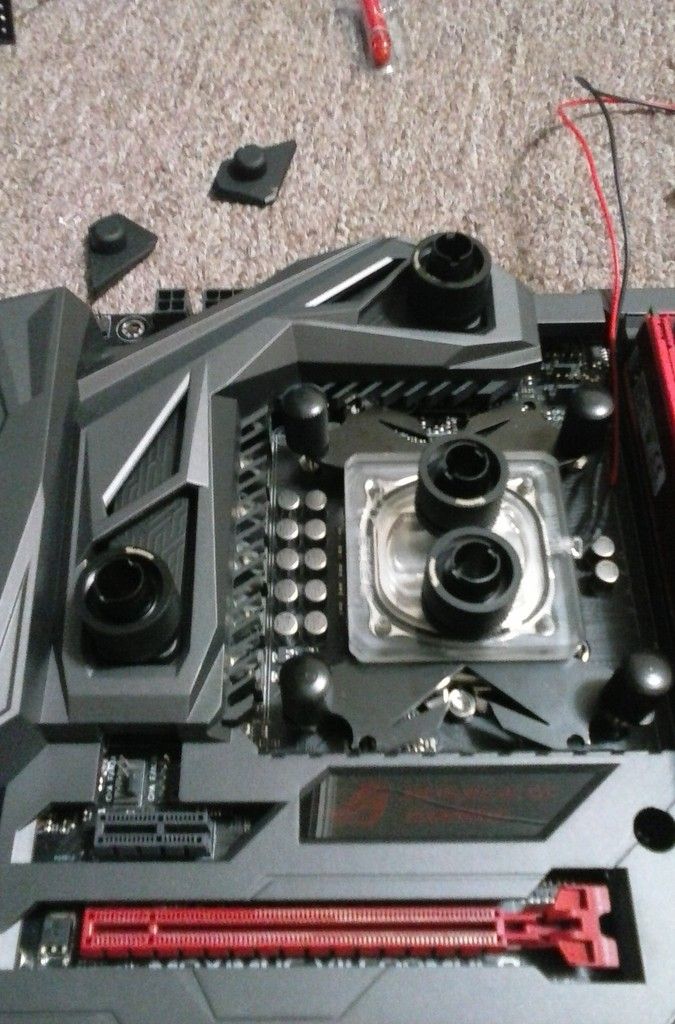
The kit came with a GPU water block, but I'm waiting to get my GTX 760 fixed before I add my graphics card to the system, so I robbed the compression fittings off of the GPU block and installed them in to the ports on the motherboard.
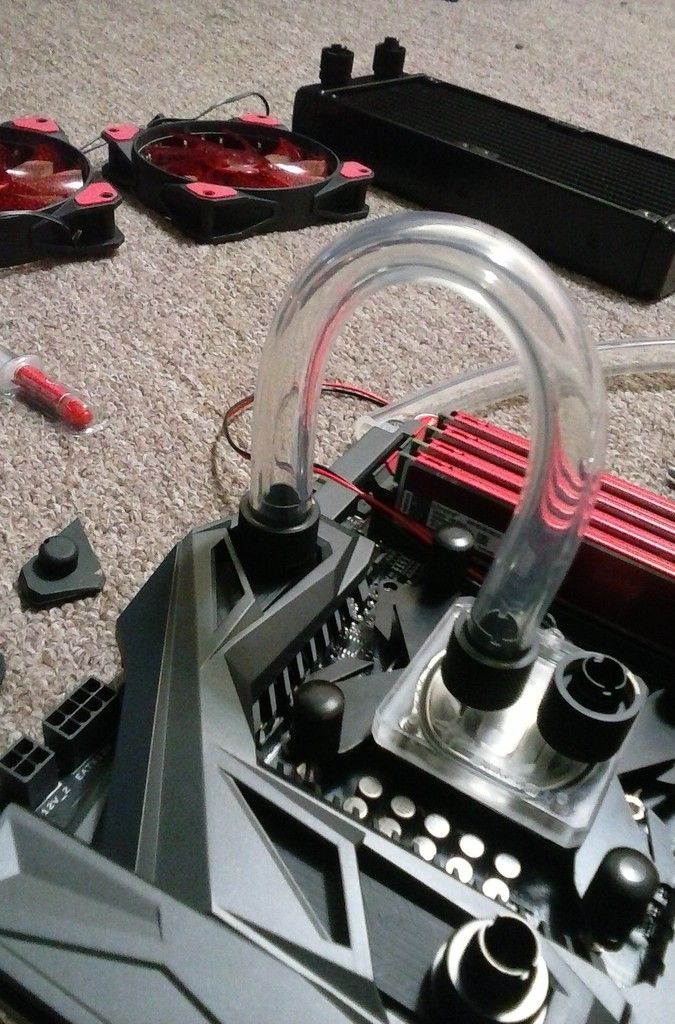
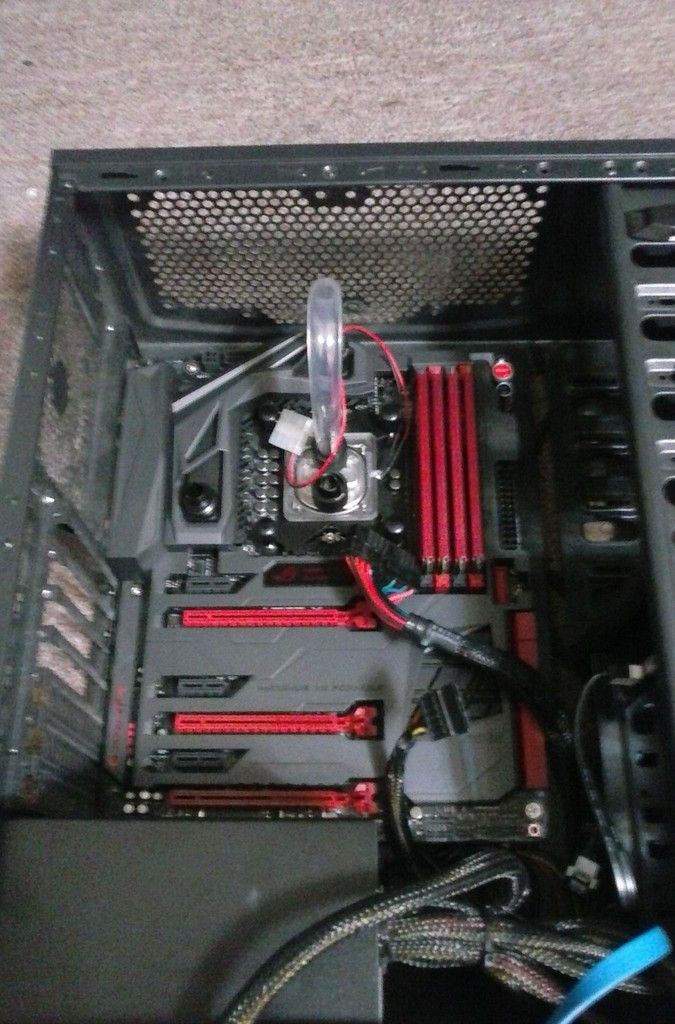
Cut the first piece of tubing and installed from the CPU water block outlet to the motherboard inlet becuase it's a lot easier to do while it's out of the case since this piece's length wasn't affected by space or location in the case.
Installed the motherboard in the case.
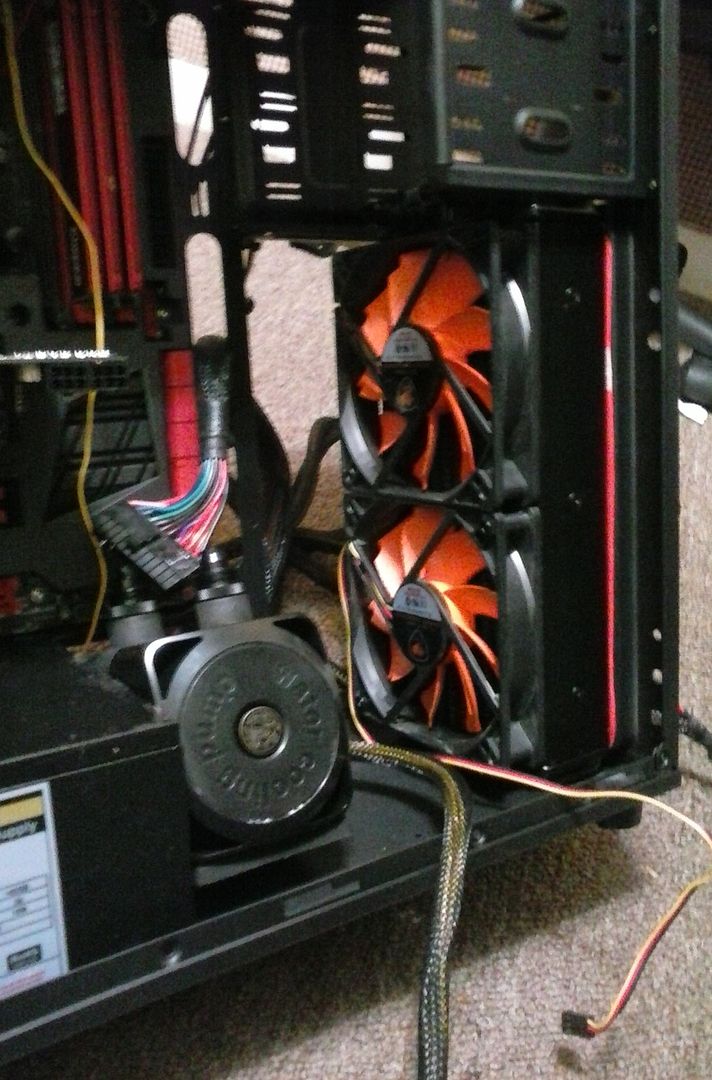
Used 4 of the 8 (two per fan) the long screws that came with the radiator to attach the fans inside the case to the radiator through the fan mounting holes in the case.
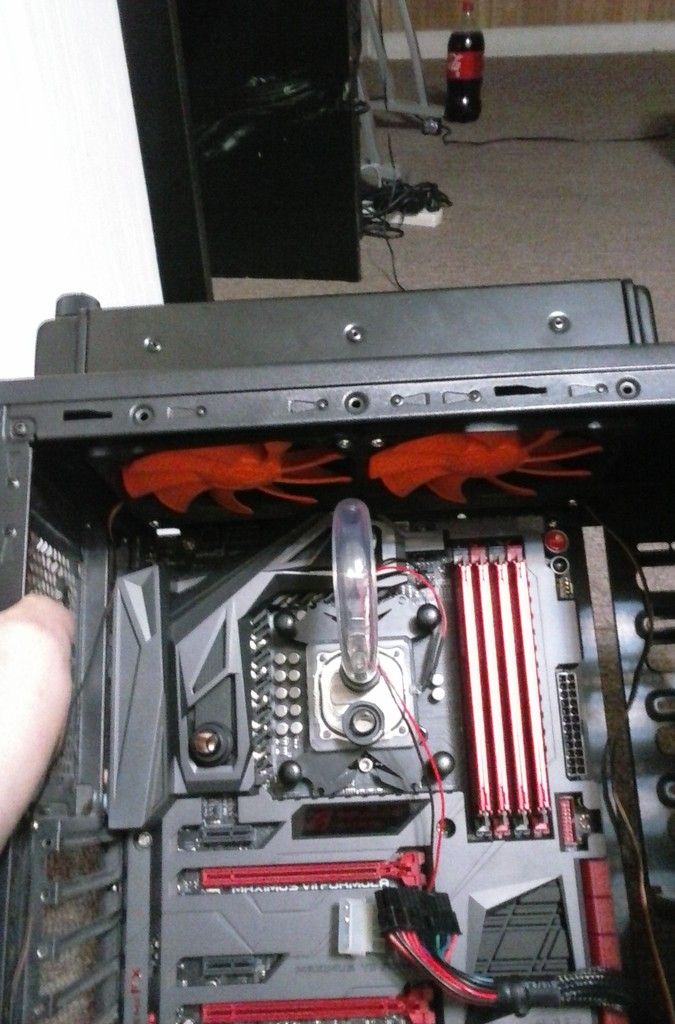
Then attached the two fans that came with the kit as puller fans on the other side of the radiator on the outside of the case.
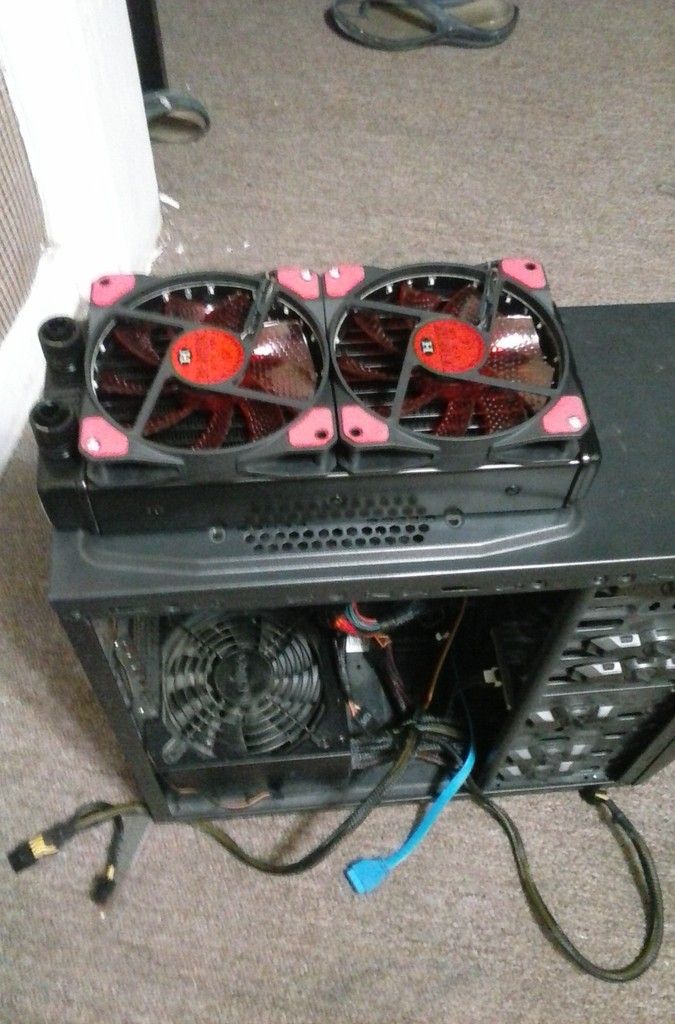
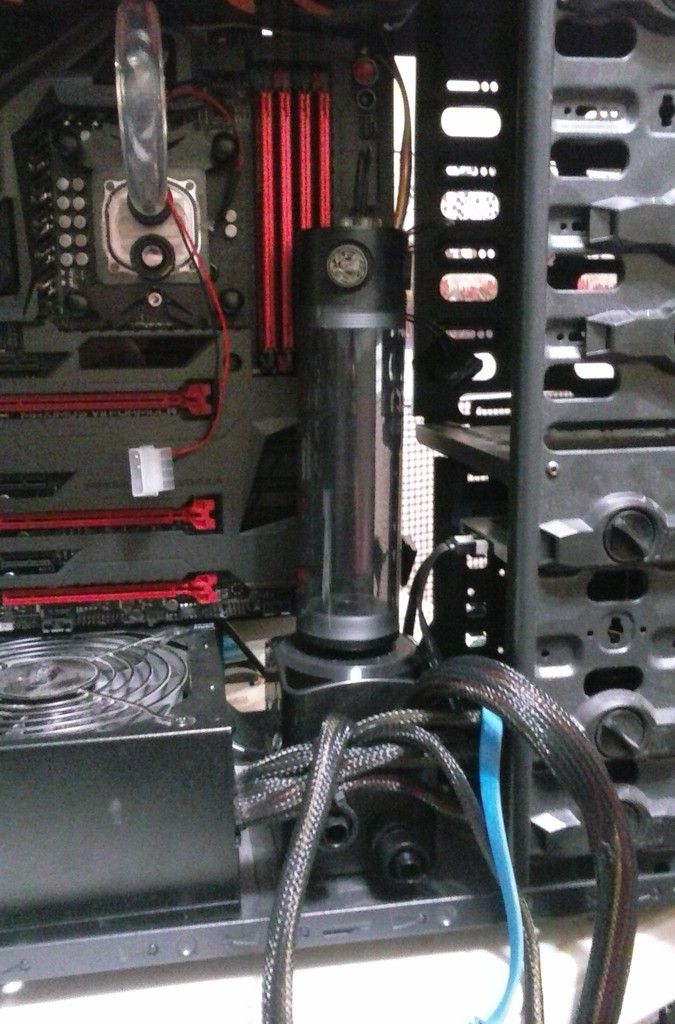
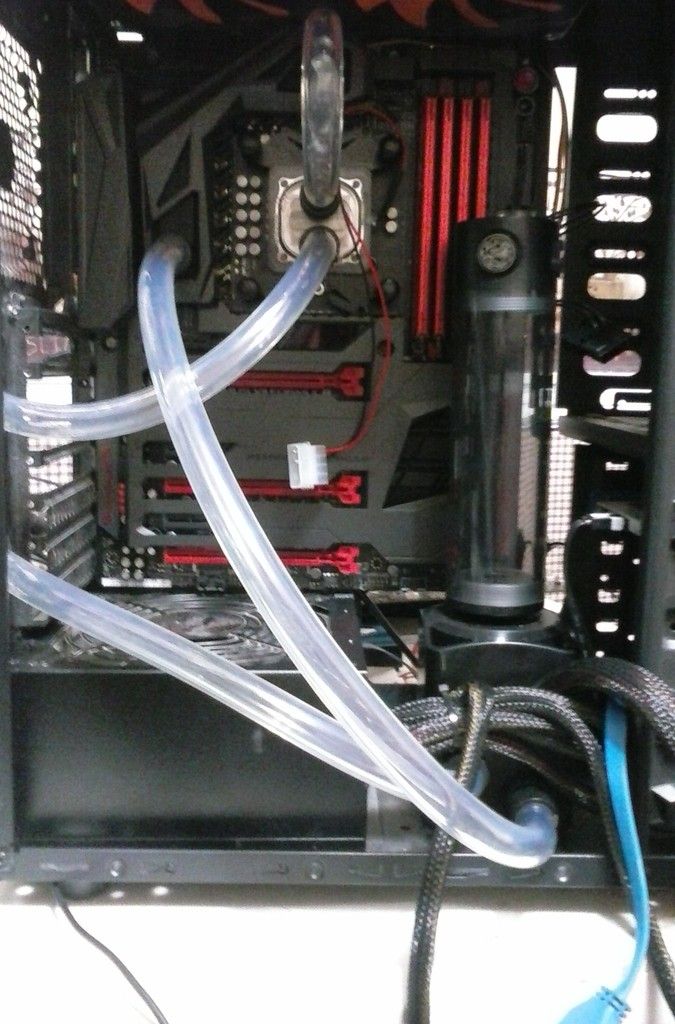
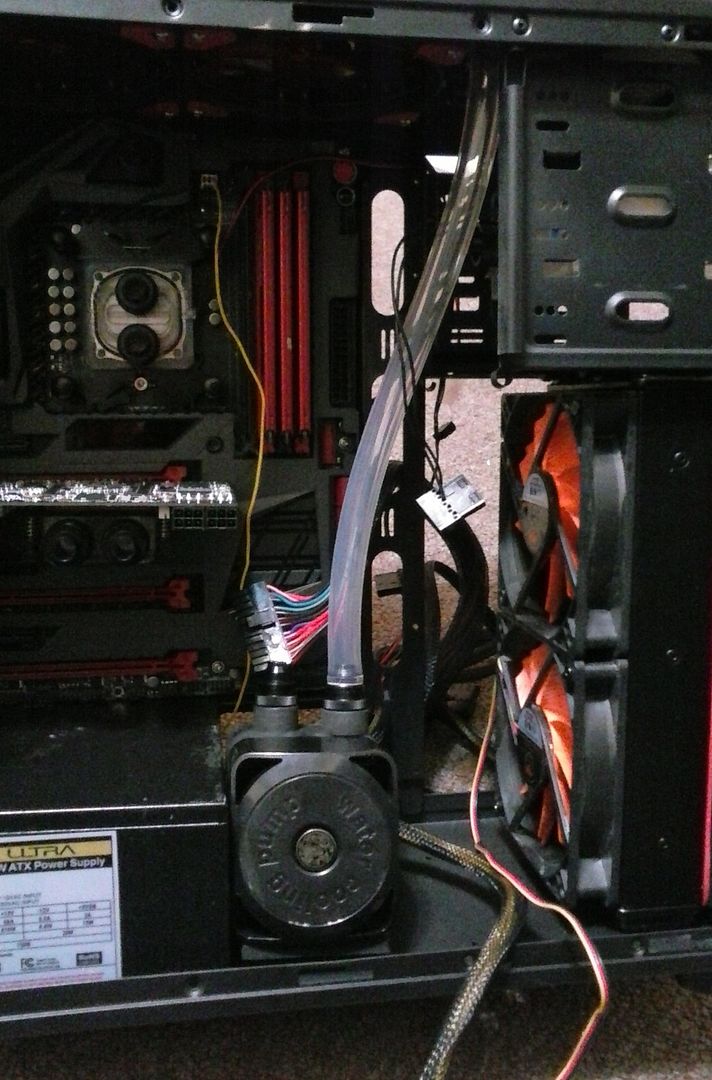
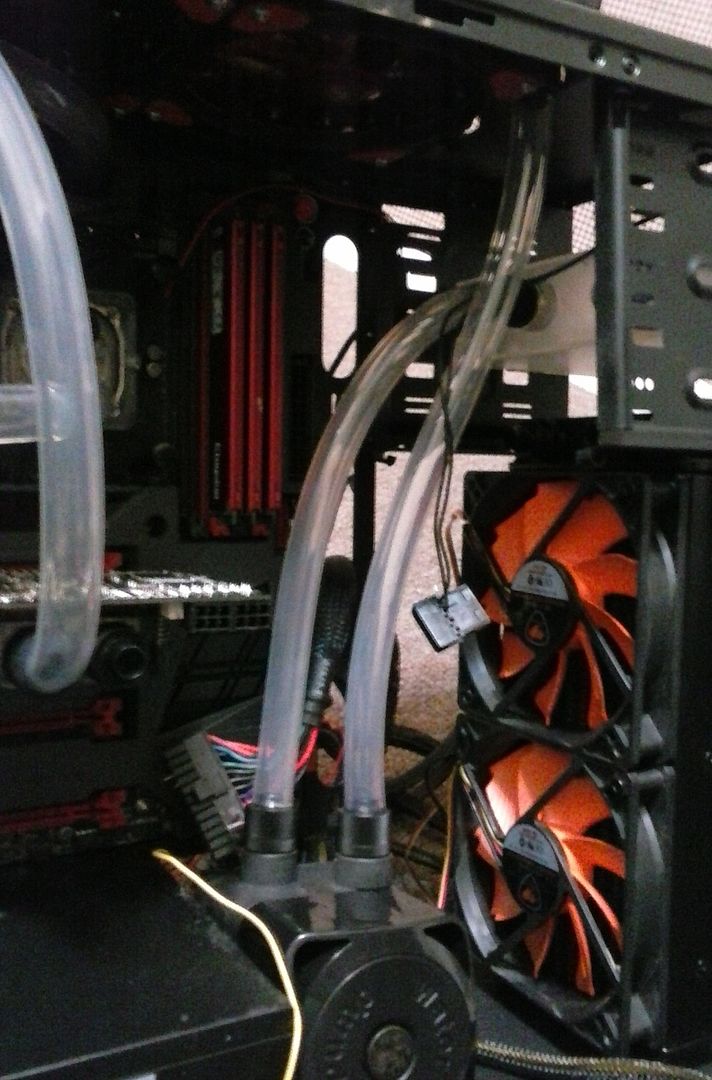
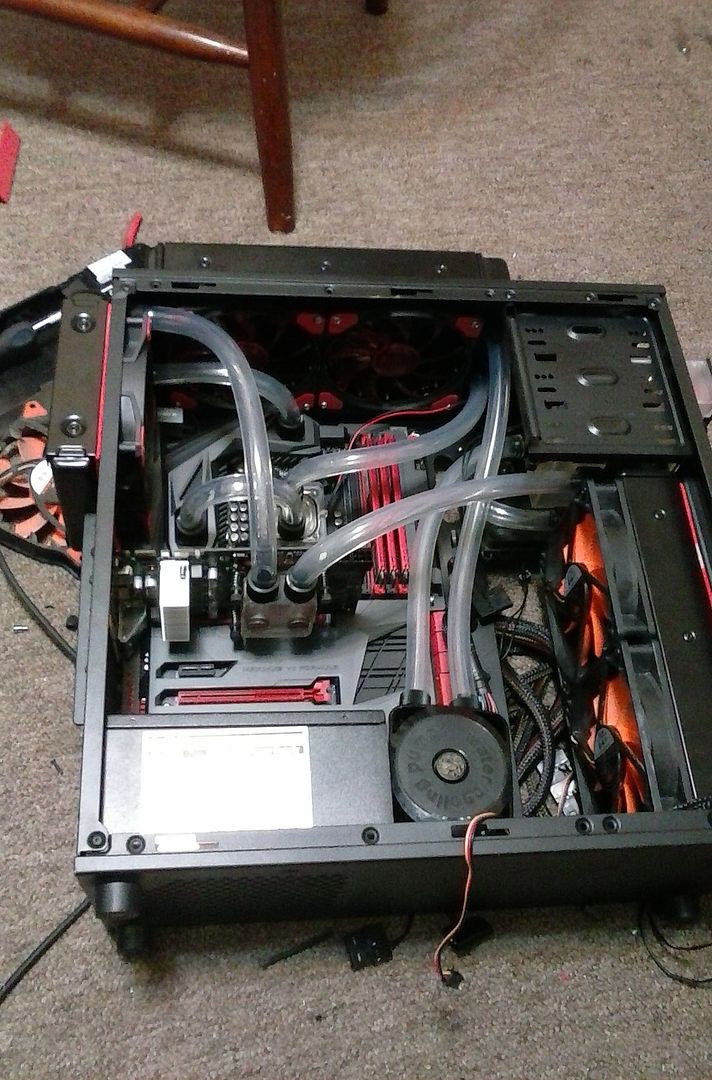
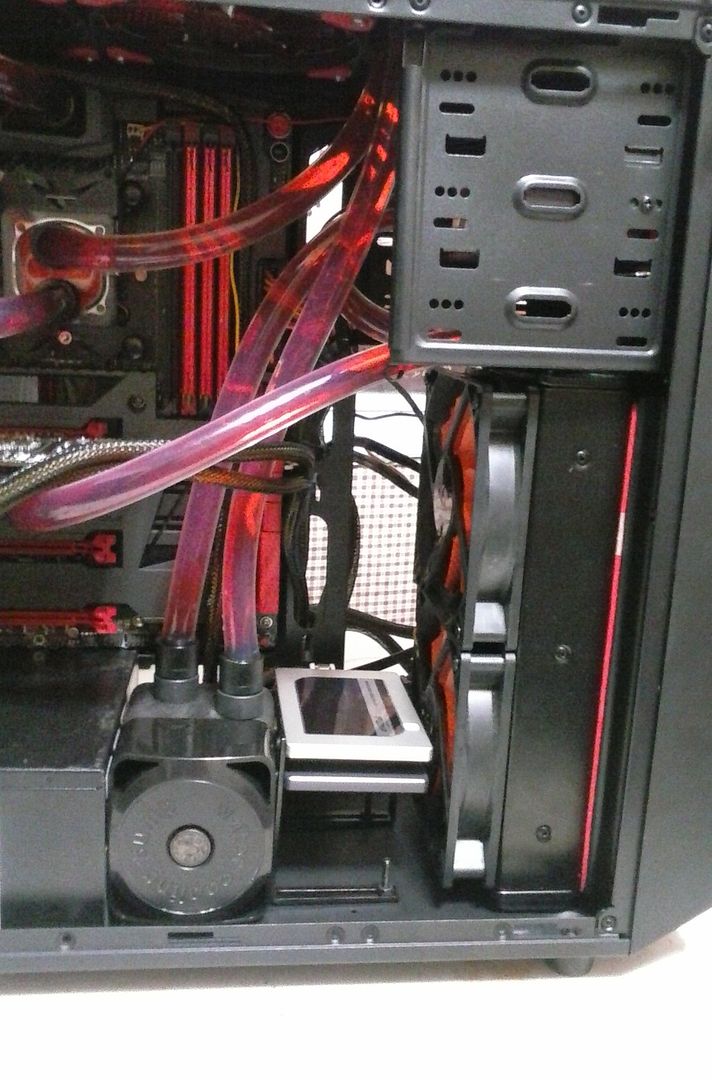
Made sure there was enough room to fit the pump and reservoir. Looks like as good of a place as any for this case.
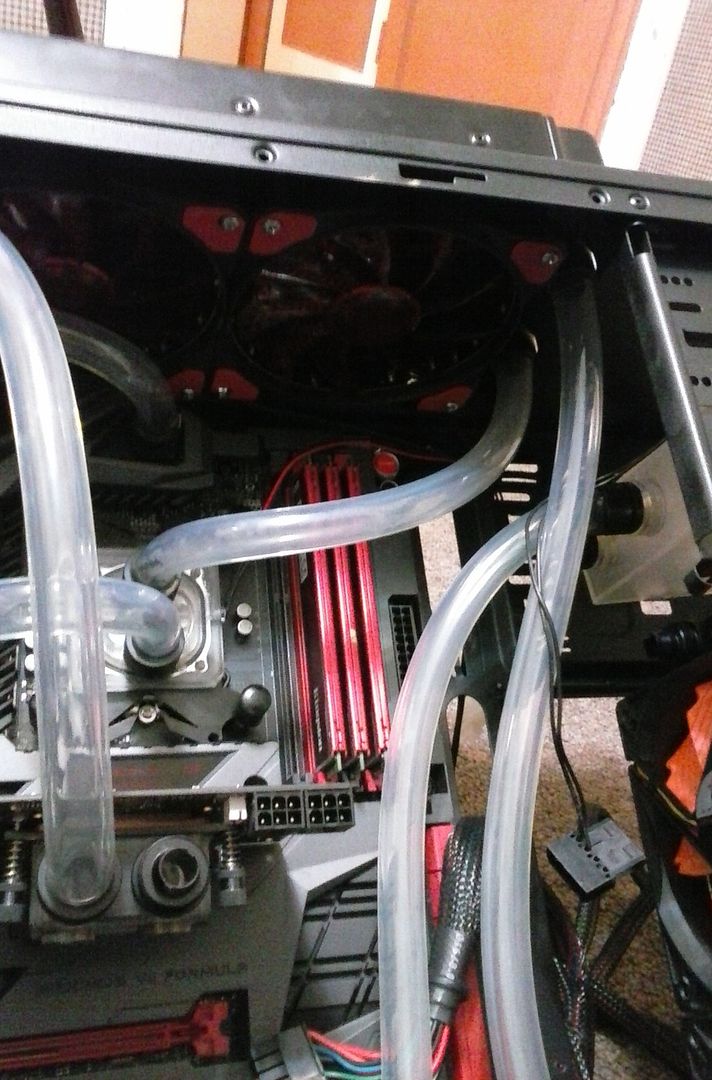
Ran the tubing from the pump outlet to the radiator inlet and from the radiator outlet to the CPU water block inlet.
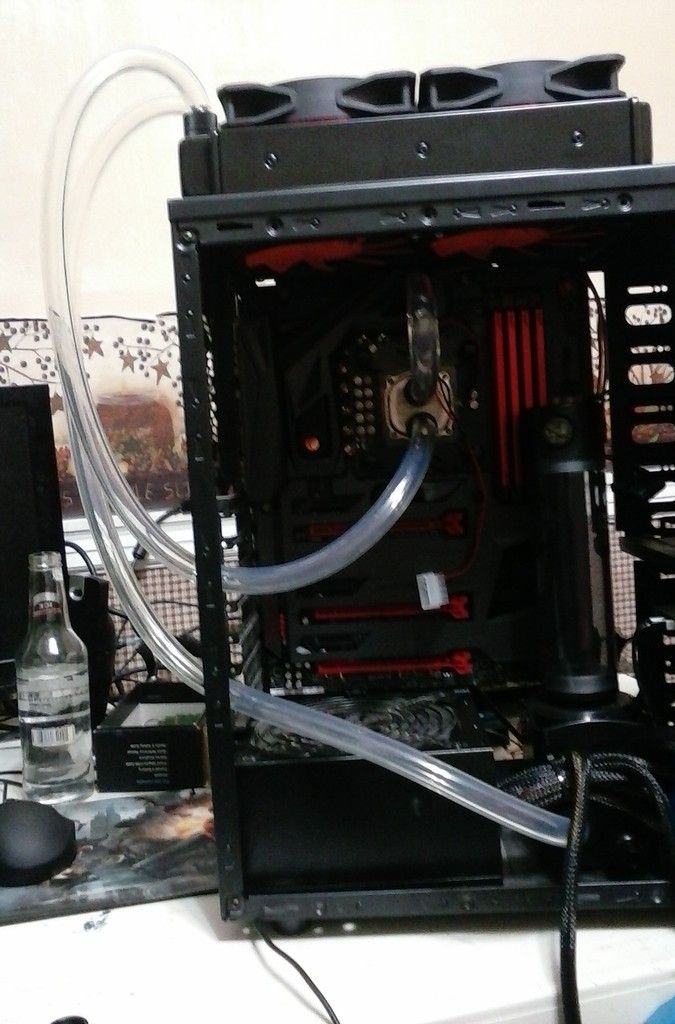
Then from the motherboard outlet to the pump inlet.
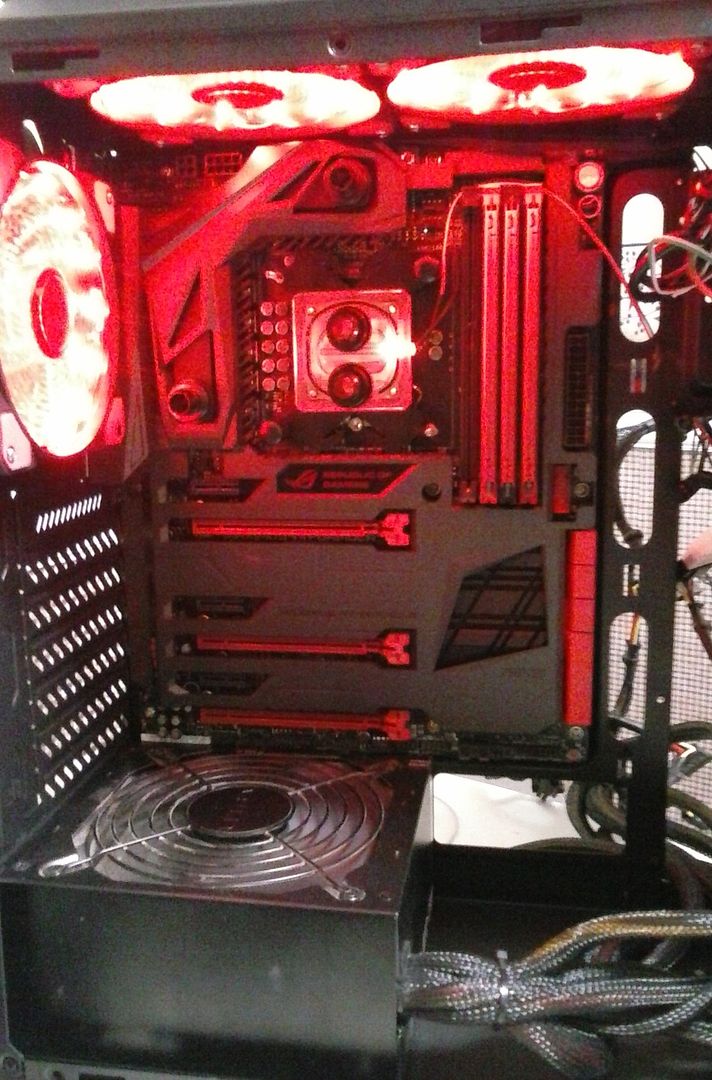
Then filled it with some of Mikeeman's own super secret coolant.
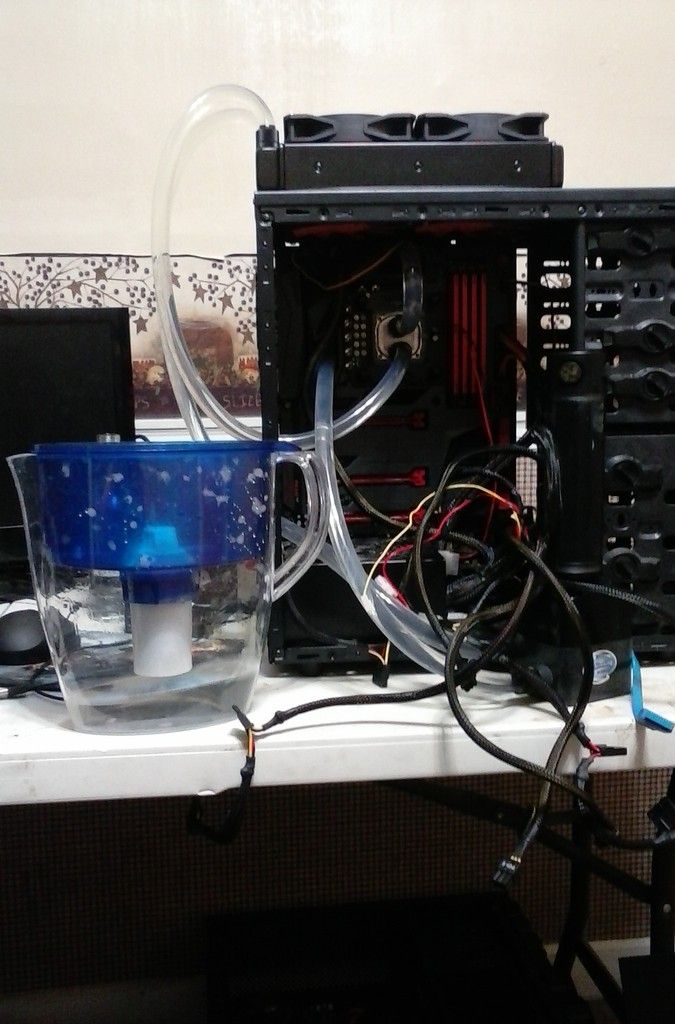
Bled all the air out of the system and put the pump and reservoir back in the case.
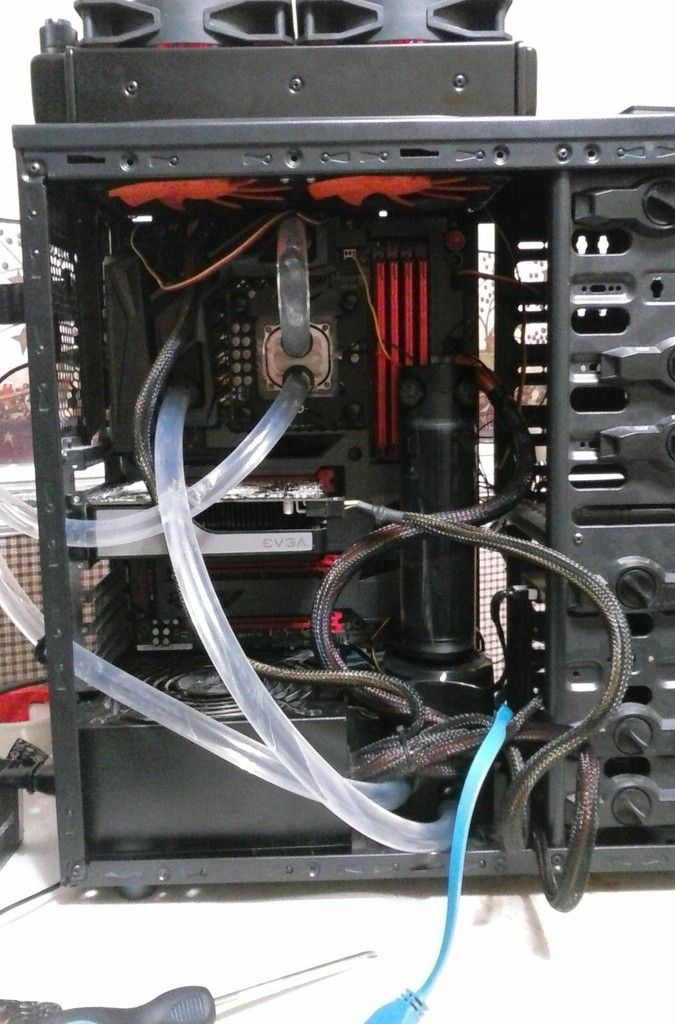
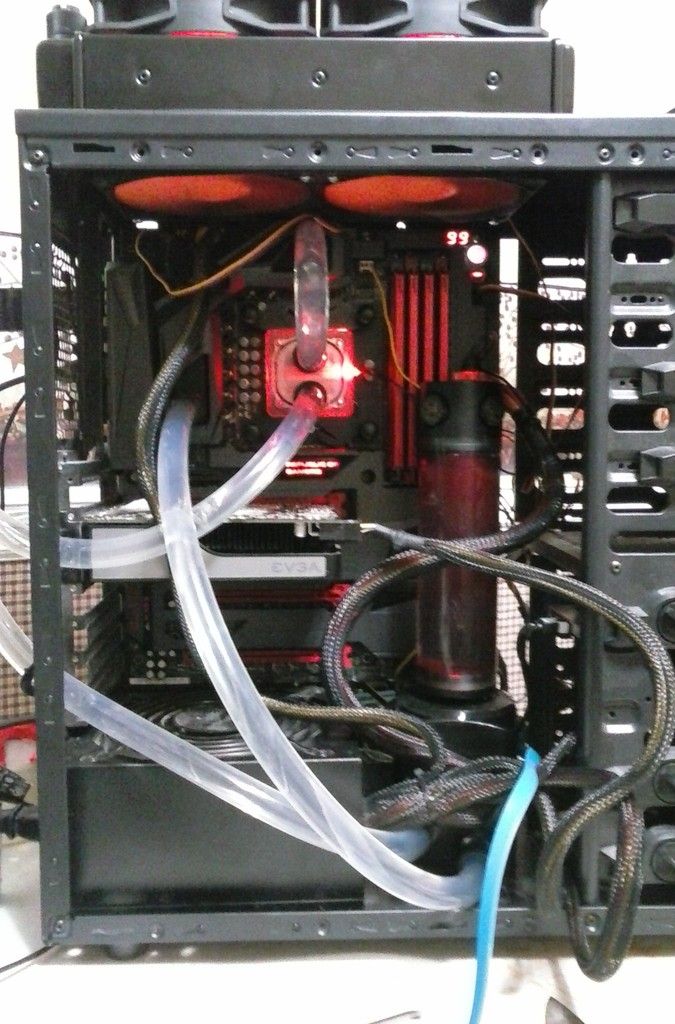
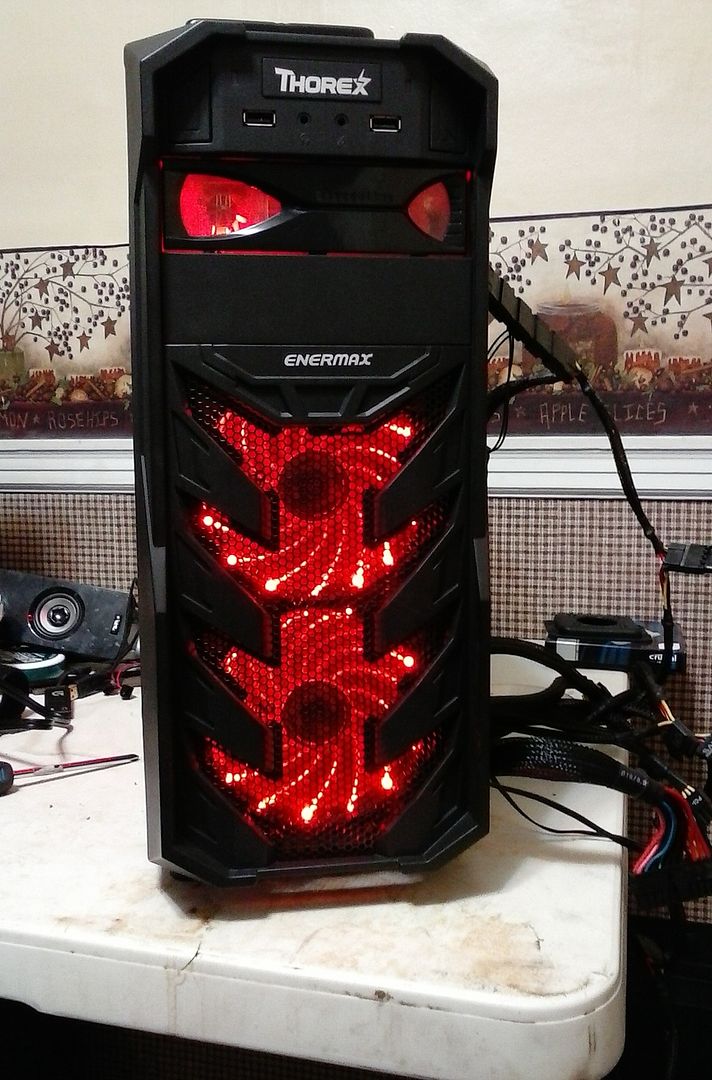
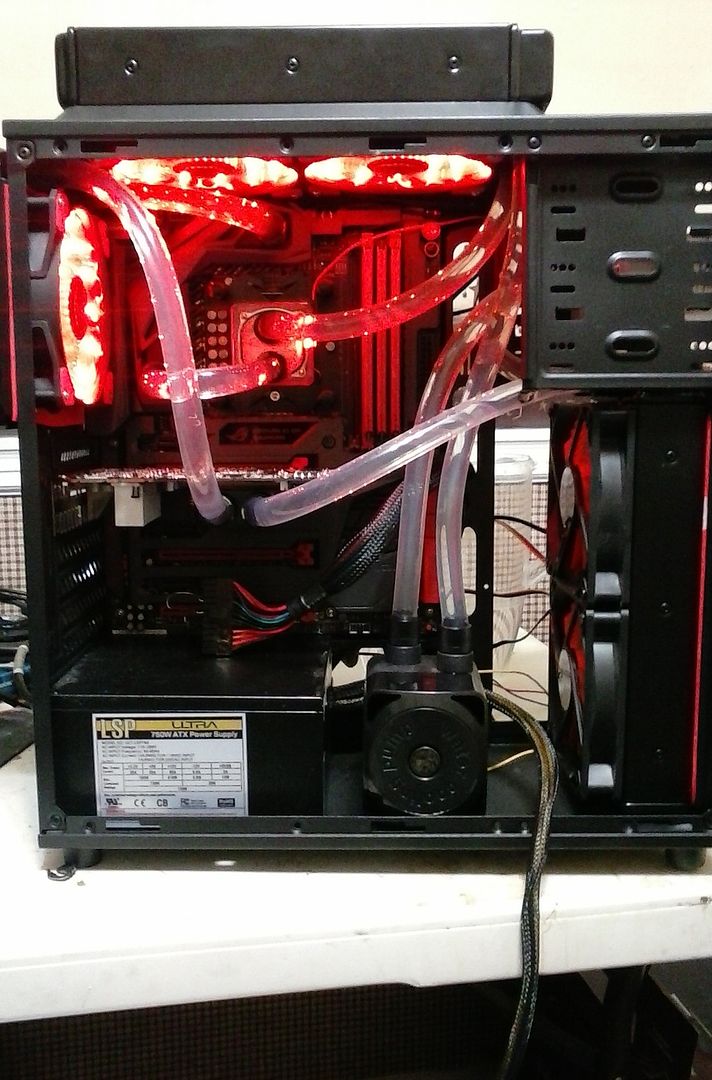
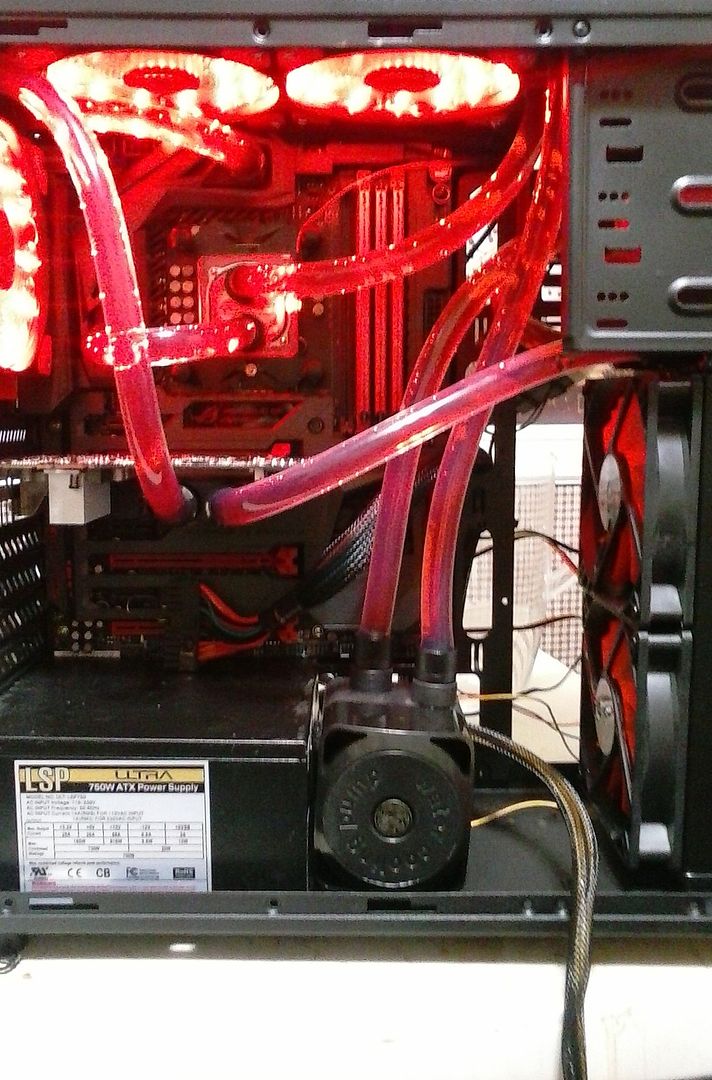
And there it is all glowy and running!
Hope you guys enjoyed this little build along. It will continue as I add more to the build like a new case (I'm just using this one temporarily), some more radiators and fans, and installing the GPU water block and adding that to the liquid system. Then I'll move in to overclocking and benchmarking. If you have any questions about PC that pertain to hardware (I'm not so great with programming or networking) feel free to ask! Thanks for reading!
(UPDATE)
Not that anyone is actually following this but I got my new case in on Friday and picked up the rest of my liquid cooling parts from the post office on my way in to work this morning. Should get to start building it in it's permanent home this evening.
(UPDATE)
So I finally got all my new stuff in on Monday. Two new radiators, 3 120mm LED fans, more tubing, a drive bay reservoir with a flow meter, and a case.
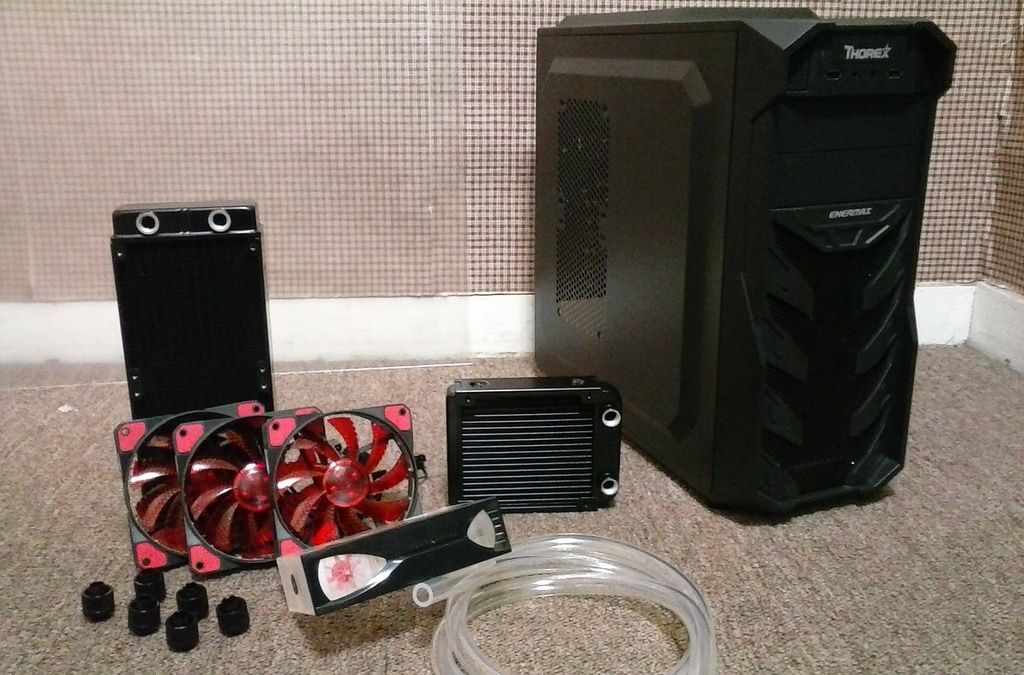
It's only a mid tower, but it's got all the room I need. Well... Sort of. It WILL have all the room I need.
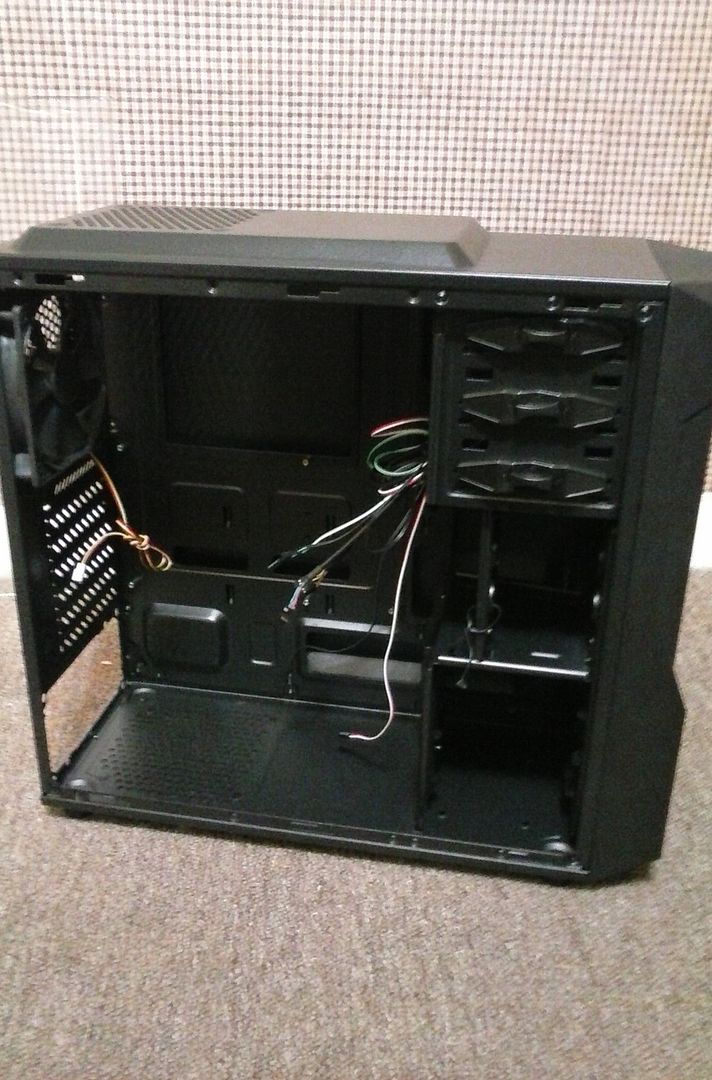
Ok, let's get all the panels and everything off of it that we don't need right now.

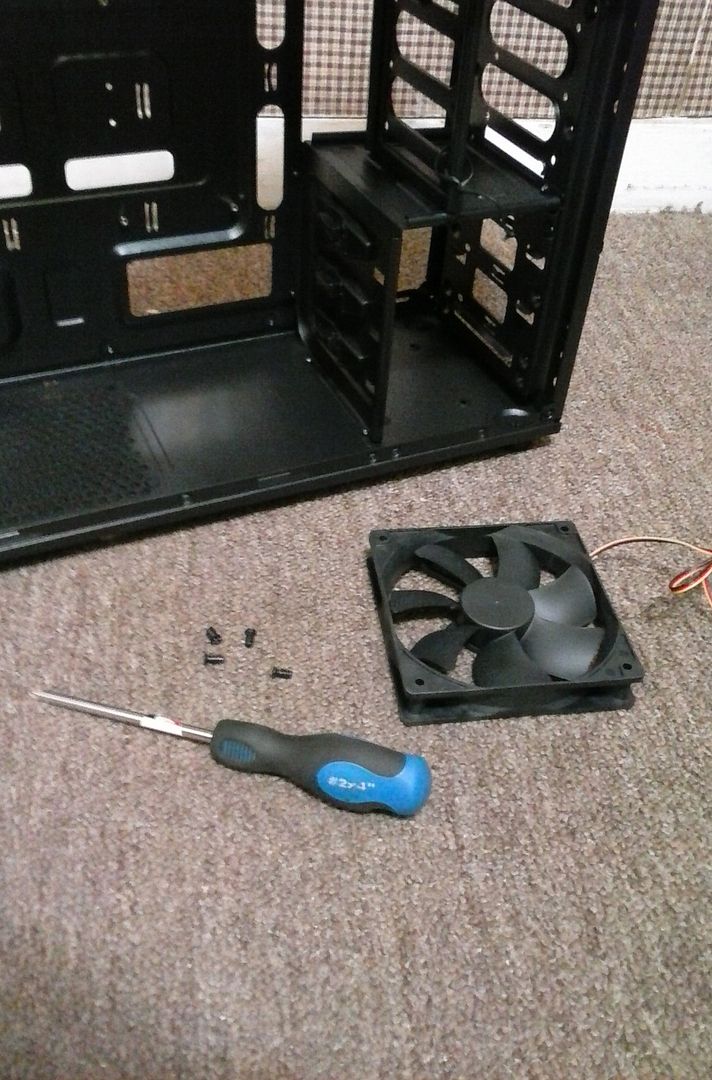
Great, It came with a 120mm fan pre installed on the back panel.
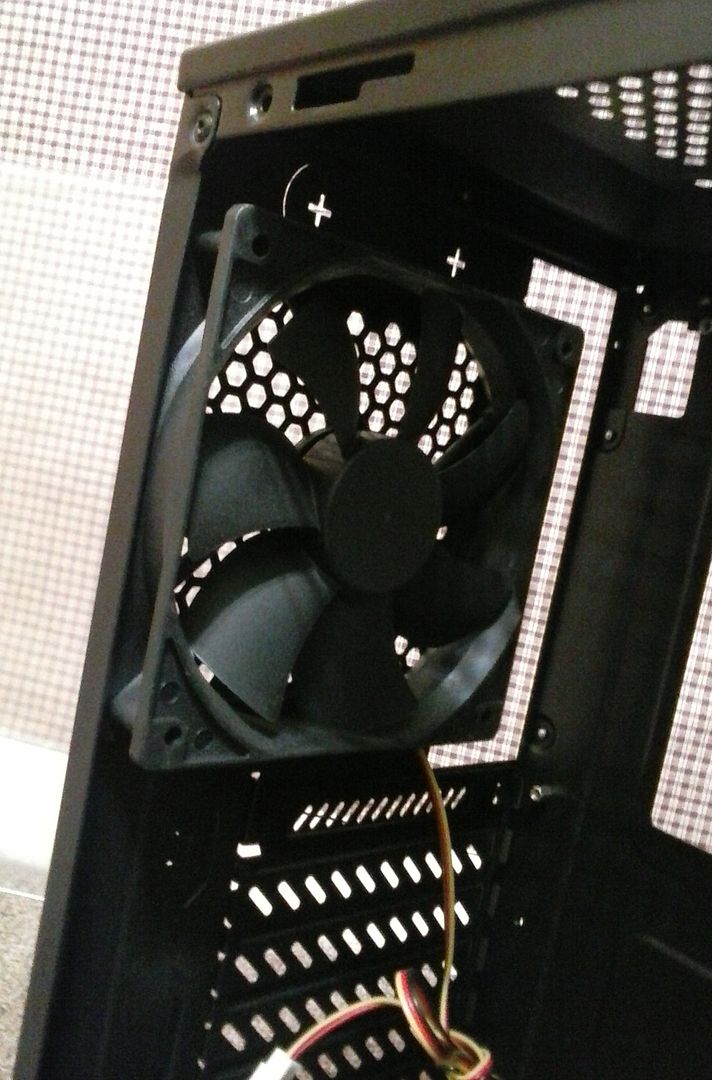
That's not where it's going to live, so let's get that out of the way.
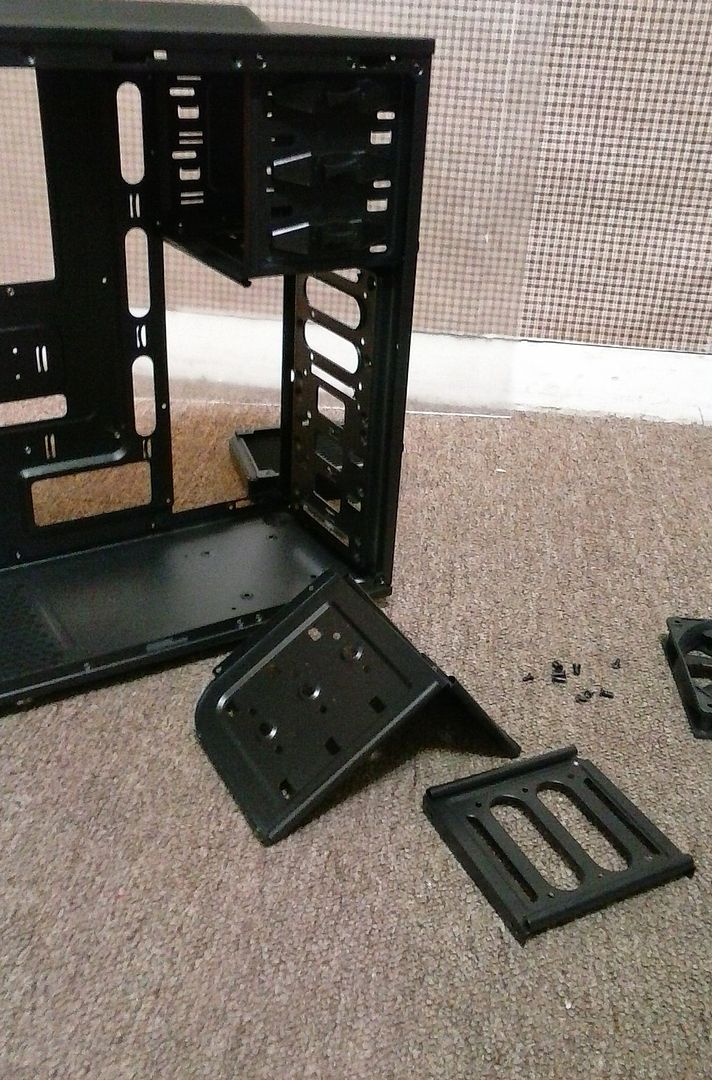
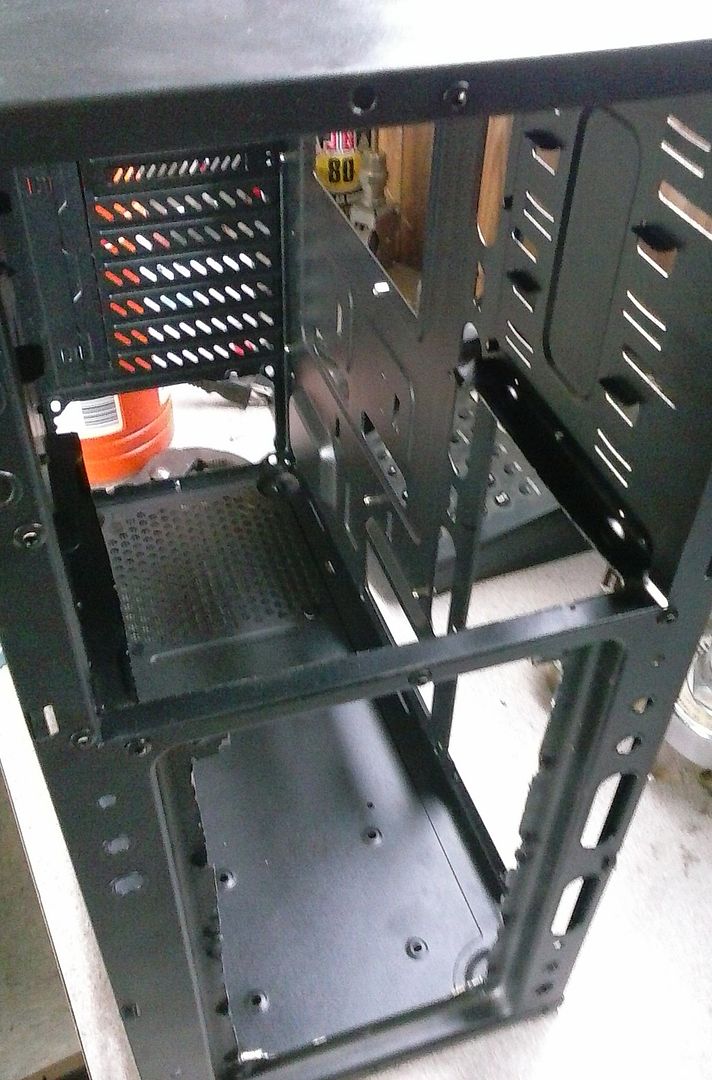
So this particular case comes with a removable/adjustable section for smaller drives. It's kind of right where I plan to put one of my radiators, so that's gotta go.
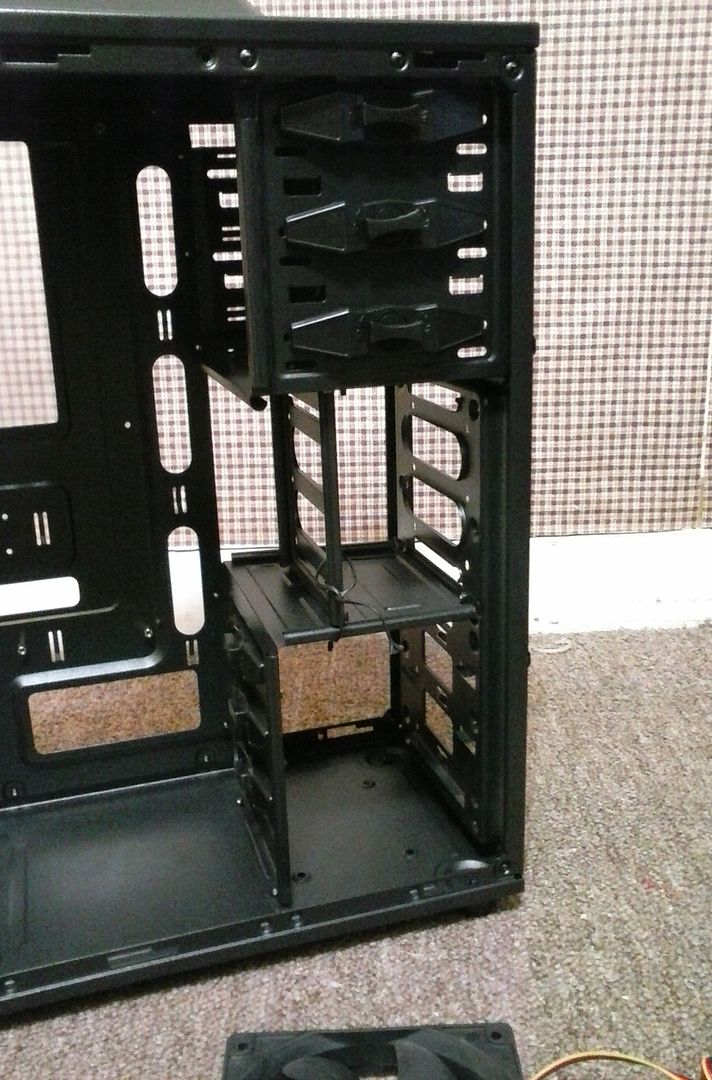
That's better.

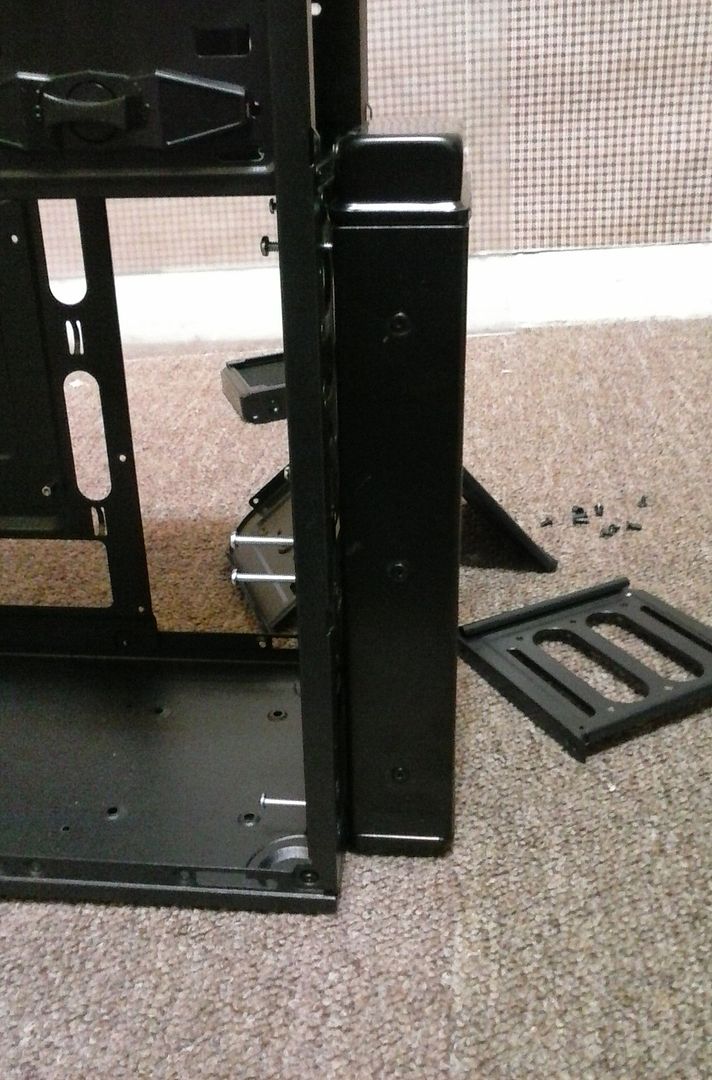
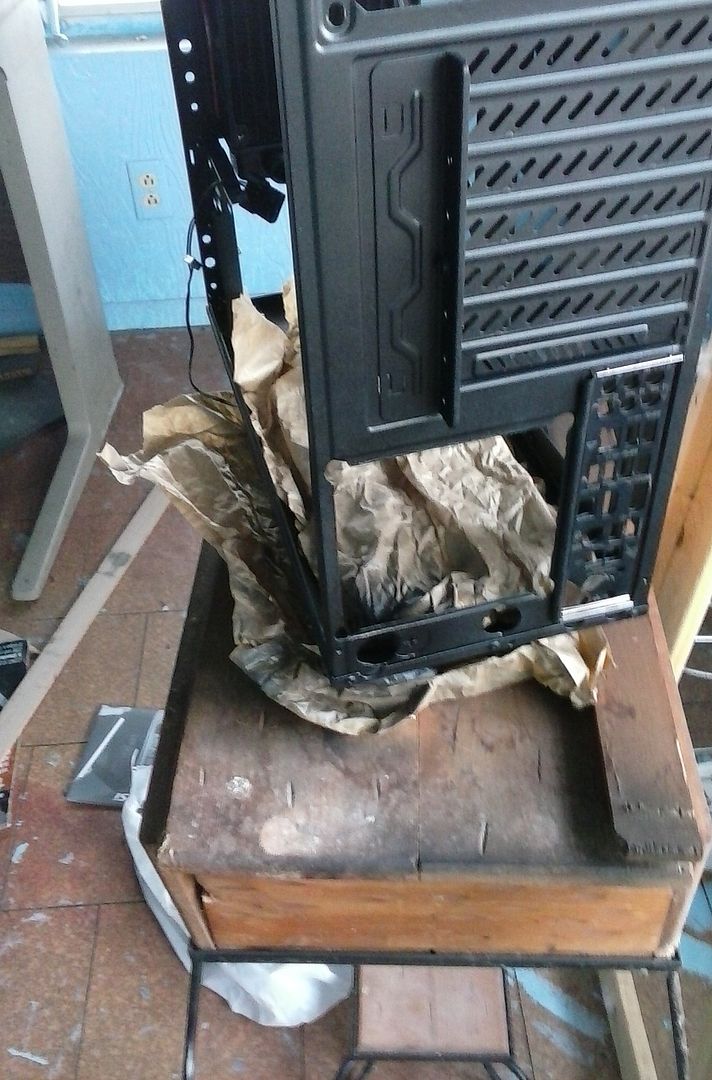
The drive bay for the regular sized hard drives, however, was riveted in. So I had to get out my rotary tool and cut the rivets out.
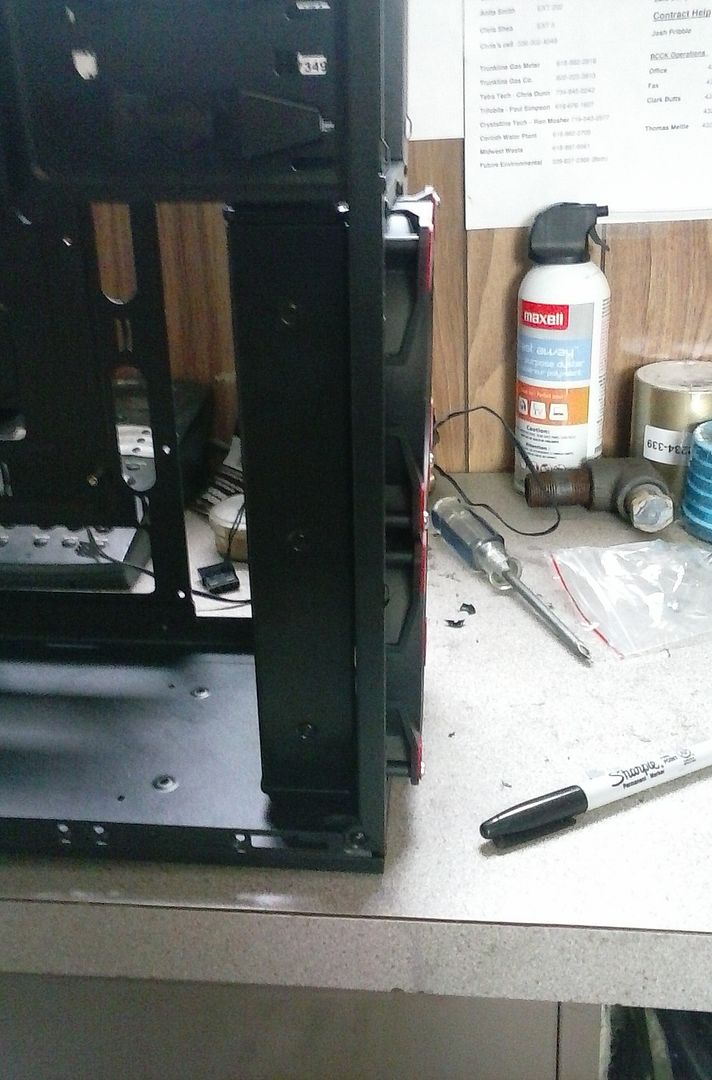
Cool. Much more room. Here I'm sizing up where I need to cut out on the front panel. The piece that is there has pieces that stick out that won't allow for a seal between the fans and the radiator, so it has to go, too.
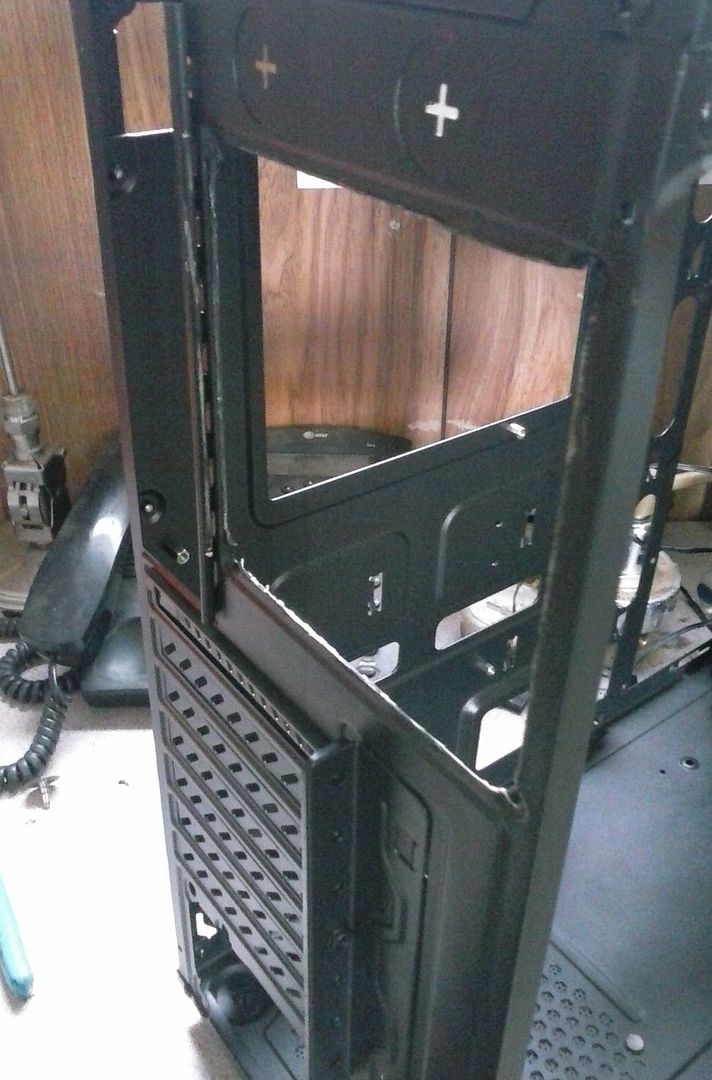
If it looks like I'm suddenly in a different place, well... That's because I am. I may or may not have worked on this some at work, so... Shh! Don't tell! Anyway, I got the front panel all cut out.

The bottom part of the CD drive bay wasn't quite tall enough. The radiator is too tall, so I had to cut that part out, too. It won't matter because I'm going to mount everything in those bays with screws, so it will still be stable.
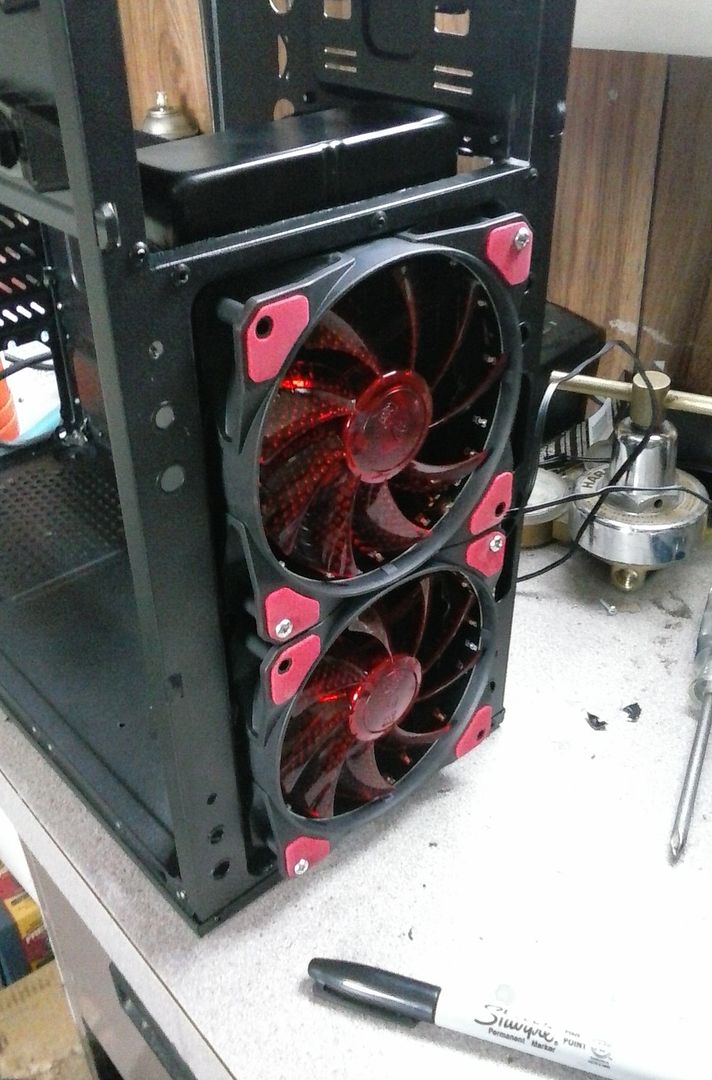
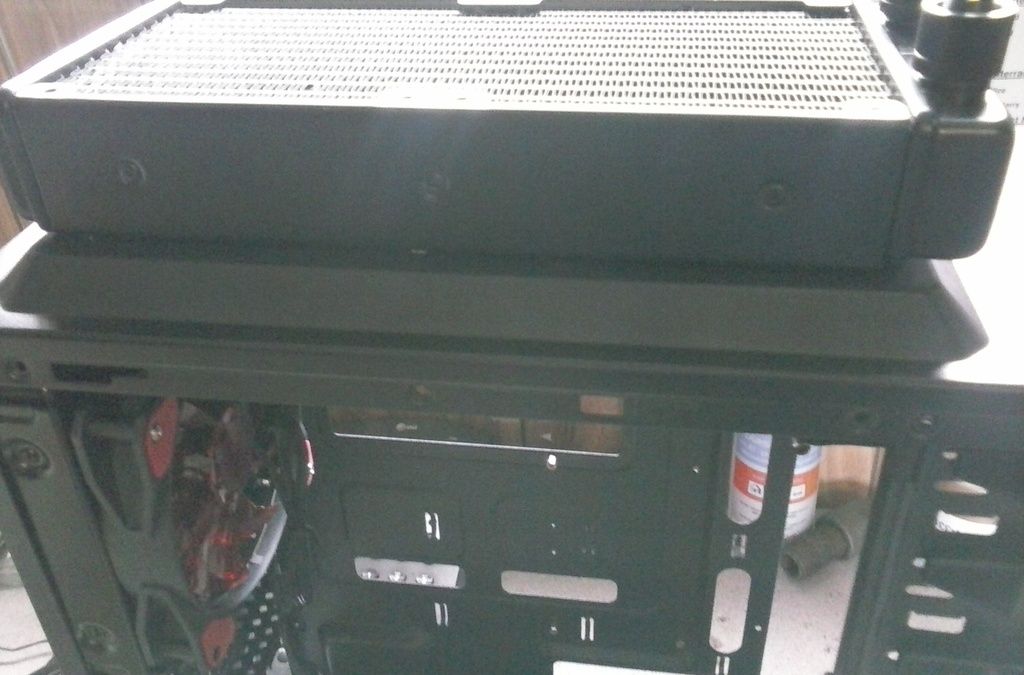
I test fit the radiator and the fans in the cut out section. Looking good, so far.
The same was true for the fan spot on the back panel. It was a funky shape that would prevent a seal between the radiator and the fans, so I went ahead and "deleted" that as well.
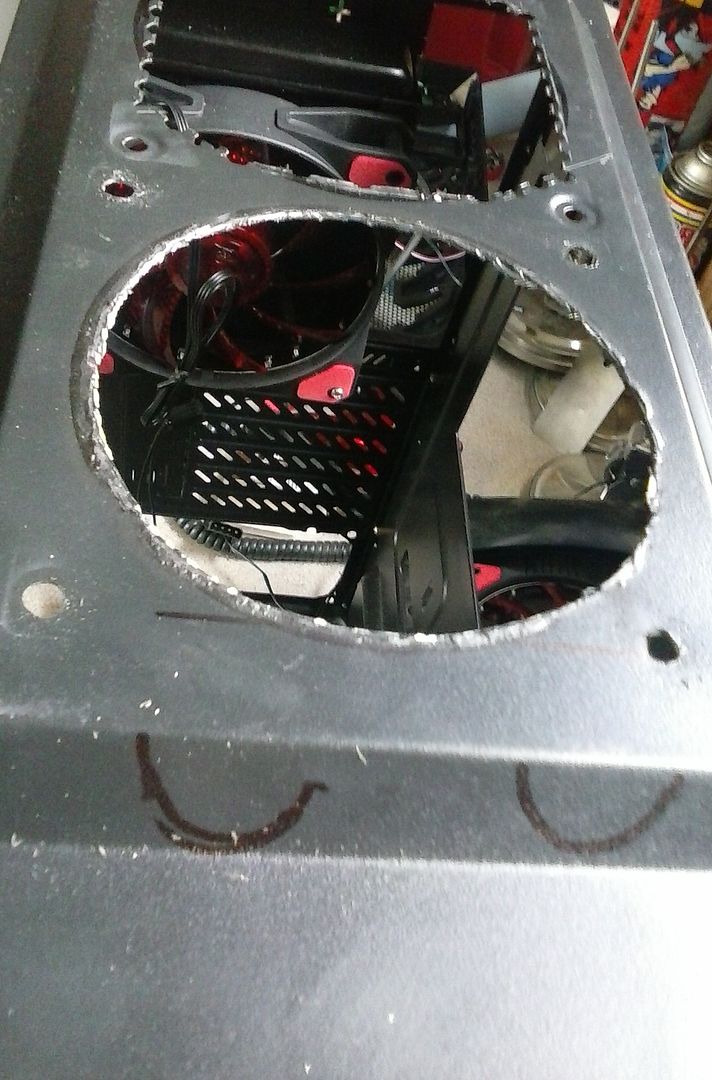
The top of the case only had a spot for one 120mm fan. The radiator I want to mount to the case is a dual 120mm radiator, so I sized up and marked where to cut out for two fans.

Cut out the first hole.
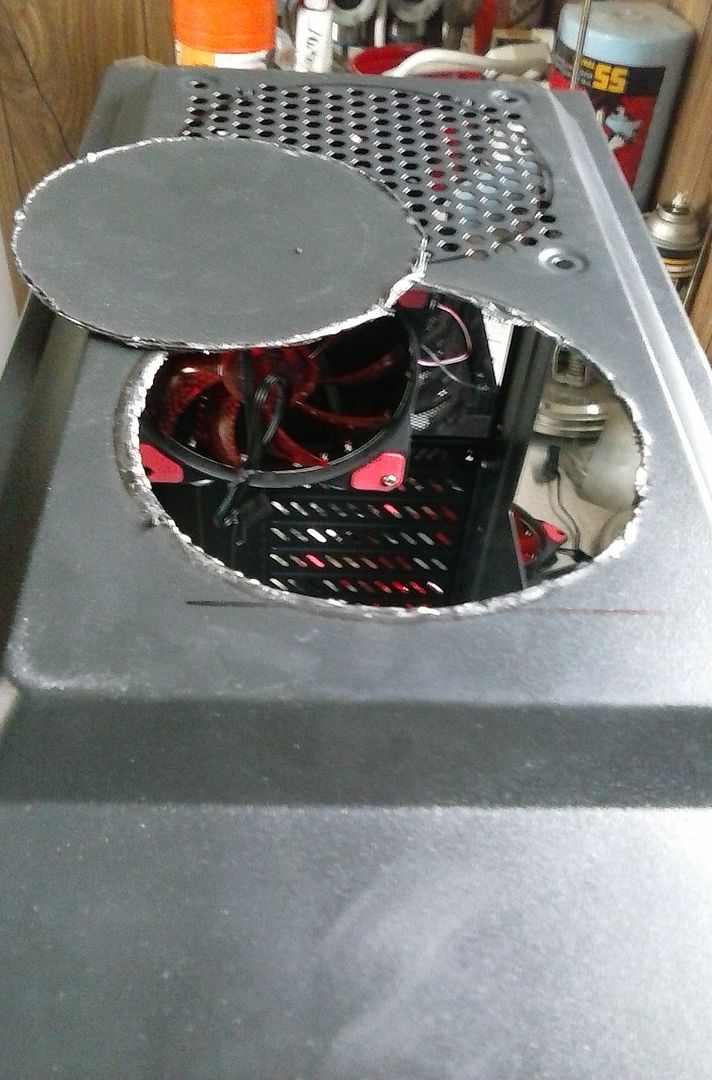
Since cutting a circle was so hard to do with a rotary tool, and the back fan slot already had all those nice little spots cut out of it, I decided to go ahead and use the shape of that instead of a circle.
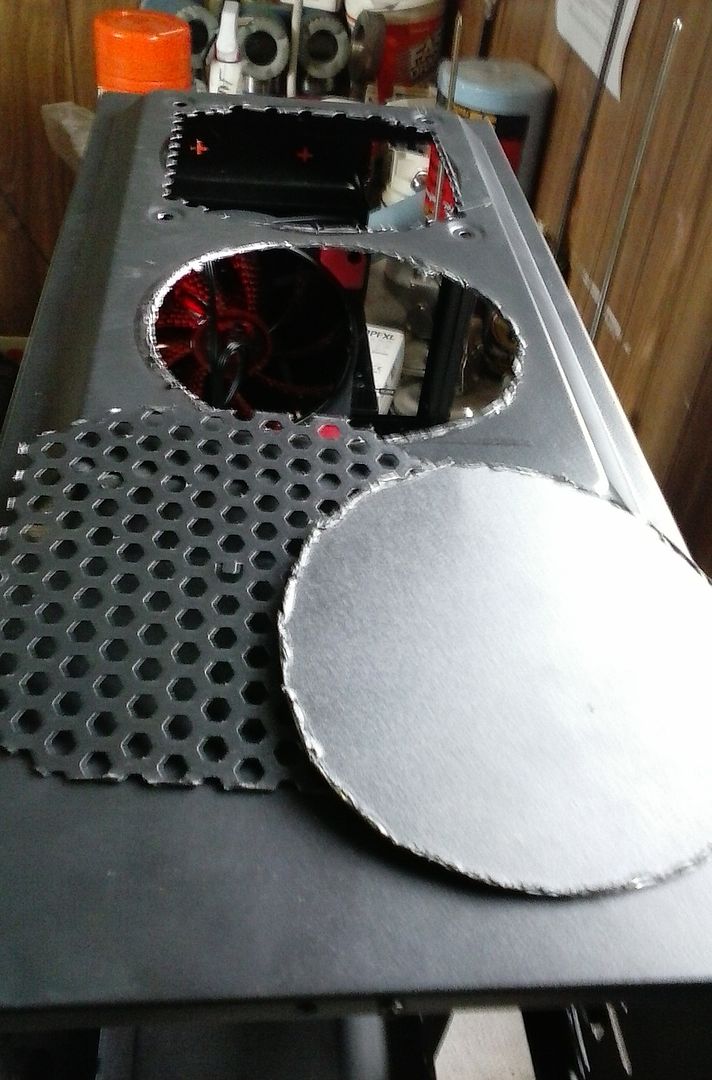
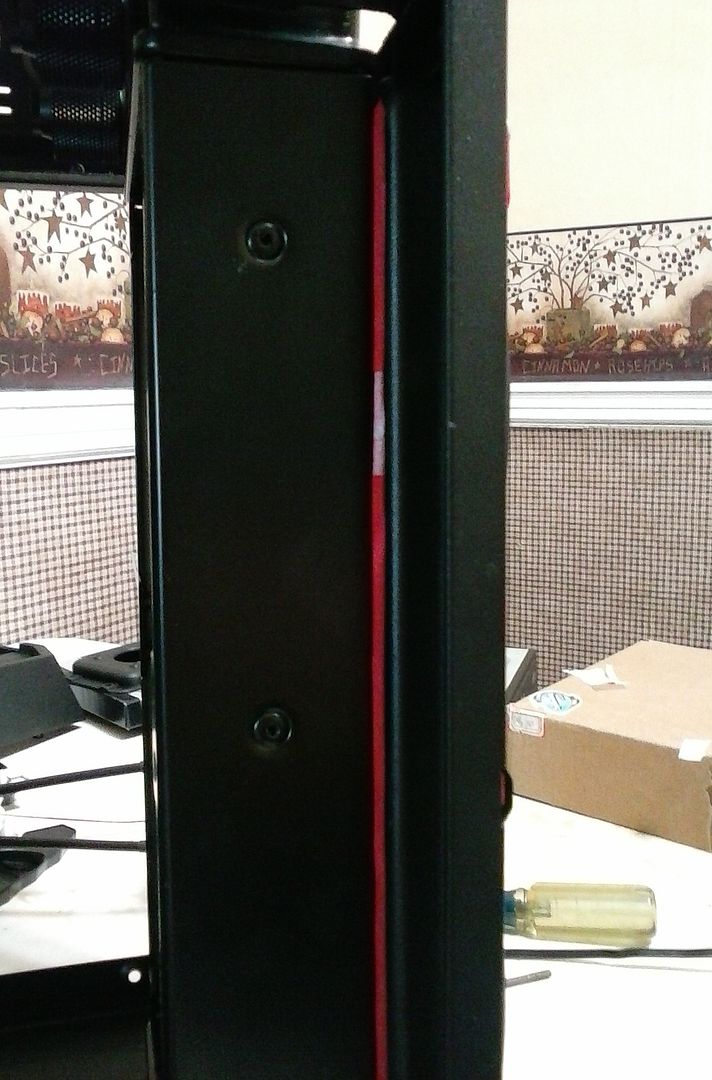
When I lined up the radiator, it perfectly covered any cut out sections, so you will never know how terrible it looks underneath.
Next, I flipped it over and put the long screws through the case in to it to get an idea of where the holes for the tubing connectors should go since I didn't want to run it out the back of the case like I did last time.
Upon trying to put the screws in, I realized that I hadn't drilled the holes for the second fan spot, so I went ahead and did that.
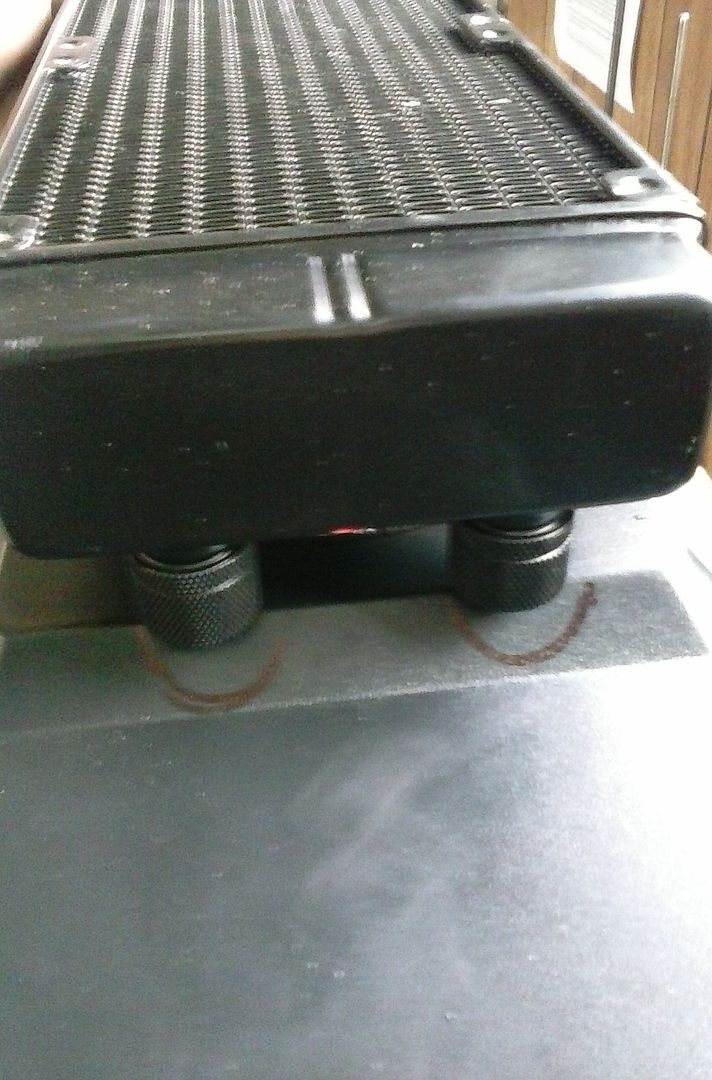
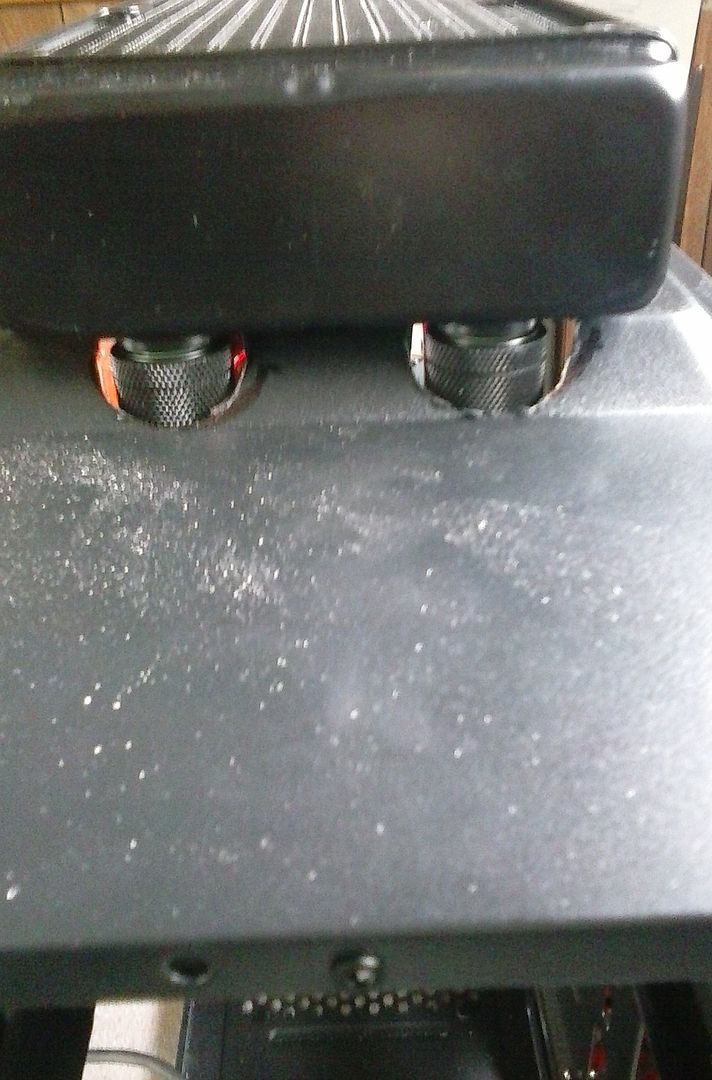
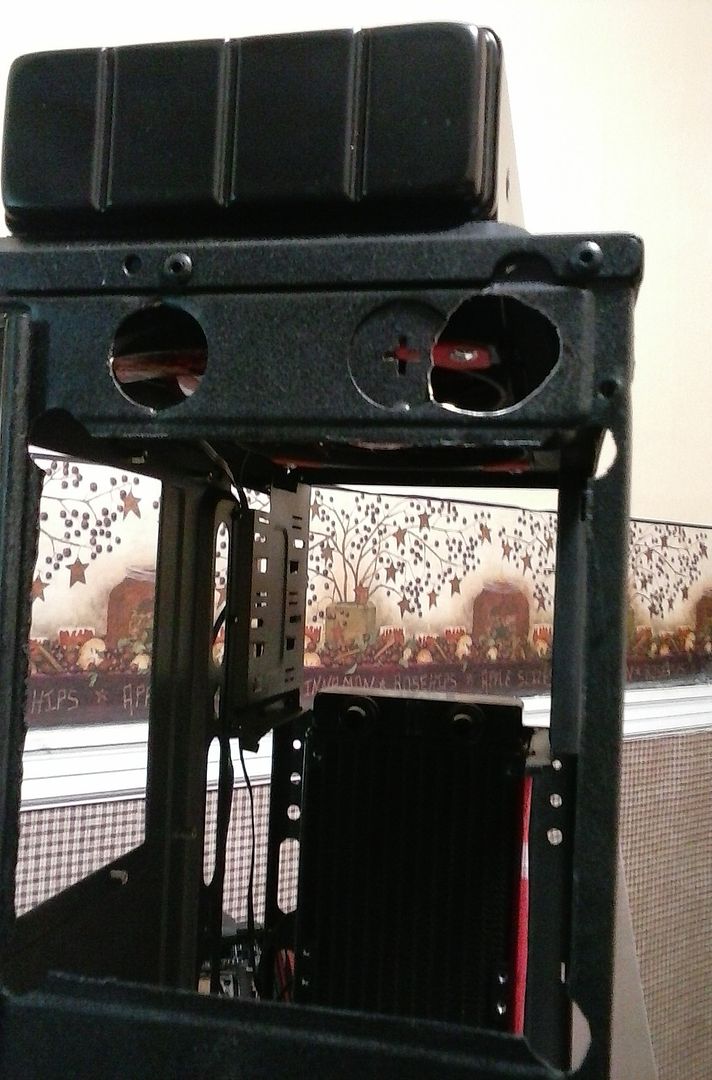
Much better. Now that I could connect more screws to get a better idea of where the radiator was going to sit, I went ahead and cut out the spots for the tube fittings.

They are a little crude, but they lined up very nicely. I'll clean them up later before I repaint the case.
Well, that's all the progress for right now. I'll get more done over the weekend, hopefully, and SHOULD have it up and running by next week. Stay tuned for some more super-cool (literally) PC mods!
(UPDATE)
Got more work done on it over the weekend. Not quite as much as I would have liked, but better than nothing. Now that the new case is "prepped and ready" (Starcraft: Brood War reference) it's time to take all the innards out of the old case. You'll notice the liquid is red, now. I ordered some dye stuff that is supposed to keep corrosion down in the loop. I had to try it out. It didn't do too bad of a job for two eye drops.
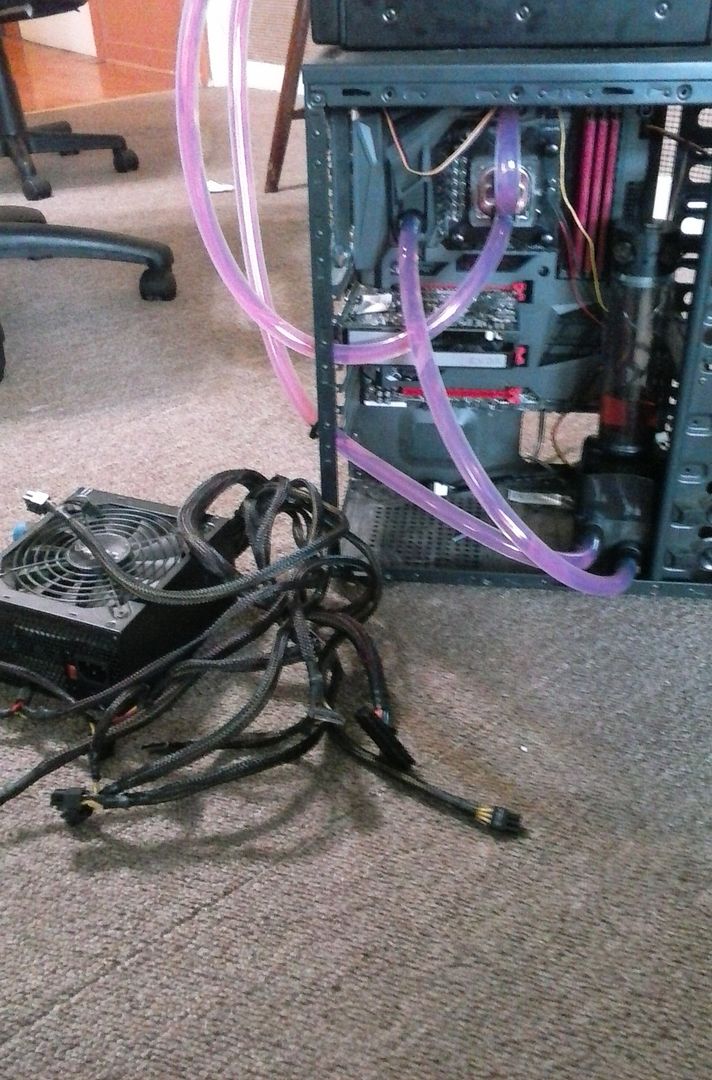
Unhooked and removed the PSU
Took out the graphics card and one of the pusher fans on the radiator.
Took the screws out that were holding the motherboard to the case.
Took off the radiator and the rest of the fans.
And then in to the bath tub to drain everything and rinse a few parts out.

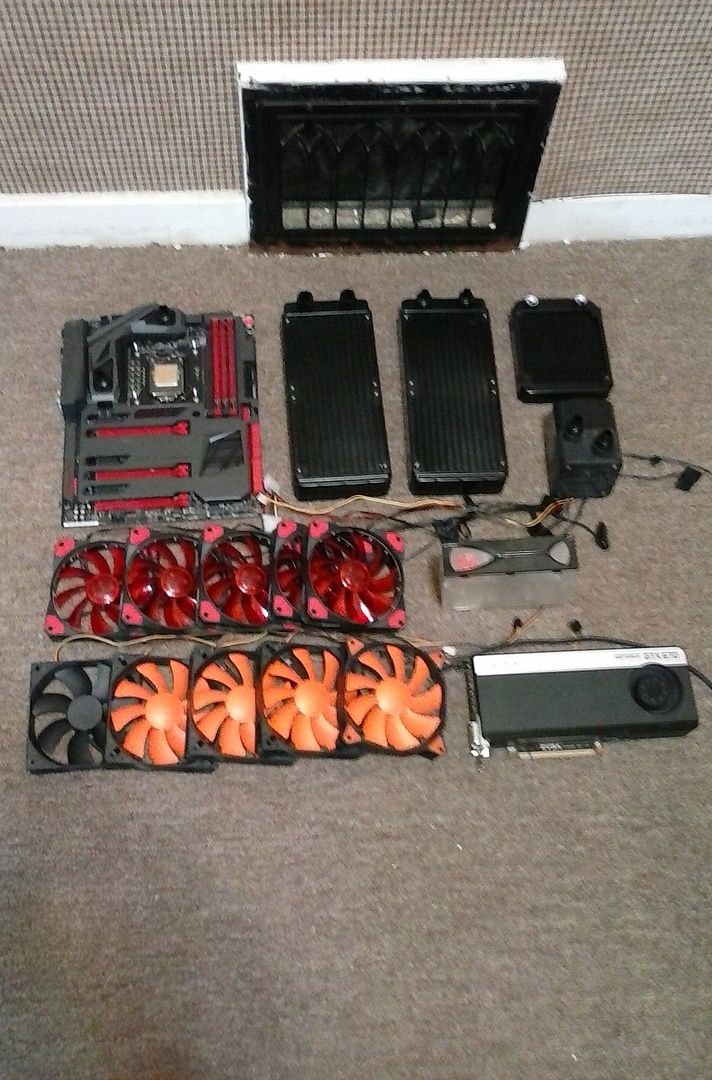
So now that everything is out of my old case, here's everything together that will be going in the new one.
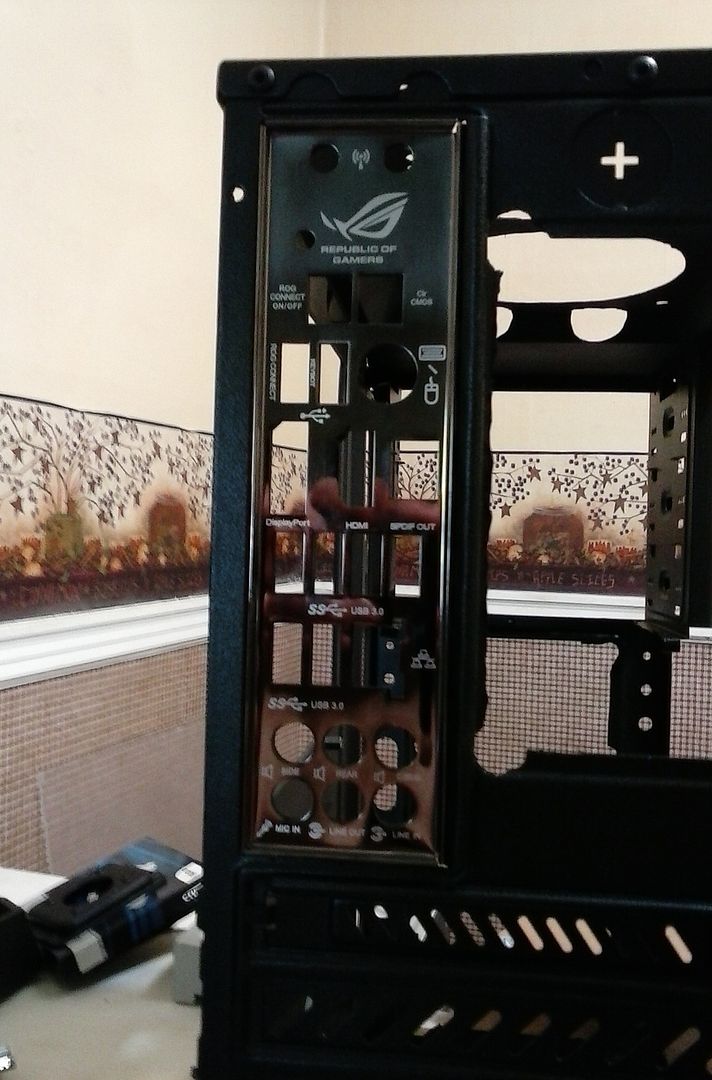
I have no idea why, but I was super excited to put the I/O panel in. It's just really cool compared to most of them.
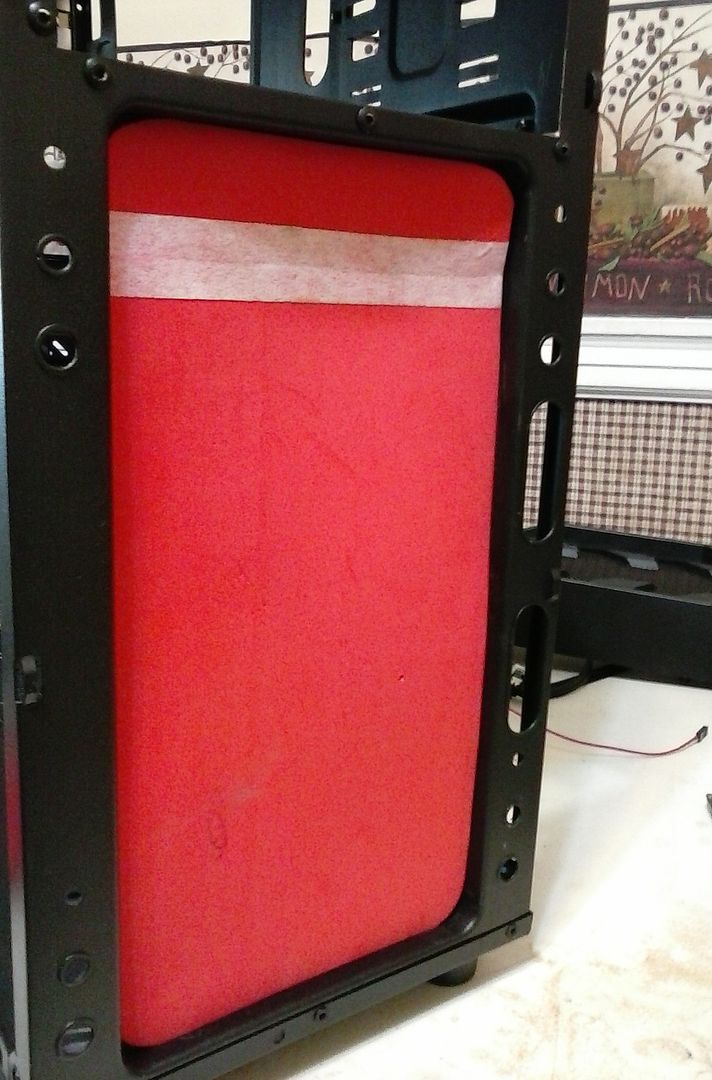
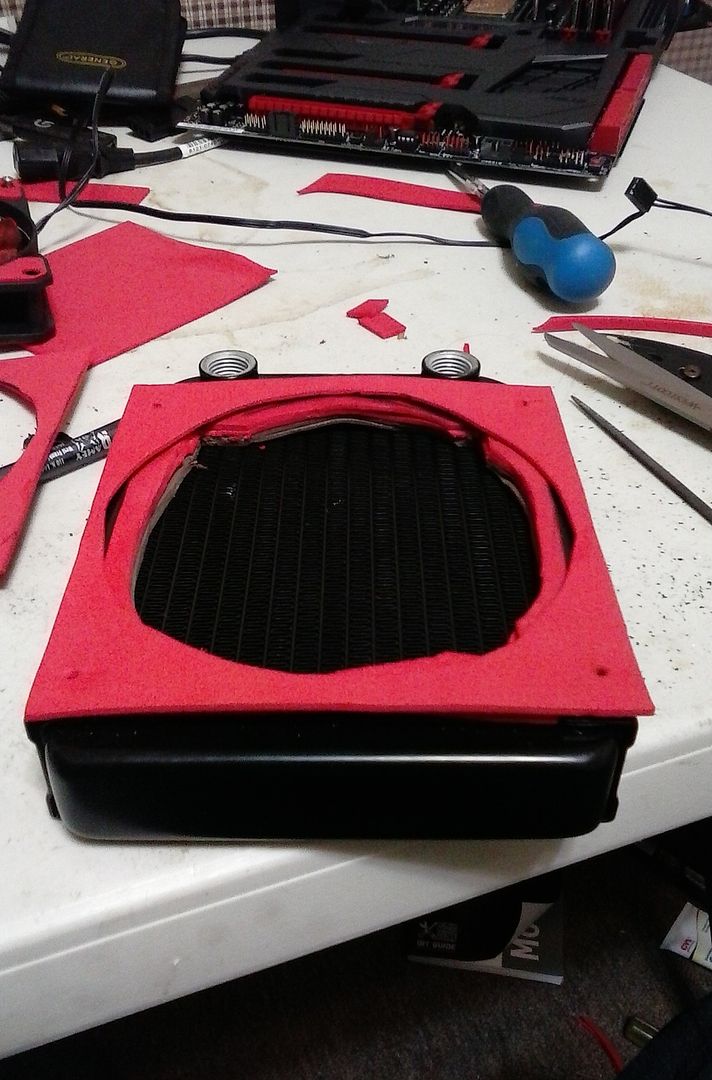
I'm only gonna show the steps to the first gasket I made. It's boring, and a terribly tedious process, so I'll just do the one. The foam sheets I had weren't quite tall enough for the whole area so I taped two of them together with some masking tape and cut it to fit where the fans go on the front of the case.
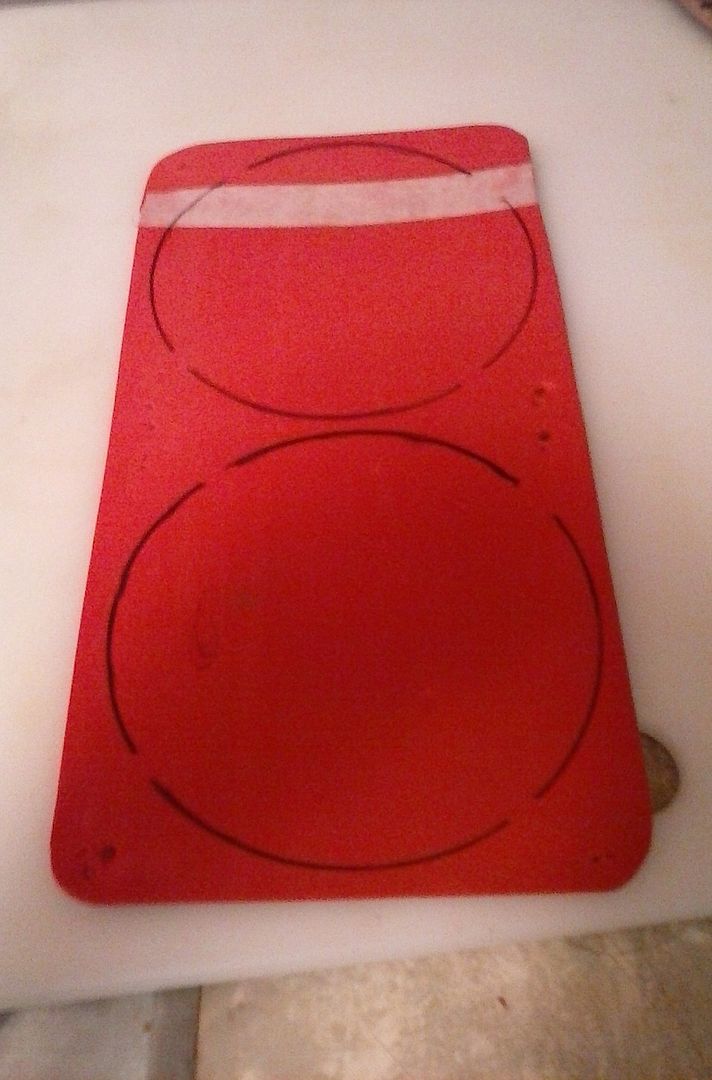
I poked holes in the foam and screwed the fans to the radiator with the gasket in place. Then I took a pen and drew around the inner circle where the blades spin.

Now that I have the shape I need to cut out, I took it to the cutting board.
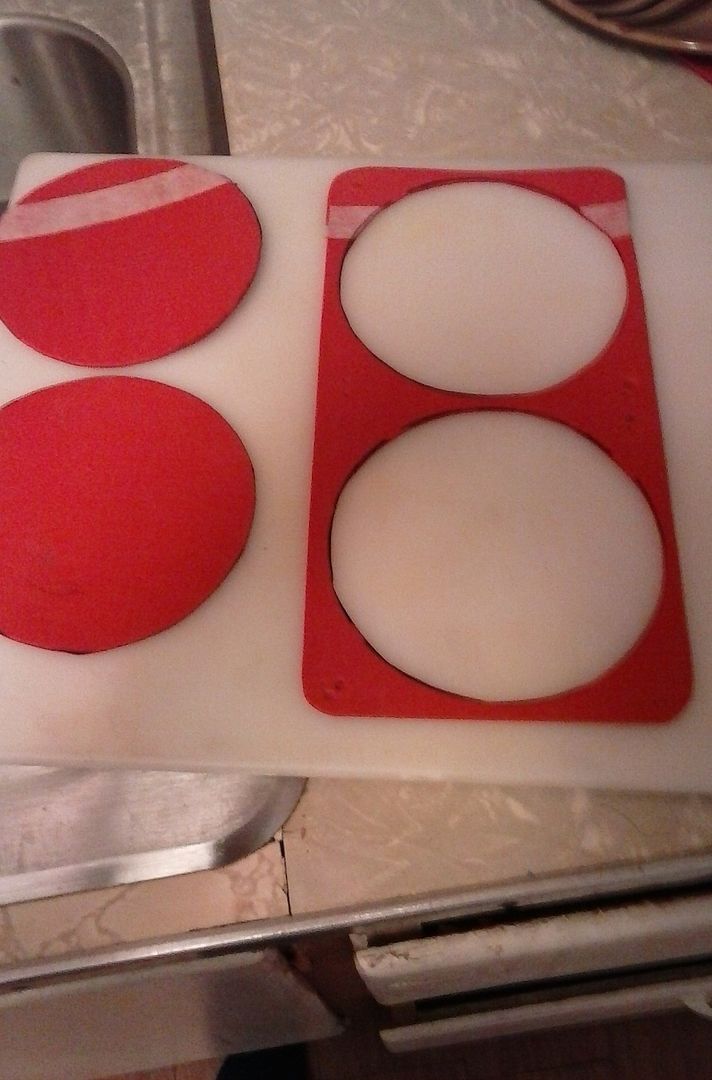
I took just a regular old paring knife and traced around the circles with it. The foam stuff cuts pretty easily, so the circles just popped right out.
I did pretty much the same thing and then fit it between the radiator and the front of the case.
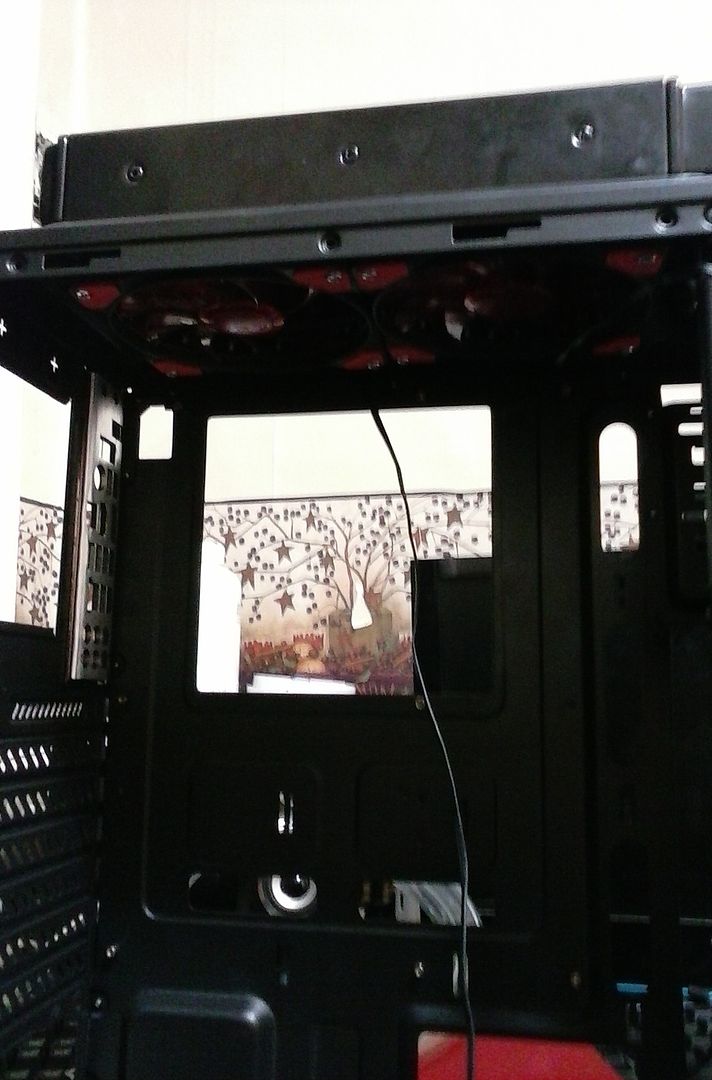
I made gaskets and attached the top radiator and fans.
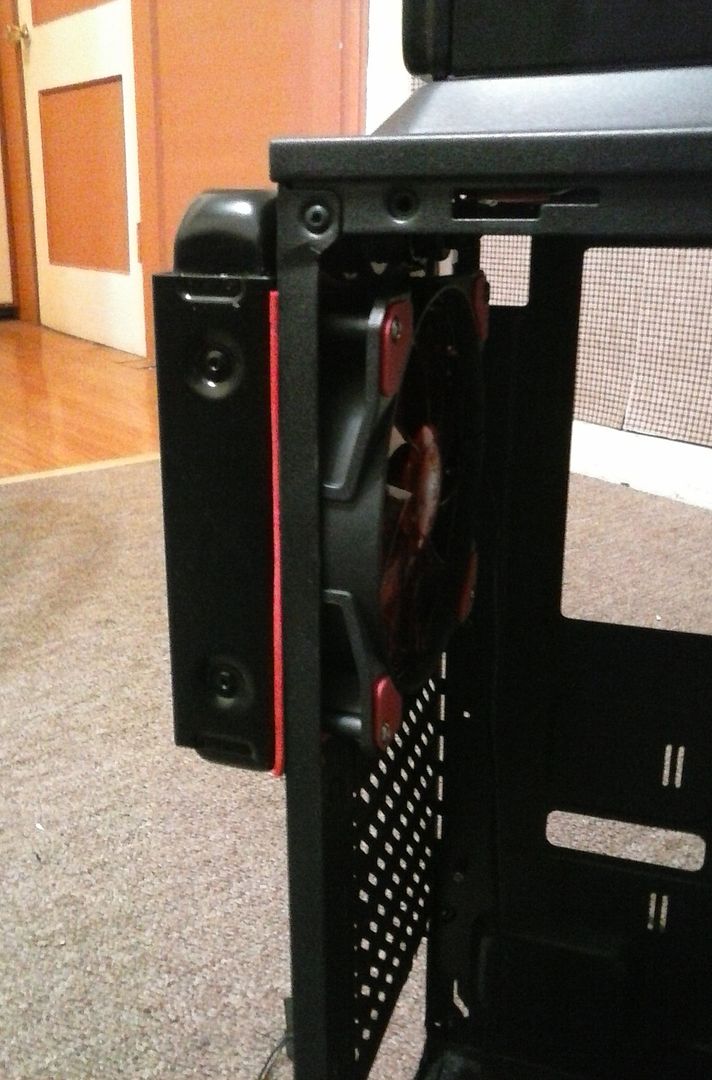
The rear radiator didn't fit quite like I had intended and didn't line up very well with the holes that came in the case, so I had to make a new hole that would allow for the fittings to reach inside the case like I did with the top radiator.
It was a total pain to get the fans and radiators attached with the gaskets there, so instead of taking them off to paint the section where the new hole was, I took some paper bags (that may or may not have came with liquor bottles inside of them) and wrapped them around things I didn't want painted.
The rear single fan radiator was not very well made and had spots all over the sides where air could go anywhere besides through the fins, so I had to make a gasket to fit INSIDE the radiator between the fins to and the actual outer portion of the radiator. THEN make a gasket to go on the outter area to seal it.
Went ahead and got that attached. One of the screw holes were stripped, so I had to use a different kind of screw. It barely fit and was an ULTRA pain to try to get where I wanted it, but I finally got it on there.
It may not have looked like much, but that part was the most annoying, longest, and frustrating part of the entire build. I wanted to throw things, kick stuff, and all the bad stuff. The fans kept falling, I had to keep pressure on screws otherwise they wouldn't smash the gaskets enough to get the threads in the holes, the fans kept falling, the gaskets kept getting crooked, and it just made me want to scream. I'm just REALLY glad that part is over. I tried not to spend much time on it because it's really not exciting to read about.
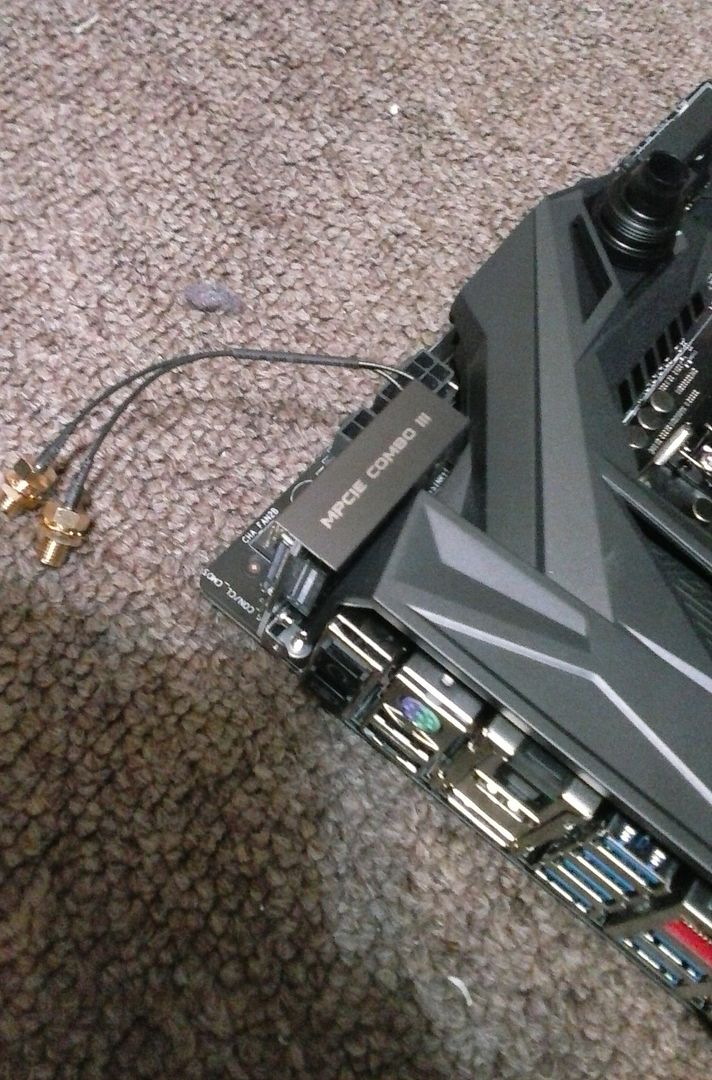
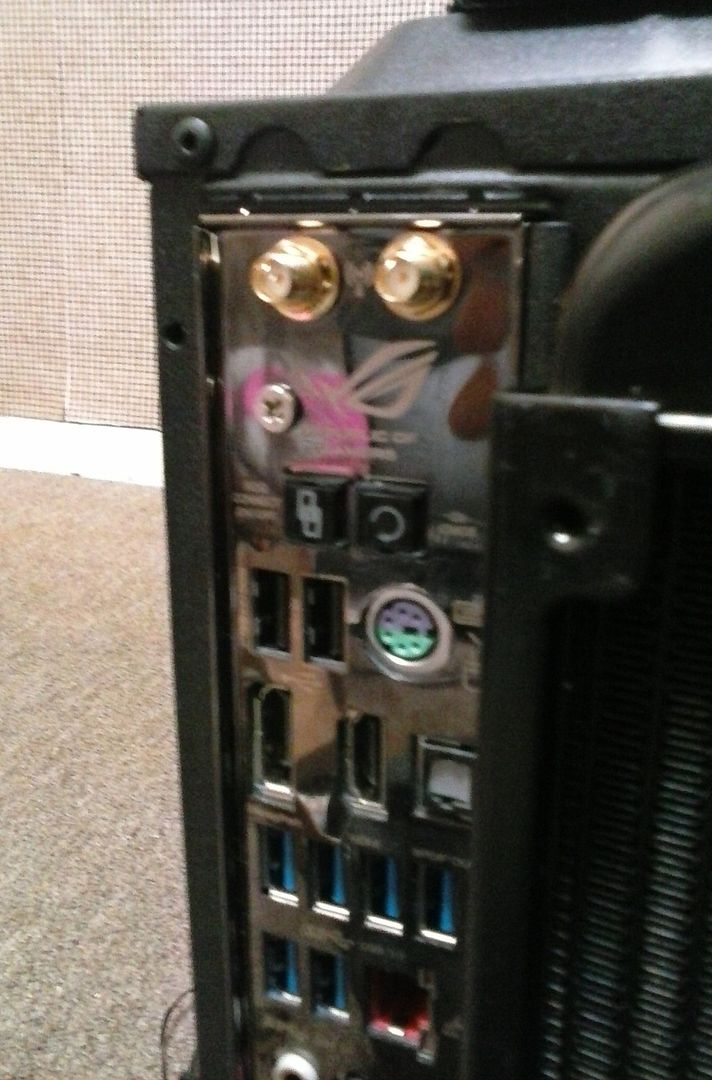
So now that I've calmed down, I went ahead and attached this really cool wireless adapter to the motherboard. It lets you get wifi AND bluetooth. There's a little program/app thing where you can monitor what your computer is doing from your phone. That's really cool.
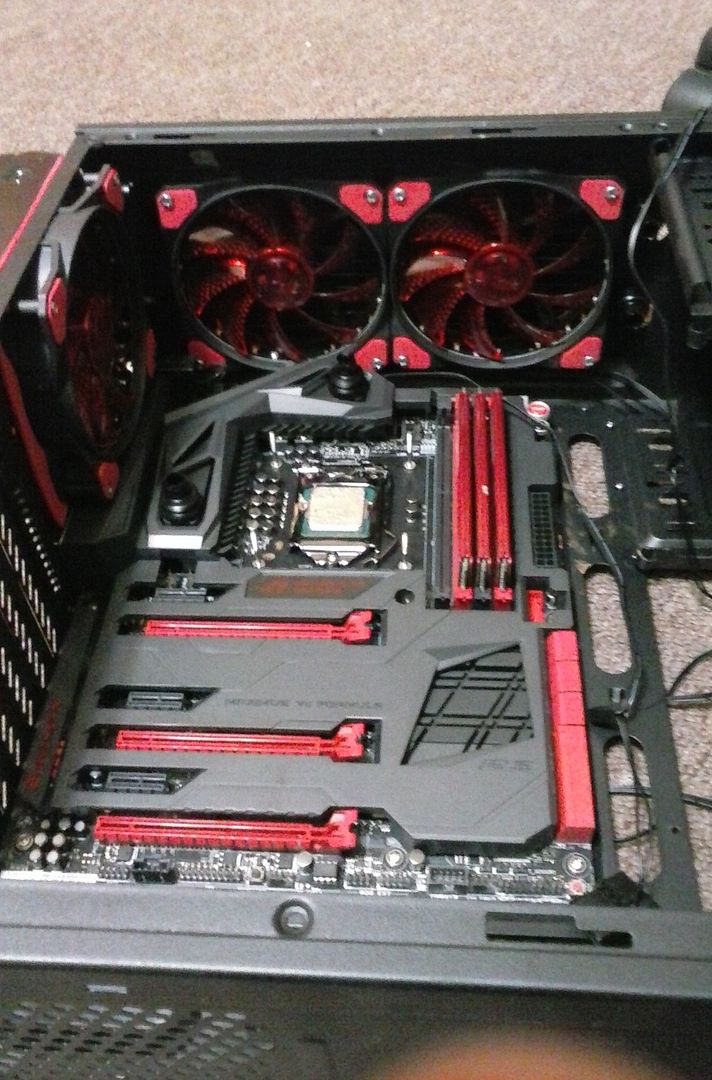
Got the motherboard put in the new case.
It's kind of a bad picture, but I got the connectors for the wireless thing bolted to the I/O panel and put the screw in that helps hold it in place.
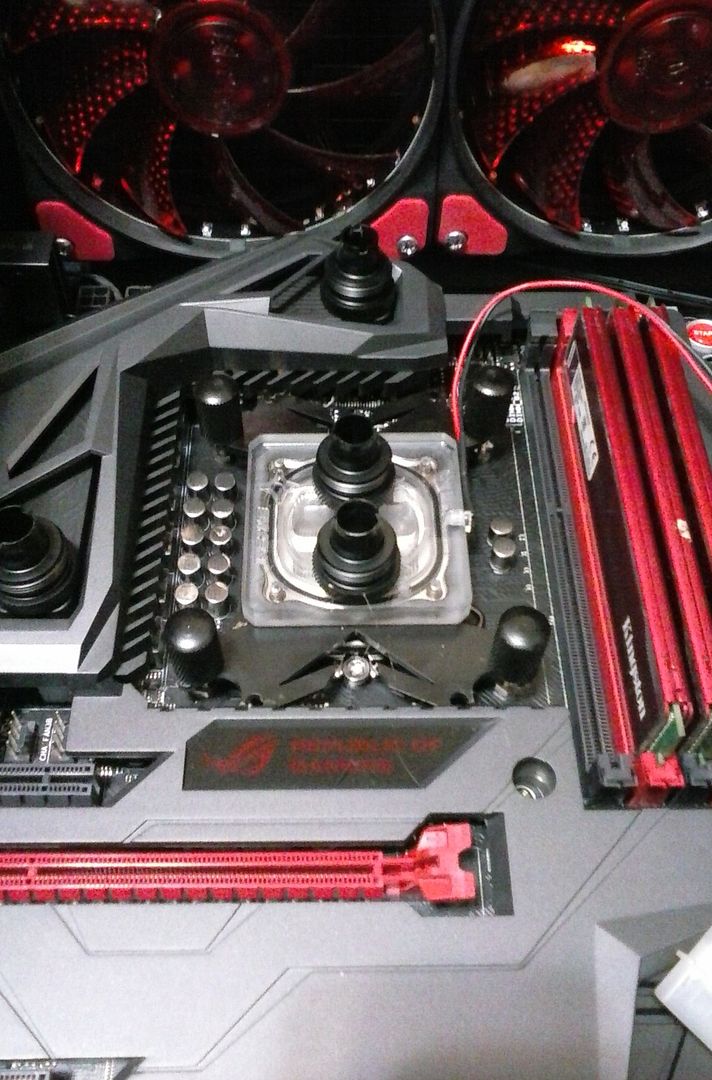
Reseated the CPU water block. I think last time it wasn't seated correctly because I was getting some pretty crazy temp spikes. So I took some extra time to make sure it was on there good and wan't crooked so it made full contact with the processor.
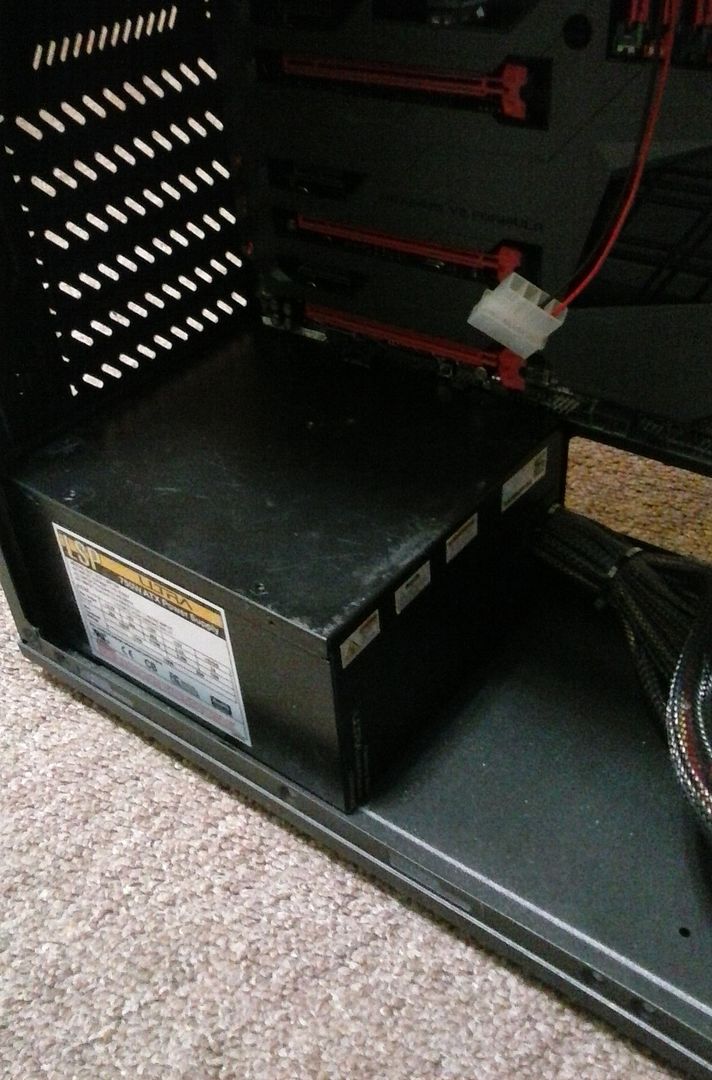
I put the PSU in, but this time with the fan on the bottom so it draws air in from there instead of robbing air flow from the front inlet radiator and fans.
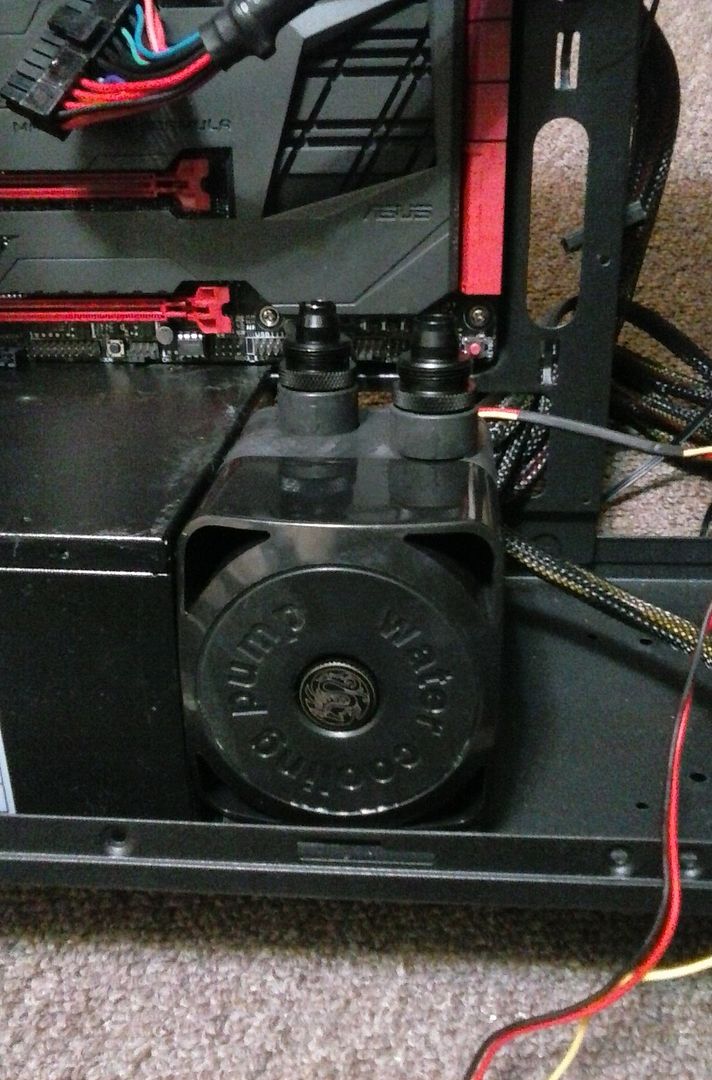
The water pump came with this double sided sticky foam pad thing, so I decided to stick it flush with the end of the PSU. Then I will still have room between the pump and the puller fans on the front radiator to build a bracket and put my SSDs there. The sticky foam thing sorta refuses to stick to the case, so I'll have to find some other way to attach it later, but it works for now.
While I'm still not sure what is wrong with the 670, I went ahead and took off the casing, put the GPU water block on it and installed it. Even if I end up with a different card, the water block should still end up in the same general area, so it'll still work for measuring out the tubing.
These aren't the fans I want to use for the permanent puller fans for the front radiator, but they will work for now. At least until I order the fans I want. I'm gonna have to get different screws, because the radiator only came with 8 long screws to attach two fans to one side. The screws I used barely hold these fans on and hopefully I can make it to the hardware store soon to get some longer ones.
Well, that's all for the time being. I already measured out, cut, and test fit all the tubing and have pictures of all of it, but I'm at work and kinda need to be working instead of writing this build along. If I get some time later, I'll add those.
(UPDATE)
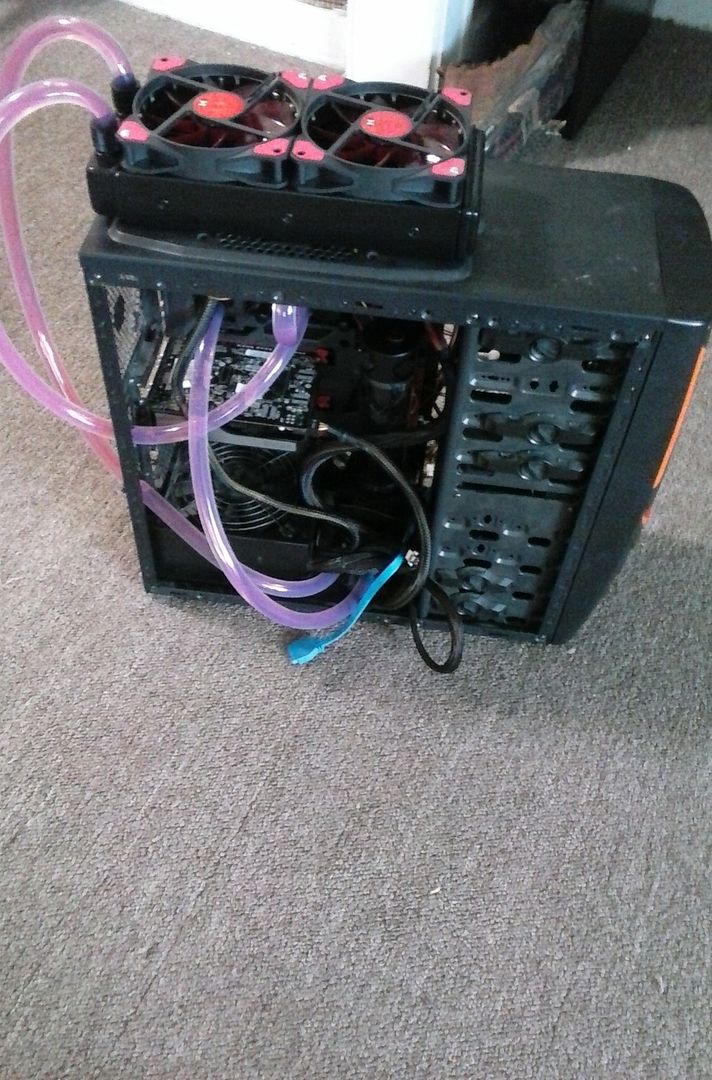
Looking pretty good so far.
So now that everything is basically in place, except a few minor things that need to be done, I can go ahead and start cutting and attaching the tubing.
Cut and attached the tubing from the pump outlet to the top radiator inlet.
From the motherboard outlet to the rear radiator inlet.
From the rear radiator outlet to the GPU water block inlet.

From the reservoir outlet to the pump inlet.
From the top radiator outlet to the CPU water block inlet and from the water block outlet to the motherboard inlet.
Then from the GPU water block outlet to the front radiator inlet, and from the front radiator outlet back in to the reservoir.
And the loop is complete. Hopefully tonight I will be able to fill the loop, bleed the air out of the system, and add the dye to the coolant.
(UPDATE)
Last night I stayed up WAY later than I should have working on this. It was already a long day and I didn't get home until around 11 PM. I didn't like the way the front of the reservoir looked because it was that plasticy gloss black. I took a dish sponge and roughed up the plastic, taped off the clear parts, and while I was at work I painted it with the same textured black paint I used for the case.
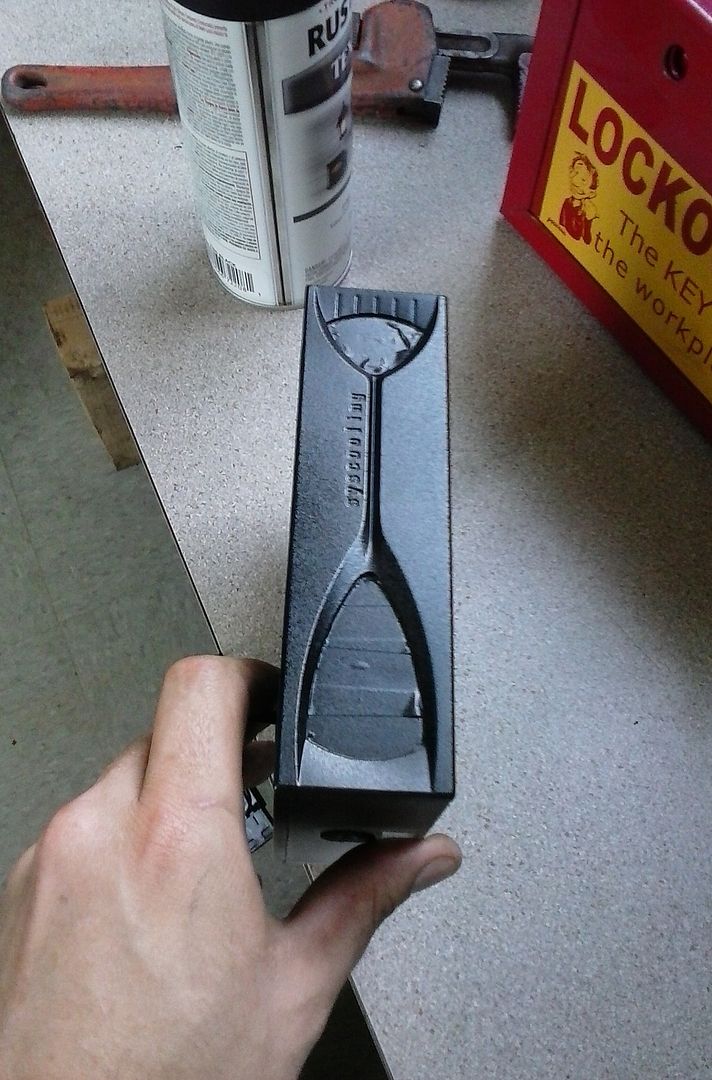
Peeled the tape off. It actually turned out great.

So I put the reservoir back in, tightened the last two tubing fittings, and filled 'er with water. As cool as having a flow meter on the front of the reservoir is, because of the location of the threads for the fittings, it's damn near impossible to bleed the air out of the system. every time you get all the air out, it lowers the water level in the reservoir and the pump starts sucking air back in to the system. It's not a HUGE deal, since it's a pretty small amount of air, but it would still be nice if it wasn't there.
I added the Mayhem's red dye to the coolant and let it circulate around a little bit.
The brackets for mounting the old tube reservoir were perfect for making a little thing to hold my SSDs. There were some holes on the bottom of the case that lined up perfectly, so I just screwed the SSDs to the bracket and bolted the bracket to the holes. As an added bonus, it sits right up against the water pump to keep it from moving around like it was before.
I'm running two 500 GB SSDs. On accident. I had bought the Samsung SSD a while back, but I thought I accidentally threw it away with a pile of other stuff that I had thrown out. I had completely forgot that I had screwed it in to another case that I had intended to use when I had ordered a different motherboard to use with my old i5 processor. When that motherboard came with bent pins, I had just completely forgot to take that SSD out of the case. So when I ordered my new processor and Maximus VII, I bought a Crucial 500 GB SSD. I was going to put my old motherboard and processor back in the old case and HOLY COW THERE'S MY OTHER SSD! YESS! So now I have a terabyte of SSD. Sweet...
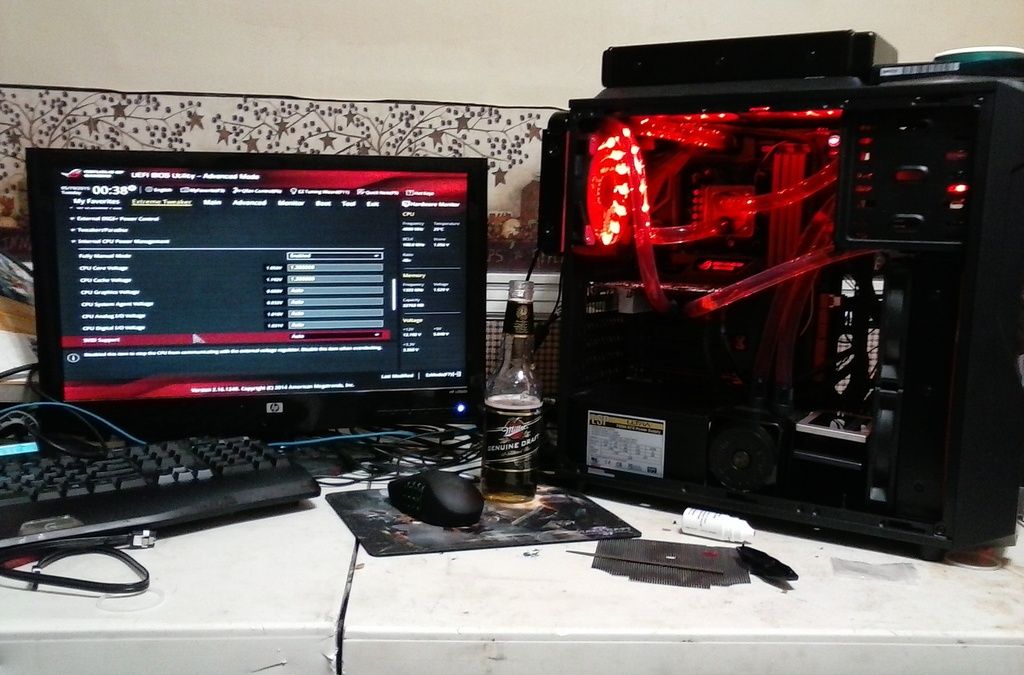
Hooked up all the cables and turned it on in it's new home for the first time.
And a shot of the speeds and temps from the bios.
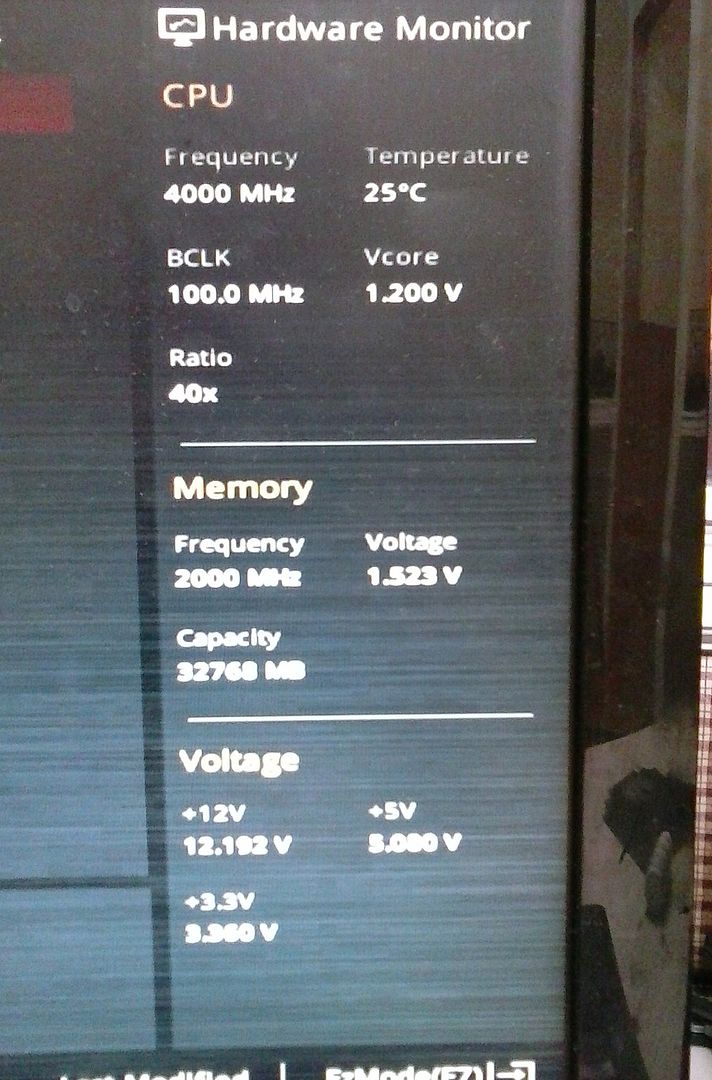
That 25 C is a farcry from the mid 50's it was running with the stock cooler. The first time I installed the liquid system, it was idling right around 45 C, but I don't think the CPU water block was seated quite right and wasn't transferring heat as efficiently as it could. Someone had asked why I had such low speed RAM. Mainly because I bought it right before Christmas 2012, and it wasn't so bad, then. Either way, I've had it running at 2000 MHz for a while with no overvoltage, so I'm pretty confident that I can get it much higher. Heck, it's already almost double it's original speed and I haven't even done anything.
Next step is to install Windows, but my cousin, who is vastly more knowledgeable about this stuff than I am, wants to show me a couple things and make a few "partitions" for something or another. Either way, it will be fun. I'm just ready to get to overclocking and playing StarCraft II, again.
4790K i7 4.00Ghz stock
HyperX Red 1333Mhz RAM (32 Gigs) (from my old build)
Asus Maximus VII Formula motherboard
GTX 650 (from my old build)
120 Gb HyperX SSD (from my old build
500 Gb Crucial SSD
650W PSU (from my old build)
eBay liquid cooling kit with red LED stuff
I had just put the processor in the motherboard and hooked it up to all my old stuff, but the stock cooler just wasn't cutting it as the 4790Ks run really hot. So here's what I started with.
First thing first. The stock cooler had to go.
Much better. Next I had to install the new backplate for the water block to hold on to. It fit really nicely around the plate for the processor latch.
Screwed in the bolts that hold the backplate on.
Put the little LED light thing in it's place in the water block
I test fit the water block before putting the thermal paste on. You can see that the water block didn't quite fit right on the motherboard because of it's dust shielding/armor.
Fortunately, I'm pretty handy and convinced the water block to get along with the motherboard better with a little bit of filing.
Ah. Much better.
Added the thermal paste.
The waterblock is held on by these nuts that screw on to the posts that hold the backplate on. It has springs that go between the nuts and the waterblock to avoid overtightening. Sometime between opening the baggie that had all that in it and actually installing it, I lost one of the springs. So I did what any man would do and found a suitable replacement.
"Ahlike a glove" (Ace Ventura, anyone?)
I'm not entirely sure what this particular part is called, but on this motherboard, it can be either liquid or air cooled. Since I'm running an open loop kit, I figured I might as well include it in the system. I took out the rubber stoppers that keep dust out if you are just going air cooled.
The kit came with a GPU water block, but I'm waiting to get my GTX 760 fixed before I add my graphics card to the system, so I robbed the compression fittings off of the GPU block and installed them in to the ports on the motherboard.
Cut the first piece of tubing and installed from the CPU water block outlet to the motherboard inlet becuase it's a lot easier to do while it's out of the case since this piece's length wasn't affected by space or location in the case.
Installed the motherboard in the case.
Used 4 of the 8 (two per fan) the long screws that came with the radiator to attach the fans inside the case to the radiator through the fan mounting holes in the case.
Then attached the two fans that came with the kit as puller fans on the other side of the radiator on the outside of the case.
Made sure there was enough room to fit the pump and reservoir. Looks like as good of a place as any for this case.
Ran the tubing from the pump outlet to the radiator inlet and from the radiator outlet to the CPU water block inlet.
Then from the motherboard outlet to the pump inlet.
Then filled it with some of Mikeeman's own super secret coolant.
Bled all the air out of the system and put the pump and reservoir back in the case.
And there it is all glowy and running!
Hope you guys enjoyed this little build along. It will continue as I add more to the build like a new case (I'm just using this one temporarily), some more radiators and fans, and installing the GPU water block and adding that to the liquid system. Then I'll move in to overclocking and benchmarking. If you have any questions about PC that pertain to hardware (I'm not so great with programming or networking) feel free to ask! Thanks for reading!
(UPDATE)
Not that anyone is actually following this
 but I got my new case in on Friday and picked up the rest of my liquid cooling parts from the post office on my way in to work this morning. Should get to start building it in it's permanent home this evening.
(UPDATE)
So I finally got all my new stuff in on Monday. Two new radiators, 3 120mm LED fans, more tubing, a drive bay reservoir with a flow meter, and a case.
It's only a mid tower, but it's got all the room I need. Well... Sort of. It WILL have all the room I need.
Ok, let's get all the panels and everything off of it that we don't need right now.
Great, It came with a 120mm fan pre installed on the back panel.
That's not where it's going to live, so let's get that out of the way.
So this particular case comes with a removable/adjustable section for smaller drives. It's kind of right where I plan to put one of my radiators, so that's gotta go.
That's better.
The drive bay for the regular sized hard drives, however, was riveted in. So I had to get out my rotary tool and cut the rivets out.
Cool. Much more room. Here I'm sizing up where I need to cut out on the front panel. The piece that is there has pieces that stick out that won't allow for a seal between the fans and the radiator, so it has to go, too.
If it looks like I'm suddenly in a different place, well... That's because I am. I may or may not have worked on this some at work, so... Shh! Don't tell! Anyway, I got the front panel all cut out.
The bottom part of the CD drive bay wasn't quite tall enough. The radiator is too tall, so I had to cut that part out, too. It won't matter because I'm going to mount everything in those bays with screws, so it will still be stable.
I test fit the radiator and the fans in the cut out section. Looking good, so far.
The same was true for the fan spot on the back panel. It was a funky shape that would prevent a seal between the radiator and the fans, so I went ahead and "deleted" that as well.
The top of the case only had a spot for one 120mm fan. The radiator I want to mount to the case is a dual 120mm radiator, so I sized up and marked where to cut out for two fans.
Cut out the first hole.
Since cutting a circle was so hard to do with a rotary tool, and the back fan slot already had all those nice little spots cut out of it, I decided to go ahead and use the shape of that instead of a circle.
When I lined up the radiator, it perfectly covered any cut out sections, so you will never know how terrible it looks underneath.
Next, I flipped it over and put the long screws through the case in to it to get an idea of where the holes for the tubing connectors should go since I didn't want to run it out the back of the case like I did last time.
Upon trying to put the screws in, I realized that I hadn't drilled the holes for the second fan spot, so I went ahead and did that.
Much better. Now that I could connect more screws to get a better idea of where the radiator was going to sit, I went ahead and cut out the spots for the tube fittings.
They are a little crude, but they lined up very nicely. I'll clean them up later before I repaint the case.
Well, that's all the progress for right now. I'll get more done over the weekend, hopefully, and SHOULD have it up and running by next week. Stay tuned for some more super-cool (literally) PC mods!
(UPDATE)
Got more work done on it over the weekend. Not quite as much as I would have liked, but better than nothing. Now that the new case is "prepped and ready" (Starcraft: Brood War reference) it's time to take all the innards out of the old case. You'll notice the liquid is red, now. I ordered some dye stuff that is supposed to keep corrosion down in the loop. I had to try it out. It didn't do too bad of a job for two eye drops.
Unhooked and removed the PSU
Took out the graphics card and one of the pusher fans on the radiator.
Took the screws out that were holding the motherboard to the case.
Took off the radiator and the rest of the fans.
And then in to the bath tub to drain everything and rinse a few parts out.
So now that everything is out of my old case, here's everything together that will be going in the new one.
I have no idea why, but I was super excited to put the I/O panel in. It's just really cool compared to most of them.
I'm only gonna show the steps to the first gasket I made. It's boring, and a terribly tedious process, so I'll just do the one. The foam sheets I had weren't quite tall enough for the whole area so I taped two of them together with some masking tape and cut it to fit where the fans go on the front of the case.
I poked holes in the foam and screwed the fans to the radiator with the gasket in place. Then I took a pen and drew around the inner circle where the blades spin.
Now that I have the shape I need to cut out, I took it to the cutting board.
I took just a regular old paring knife and traced around the circles with it. The foam stuff cuts pretty easily, so the circles just popped right out.
I did pretty much the same thing and then fit it between the radiator and the front of the case.
I made gaskets and attached the top radiator and fans.
The rear radiator didn't fit quite like I had intended and didn't line up very well with the holes that came in the case, so I had to make a new hole that would allow for the fittings to reach inside the case like I did with the top radiator.
It was a total pain to get the fans and radiators attached with the gaskets there, so instead of taking them off to paint the section where the new hole was, I took some paper bags (that may or may not have came with liquor bottles inside of them) and wrapped them around things I didn't want painted.
The rear single fan radiator was not very well made and had spots all over the sides where air could go anywhere besides through the fins, so I had to make a gasket to fit INSIDE the radiator between the fins to and the actual outer portion of the radiator. THEN make a gasket to go on the outter area to seal it.
Went ahead and got that attached. One of the screw holes were stripped, so I had to use a different kind of screw. It barely fit and was an ULTRA pain to try to get where I wanted it, but I finally got it on there.
It may not have looked like much, but that part was the most annoying, longest, and frustrating part of the entire build. I wanted to throw things, kick stuff, and all the bad stuff. The fans kept falling, I had to keep pressure on screws otherwise they wouldn't smash the gaskets enough to get the threads in the holes, the fans kept falling, the gaskets kept getting crooked, and it just made me want to scream. I'm just REALLY glad that part is over. I tried not to spend much time on it because it's really not exciting to read about.
So now that I've calmed down, I went ahead and attached this really cool wireless adapter to the motherboard. It lets you get wifi AND bluetooth. There's a little program/app thing where you can monitor what your computer is doing from your phone. That's really cool.
Got the motherboard put in the new case.
It's kind of a bad picture, but I got the connectors for the wireless thing bolted to the I/O panel and put the screw in that helps hold it in place.
Reseated the CPU water block. I think last time it wasn't seated correctly because I was getting some pretty crazy temp spikes. So I took some extra time to make sure it was on there good and wan't crooked so it made full contact with the processor.
I put the PSU in, but this time with the fan on the bottom so it draws air in from there instead of robbing air flow from the front inlet radiator and fans.
The water pump came with this double sided sticky foam pad thing, so I decided to stick it flush with the end of the PSU. Then I will still have room between the pump and the puller fans on the front radiator to build a bracket and put my SSDs there. The sticky foam thing sorta refuses to stick to the case, so I'll have to find some other way to attach it later, but it works for now.
While I'm still not sure what is wrong with the 670, I went ahead and took off the casing, put the GPU water block on it and installed it. Even if I end up with a different card, the water block should still end up in the same general area, so it'll still work for measuring out the tubing.
These aren't the fans I want to use for the permanent puller fans for the front radiator, but they will work for now. At least until I order the fans I want. I'm gonna have to get different screws, because the radiator only came with 8 long screws to attach two fans to one side. The screws I used barely hold these fans on and hopefully I can make it to the hardware store soon to get some longer ones.
Well, that's all for the time being. I already measured out, cut, and test fit all the tubing and have pictures of all of it, but I'm at work and kinda need to be working instead of writing this build along. If I get some time later, I'll add those.
(UPDATE)
Looking pretty good so far.
So now that everything is basically in place, except a few minor things that need to be done, I can go ahead and start cutting and attaching the tubing.
Cut and attached the tubing from the pump outlet to the top radiator inlet.
From the motherboard outlet to the rear radiator inlet.
From the rear radiator outlet to the GPU water block inlet.
From the reservoir outlet to the pump inlet.
From the top radiator outlet to the CPU water block inlet and from the water block outlet to the motherboard inlet.
Then from the GPU water block outlet to the front radiator inlet, and from the front radiator outlet back in to the reservoir.
And the loop is complete. Hopefully tonight I will be able to fill the loop, bleed the air out of the system, and add the dye to the coolant.
(UPDATE)
Last night I stayed up WAY later than I should have working on this. It was already a long day and I didn't get home until around 11 PM. I didn't like the way the front of the reservoir looked because it was that plasticy gloss black. I took a dish sponge and roughed up the plastic, taped off the clear parts, and while I was at work I painted it with the same textured black paint I used for the case.
Peeled the tape off. It actually turned out great.
So I put the reservoir back in, tightened the last two tubing fittings, and filled 'er with water. As cool as having a flow meter on the front of the reservoir is, because of the location of the threads for the fittings, it's damn near impossible to bleed the air out of the system. every time you get all the air out, it lowers the water level in the reservoir and the pump starts sucking air back in to the system. It's not a HUGE deal, since it's a pretty small amount of air, but it would still be nice if it wasn't there.
I added the Mayhem's red dye to the coolant and let it circulate around a little bit.
The brackets for mounting the old tube reservoir were perfect for making a little thing to hold my SSDs. There were some holes on the bottom of the case that lined up perfectly, so I just screwed the SSDs to the bracket and bolted the bracket to the holes. As an added bonus, it sits right up against the water pump to keep it from moving around like it was before.
I'm running two 500 GB SSDs. On accident. I had bought the Samsung SSD a while back, but I thought I accidentally threw it away with a pile of other stuff that I had thrown out. I had completely forgot that I had screwed it in to another case that I had intended to use when I had ordered a different motherboard to use with my old i5 processor. When that motherboard came with bent pins, I had just completely forgot to take that SSD out of the case. So when I ordered my new processor and Maximus VII, I bought a Crucial 500 GB SSD. I was going to put my old motherboard and processor back in the old case and HOLY COW THERE'S MY OTHER SSD! YESS! So now I have a terabyte of SSD. Sweet...
Hooked up all the cables and turned it on in it's new home for the first time.
And a shot of the speeds and temps from the bios.
That 25 C is a farcry from the mid 50's it was running with the stock cooler. The first time I installed the liquid system, it was idling right around 45 C, but I don't think the CPU water block was seated quite right and wasn't transferring heat as efficiently as it could. Someone had asked why I had such low speed RAM. Mainly because I bought it right before Christmas 2012, and it wasn't so bad, then. Either way, I've had it running at 2000 MHz for a while with no overvoltage, so I'm pretty confident that I can get it much higher. Heck, it's already almost double it's original speed and I haven't even done anything.
Next step is to install Windows, but my cousin, who is vastly more knowledgeable about this stuff than I am, wants to show me a couple things and make a few "partitions" for something or another. Either way, it will be fun. I'm just ready to get to overclocking and playing StarCraft II, again.


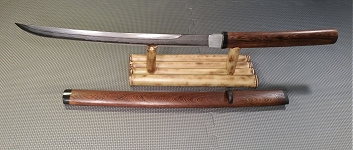


 Unfortunately I'm an edge-perfectionist. Also one wrong move when unsheathing and the throat nicks the edge on either side.
