|
|
Post by schoolofmonkey on Jan 9, 2015 1:59:02 GMT
Yeah, etching will dull the finish. you can hit it with some Metal Glo or Mothers Mag and Aluminum polish and it should help, or polish the non-hamon areas with some high-grit paper(like 2000). Attach the paper to a block and pull from the base of the blade to the tip. You can use water or oil to lubricate it. Now the Mothers Mag won't remove the Hamon like what was mentioned in the etching guide? It was some strange residue up near the Habaki I hadn't noticed before, could of been left over oil, So it dismantled the sword and cleaned it properly. Noticed some brown stuff on the cleaning rag after the vinegar, guess that was the previous polish. On another note, No surface scratches at all even after the pool noodle style foam, Heck it even went through one of those Post office plastic boxes, no scratches or blade damage. You were right though Adrian, you feel like the waiting was wasted cutting time..lol |
|
|
|
Post by Adrian Jordan on Jan 9, 2015 2:02:55 GMT
It will if you do it long and hard enough. I'd just use it on the areas of the blade you don't want the heavier etching on.
Yeah, cutting is fun! Now you can need a "beater" sword that you can throw at reckless targets and not worry about killing, hahaha.
|
|
|
|
Post by Cottontail Customs on Jan 9, 2015 2:04:01 GMT
There is another acid etching tutorial at the UBC forum. I've used this method many times with success. As far as the review, you can use the review template (if still available) or just copy the review headings from a review you like and insert your own opinions and findings. Showcasing in your review the things you were curious about before you bought the sword will help others that are now considering a purchase. Just imagine that the you from the present is giving a detailed description of the sword to the you in the past  -Josh |
|
|
|
Post by schoolofmonkey on Jan 9, 2015 2:55:50 GMT
There is another acid etching tutorial at the UBC forum. I've used this method many times with success. As far as the review, you can use the review template (if still available) or just copy the review headings from a review you like and insert your own opinions and findings. Showcasing in your review the things you were curious about before you bought the sword will help others that are now considering a purchase. Just imagine that the you from the present is giving a detailed description of the sword to the you in the past -Josh Yeah that's the one I was looking at. Stupid me didn't have Windex to neutralize the acids, just ran out an bought some then, I'm guessing that's what dulled the blade after using vinegar. The auto shop is a bit further away so I just Windex, Isoproply Alcohol and oiled till I get some after lunch. I'm guessing that's ok now that all the acids have been neutralized. I feel really stupid, and what a rookie mistake on such a fine sword, feel like I let you guys down too, I should of known better. A light polish with Mag cleaner should bring back the shine I hope. |
|
|
|
Post by Cottontail Customs on Jan 9, 2015 3:22:17 GMT
Not really a mistake or a direct result of not having the Windex on hand. Acids effect the surface of the steel and will give it a dull grey appeance, even when you neutralize it right away. The key to a good acid etching, in my opinion and experience, is following all the steps and repeating these steps multiple times.
I get the best results when I use multiple shorter baths rather than fewer longer ones. You also need to make sure the blade is as clean and free of dirt and oil as possible as you repeat the steps. Mothers polish will leave a protective residue on the blade that can affect the next acid bath so always be sure to clean it thoroughly after each application.
Don't rush it, make sure your steps are plotted out beforehand so you don't get tripped up and just take your time and focus and you should get some pretty good results. Mothers is also extremely fine grit so don't worry too much about removing the enhancement during the process, you will add, then take it back a notch and then add more and so on. The last blade I etched was a very slow process of about 7 or 8 baths and it really made the details stand out.
Remember to freshen your acid every couple of baths as well. As for polishing with the paste, follow the directions, you don't have to use a lot of pressure for it to be effective.
-Josh
|
|
|
|
Post by schoolofmonkey on Jan 9, 2015 3:30:04 GMT
You guys have been great help, my heart sank when it went grey, the Hamon stood out a lot more, I was like WOW, but then I noticed there was no shine.
I found out also that the stainless steel cleaner was using Citric acid, so I didn't really remove the acids from the blade properly the other night as well.
For what you saw in the pictures would it mean I wouldn't have to polish it too much to bring back the shine?
Best way would be to start with a quick gentle polish to start with?
|
|
|
|
Post by Cottontail Customs on Jan 9, 2015 3:41:30 GMT
You can start by slowly bringing the grey down and the sheen back up and try to get an even effect along the whole blade. I believe the directions say to apply a small amount of paste, spread it out and then wipe down with a clean rag. When you do this, you will notice the paste you remove will be black, it's normal. With this process, it's really hard to permanently damage the blade so don't panic.
When it's evened out, you can clean well and start the etching process again. Repetition baby!
-Josh
|
|
|
|
Post by schoolofmonkey on Jan 9, 2015 8:56:24 GMT
You can start by slowly bringing the grey down and the sheen back up and try to get an even effect along the whole blade. I believe the directions say to apply a small amount of paste, spread it out and then wipe down with a clean rag. When you do this, you will notice the paste you remove will be black, it's normal. With this process, it's really hard to permanently damage the blade so don't panic. When it's evened out, you can clean well and start the etching process again. Repetition baby! -Josh Cool, I think I can handle that one, I know I don't need a "showroom shine" as I'll be using this now as my cutting blade. (Not for stupid targets though, still want the blade in good shape..lol). What I did with the acidic liquids defiantly made the Hamon stand out though, so if I carefully take off the grey layer it might make it look even better. 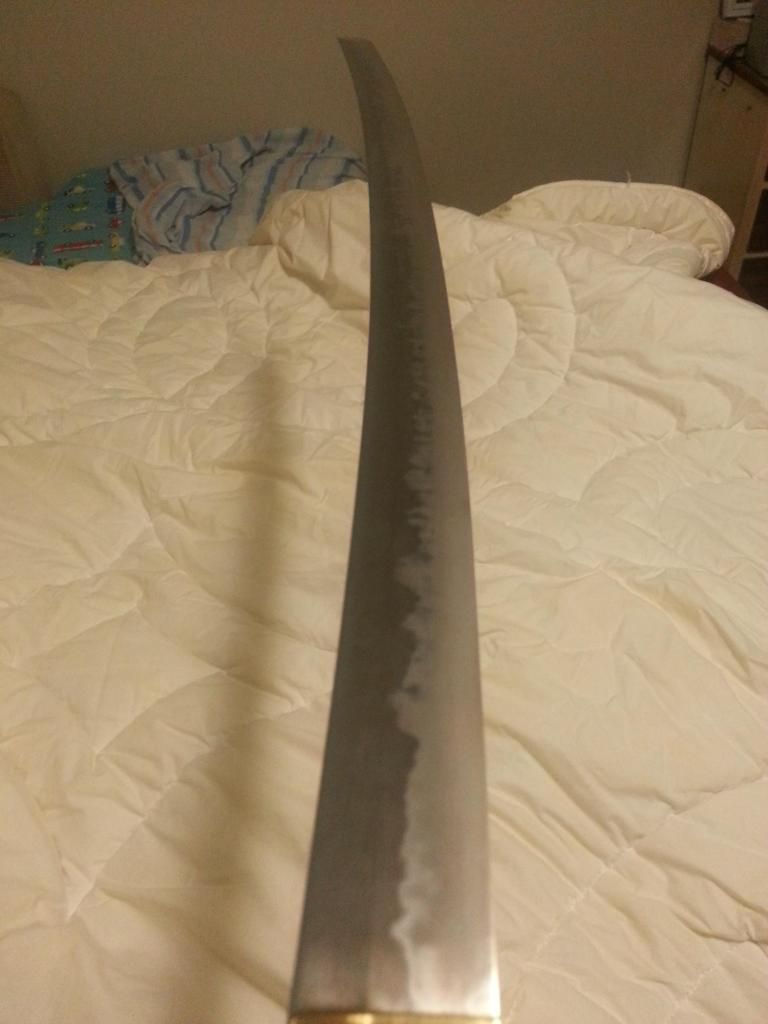 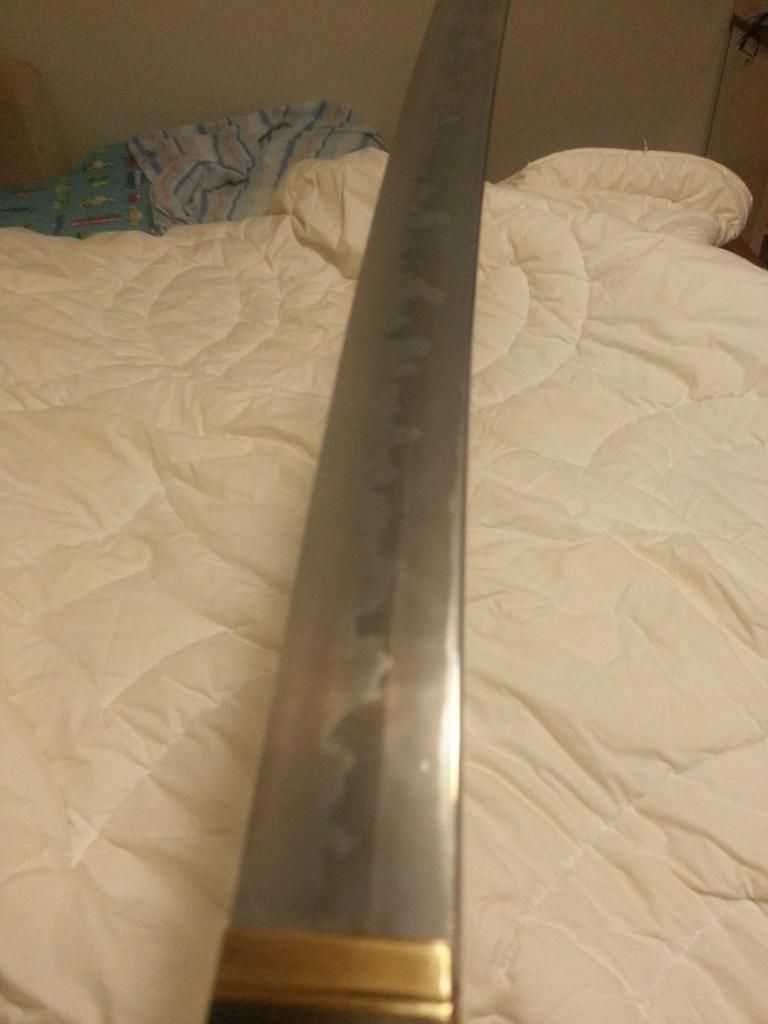 |
|
|
|
Post by sonofarwyn on Jan 9, 2015 16:46:10 GMT
Man, that really did make the hamon pop!
|
|
|
|
Post by Arthur Dayne on Jan 9, 2015 18:44:48 GMT
That is a nice blade and great hamon. For cleaning I just use basic water and a cloth (sometimes hand sanitize gel or a bit of soap to keep edge from being infectious), then another cloth with Breakfree CLP oil. If I'm lazy I just use a cloth soaked with Breakfree CLP oil since it does a great job at removing tape residue/adhesives/gunk and keeping the blade from rusting.
|
|
Aikidoka
Member
Monstrous monk in training...
Posts: 1,452
|
Post by Aikidoka on Jan 9, 2015 19:14:42 GMT
As stated above, a good metal polish is very helpful when cleaning off tough residue. I have always used Nevr-Dull wadding polish and it has worked very well for me. It also works well if I receive a blade with a minor spot of corrosion. And a can of it seems to last forever...  |
|
Greg E
Member
little bit of this... and a whole lot of that
Posts: 1,338 
|
Post by Greg E on Jan 9, 2015 21:55:08 GMT
|
|
|
|
Post by schoolofmonkey on Jan 10, 2015 4:31:27 GMT
Well picked up some mothers and will start the polish tonight when the babies go to bed.
Post pics when I'm done.
|
|
|
|
Post by schoolofmonkey on Jan 10, 2015 13:20:27 GMT
Ok, All I got to say is how much black gunk comes off. I'm sure I need to do a little more, and excuse the dark room, makes it look a little dull still. But the blade isn't grey anymore.. Let me know is I need to keep going a little more, I'm not looking for do your makeup shiny, but a practical shine. 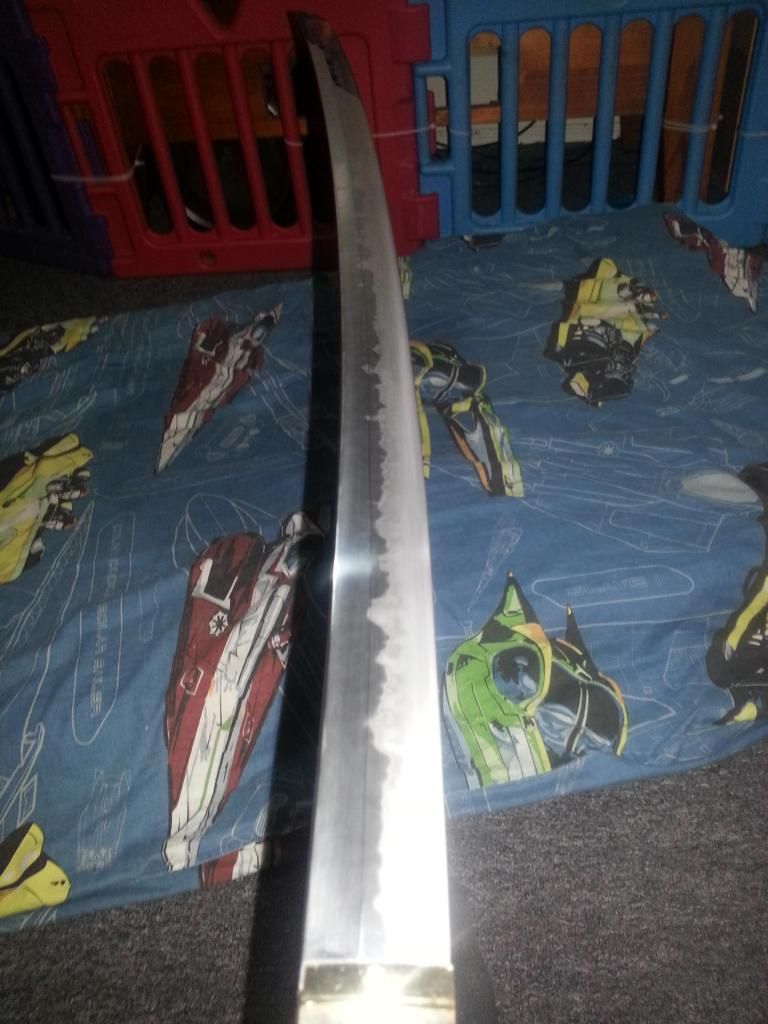 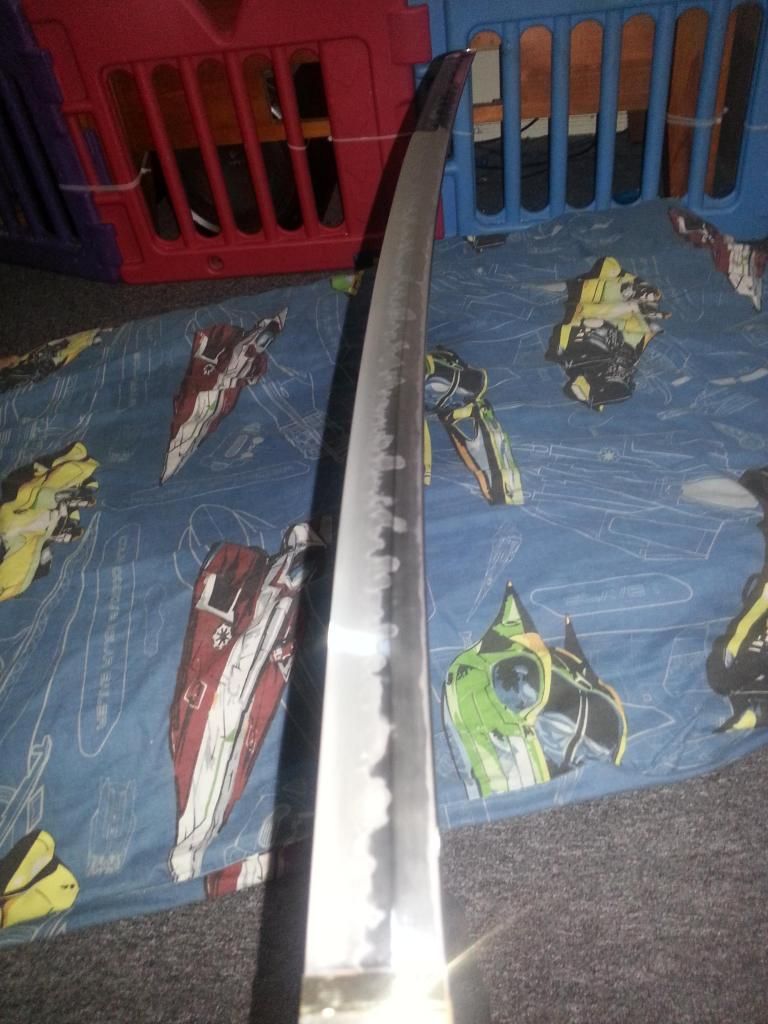 |
|
|
|
Post by schoolofmonkey on Jan 10, 2015 14:14:50 GMT
Ok something was bugging me so I gave it another 5 goes each side this time paying more attention to the edge. 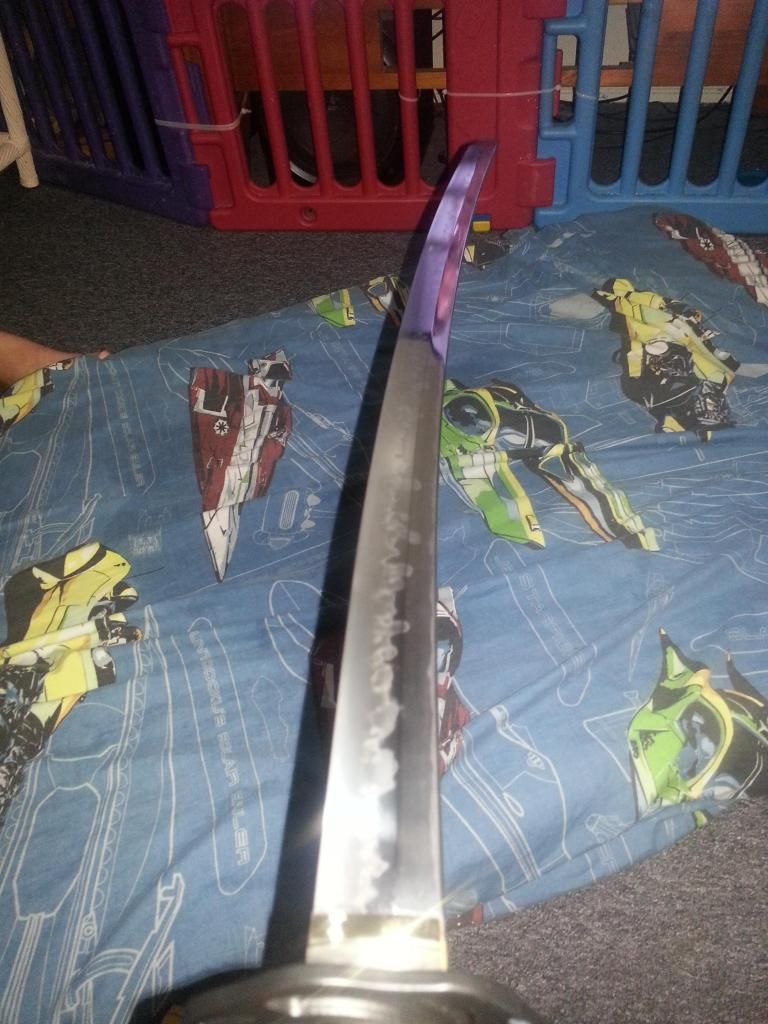  |
|
|
|
Post by uchiha998 on Jan 10, 2015 14:46:22 GMT
I think that looks great man! Is this the first time you have done any etching? Because your sword has a very nihonto-ish look to it with that white hamon. That is one think I love more than anything on a sword is the whitish colored hamon you so rarely see in production swords. Save some of the really expensive Kaneie and some others that are very highly priced. Wow, if that sword was folded the hada would really stand out nicely in the hamon I bet. Then again I don't like the look of most production sword hada. Too swirly and gaudy. Again you have to get something higher end like a Kaneie for the Hada to look right, IMO. Although some higher end Hanwei don't have a bad looking hada. But I digress, you did an incredible job with that etching. I have tried etchings on old beaters and even TH beaters a few times just to see if I could pull it off and after at least 5 tries on different swords. I realized I just don't have a knack for it. They always end up looking like a there is just a long dirty smudge going down the existing hamon. And before someone asks yes I made sure to clean them quite well before beginning. At least all of those swords were old or super cheap swords that I didn't much care for.
|
|
Greg E
Member
little bit of this... and a whole lot of that
Posts: 1,338
|
Post by Greg E on Jan 10, 2015 16:14:26 GMT
Now that looks great. Well done.
|
|
|
|
Post by Cottontail Customs on Jan 10, 2015 20:08:02 GMT
That looks AWESOME!!!  -Josh |
|
|
|
Post by schoolofmonkey on Jan 10, 2015 22:41:01 GMT
I think that looks great man! Is this the first time you have done any etching? Because your sword has a very nihonto-ish look to it with that white hamon. That was my first time, It came about from making a little mistake when I couldn't get some gunk off the blade. I used Stainless Steel cleaner, which from reading the bottle has a high concentration of citric acid. Personally I thought I'd stuffed the look of the blade, but the guys here helped, got some Windex to neutralize all the acids on the blade. Bought the Mother's yesterday, seems everyone swears by it, and I can see why. I was so worried about removing the Hamon which I read can happen, but no, it runs deep. I want to thank all the guys who helped me out, was feeling a little down when I thought I wrecked the blade. |
|
|
|
Post by Cottontail Customs on Jan 10, 2015 23:55:27 GMT
I was so worried about removing the Hamon which I read can happen, but no, it runs deep. I want to thank all the guys who helped me out, was feeling a little down when I thought I wrecked the blade. Just in case anyone is worried, an authentically created hamon cannot be removed from a blade with any amount of polishing whether using stones or pastes, at least not other than visually. Etching with acids as you did are only visually enhancing the hamon that is already there, they are not creating one so when it seems to disappear with polishing, it's only the enhancement that goes but the edge is still hardened and a hamon, pattern and all, is still there. If you ever try this on a blade that doesn't show a hamon after the process is completed, there might not be a real hamon there to begin with. You can also "create a hamon" with acid on a blade that was not differentially heated but this will be only an aesthetic one and does not actually harden the edge the same way as dh heat treating. Just an fyi I guess  -Josh |
|


