

DIY $7 Locking Sword Wall Mount (added another one)
Jun 24, 2011 1:29:52 GMT
Post by chrisperoni on Jun 24, 2011 1:29:52 GMT
---DIY Locking Sword Wall Mount---
(added another one)

Been thinking about making this for a while and finally got around to it last weekend. Nothing special and a design I'm sure is available to buy somewhere, but where's the fun in that?!
I have it mounted close enough to the ceiling that you can't just slide the sword up and out. Or you can mount the top piece diagonally across either side of the guard. Alternatively you could make the top part smaller and fit it around the grip, provided the pommel is big enough to prevent from sliding the sword down and out.
Approx. total cost is $7 per mount.
Parts:
-1" x 3" wood board cut to 9" long (remember that at the store it's called 1" x 3" but the actual measurements are more like 3/4" x 2&1/2". I used pine)
-1 hinge
-1 hasp and staple (or a hook & staple if ya don't need to lock it)
nails and screws should come with the hinge/hasp
-1 stain/lacquer
-6 1&1/2" wood screws
-brown ribbon
-glue
Tools:
-saw (the better your saw the easier this will be. I used a sliding mitre saw for the main cuts, and a band saw for the curves)
-drill/dremel and bits
-sandpaper (likewise the more types of sanders you have the easier it'll be. I used a disc sander, belt sander, dremel sanding bits and hand sanding.)
-screwdriver
-brush
-scissors
Do This:
After cutting wood to 9" length make your measurements. Keep in mind these numbers are based around the scabbard for a HT Tinker ems- you may have to adjust for your sword.
From the left-
1&1/2" -back of lower rest
2&3/4" -top of lower rest
4&1/2" x 3/4" -back of upper gate
4&7/16" x 1&1/2" -gate (you'll see why taking off that extra 1/16" is needed later)
a couple of inside measurements for shaping the gate
3/4" -basic thickness of gate
1/2" -cutout of gate piece, be careful not to cut this too deep or you won't have material left to shape the inside curve. (like I did the first time... whoops :oops: )
Should look like this. I left some space between each piece to account for the thickness of the cutting blade. Also, my piece of wood here is a little longer than 9".


Make your rough cuts, end up with this

Sand to final shapes- make any small shape adjustments you feel like. Rough sanding was done on a disc/belt sander with 80 grit. Then a dremel sanding drum and finally hand sanding with 100 grit then 220.

Drill countersinks first and pilot holes second, for screws on lower rest and back of gate. Keep in mind the spacing required so the screws do not run into each other in the rest.
(my countersinks were a bit rough looking- I really should get an actual countersink bit for this but instead I just used a large drill bit)

Drill recess for chape/tip. Size of this really depends on the shape of your chape/tip. I went with a two tier recess- found it worked better than just one hole. (sidenote- I forgot to do this until after I had already started staining so I had to backtrack a bit, whoops again :roll: )

Next maybe do a little touch up sanding on the drilled holes if needed. Then apply stain. I used Minwax Polyshades stain and finish in one- antique walnut. 3-4 coats. Note- some people prefer to stain after assembly. That's fine too, some people actually insist on this.Though I find inside edges where two parts meet can trap extra stain, and it's annoying trying to keep the stain off the hardware.

Assembly- Use 2 1&1/2" wood screws and glue to attach the 2 parts of the lower rest together. Attach the hinge, hasp and staple. Remember that extra 1/16" we took off the gate in the beginning? Well, now the gate should be somewhere between 1/16" and 1/32 "shorter than it's back piece, depending on how careful you were with sanding. This slight difference will allow the hasp to sit flush against the gate as opposed to being offset by the staple.
(optional hook shown as well)


Finally, mount to your wall with the last 4 wood screws. After screwing the gate to the wall glue the ribbon over the gate screws to hide them.
Finished product looks something like this. Note- these pics are of the first one I made
(whereas the pics in progress were for #2)


Clearly if someone truly wants to take the sword down form the wall they can tear this sucker apart, but technically that can be said of almost any sword display (save for something along the lines of steel a gun locker ). Lucky for me this mount serves as a sufficient deterrent and none of my houseguests are prone to vandalizing my home :twisted:
Edit/Add: Pics of another one made just for my jian. I decided the jian didn't fit well enough on the wall rack I made (scabbard has some funny curves to it) so I churned a vertical mount out for it with leftover wood from the last one. Top part is a bit blocky looking but, ehh, whatever- good enough. Needs staining.


(I realize I am contradicting what I wrote earlier about staining then assembling. What can I say?- I do what I feel like )
For this one I personalized one I had started earlier. I'm thinking now that if I make any to sell I'll probably just start with 'blanks' and cut/shape them to fit per order. It's really not much more work and should be a nice custom touch.
(added another one)
Been thinking about making this for a while and finally got around to it last weekend. Nothing special and a design I'm sure is available to buy somewhere, but where's the fun in that?!
I have it mounted close enough to the ceiling that you can't just slide the sword up and out. Or you can mount the top piece diagonally across either side of the guard. Alternatively you could make the top part smaller and fit it around the grip, provided the pommel is big enough to prevent from sliding the sword down and out.
Approx. total cost is $7 per mount.
Parts:
-1" x 3" wood board cut to 9" long (remember that at the store it's called 1" x 3" but the actual measurements are more like 3/4" x 2&1/2". I used pine)
-1 hinge
-1 hasp and staple (or a hook & staple if ya don't need to lock it)
nails and screws should come with the hinge/hasp
-1 stain/lacquer
-6 1&1/2" wood screws
-brown ribbon
-glue
Tools:
-saw (the better your saw the easier this will be. I used a sliding mitre saw for the main cuts, and a band saw for the curves)
-drill/dremel and bits
-sandpaper (likewise the more types of sanders you have the easier it'll be. I used a disc sander, belt sander, dremel sanding bits and hand sanding.)
-screwdriver
-brush
-scissors
Do This:
After cutting wood to 9" length make your measurements. Keep in mind these numbers are based around the scabbard for a HT Tinker ems- you may have to adjust for your sword.
From the left-
1&1/2" -back of lower rest
2&3/4" -top of lower rest
4&1/2" x 3/4" -back of upper gate
4&7/16" x 1&1/2" -gate (you'll see why taking off that extra 1/16" is needed later)
a couple of inside measurements for shaping the gate
3/4" -basic thickness of gate
1/2" -cutout of gate piece, be careful not to cut this too deep or you won't have material left to shape the inside curve. (like I did the first time... whoops :oops: )
Should look like this. I left some space between each piece to account for the thickness of the cutting blade. Also, my piece of wood here is a little longer than 9".
Make your rough cuts, end up with this
Sand to final shapes- make any small shape adjustments you feel like. Rough sanding was done on a disc/belt sander with 80 grit. Then a dremel sanding drum and finally hand sanding with 100 grit then 220.
Drill countersinks first and pilot holes second, for screws on lower rest and back of gate. Keep in mind the spacing required so the screws do not run into each other in the rest.
(my countersinks were a bit rough looking- I really should get an actual countersink bit for this but instead I just used a large drill bit)
Drill recess for chape/tip. Size of this really depends on the shape of your chape/tip. I went with a two tier recess- found it worked better than just one hole. (sidenote- I forgot to do this until after I had already started staining so I had to backtrack a bit, whoops again :roll: )
Next maybe do a little touch up sanding on the drilled holes if needed. Then apply stain. I used Minwax Polyshades stain and finish in one- antique walnut. 3-4 coats. Note- some people prefer to stain after assembly. That's fine too, some people actually insist on this.Though I find inside edges where two parts meet can trap extra stain, and it's annoying trying to keep the stain off the hardware.
Assembly- Use 2 1&1/2" wood screws and glue to attach the 2 parts of the lower rest together. Attach the hinge, hasp and staple. Remember that extra 1/16" we took off the gate in the beginning? Well, now the gate should be somewhere between 1/16" and 1/32 "shorter than it's back piece, depending on how careful you were with sanding. This slight difference will allow the hasp to sit flush against the gate as opposed to being offset by the staple.
(optional hook shown as well)
Finally, mount to your wall with the last 4 wood screws. After screwing the gate to the wall glue the ribbon over the gate screws to hide them.
Finished product looks something like this. Note- these pics are of the first one I made
(whereas the pics in progress were for #2)
Clearly if someone truly wants to take the sword down form the wall they can tear this sucker apart, but technically that can be said of almost any sword display (save for something along the lines of steel a gun locker
 ). Lucky for me this mount serves as a sufficient deterrent and none of my houseguests are prone to vandalizing my home :twisted:
 Edit/Add: Pics of another one made just for my jian. I decided the jian didn't fit well enough on the wall rack I made (scabbard has some funny curves to it) so I churned a vertical mount out for it with leftover wood from the last one. Top part is a bit blocky looking but, ehh, whatever- good enough. Needs staining.
(I realize I am contradicting what I wrote earlier about staining then assembling. What can I say?- I do what I feel like
)For this one I personalized one I had started earlier. I'm thinking now that if I make any to sell I'll probably just start with 'blanks' and cut/shape them to fit per order. It's really not much more work and should be a nice custom touch.

 such is the virtue of low res pics.


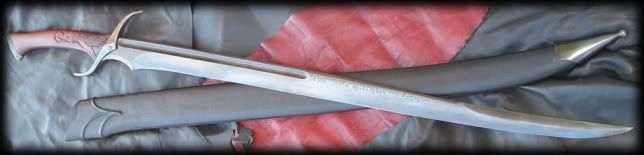
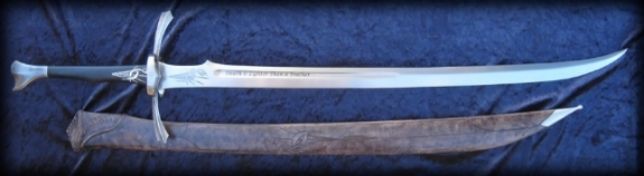 Herron's Flight by Brendan of Fable Blades


