|
|
Post by Brendan Olszowy on Feb 21, 2008 1:20:41 GMT
Yes I'm sure you experts wall call it a bit of licence to call my first ever attempt at forging "a blade", but I think it should be quite servicable. I got it down to about a 1 -1.5mm edge varying along the blade. I drew the tip out to about 2.5mm along the spine. It was just an offcut from a dagger I'm making (which I'll unveil at a later date), i was using it for bending the cross on the dagger, and it was the only piece I hadn't chucked out, and I thought it would lend its self to a blade. I didn't shape it at all before forging, and I won't do any but the bare minimum of grinding on it just to but an edge on it, Ill leave it hammered as a proud display of my first forging. I doubt I'l even sand it. Even the handle will stay as it is, I'll just tidy the edges and add scales. 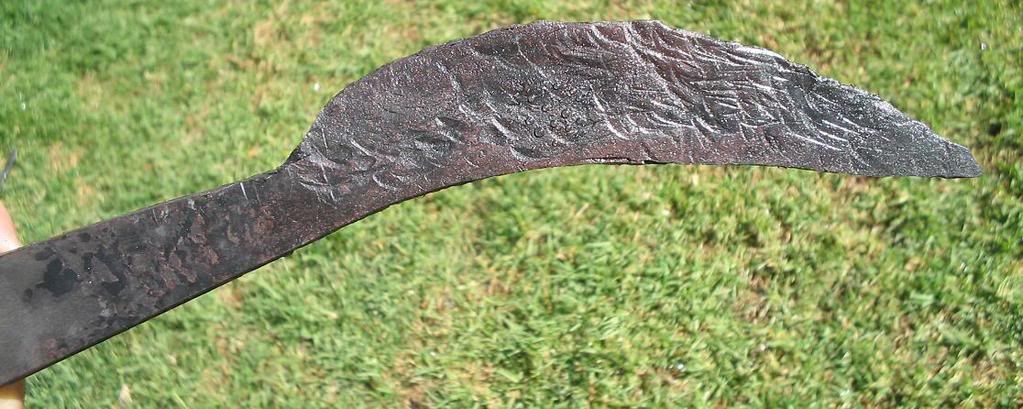 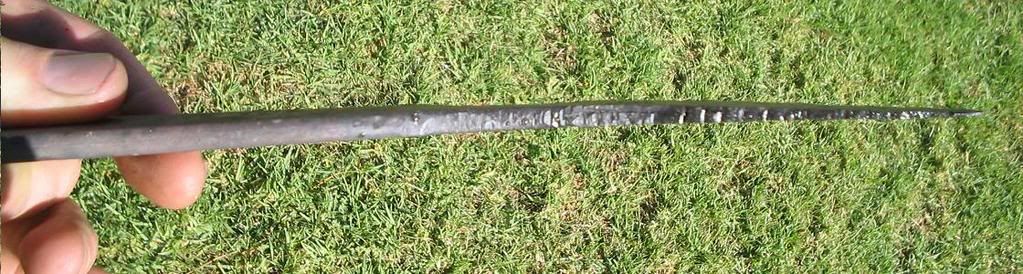 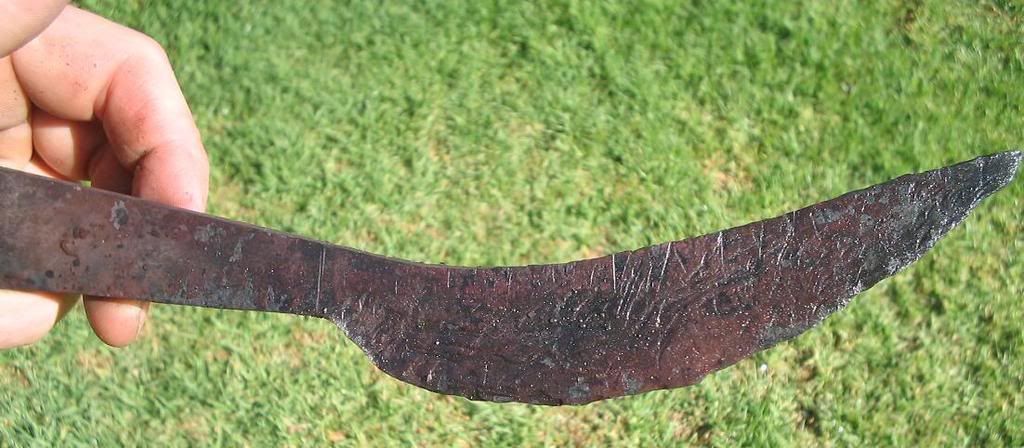 And these are a selection of scales I bought off ebay, which will be beautiful on my upcoming projects. 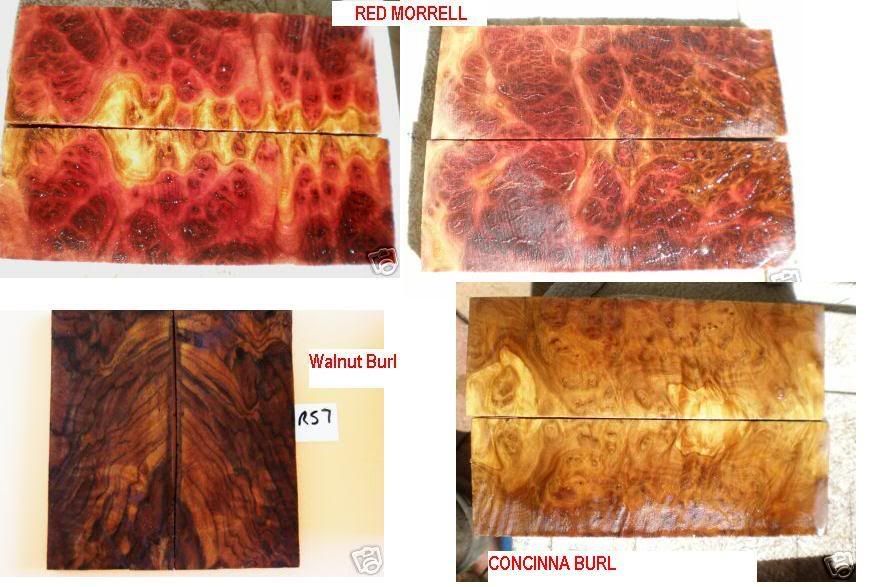 |
|
|
|
Post by rammstein on Feb 21, 2008 1:27:12 GMT
Wow! Congratz brenno! Have a karma when I recharge!
By the way...that first red morrell picture is the prettiest thing I've ever seen....
|
|
Deleted
Deleted Member
Posts: 0
|
Post by Deleted on Feb 21, 2008 2:06:27 GMT
Dress your hammer properly, and you won't get so many corner dig ins, also hammer control practice. Use a wooden mallet and modeler's clay to practice hammering hot steel(both move similarly) and you will learn quick.
|
|
|
|
Post by themaster293 on Feb 21, 2008 4:06:13 GMT
Looks like a kukri with a reverse edge.
|
|
Deleted
Deleted Member
Posts: 0
|
Post by Deleted on Feb 21, 2008 13:25:20 GMT
nice first attempt ive seen alought worse
|
|
|
|
Post by Dan Davis on Feb 21, 2008 13:41:25 GMT
Very nice for a first attempt. I second Sam's advice wit a bit of clarification- round the edges of your hammer and put a slight crown in the center of the face.
You're completely hooked now. Tell you wife it's all over.
|
|
|
|
Post by Brendan Olszowy on Feb 21, 2008 13:43:40 GMT
Yeah, this wasn't to be serious, it was just a quick experiment and some fun after heat treating my 'good' dagger.
Sam, I do need to 'dress' my hammer. Can I PLEASE see a pic of yours so I can immitate how you have it. Also sam is there a link to one of these drop point hunters that you mentioned - Thanks mate.
One of the reasons I purposely used the corner alot is because I wasn't heating the metal up very hot - only to a stong red/slight orange - so as to avoid growing the grain. So I needed to really attack it to get it moving, and it would cool after about 6 hits. So yeah, I wasn't vary caring. I like this ugly rustic look however. And the edge is surpricingly fairly uniform, as you'll see when I post the next pics of the sharpened edge.
I also normalised it three times when done, coz I was worried about Matt's concerns regarding forging High Carbon Steel.
I was also not prepared for how the blade curved as I spread the edge, so I have this scimitar jobby.
|
|
|
|
Post by Matt993f.o.d on Feb 21, 2008 15:46:05 GMT
The way you avoid the mega curving is to introduce a downward bend to the tip before starting to forge in the bevels.
Cherry red/light orange is actually a good temperature to forge most high carbon steels (according to Hrisoulas). Some other authors have written that high carbon steel can be forged from cherry red to bright orange, but ALL seem to agree that if you go too yellow, you have ruined it. Forging too cool can also cause problems. The concensus between the authors I have read is not to forge tool steel below critical.
Great first try, by the way. I doubt I'll be brave enough to try that for a while. Did you brush off any scale that formed before forging? That was a mistake I made when making my fork back along. The scale is so hard that it gets pressed into the surface of the hot steel, and leaves nasty marks.
|
|
|
|
Post by Matt993f.o.d on Feb 21, 2008 20:47:58 GMT
If you find shifting the metal hard, you could also just use a heavier hammer.
|
|
|
|
Post by Brendan Olszowy on Feb 22, 2008 9:23:45 GMT
Heres the gig: I arced up the forge again today, and decided to repair the blade from yesterday, and to try another one too. I managed to get yesterday's knife straightened up as such:  It was looking pretty cool. I heat treaded it and tempered it. It was only after removing it from the oven that I noticed I forgot to line up the blade edge, being too concerned with straightening up the spine. It was still quite hot from tempering so Stupidly I decided to use the hammer to try to flatten out the blade edge. DUMB:  Spew hey, and it was going so nicely. Anyway this shot shows the off cut that I used for the second blade - I used the other side yesterday: 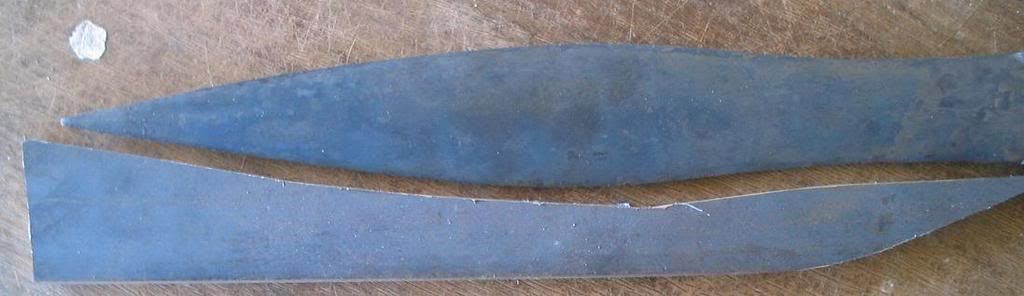 And this is the blade I made today - probably not as nice in shape as yesterdays effot. Spewin it broke. I drew it out longer today, mainly coz I din't leaveas much handle material. Below are the two knives side by side:  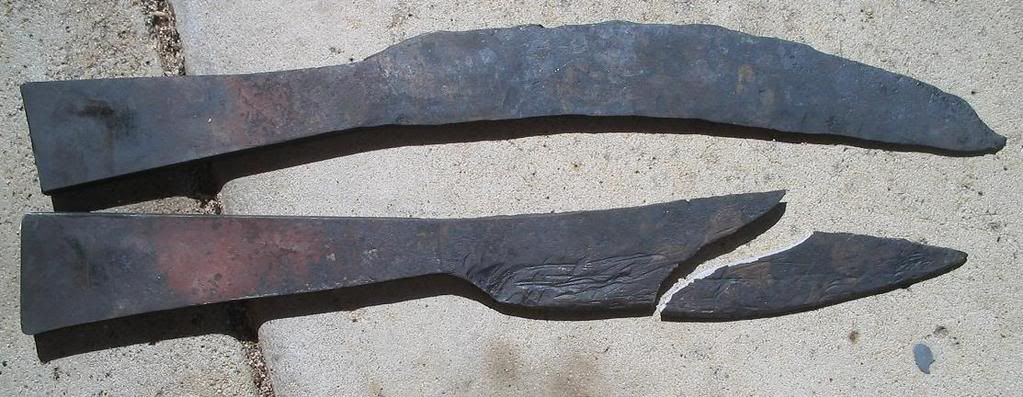 So this will be my memento for my first forgeries. 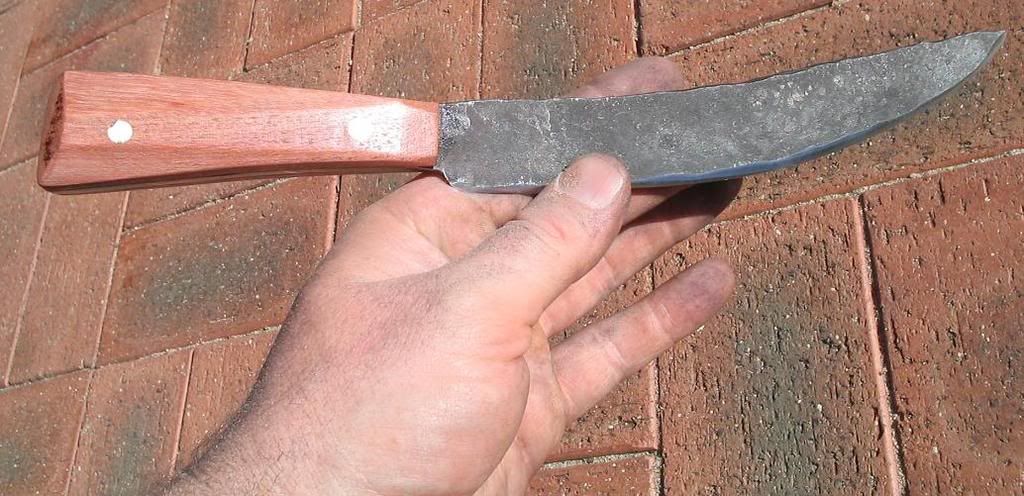 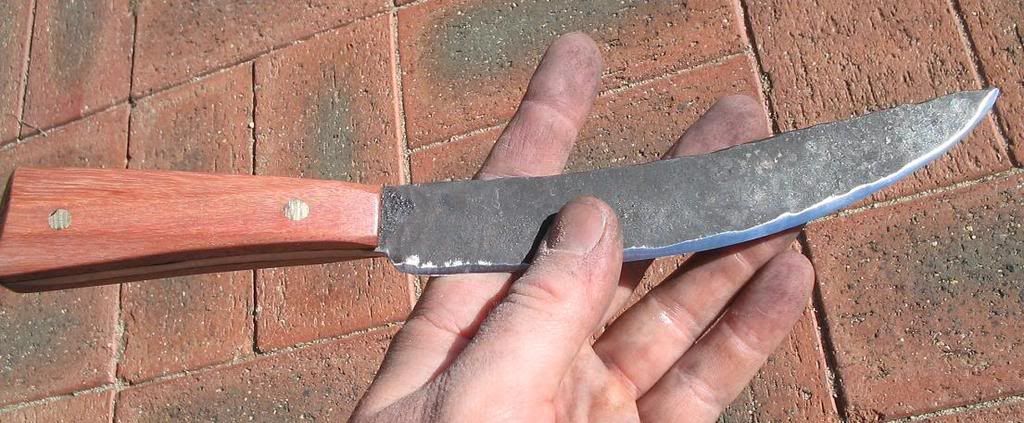 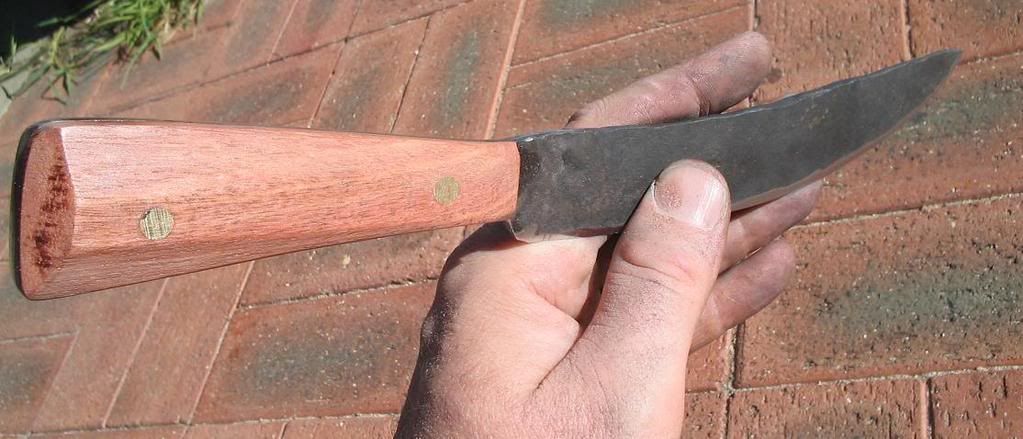 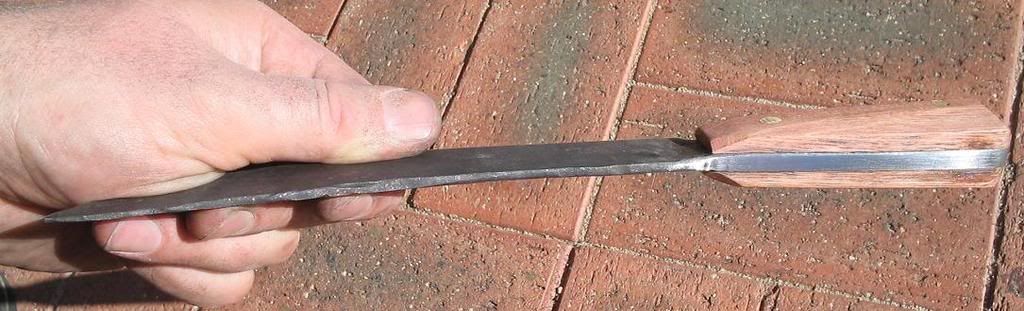 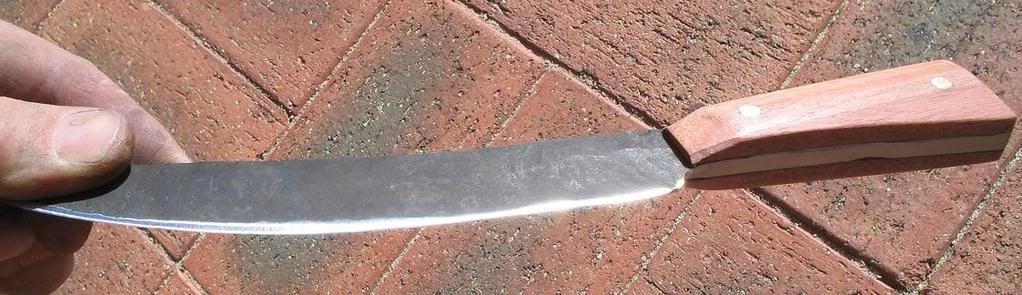 Ive got to say that so far I'm not sold on forging - it is very slow and requires CALORIES man. I'm using a 3lb club hammer and I'm feeling it. I decided to draw out and shape the point of my forge poker (1/2" square mild steel rod - left over from Braveheart) for some extra practice between waiting for my blade to heat up, and man it was some effort. Just to draw it out maybe an inch, It was taking too much out of me that I wanted to shape the blade - very time and energy consuming. I can't imagine drawing out a 30" blade. Maybe I wasn't getting it hot enough - my forge doesn't get mega hot, and I've been worrying about overheating the steel. I can craft some really shapely stuff with my grinders, and these knives just look like a 6 year olds clay pottery by comparison. Don't get me wrong - it's fun, and satisfying, and I'll try some more, but I don't think I'll be forging any tantos any time soon. |
|
Deleted
Deleted Member
Posts: 0
|
Post by Deleted on Feb 22, 2008 13:11:02 GMT
a question, I have seen that u have made a really nice blade which u posted before, how did u make that blade if you didn't forge it
|
|
|
|
Post by Dan Davis on Feb 22, 2008 14:03:18 GMT
They were made via stock removal, a perfectly viable option.
|
|
Deleted
Deleted Member
Posts: 0
|
Post by Deleted on Feb 22, 2008 14:13:06 GMT
I don't want to be rude but can you explain better? I'm kinda dumb x).
|
|
|
|
Post by Matt993f.o.d on Feb 22, 2008 15:54:22 GMT
Stock removal=Grinding into shape.
Hey Bren, I really like the second one! Much nicer than the first. Did you find avoiding the mega curve easier this time?
I find it odd that you find forging slow. It should be the case that 10 minutes in the forge should equal an hour on the grinder. Perhaps the forge isnt getting it hot enough. With mild steel, by the way, you can forge it at bright yellow heat, as the lower the carbon content, the hotter steel can be worked. Since mild steel has so little carbon (and therefore cannot be hardened), problems like grain growth don't occur.
Thing is with forged blades, what most smiths do is forge the blade roughly to shape, then grind it to the finished shape just like you do with your stock removal blades. Forging bevels and blade shapes so perfect that they dont need grinding would require lots of experience. Your work is amazing for a first try, and much better than I hope to achieve. Stick at it, man.
|
|
Deleted
Deleted Member
Posts: 0
|
Post by Deleted on Feb 22, 2008 16:05:53 GMT
If I can ask another thing, when you grind a weapon in to shape like this, how do they preform if you compare it to a forged blade? Is it the same or is it for wallhangers only? And what kind of steel do you use to do this?
|
|
Deleted
Deleted Member
Posts: 0
|
Post by Deleted on Feb 22, 2008 17:23:08 GMT
Cherry red/light orange is actually a good temperature to forge most high carbon steels (according to Hrisoulas). Some other authors have written that high carbon steel can be forged from cherry red to bright orange, but ALL seem to agree that if you go too yellow, you have ruined it. Forging too cool can also cause problems. The concensus between the authors I have read is not to forge tool steel below critical. No offense to Jim, or anyone else, but EVERYONE has they're own ways of doing things, and they all work well. One thing I do not agree with Jim is the forging temperatures thing(or you might be misunderstanding his description of color temperatures, as EVERYONE also see colors of steel differently). When doing all the rough shaping, FORGE IT HOT, metal moves MUCH MUCH easier at hotter temperatures, go to yellow, just don't turn it into a sparkler THAT is when steel is ruined. Forging too cold and worrying so much about temperature, no wonder you don't like smithing brenno. Forging blade steel is something you have to DO, you can read about it, study pictures, but until you do it, and not do it once or twice but OVER AND OVER again, you will not understand. Work the metal how you think it should be worked and how it is easier for you, then go from there. I find it odd that you find forging slow. It should be the case that 10 minutes in the forge should equal an hour on the grinder. Perhaps the forge isnt getting it hot enough. With mild steel, by the way, you can forge it at bright yellow heat, as the lower the carbon content, the hotter steel can be worked. Since mild steel has so little carbon (and therefore cannot be hardened), problems like grain growth don't occur. Thing is with forged blades, what most smiths do is forge the blade roughly to shape, then grind it to the finished shape just like you do with your stock removal blades. Forging bevels and blade shapes so perfect that they dont need grinding would require lots of experience. Your work is amazing for a first try, and much better than I hope to achieve. Stick at it, man. For someone with expeirience moving hot steel at the forge yes 10 minutes at the forge could be worth an hour at the grinder, but for a beginner that will NOT be the case, and will not be the case for quite awhile. Matt, with mild steel there IS grain growth going on, but it doesn't matter because you are not going to heat treat it. Grain growth doesn't mean crap for art. GRAIN GROWTH IS NOT THIS HUGE ASS BIG DEAL SO MANY PEOPLE MAKE IT OUT TO BE, I wish they would just drop it. After a regular forging cycle, one normalisation should handle ANY problems you have created during proper forging, AS A BEGINNER HOWEVER you might find that one or two will be beneficial. As you start to forge your blade, move all the serious material with nice hot heats, then as you refine your shape you can move to cooler heats, as you are not moving so much material, only just cleaning up lines and shapes not creating them from the raw barstock. Ive got to say that so far I'm not sold on forging - it is very slow and requires CALORIES man. I'm using a 3lb club hammer and I'm feeling it. I decided to draw out and shape the point of my forge poker (1/2" square mild steel rod - left over from Braveheart) for some extra practice between waiting for my blade to heat up, and man it was some effort. Just to draw it out maybe an inch, It was taking too much out of me that I wanted to shape the blade - very time and energy consuming. I can't imagine drawing out a 30" blade. Maybe I wasn't getting it hot enough - my forge doesn't get mega hot, and I've been worrying about overheating the steel. Brenno, for some and other reasons, yes forging is slow, and hard, and hot. With PROPER techniques however it is easy, a pleasure and very fluid and creative. Partly your problem is swinging a massive hammer that is WAY to big for you to start out with, you can expect to be able to be able to drive a formula 1 car never having driven a go kart??!? Start out with a lighter hammer, 1 or 2 pound NO heavier, when you find you can swing that hamer all day and not even feel the weight, THEN go to a larger hammer. PRACTICE proper hammer technique, proper control and tending of the fire, it's all gonna be hard, and no offense but don't wuss out on us yah big lug. I may not have too much practical expeirience finishing blades, but if you want advice from someone who forges, ALOT, MANY types of steel, forged many shapes and many blade styles, and screwed up PLENTY of blades, and I temper my advice not with my opinions so much as trying to get you to understand your way of doing things, not mine. My advice? learn the basics of shaping steel first, no blades, until you can form the metal into what shape you want it consistently and precisely, understand each heat and what is too hot and what is too cold, how to move the steel in the way you want it to make it do what YOU want. If I can ask another thing, when you grind a weapon in to shape like this, how do they preform if you compare it to a forged blade? Is it the same or is it for wallhangers only? And what kind of steel do you use to do this? Properly done,when talking with mono steel blades (not damascus), when done properly forging and stock removal will provide a blade with the same properties, forging does not make a super blade, in face so much more can get screwed up during the forging process, that alot of times stock removal is a more sure fire way to make a blade. Personally, forging provides a way to not be held down by your material's dimensions. With stock removal, if you have a peice 12 inches long 1/4 thick 1 1/2 inch wide, you can only make a blade within those dimensions, with forging you can draw that bar out to almost twice it's length, with a vicious curve. Or, if you have a bar of good steel that happens to be 1 1/4 inch wide, 1/2 inch thick, and bent up like a moustache(rail road rail anchors) you can draw that bar out into a sword, whereas that would be useless with stock removal. FORGING IS FREEDOM!!!!!!!!!!!!!! |
|
Deleted
Deleted Member
Posts: 0
|
Post by Deleted on Feb 22, 2008 19:39:19 GMT
Thx for that info Sam really helpful can anyone tell me if there are like info on how to do stock removal?
|
|
|
|
Post by YlliwCir on Feb 22, 2008 21:36:09 GMT
sl4k, stock removal makes a functional blade. I believe they perform about the same, but I'm no expert. Albion uses stock removal as does Angus Trim, two well thought of sword makers. Here is a link comparing the two processes; www.myarmoury.com/feature_groundpound.htmlBrenno, you do impress me with your talent and willingness to learn and attempt new things. Good on you, brother. It seems Sam posted while I was typing, my bad. |
|
|
|
Post by Matt993f.o.d on Feb 22, 2008 22:20:23 GMT
There certainly does seem to be a lot of noise about grain growth. Good to hear that its not as big a deal as they make out, as that simplifies things a lot!
|
|
Deleted
Deleted Member
Posts: 0
|
Post by Deleted on Feb 22, 2008 23:31:21 GMT
I never imagined that you could make a functional sword this way  , why don't I have 10 pm's about this? ;(. Well I guess I will be joining you all in stock removal sword making soon then  , just need to build a forge. If it's not to mutch to ask, if anyone that is making stock removal swords would do a proper walk trough on how the process is done I would be really happy, I have read some on the inet after hearing this from you guys but I haven't found a good one yet. |
|


 , why don't I have 10 pm's about this? ;(. Well I guess I will be joining you all in stock removal sword making soon then
  , just need to build a forge.