|
|
Post by Matt993f.o.d on Jan 27, 2008 19:51:20 GMT
And its a stunner! 1.5m square hearth. Pics will be uploaded tomorrow (I'm on my work computer and the admin won't let us use sites like photobucket). It has a water-cooled tue iron, adjustable legs, a mounting point for a leg-vice, a hopper for spare fuel and even a rack for hanging tongs! What a beauty!!
The downside is that it needs a lot of de-rusting to make it useable. The chimney needs welding, and the hearth, water tank and legs need de-rusting and painting. No rust holes in the important bits. It's all made from 6mm plate! I reckon I'll paint the chimney in high-temp exhaust paint, the water tank in bitumastic, and the legs and hearth in good old hammerite.
I still need a blower, but that is no problem. I may just forget about the expense and buy a leaf blower, then strip it for bits!
All this for twenty quid. Not bad.
I have a funny story about collecting this forge. Refer to the forum cafe for this.
|
|
Deleted
Deleted Member
Posts: 0
|
Post by Deleted on Jan 27, 2008 19:56:21 GMT
Conga rats, Matt! Look forward to pics!  |
|
|
|
Post by Matt993f.o.d on Jan 27, 2008 20:00:05 GMT
Its not much of a looker at the mo. Rusty as hell on the surface. Needs a good cleanup, and some paint.
|
|
Deleted
Deleted Member
Posts: 0
|
Post by Deleted on Jan 27, 2008 20:00:44 GMT
PICTURES, PICTURES.
|
|
|
|
Post by Matt993f.o.d on Jan 27, 2008 20:09:26 GMT
Tomorrow. Guaranteed! I hate my computer, home and work. Neither allows me to upload pics. And I don't own a camera. I have to use the missus' camera and PC to upload them, cos she is the only one with a fast enough net connection to do it.
Shes a bloody excellent photographer, though.
|
|
|
|
Post by themaster293 on Jan 27, 2008 22:42:13 GMT
Congrats. I get mine in the Spring.
|
|
|
|
Post by Matt993f.o.d on Jan 28, 2008 12:52:21 GMT
You're getting a forge? What sort is it going to be?
|
|
|
|
Post by Brendan Olszowy on Jan 28, 2008 13:45:14 GMT
Well I'm keen to have mine, even if it is half stacked bricks. The tuyere kicks a.
Sorry Sam, did you say photos? *ahem*
|
|
Deleted
Deleted Member
Posts: 0
|
Post by Deleted on Jan 28, 2008 14:58:26 GMT
IT IS NOW TOMMORROW, PHOTOS OR DIE~~~~~~~~~~~LOL.
|
|
|
|
Post by Matt993f.o.d on Jan 28, 2008 22:41:58 GMT
ALL PICS ARE IN!!! I apologize for the crappiness of the photos. I wanted the girlfriend to take them because she is a genius photographer, but she wouldnt because she is also a perfectionist, and said the lighting was too bad. Nevertheless, Here are my tools I got free. Since I have 4 (!) pairs of nail pullers, I think I will modify them, and turn them into different types of tongs. They are rusty at the moment, but I will clean them up.  Next is my nice little anvil. I pretty much gave myself a hernia lifting it up onto the bench. Poor lifting technique. It bounces the hammer back really nicely, and gives a beautiful ring when struck.  Now here is the anvil with my lovely bodywork dolly in the hardie hole. I had to have it ground to fit, but it fits beautifully now.  The next pic is the rusty old chimney for my forge. The legs for the hearth are propped up on it. They are adjustable, so the forge can be set up on unlevel ground. I have already cut all the rusty metal out of it, so it doesnt look like this anymore. It was surprising just how much good metal was actually left in it! I plan to weld it up and repaint it in high temperature exhaust paint.  This is the water tank, blower inlet and watercooled tue iron. It is rusty on the surface, but there are no holes.  A better view of the tue iron. It is a sideblast forge, so there is no special firepot. As it is coke fuelled, the fireball itself is kept alight by the air from the tuyere, and so the surrounding coke in the hearth will not burn. The tuyere is in great shape.  A better view of the blower mounting bracket, and air ducting through the water tank. The water cools the entire air inlet and tuyere assembly. It must be pretty efficient, because the tuyere shows no sign of heat damage.  I'm sorry about the poor angle of this photo. The hearth is too heavy for me to drag out on my own. Its made from 6mm plate! It is 1m square, so should be big enough for anything I should ever want to use it for. You can just about make out the tong-hanging rack and vice mounting point.  This is the hopper for holding spare fuel.  This final pic is of the back of the hearth, where the tue iron enters.  The whole forge bolts together. The hearth needs lining with firebricks to stop the base burning through. It all needs a good de-rusting and paint up, but all of the major components are in perfect shape. A bargain for 20 quid, don't you think? |
|
|
|
Post by themaster293 on Jan 28, 2008 23:51:15 GMT
You're getting a forge? What sort is it going to be? To tell you the truth: I have no idea. A hole dug in the ground, lined with bricks and then a whole bunch of coal gets dumped in. And then I have a huge steel tub to quench/temper. Your forge looks nice BTW. |
|
|
|
Post by Matt993f.o.d on Jan 29, 2008 9:19:15 GMT
|
|
|
|
Post by Brendan Olszowy on Jan 29, 2008 10:16:11 GMT
Sweet forge matt. Actually that's some very serious hardware, which I'm sure could last you a lifetime if you wanted it to. Making gates etc. 293 - when you say "tub" for quenching I'm imagining like a bath tub. Please note that a sword must be dipped into the quench vertically. If horizontally one side will cool marginally quicker putting a bend in the blade - very bad. This is my Quencher - its a piece of 100mm x 50mm gutter downpipe, which is crimped and folded at the bottom to seal it. Filled with canola oil. Cap made from the tubing. 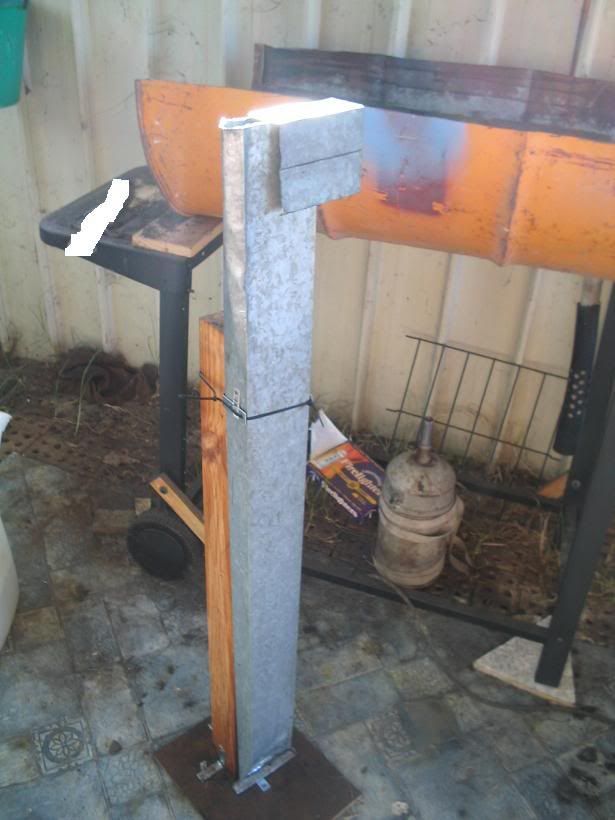 And heres my forge in case it inspires any other DIY jobs. It works fine. The tuyere set in mortar, in a half drum, on a BBQ trolley: 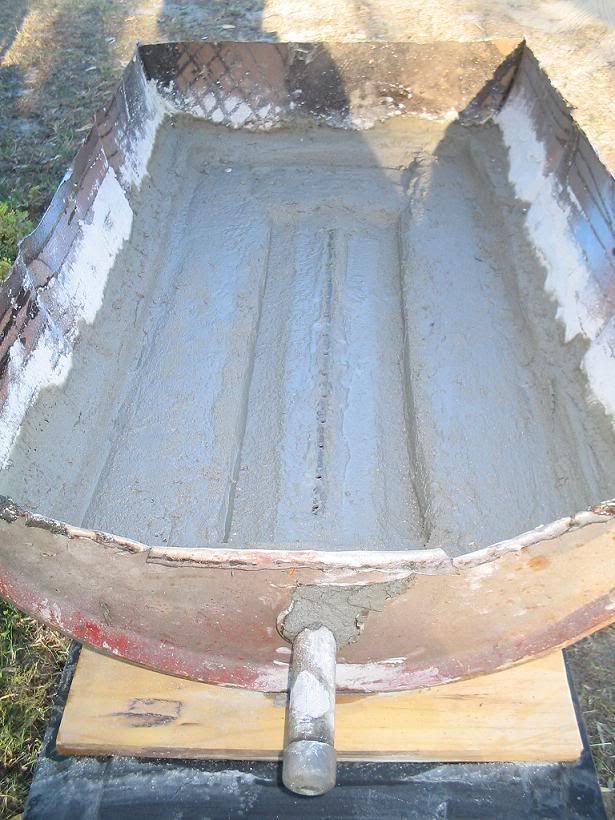 Lined with bricks and in use:  At the old air pump I have a perforated tube which allows me to control air intake to some degree (pumps too much - slide the tube up or down): 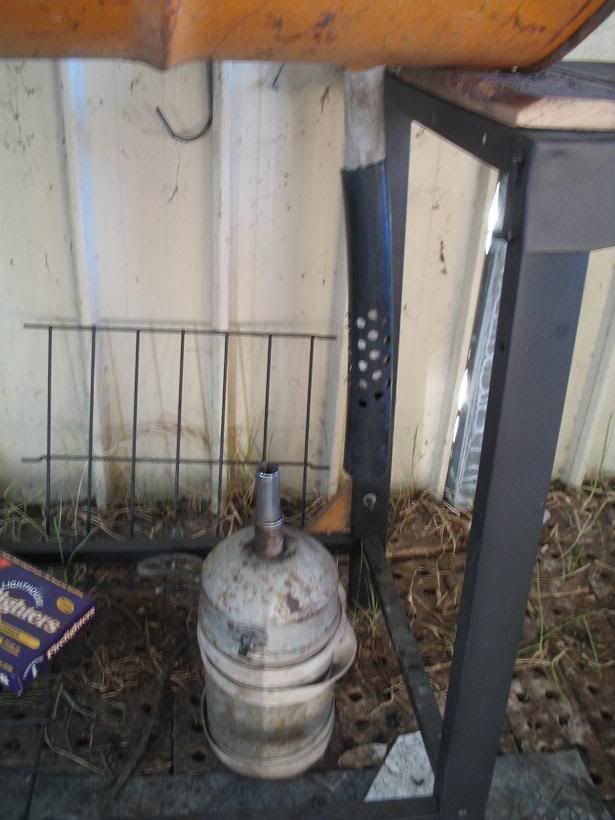 And an easily removed cap at the end for clearing and further regulation of flow. 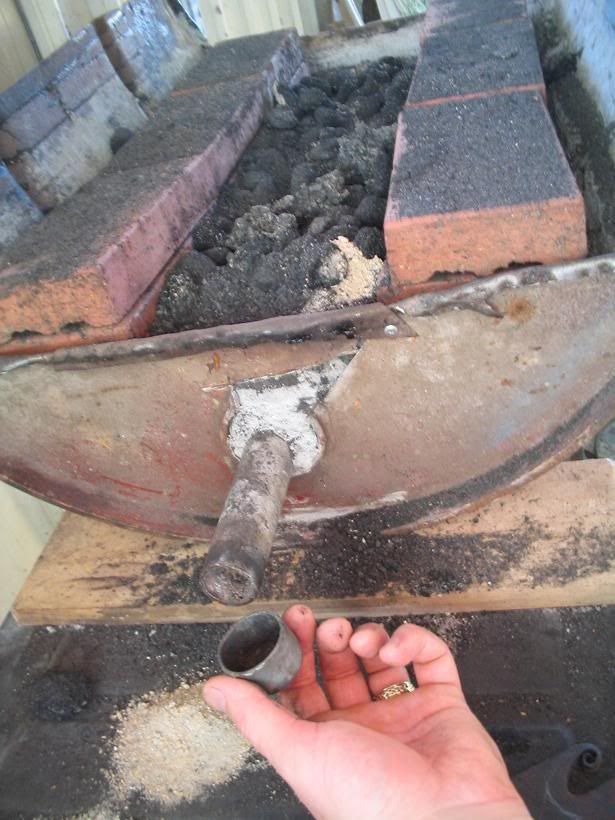  |
|
|
|
Post by Matt993f.o.d on Jan 29, 2008 14:06:36 GMT
Brenno's is a good design, I think. Lots of people try to get beginners to use brake drum forges and the like, but they really are crap. Burn out after a couple of weeks and are so small the largest thing you can make in them is a nail.
The forge I have up there served Nathan Bennett (the kind smith who supplied it) for 3 years of business before he got an even bigger one. He has three now. The huge one, one like mine, and a small one for demonstrations.
So far today I have finished cutting the gouty rust out of the chimney, and have ground a lot of the surface rust off the frame. I got through 2 grinding wheels! I will get pics when it has been welded and painted.
|
|
Deleted
Deleted Member
Posts: 0
|
Post by Deleted on Jan 29, 2008 15:30:39 GMT
Brenno's is a good design, I think. Lots of people try to get beginners to use brake drum forges and the like, but they really are crap. Burn out after a couple of weeks and are so small the largest thing you can make in them is a nail. Which ones were you looking at? I have had a brake drum in service for demonstrations for 3 years now, with NO signs of stopping, and with a slight modification i could do long blades of ANY length in it, but as is i can forge up to a 6 inch blade knife with room to spare. and can heat up 1 1/2 inch round SOLID in it NO problem either. Keep in mind also, Brenno's forge is just suitable for heat treating, for one using charcoal briquets, and for 2, when working a sword you only work 4 to 7 inches at one time, when working a knife 3 or 4 inches at a time, YOU DO NOT NEED TO HEAT THE WHOLE BLADE UP WHILE FORGING. |
|
|
|
Post by Matt993f.o.d on Jan 29, 2008 18:04:43 GMT
The whole thing would go floppy ;D I am slightly embarrassed to say that I am just echoing John and Nathan, who both advised me against them. The bloke on www.beautifuliron.com seems to hate them, as well. What do you think of the pics? So far I got ALL the rust out of the chimney, made up one replacement panel (two to go), breathed in a ton of fine rust and metal filings, turned myself red with rust-dirt and found out how NOT to use an angle grinder. Tomorrow, I plan to finish chimney, which will involve making the other 2 panels and welding them on, then painting it with high-temp paint of some kind. Perhaps fireplace paint. Got myself some firebricks on order with a builder I know, as well. |
|
Deleted
Deleted Member
Posts: 0
|
Post by Deleted on Jan 29, 2008 19:03:33 GMT
|
|
|
|
Post by Matt993f.o.d on Jan 29, 2008 19:53:33 GMT
That is the neatest drum forge on the planet! Really smart design! Is this you at a demo of some kind? The mother in the 2nd pic is obviously preventing her son from touching the "nice shiny red metal!" I'm not sure if I'll be using the full size of the forge for a long long time, but all the same, its nice to know its there. The only worry is that I'll have to be careful to manage the fire so as to not waste fuel, since the hearth is sooo big. |
|
Deleted
Deleted Member
Posts: 0
|
Post by Deleted on Jan 29, 2008 20:06:53 GMT
Thanks, it works like a TOP, Yeah i do demonstrations all over the place when I can. Just take it easy on the airflow, the more air you add the bigger the fire will get, hand crank is your best friend:). Now change your friggin signature now, no more "one forge short of a smith"  . |
|
Deleted
Deleted Member
Posts: 0
|
Post by Deleted on Jan 29, 2008 21:12:58 GMT
|
|


 .
. Unfortunately I'm an edge-perfectionist. Also one wrong move when unsheathing and the throat nicks the edge on either side.