|
|
Post by muerteblack on Aug 10, 2010 23:58:18 GMT
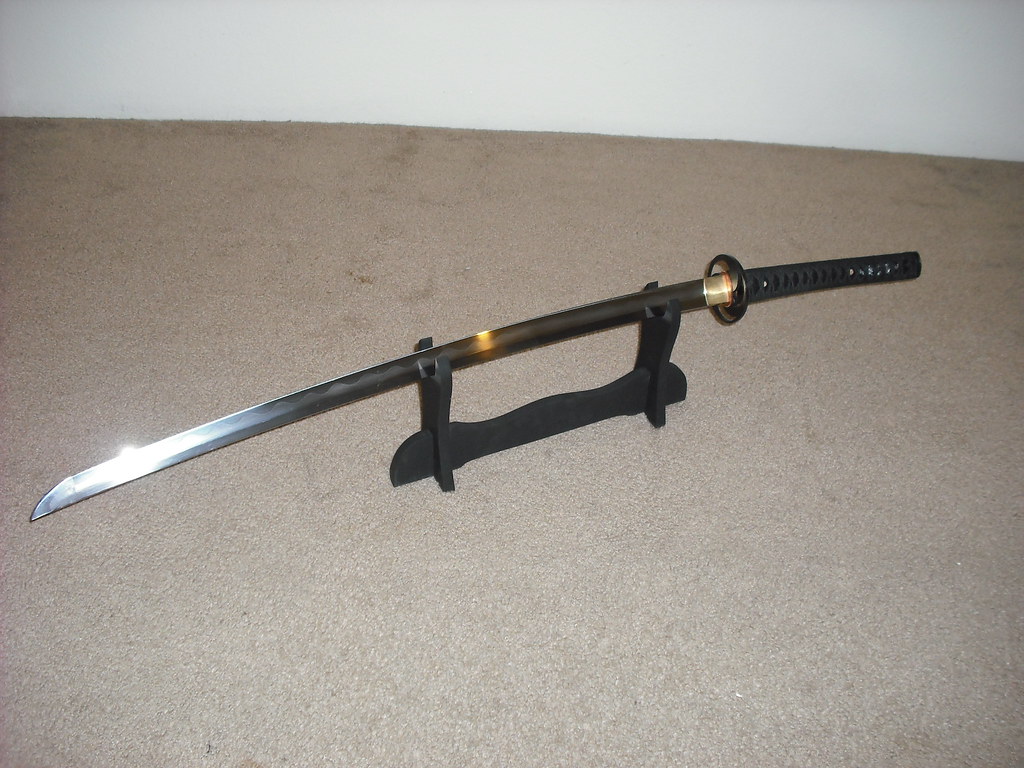
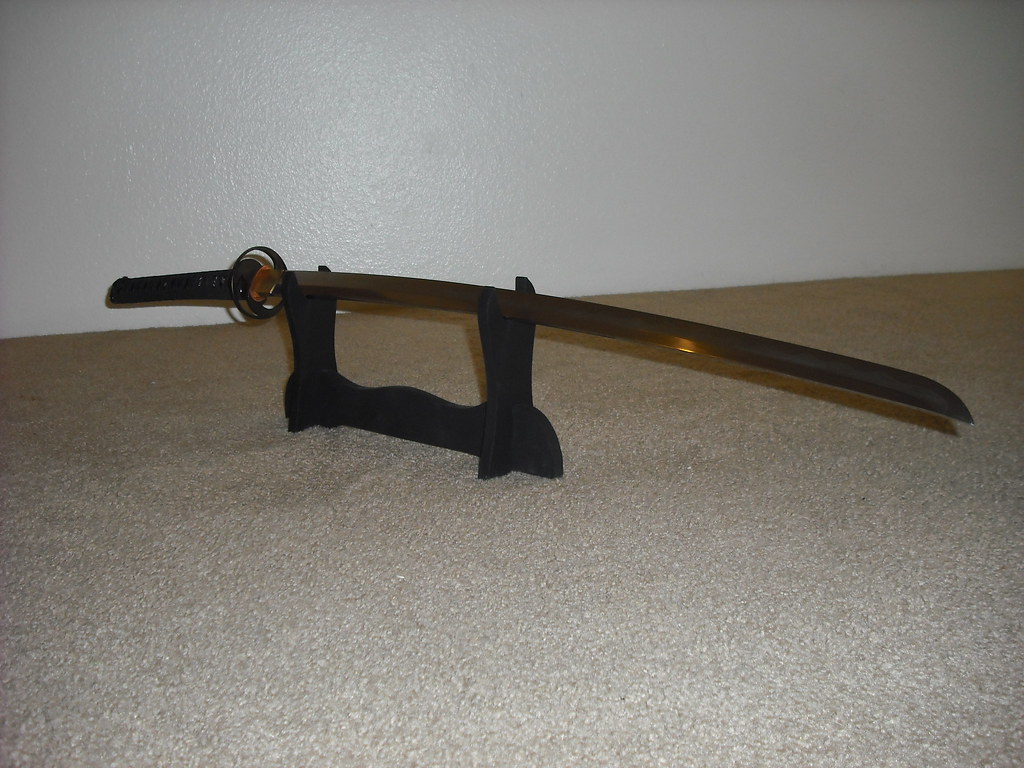
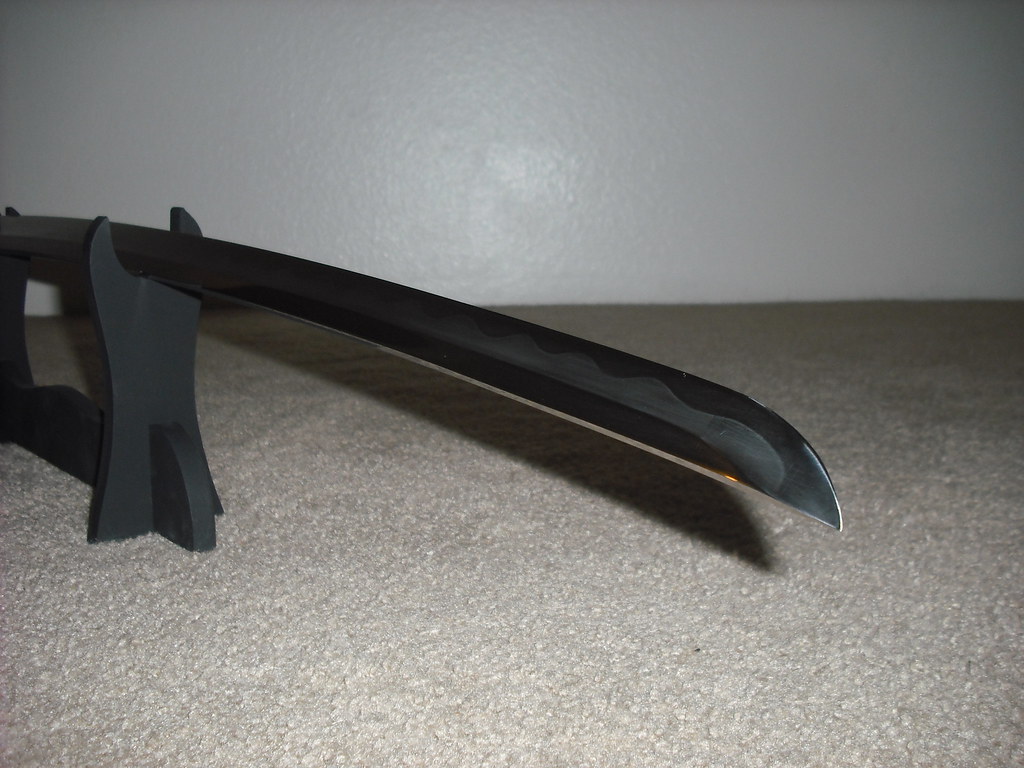
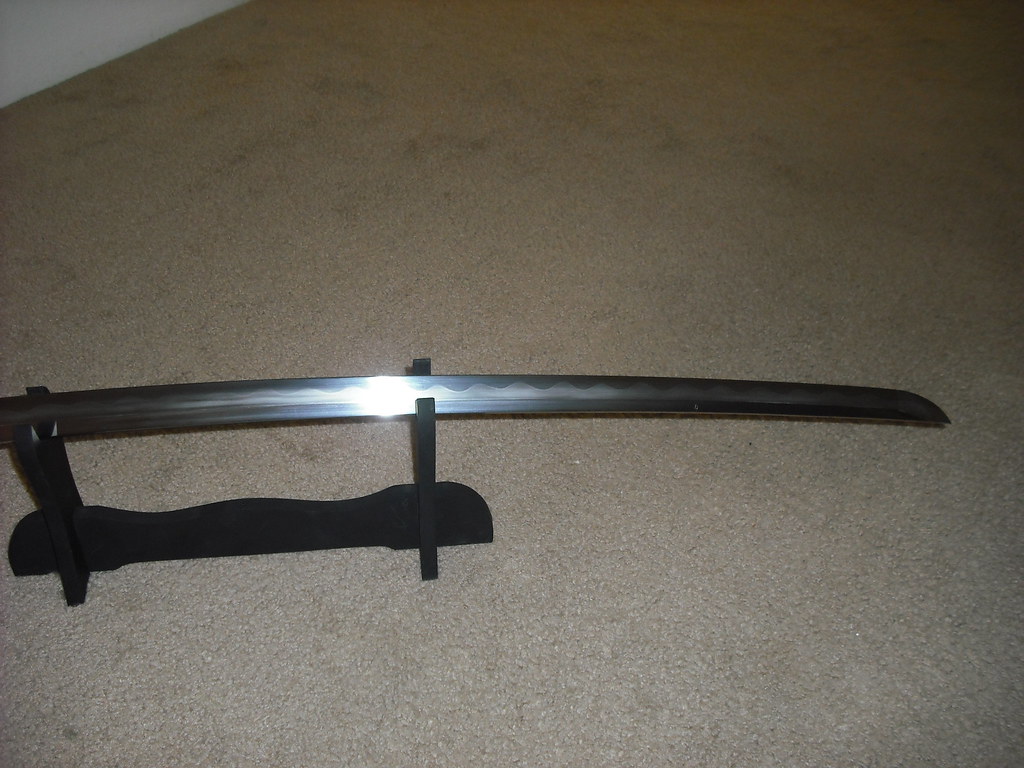
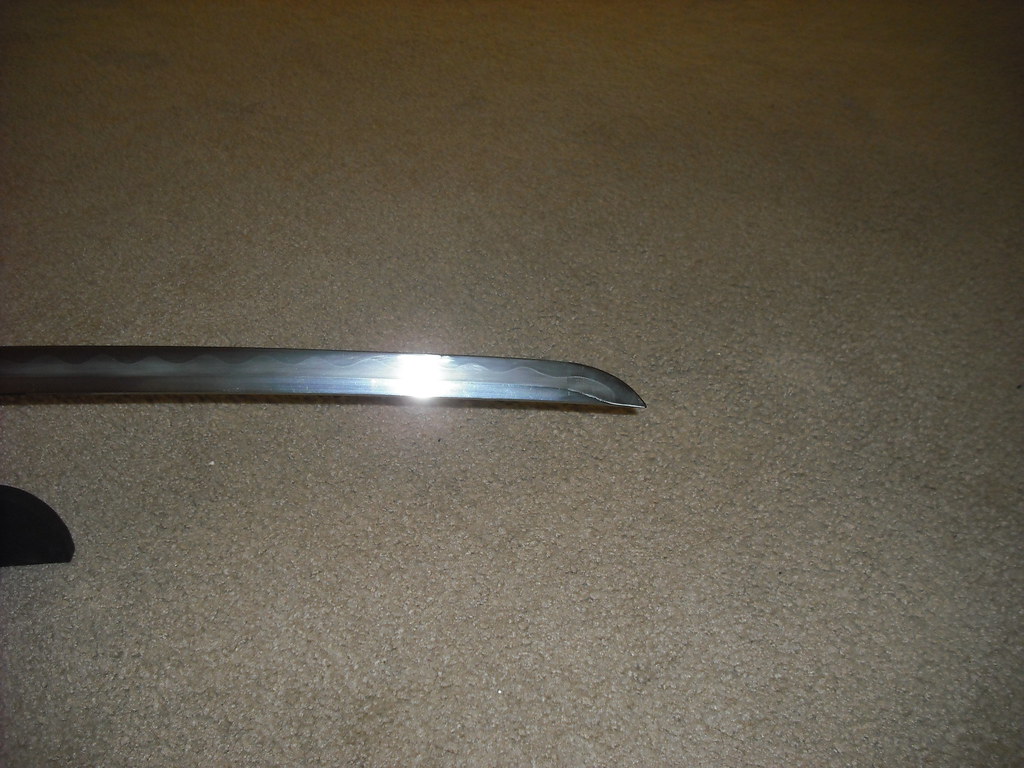
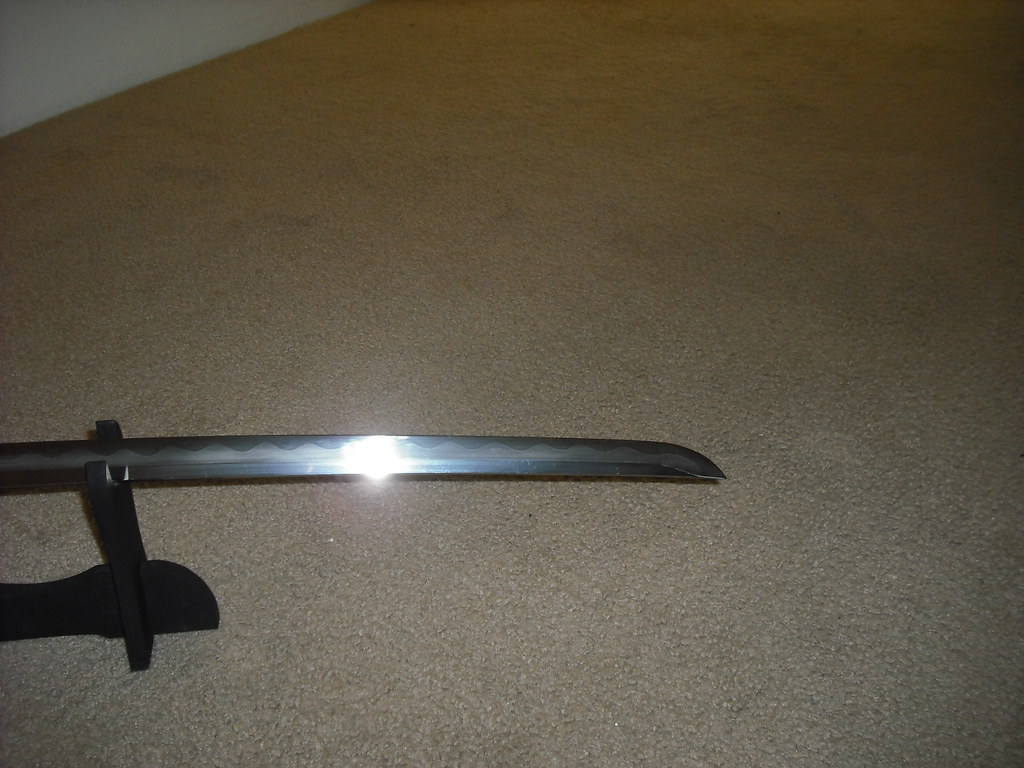
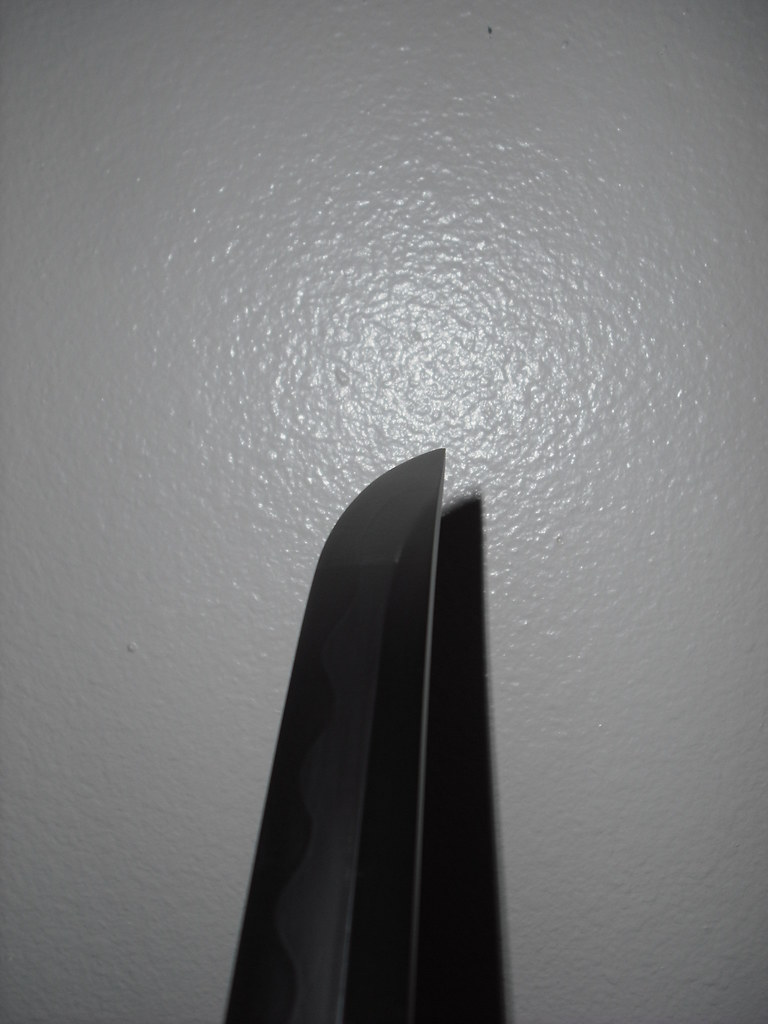
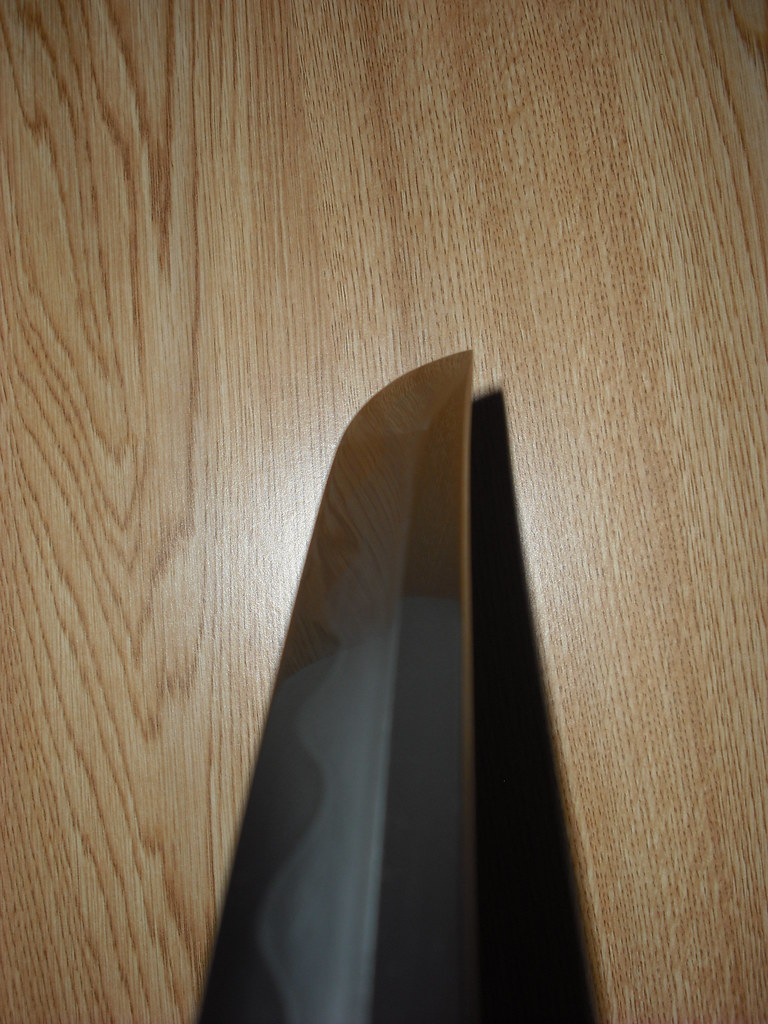
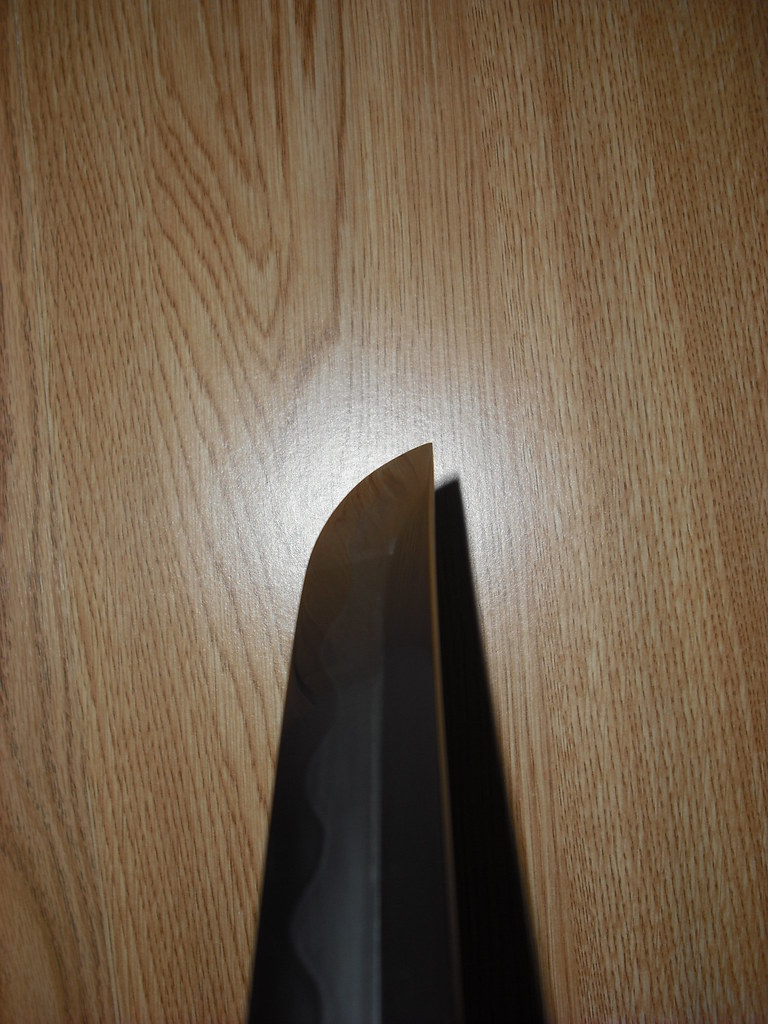
Ok, so if you'll recall the old thread I made about having to repair some damage on my Kuramono and re-polish it, you'll notice that the polish, while consistent, did not match the look of the original polish that the sword came with that I adored so much, which was a nice grey satin from the shinogi to the hamon, which was a clear, mirrored band, then became a milky near-mirror the rest of the way to the edge. The new polish basically turned the whole ji into a perfect mirror, with the exception of the hamon, which was now a solid white or black (depending on the angle of the light) line zig zagging down the sword. While not bad (it actually looked a lot like pictures of some Munetoshi swords I've seen) it really was not as interesting as the original polish with which the Kuramono came. I got some new sandpaper from a very nice ebay store, and set out to replicate the original finish, starting by bringing the ji all the way down to 320 grit to repair some deeper scratches that my previous hen-scratched kissaki left. I then brought it back up until the polish matched the original, using a slight bit of original polish that existed on the tang under where the habaki would have been as a reference. I then re-established the faux-yokote line and counter polished the kissaki, this time very closely matching the rest of the blade, and from comparing pictures that I took of the original polish when I first got the sword, I believe I achieved my goal, and am quite pleased with the results. I now leave you with pictures. 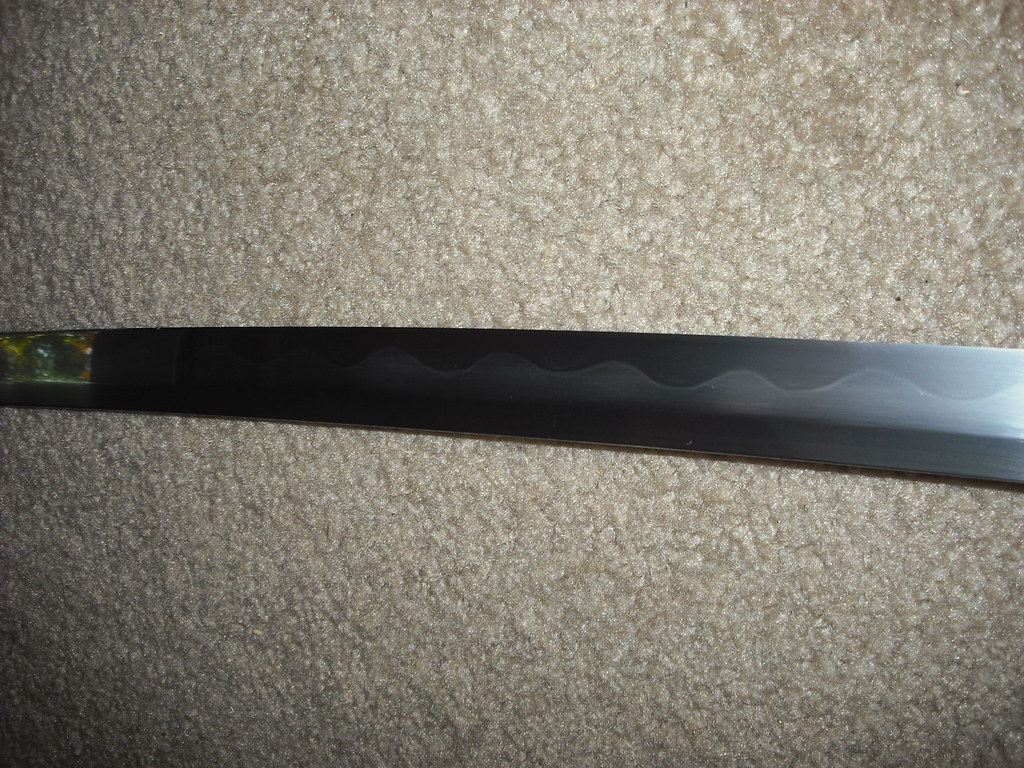 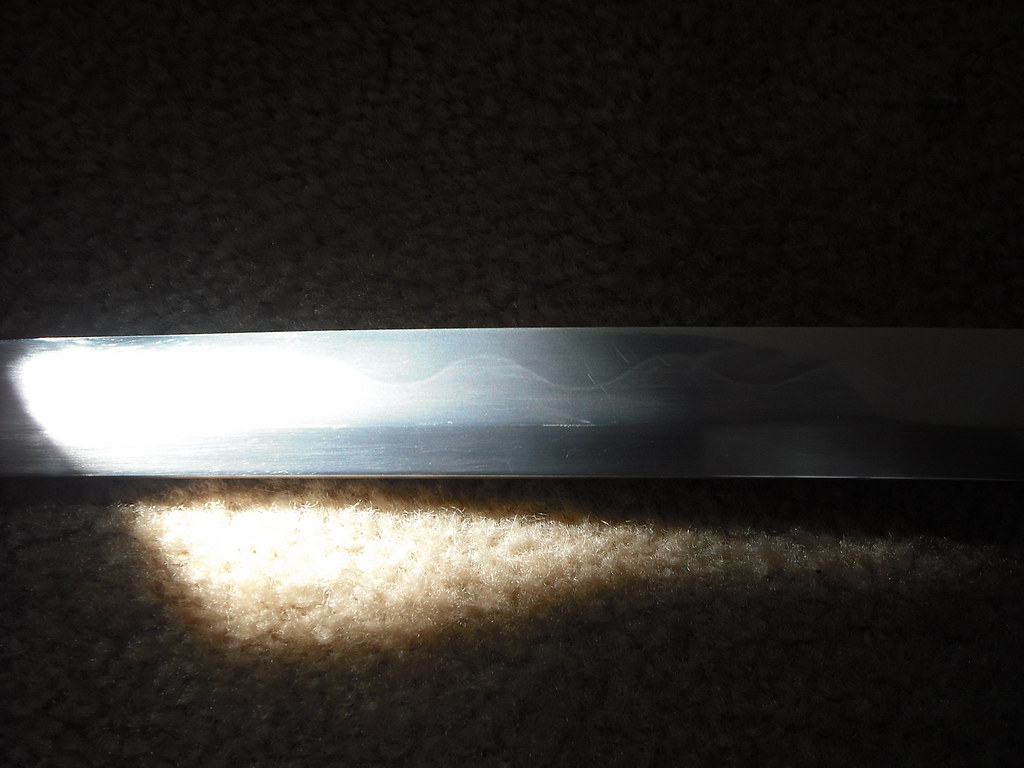 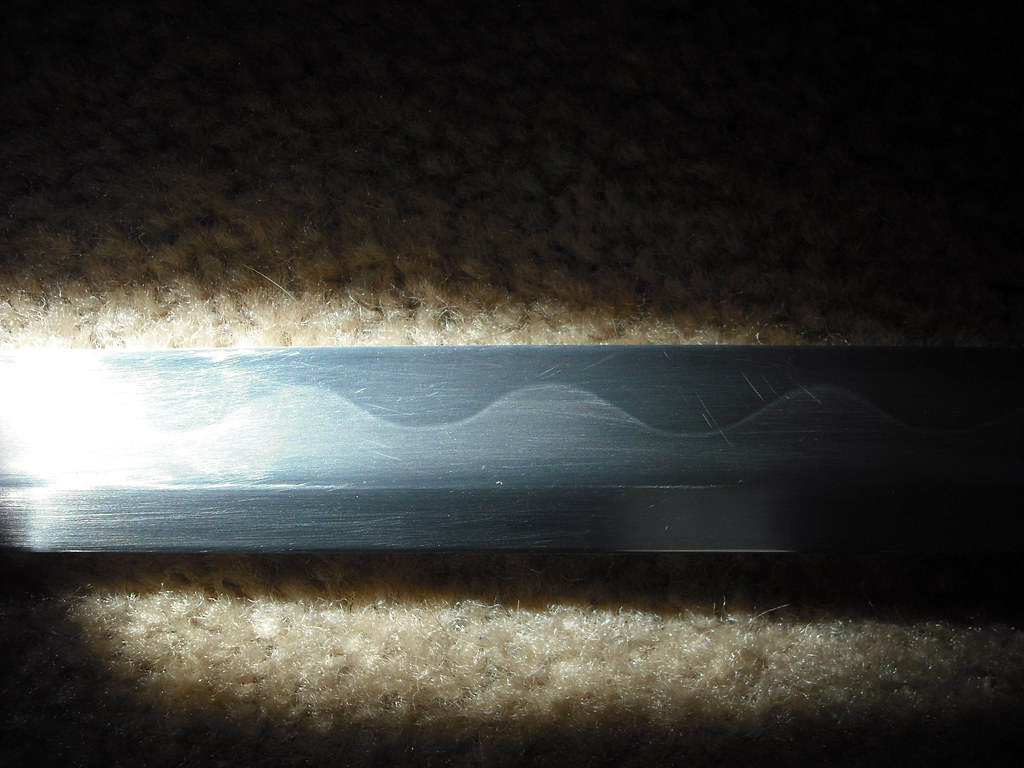 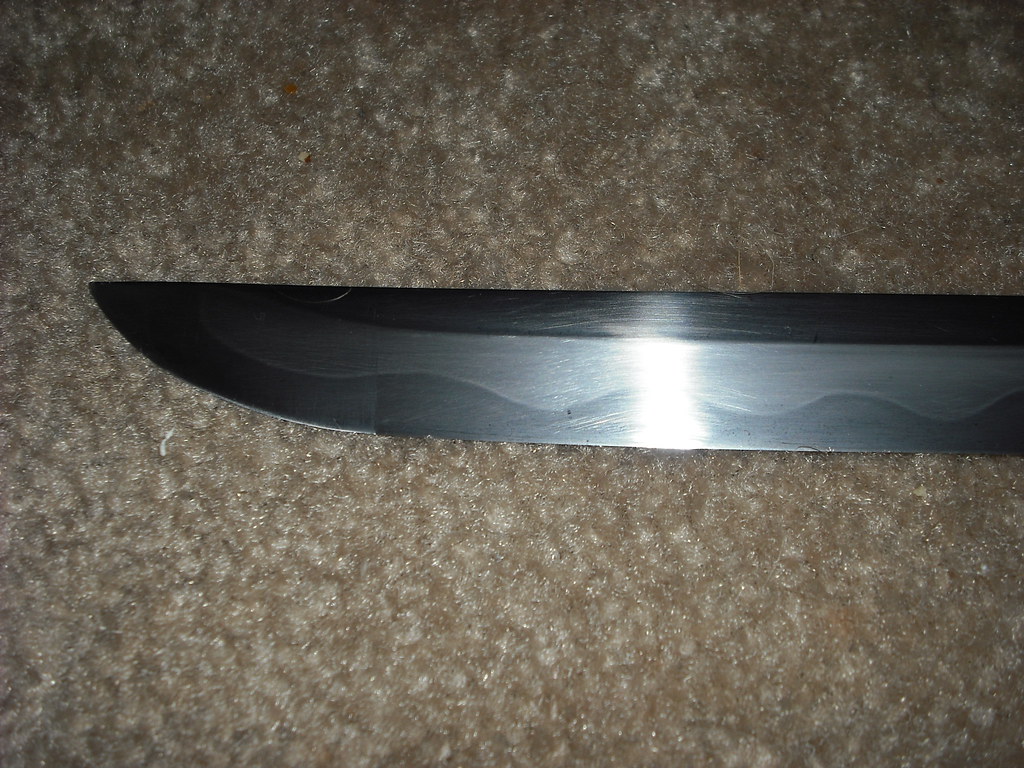 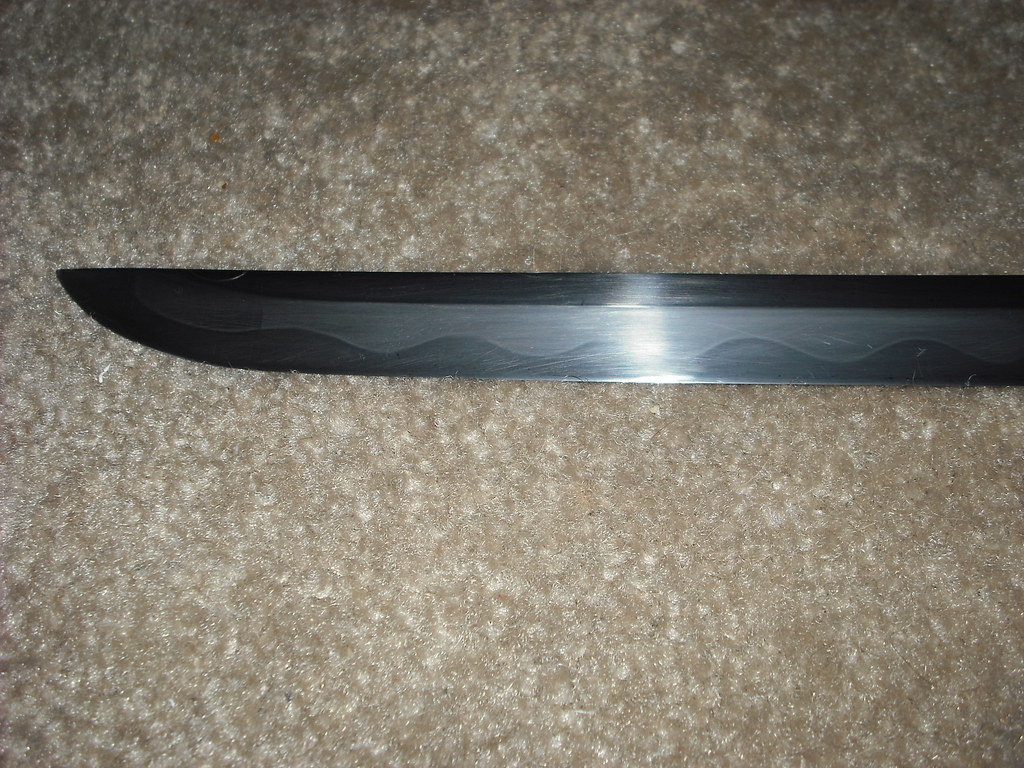 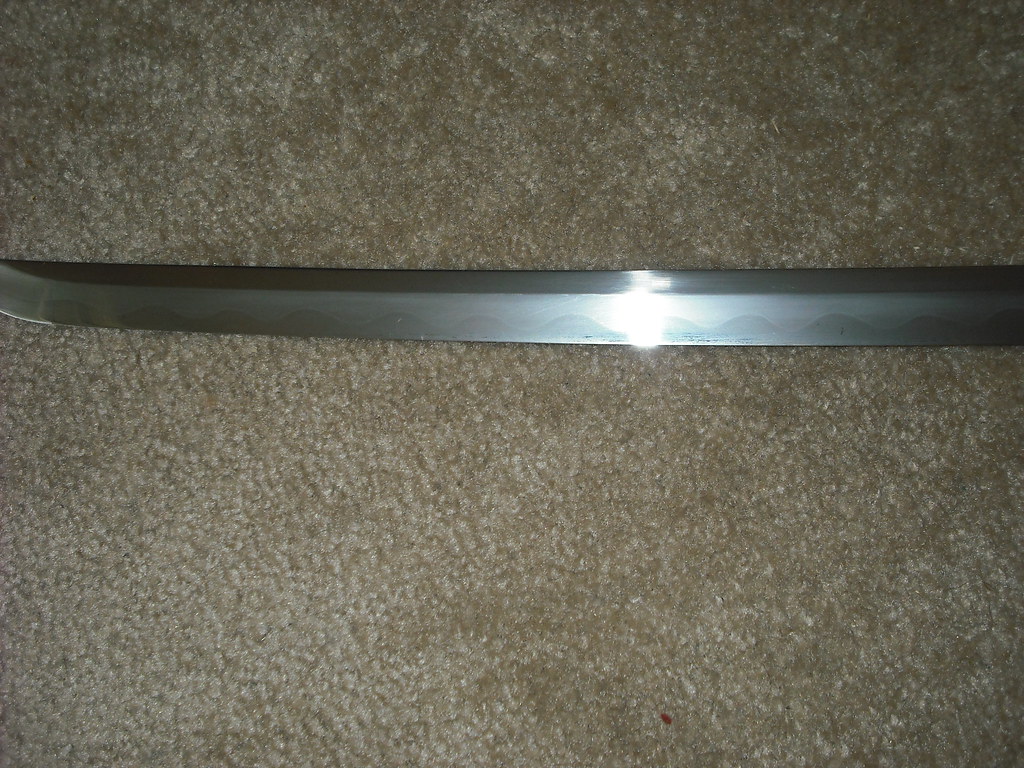 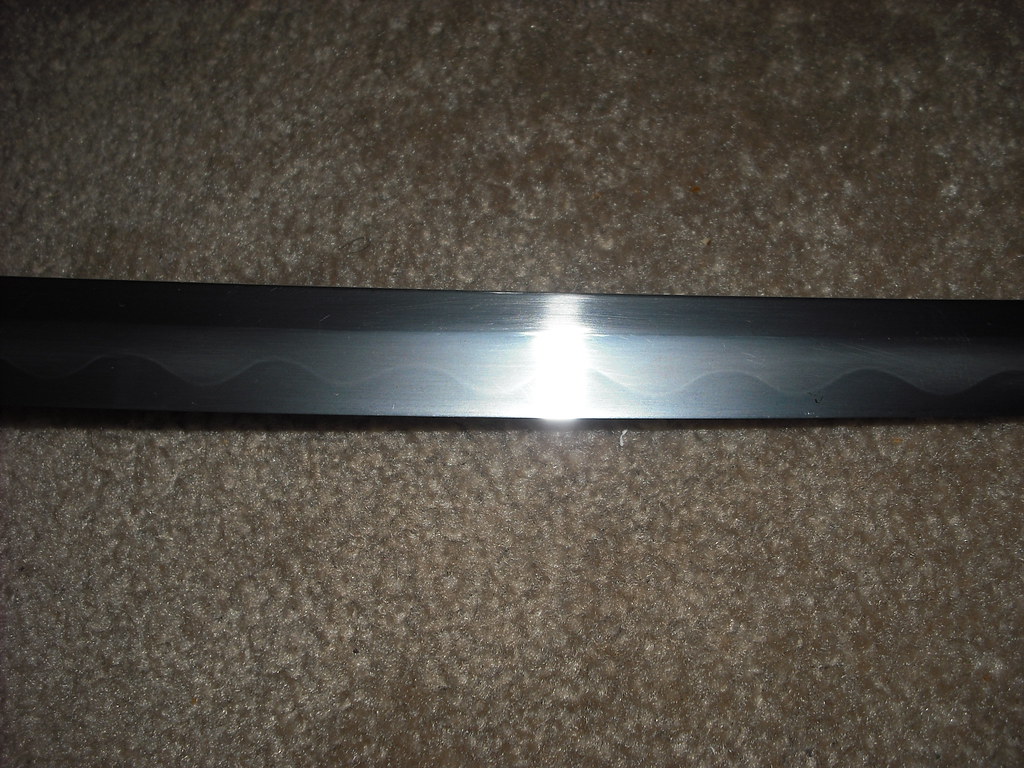 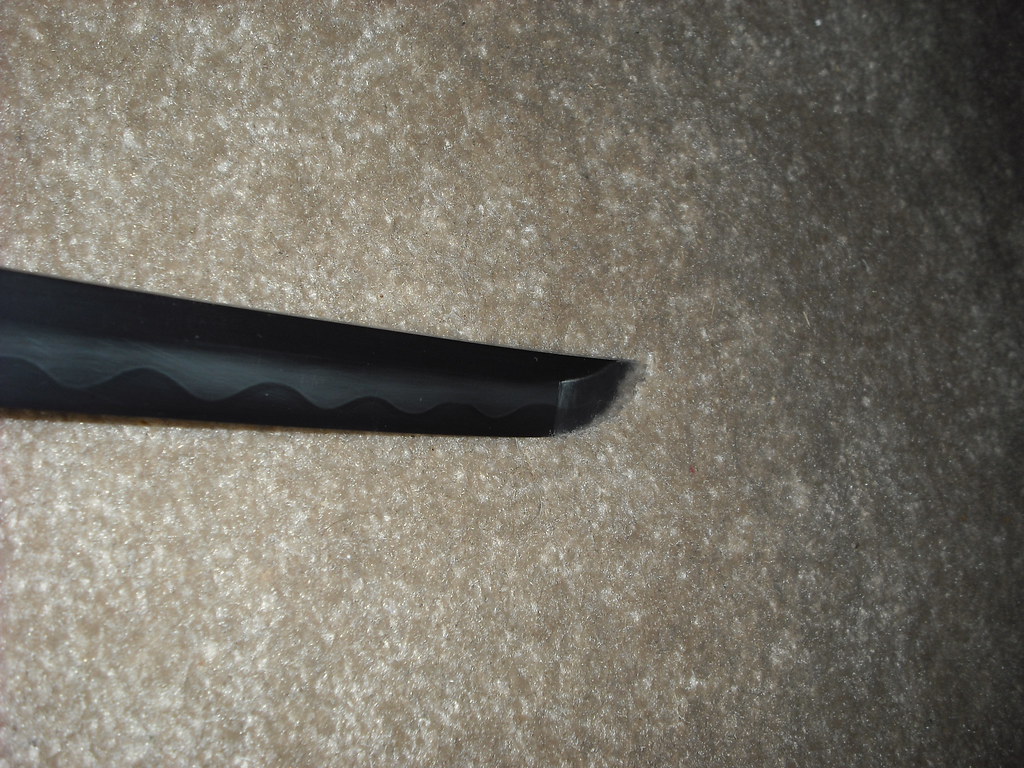  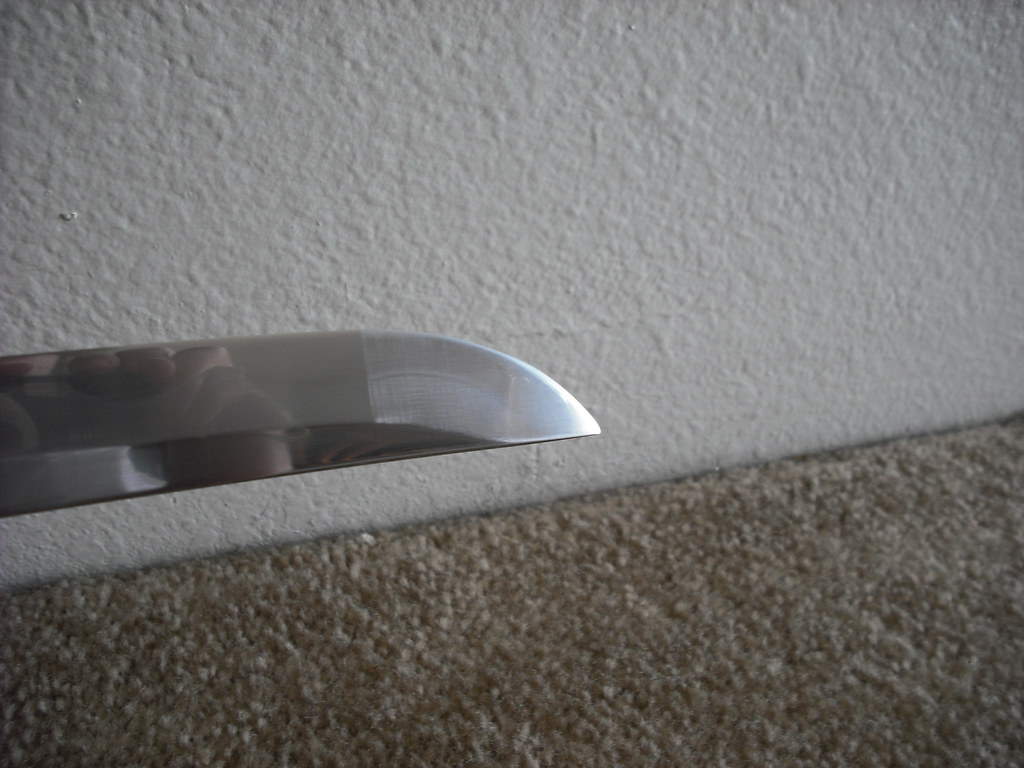 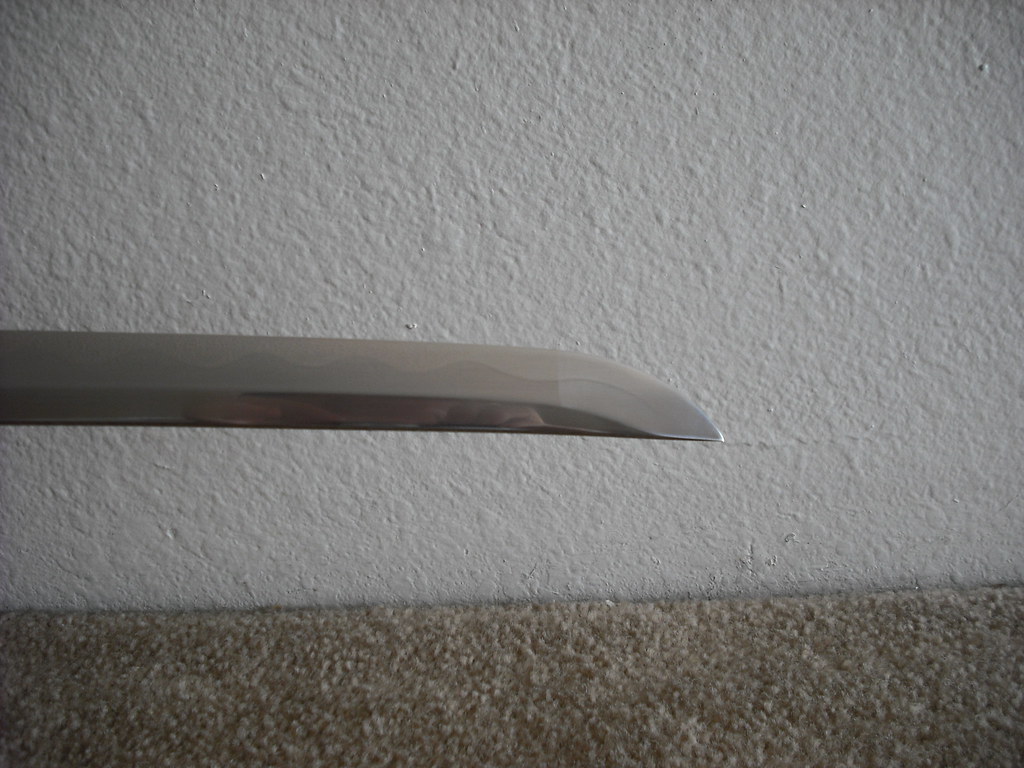 |
|
|
|
Post by muerteblack on Aug 17, 2010 4:46:30 GMT
|
|
Deleted
Deleted Member
Posts: 0
|
Post by Deleted on Aug 17, 2010 8:39:17 GMT
Looks good, thanks for sharing your great work.
|
|
|
|
Post by muerteblack on Aug 19, 2010 9:43:03 GMT
Thanks, I really wanted to replicate the beautiful job that the original polisher did with the kissaki.
The pictures really don't do it justice. They make it look rough, scratched up, and washed out because of the camera flash, and my camera only takes blurry pictures without the flash. IRL, the blade really is a sight to behold.
|
|
Deleted
Deleted Member
Posts: 0
|
Post by Deleted on Aug 20, 2010 5:35:07 GMT
Dammm!! That is one nice pollish!! You should start offering your services, You Bank will overflow for shure!!
.........SanMarc.
|
|
Deleted
Deleted Member
Posts: 0
|
Post by Deleted on Aug 20, 2010 7:49:27 GMT
Thanks, I really wanted to replicate the beautiful job that the original polisher did with the kissaki. The pictures really don't do it justice. They make it look rough, scratched up, and washed out because of the camera flash, and my camera only takes blurry pictures without the flash. IRL, the blade really is a sight to behold. Well maybe if us Seattle area folk get together for some cutting fun like Outpatient suggested Outpatient, SanMarc and I might see this polish job of yours in it full glory. I am just one town away from you being in Edmonds. So we are practically neighbors. ;D |
|
|
|
Post by muerteblack on Aug 21, 2010 2:42:14 GMT
Dammm!! That is one nice pollish!! You should start offering your services, You Bank will overflow for shure!! .........SanMarc. Hmm.... that is indeed a good idea. Perhaps I shall offer my services. I enjoy doing it. And thanks for the compliment! Well maybe if us Seattle area folk get together for some cutting fun like Outpatient suggested Outpatient, SanMarc and I might see this polish job of yours in it full glory. I am just one town away from you being in Edmonds. So we are practically neighbors. ;D That sounds like an awesome idea. We should definitely plan that. |
|
Deleted
Deleted Member
Posts: 0
|
Post by Deleted on Aug 26, 2010 18:01:38 GMT
I concur with an organized NW cutting event  |
|
Deleted
Deleted Member
Posts: 0
|
Post by Deleted on Sept 1, 2010 5:24:29 GMT
Muerteblack, I was in the back doing some light cutting on mine as well and got some scratches on it. I cleaned it when I came in but didnt oil it right away. Now I got some light rust in some areas but not bad. What were the products and methods you used to bring that mirror back?  |
|
Deleted
Deleted Member
Posts: 0
|
Post by Deleted on Sept 1, 2010 6:01:37 GMT
I concur with an organized NW cutting event Yeah, we will have to do something about that, The good weather is over, but ya never know, I wont have my Shinto probably until late this year, but I would still like to see your sword in person and of course meet every one in person! So some one has to step up to the plate and organize the NW Cutting Association! ;D ....SanMarc. |
|
|
|
Post by muerteblack on Sept 3, 2010 21:27:43 GMT
Muerteblack, I was in the back doing some light cutting on mine as well and got some scratches on it. I cleaned it when I came in but didnt oil it right away. Now I got some light rust in some areas but not bad. What were the products and methods you used to bring that mirror back? I used lengthwise rubbing on wet/dry sandpaper mounted on a plastic block to mimic a waterstone. When I did this, I paid attention to several things: First, whether you use water or oil, use a LOT. I mean completely murder it with water or oil. I used 3 in 1 household oil. Combine that with extremely light and even pressure, and it will remove material much more easily and evenly. This is especially important to maintain a crisp shinogi. Also, in addition to the above, I was sure to make equal passes on each side, and to maintain even pressure and inspect the edge frequently to ensure that it was not thrown off of its line, as this is a danger when polishing/sharpening any sword. I used 220, 320, 400, 600, 800, 1000, 15000, 2000 and 2500 grit on mine, which is what I would also recommend for rust removal, as you want a nice clean base. Just use light pressure to avoid removing TOO much material as doing so will leave deeper than normal scratches, marring the final finish, and will also tire the blade out faster. Each grit saw roughly 50 passes on each side of the blade when mounted on the "stone." Then, to absolutely ensure an even finish for that particular grit, i used smaller sized pieces using my fingers to mimic fingerstones, hand-polishing down the sides of the blade, inspecting often to ensure that the polish was even and that the light reflected off the ji did not waver, indicating an incorrect stroke and uneven polish-lines. Finally, I used masking tape to mask off the yokote line, and used a small square of 3000 grit sandpaper with my finger to establish the yokote and counter-polish the kissaki. Finally, to get the blade hair-shaving sharp, I used a leather strop mounted on a belt sander a la Tom K. This last step did put some unsightly scratches on parts of the blade, marring the final polish slightly, but the increase in performance of the edge made it well worth it. I hope that helps! [EDIT] Oh, one thing I also forgot to mention is that, since I accidentally put some scratches on the shinogi-ji as well during the process, I also polished it in the same manner, making sure to keep the stone aligned properly just like with the ji, to ensure the shinogi line remained crisp. I brought the shinogi-ji up to 3000 grit, and then used some metal polish to bring it back to a perfect mirror. A traditional polisher would use a special steel tool to achieve that perfect mirror polish on the shinogi-ji, but I do not have access to such a tool, so Mother's Mag & Aluminum Polish from Autozone will have to suffice for such purposes  . |
|


 .
.
