

Tutorial- Leather Grip Wraps
Jun 5, 2009 6:03:51 GMT
Post by Brendan Olszowy on Jun 5, 2009 6:03:51 GMT
I remember there have been a few people who have mentioned being afraid to try rewrapping their grips due to a lack of understanding and have requested a tutorial. So the other day when I was wrapping the grip for my new Anduril I decided to show just what I do. It’s not hard. It’s easy when you follow these steps. Though it is a job to do in front of the TV of an evening, as it will take you a good hour and a half. I am happy to do custom wraps for you if anyone still lacks the confidence.
Materials
*Sword ;D
*Fine Leather in your desired colour.
*5 minute Epoxy + applicator - I use a nail.
*Superglue
*Leather cord for risers. These are 2mm. 3mm is probably your maximum. Under 2mm should still work well for some things.
*Cotton cord for tieing down between steps.
*Fine Ball Point Pen
*Craft knife /Exacto
*Sharp scissors
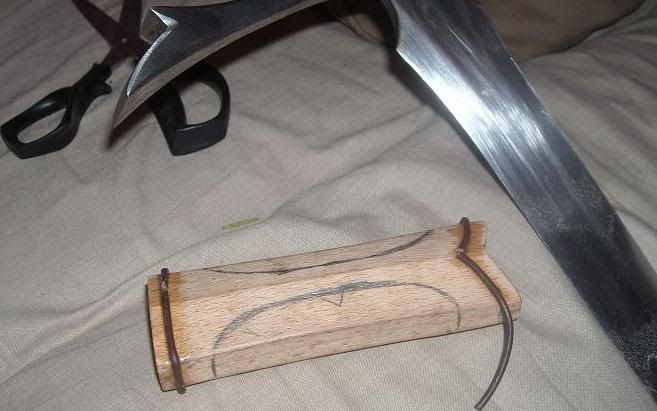
Step 1:
I have previously figured out my riser combinations on paper, and so the first step is to mark in pencil or pen on the bare wood where you want your risers. If you have wrapped the grip in cotton first, you can use a marker. Using a light coloured cotton will make that easy.
If putting multiple circumferencial risers in the centre of the grip I like to place them so they fill the dip in the middle of my palm, or you may like to place them between the fore and middle fingers, or between the middle and ring fingers.
(To prewrap the woodcore in cotton: anchor the cotton to something [pommel, tang or guard], then smearing some slow setting epoxy thinly over the grip start winding FROM THE NARROW END FIRST; the reason for this is that as you pull the cord nice and tight it will naturally want to slide toward the narrow end. Starting from the narrow end will enable you to wrap it tight and save much grief. Same for twisted wire wraps - I have done a tute on those somewhere…)
Step 2:
Glue your risers on with superglue. I use leather riser cord for several reasons:
1. The super glue grips it really easily – remember all those times you stuck your fingers together?
2. It cuts real clean with scirrors or a knife, and easily. Clean cuts mean clean joins
3. No fraying.
Leather cord will be available at any of those girly crafty shops. Incidently that’s also where I got the copper and stainless wires for the other part of the grip.
When Gluing the risers. Glue down the first inch – this provides an anchor for pulling the rest around firm. Press firmly and check that it has gripped after about 20 seconds. It should have a firm grip by then but no so firm you can’t still rip your fingers off if they’ve stuck.
Then continue to glue the rest of the riser down a few centimetres at a time. Before gluing the last bit down check where it will join with the start, mark it with your fingernail, then cut it just before that mark. The leather will happily stretch an extra millimetre, but you don’t want it bunching at the join and lifting off the wood or to the side.
Continue to glue on all your risers with superglue. The superglue holds them fine for now, and will be totally reinforced later when all the epoxy goes on, so they aren’t ever coming lose.
Step 3:
All your risers are on. You want to start the leather wrap. Take/cut a nice piece of fine leather, that you have checked will make it all the way around the grip with maybe a half inch overlap (to be cut off later), and allow about an extra inch at each end. Now make a straight cut down one side to give you a good straight starting point. Use a steel rule and hobby knife.
Step 4:
To glue that straight edge down along one narrow side of the grip (you don’t want to be looking at it on the flat face). Use 5 minute epoxy or this job will take a week. You are only adding glue to a half inch strip of the grip at this time. Use a decent layer of glue but not too thick or it will press out into places you don’t want it, either giving you lumps or gluing down leather you don’t want glued down at the moment. Make sure the glue goes over the risers too.
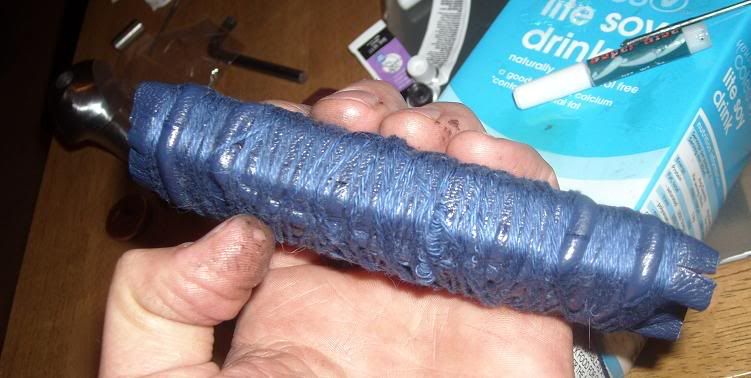
Place the leather on in a straight line down the side of the grip. Now take your roll of cotton cord and wrap it round the whole thing to press the leather down firm, and be sure to really strap it down into the valleys by the risers tightly to show off those risers. You will be aware that the other end of leather would overlap the gluey area and you don’t want that, or it will stick down accidentally, so fold that part of the leather over twice so it’s bunched neatly on the face of the grip out of the way. When you are happy it’s positioned neatly and strapped down firm go watch TV for 10 minutes, or check the drama on the forum. 5 minute epoxy allows you about 3 minutes of working time and takes about 10 more minutes to go hard.

The folded bunchy bit:
Step 5:
Now unwrap it all. Now that the leather is anchored you can glue larger sections. Depending on your type of riser setup there are a couple of options. If you are just doing risers that circumference the wood core you should be right to now add epoxy to the rest of the grip EXCEPT the last 6-10mm (1/4-3/16”) before the join. I’ll show you how to do the join later.
Now in this case I have gone for a complex riser pattern (or if you want to do an X riser like seen on gothic grips) so I have only proceeded to glue one face of the grip. I smeared glue over all the nooks and crannies and over the risers, then I pulled the leather over reasonably tight, but not very tight cos I’ll need to stretch it amongst those risers, and then I started the cord wrap. Now for the cord wrap this time I have mainly just done amongst the circumferential risers to pull them down tight, but that wont help on the longitudinal risers. So I leave the cord sparse in those areas.
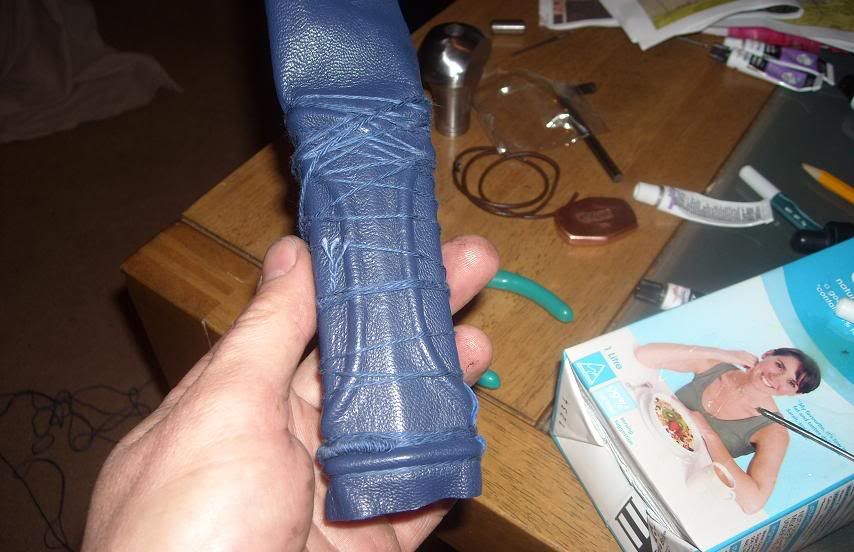
[If doing a traditional circumferential riser over cord pattern you will want to wrap the cord with excellent coverage to push the leather into the cord wrap and down tight amongst the risers. ]
For these risers or the X style risers you want to spend the next 5 minutes continuously going around the risers and pushing/stretch the leather in tight amongst the risers with your thumb (or something rounded like a capped eng of a pen that won’t scratch the leather). After 5 minutes the epoxy is getting pretty firm and they will start to stay put.
Once you are satisfied the leather is staying in there, give it a few more minutes to let the glue go hard, and then you can undo the cord wrap. If you’ve only done one side like I had, then repeat this step for the other side.
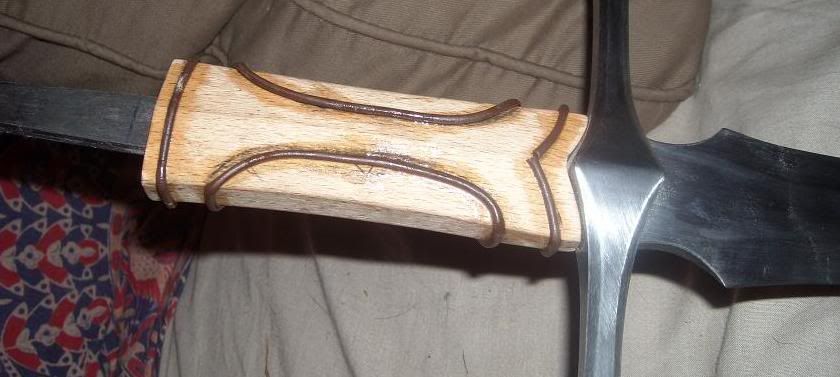
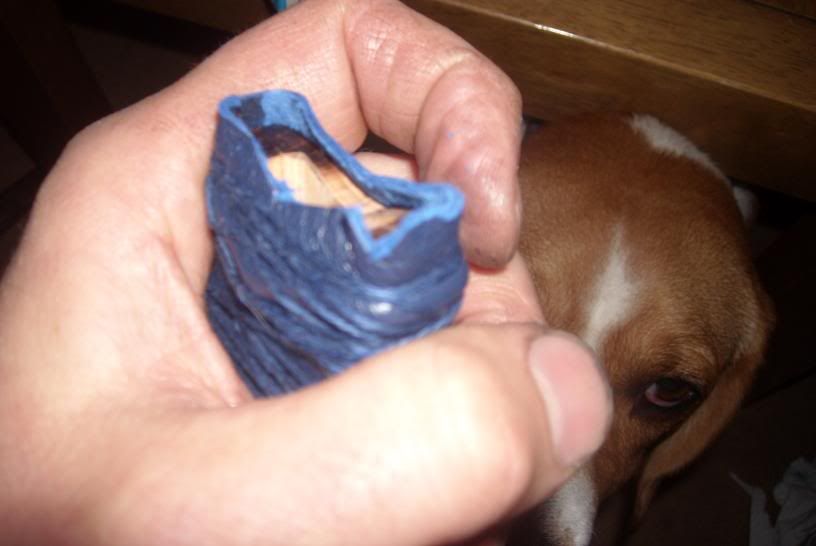
Step 6: Joining the ends.
What I will do here is to take a fine ball point pen that is a compatible colour to the leather, and run it along on the low side of the ridge where the leather overlaps. That will then show you where you need to cut your leather. In this pic I am pressing my fingernail into the groove before the ridge, and you can see that’s were I’ve marked. You’ll notice that theres little extra D shapes were the risers are – that’s good, you need the extra tags to reach over the risers.
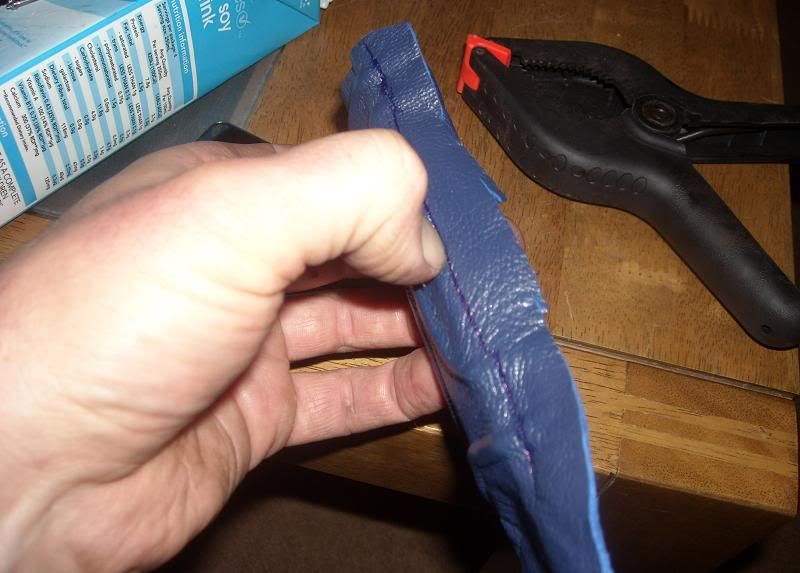
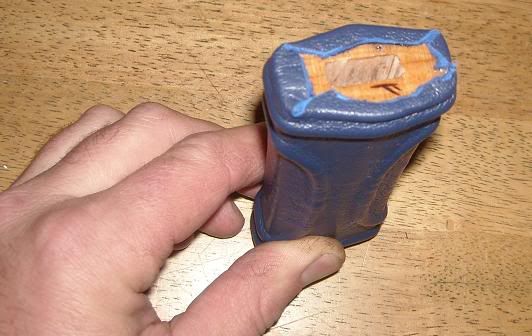
Now cut the leather with sharp scissors on the far side against the pen line – so you are keeping the inked bit. If you cut off the ink your leather will be too short.
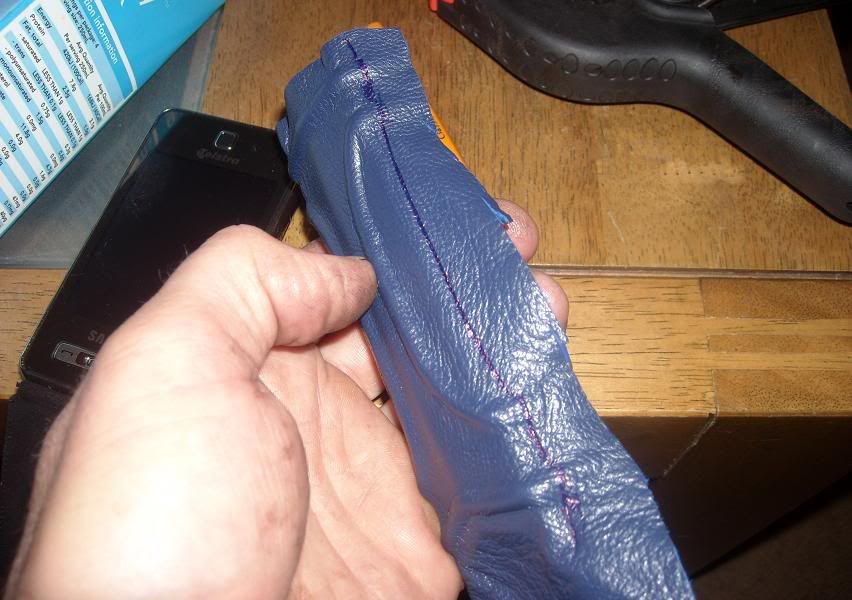
Go ahead and glue that down, again making for perfect glue coverage. Press the leather so it nestles in and doesn’t form a ridge, and you should have a join with no gaps and no bumps either.
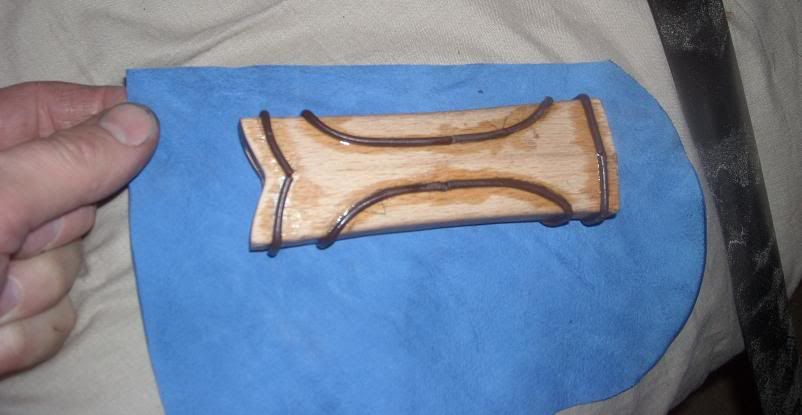
Step 7: The ends of the grip:
If you have a removable grip I see advantage in being able to tuck the leather in over the ends of the grip. It provides a compression zone for when you tighten your hilt, removing the pressure from the wood of your grip. Also it prevents lifting of the leather.
If your grip is permanent, I would personally make sure all the grip is glued so theres no lifty spots, and I would take an exacto knife and trim along the junction of the guard and pommel for a crisp finish. Though I have observed Albion and many others leaving 1/8” overlap over the guard and pommel, so I suppose that’s acceptable.
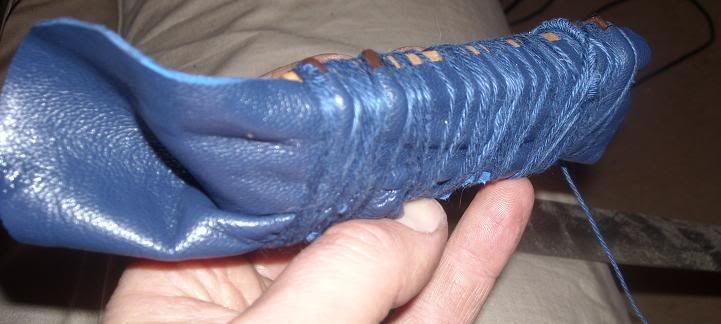
For the removable grips, you will notice that the leather pleats at the corners when you fold it over, so I remove several little triangles with sharp scissors, where the pleats would be, so it folds down in one layer only and neatly. To glue it down you can either use super glue which is quick and easy, as the compression fit will hold them fixed once it’s assembled, or for epoxy you’ll need to press the flaps in with your fingers as you assemble the parts and tighten your hilt down why they dry.
The little trangle cutouts:
The finished folds:
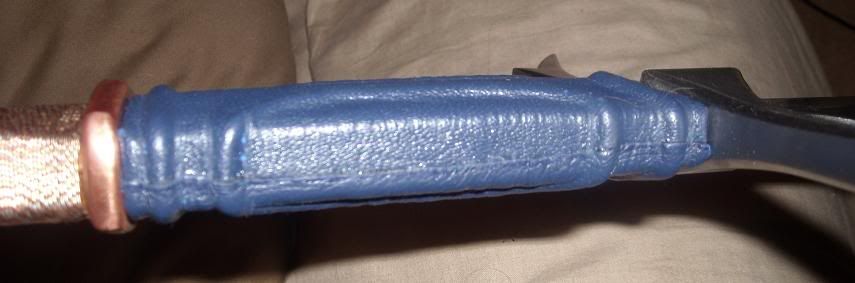
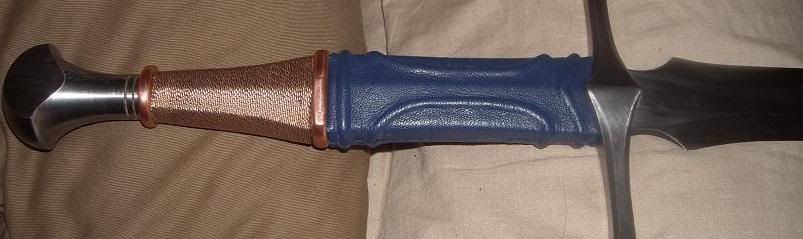
And Voila, the finished Grip:
Materials
*Sword ;D
*Fine Leather in your desired colour.
*5 minute Epoxy + applicator - I use a nail.
*Superglue
*Leather cord for risers. These are 2mm. 3mm is probably your maximum. Under 2mm should still work well for some things.
*Cotton cord for tieing down between steps.
*Fine Ball Point Pen
*Craft knife /Exacto
*Sharp scissors
Step 1:
I have previously figured out my riser combinations on paper, and so the first step is to mark in pencil or pen on the bare wood where you want your risers. If you have wrapped the grip in cotton first, you can use a marker. Using a light coloured cotton will make that easy.
If putting multiple circumferencial risers in the centre of the grip I like to place them so they fill the dip in the middle of my palm, or you may like to place them between the fore and middle fingers, or between the middle and ring fingers.
(To prewrap the woodcore in cotton: anchor the cotton to something [pommel, tang or guard], then smearing some slow setting epoxy thinly over the grip start winding FROM THE NARROW END FIRST; the reason for this is that as you pull the cord nice and tight it will naturally want to slide toward the narrow end. Starting from the narrow end will enable you to wrap it tight and save much grief. Same for twisted wire wraps - I have done a tute on those somewhere…)
Step 2:
Glue your risers on with superglue. I use leather riser cord for several reasons:
1. The super glue grips it really easily – remember all those times you stuck your fingers together?
2. It cuts real clean with scirrors or a knife, and easily. Clean cuts mean clean joins
3. No fraying.
Leather cord will be available at any of those girly crafty shops. Incidently that’s also where I got the copper and stainless wires for the other part of the grip.
When Gluing the risers. Glue down the first inch – this provides an anchor for pulling the rest around firm. Press firmly and check that it has gripped after about 20 seconds. It should have a firm grip by then but no so firm you can’t still rip your fingers off if they’ve stuck.
Then continue to glue the rest of the riser down a few centimetres at a time. Before gluing the last bit down check where it will join with the start, mark it with your fingernail, then cut it just before that mark. The leather will happily stretch an extra millimetre, but you don’t want it bunching at the join and lifting off the wood or to the side.
Continue to glue on all your risers with superglue. The superglue holds them fine for now, and will be totally reinforced later when all the epoxy goes on, so they aren’t ever coming lose.
Step 3:
All your risers are on. You want to start the leather wrap. Take/cut a nice piece of fine leather, that you have checked will make it all the way around the grip with maybe a half inch overlap (to be cut off later), and allow about an extra inch at each end. Now make a straight cut down one side to give you a good straight starting point. Use a steel rule and hobby knife.
Step 4:
To glue that straight edge down along one narrow side of the grip (you don’t want to be looking at it on the flat face). Use 5 minute epoxy or this job will take a week. You are only adding glue to a half inch strip of the grip at this time. Use a decent layer of glue but not too thick or it will press out into places you don’t want it, either giving you lumps or gluing down leather you don’t want glued down at the moment. Make sure the glue goes over the risers too.
Place the leather on in a straight line down the side of the grip. Now take your roll of cotton cord and wrap it round the whole thing to press the leather down firm, and be sure to really strap it down into the valleys by the risers tightly to show off those risers. You will be aware that the other end of leather would overlap the gluey area and you don’t want that, or it will stick down accidentally, so fold that part of the leather over twice so it’s bunched neatly on the face of the grip out of the way. When you are happy it’s positioned neatly and strapped down firm go watch TV for 10 minutes, or check the drama on the forum. 5 minute epoxy allows you about 3 minutes of working time and takes about 10 more minutes to go hard.
The folded bunchy bit:
Step 5:
Now unwrap it all. Now that the leather is anchored you can glue larger sections. Depending on your type of riser setup there are a couple of options. If you are just doing risers that circumference the wood core you should be right to now add epoxy to the rest of the grip EXCEPT the last 6-10mm (1/4-3/16”) before the join. I’ll show you how to do the join later.
Now in this case I have gone for a complex riser pattern (or if you want to do an X riser like seen on gothic grips) so I have only proceeded to glue one face of the grip. I smeared glue over all the nooks and crannies and over the risers, then I pulled the leather over reasonably tight, but not very tight cos I’ll need to stretch it amongst those risers, and then I started the cord wrap. Now for the cord wrap this time I have mainly just done amongst the circumferential risers to pull them down tight, but that wont help on the longitudinal risers. So I leave the cord sparse in those areas.
[If doing a traditional circumferential riser over cord pattern you will want to wrap the cord with excellent coverage to push the leather into the cord wrap and down tight amongst the risers. ]
For these risers or the X style risers you want to spend the next 5 minutes continuously going around the risers and pushing/stretch the leather in tight amongst the risers with your thumb (or something rounded like a capped eng of a pen that won’t scratch the leather). After 5 minutes the epoxy is getting pretty firm and they will start to stay put.
Once you are satisfied the leather is staying in there, give it a few more minutes to let the glue go hard, and then you can undo the cord wrap. If you’ve only done one side like I had, then repeat this step for the other side.
Step 6: Joining the ends.
What I will do here is to take a fine ball point pen that is a compatible colour to the leather, and run it along on the low side of the ridge where the leather overlaps. That will then show you where you need to cut your leather. In this pic I am pressing my fingernail into the groove before the ridge, and you can see that’s were I’ve marked. You’ll notice that theres little extra D shapes were the risers are – that’s good, you need the extra tags to reach over the risers.
Now cut the leather with sharp scissors on the far side against the pen line – so you are keeping the inked bit. If you cut off the ink your leather will be too short.
Go ahead and glue that down, again making for perfect glue coverage. Press the leather so it nestles in and doesn’t form a ridge, and you should have a join with no gaps and no bumps either.
Step 7: The ends of the grip:
If you have a removable grip I see advantage in being able to tuck the leather in over the ends of the grip. It provides a compression zone for when you tighten your hilt, removing the pressure from the wood of your grip. Also it prevents lifting of the leather.
If your grip is permanent, I would personally make sure all the grip is glued so theres no lifty spots, and I would take an exacto knife and trim along the junction of the guard and pommel for a crisp finish. Though I have observed Albion and many others leaving 1/8” overlap over the guard and pommel, so I suppose that’s acceptable.
For the removable grips, you will notice that the leather pleats at the corners when you fold it over, so I remove several little triangles with sharp scissors, where the pleats would be, so it folds down in one layer only and neatly. To glue it down you can either use super glue which is quick and easy, as the compression fit will hold them fixed once it’s assembled, or for epoxy you’ll need to press the flaps in with your fingers as you assemble the parts and tighten your hilt down why they dry.
The little trangle cutouts:
The finished folds:
And Voila, the finished Grip:


 Unfortunately I'm an edge-perfectionist. Also one wrong move when unsheathing and the throat nicks the edge on either side.
