Deleted
Deleted Member
Posts: 0
|
Post by Deleted on Oct 24, 2008 1:57:10 GMT
More or less homemade. I bought it from a small builder off of ebay. It is a small 2 burner forge. I think I know the ones you are talking about, they have big reducer bell fittings as the intakes correct? Block off 1/2 of that end bell, on both burners and it should be a much less oxidizing fire. |
|
Deleted
Deleted Member
Posts: 0
|
Post by Deleted on Oct 24, 2008 2:41:29 GMT
Blind leading the blind:D. Facina, that means your fire is too oxidysing, which means there is too much oxygen making it through the coals to react on your steel surface. Make your fire deeper with more coals. Hey now!!! No need to be mean! I'm not blind... Just...near sited... Ok...very near sited.... And wearing sunglasses =). Although, I'd have given you the same advice this time 'round. The reason it's called 'oxidizing' is 'oxygen' =). Less oxygen, more fuel, less scale. From what I understand...you should have about 4"-6" of blueish green flame exiting the front of your forge. Correct me if I'm wrong Sam? Cris |
|
Deleted
Deleted Member
Posts: 0
|
Post by Deleted on Oct 24, 2008 3:26:18 GMT
Thank you Sam, I will try that next chance I get.
|
|
Deleted
Deleted Member
Posts: 0
|
Post by Deleted on Oct 24, 2008 4:32:01 GMT
So I wasn't happy with the distal taper. The measurements weren't bad, but it just didn't feel right to me. So I spent some time tonight thinning things out until I was happy with them. The overall feel of the blade, as well as how it looks is much improved. The tip is now 3/16" thick, half blade just under 1/4", and at the guard it's just over 1/4". Thickness then tapers down to 3/16" at the butt. The flow is MUCH better, and even though nothing really changed all that much, the blade overall looks thinner. I also worked on the profile some. One of the blade flats seemed to be curved more than the other...which was actually a pain to correct lol. Overall length is now 18 1/4" I trimmed the blade length down to 10 1/2", for the simple reason that I can't evenly heat much more blade length in my forge, and this thing's got to be heat treated lol. Tang length is about 7 3/4", which I'll probaby trim down an inch when I do the grinding and filing. Anyhow, here's some pictures of just after I finished forging this evening, followed by pictures taken after a tiny bit of profile cleanup on the grinder: 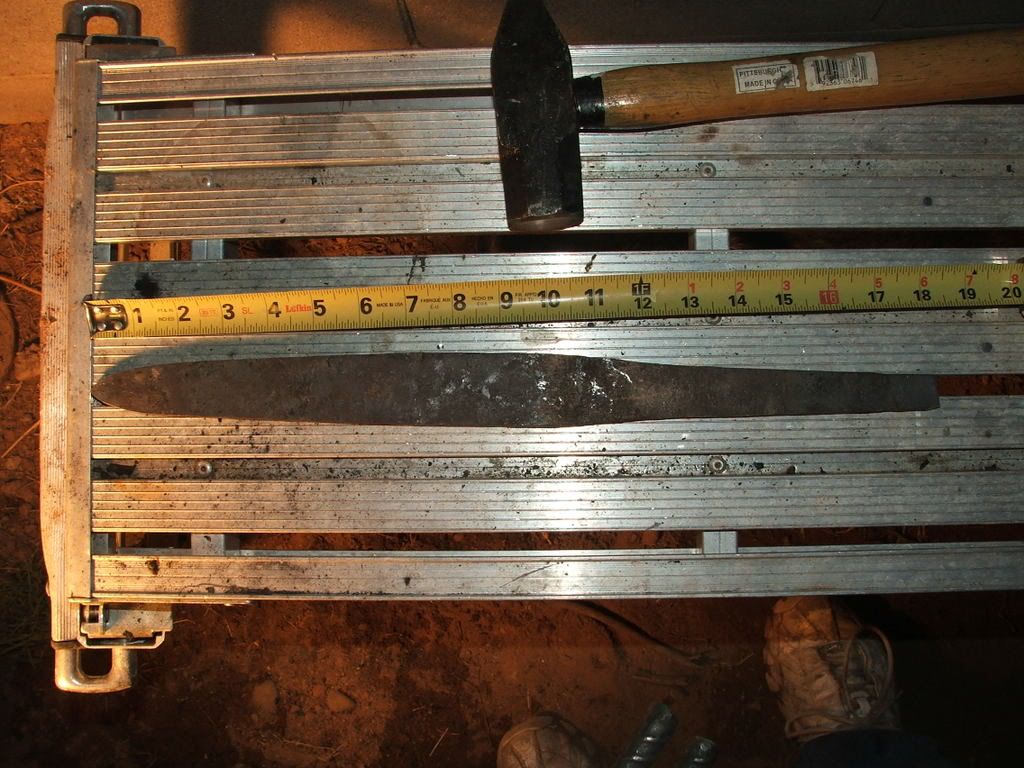 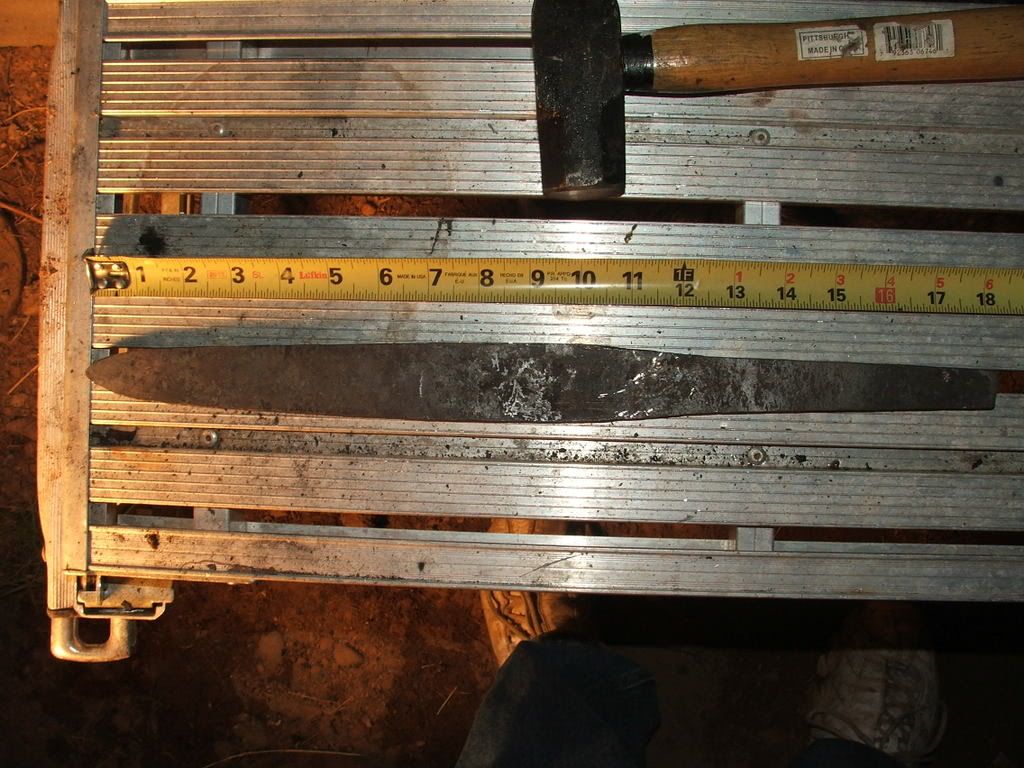 Profile. The shape turned out basically as I intended which was good. Widest point is just a hair under 1 1/2", and an inch from the tip measures exactly 1" wide. I had real problems forging in the shoulders, so I said forget it before it got ruined, and decided to just grind them in. Profile. The shape turned out basically as I intended which was good. Widest point is just a hair under 1 1/2", and an inch from the tip measures exactly 1" wide. I had real problems forging in the shoulders, so I said forget it before it got ruined, and decided to just grind them in.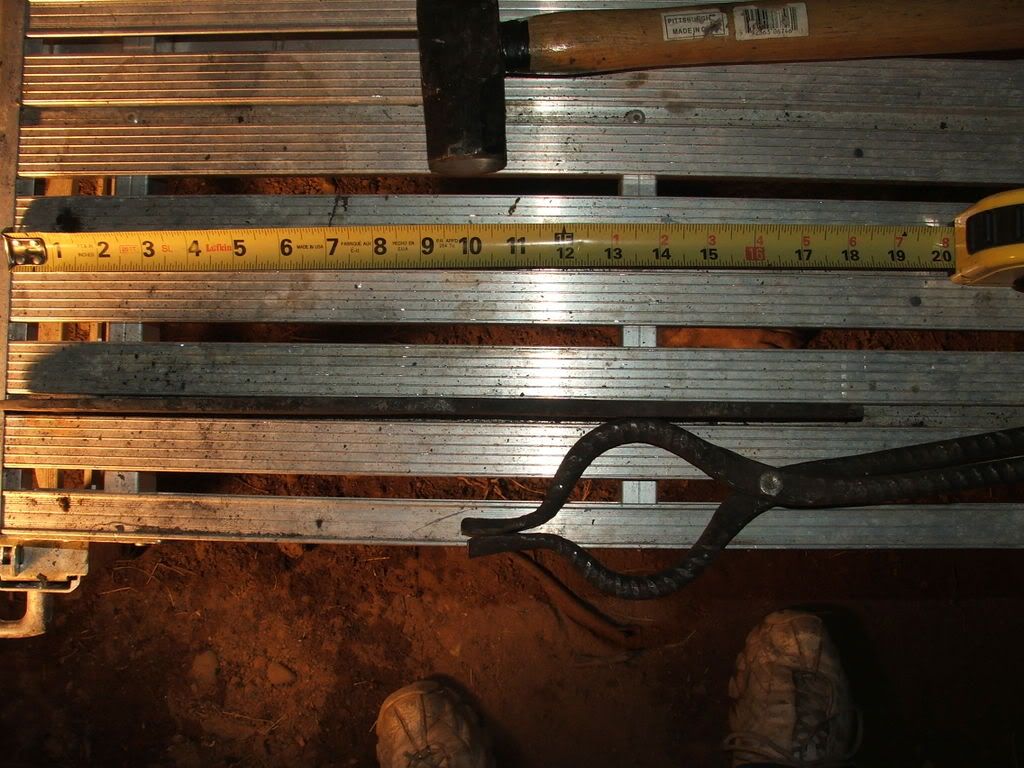 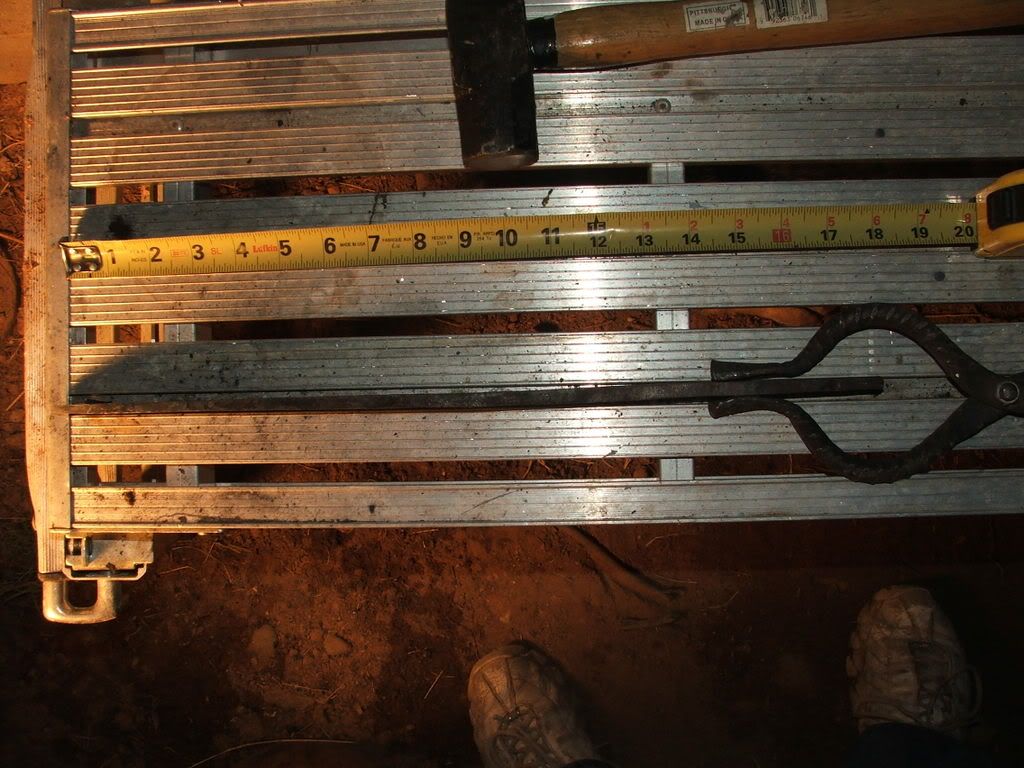 Post final thinning process lol. I'm MUCH happier with the distal taper now. No waves or bubbles...just a nice smooth straight transition to the guard, then another smooth transition to the butt. Post final thinning process lol. I'm MUCH happier with the distal taper now. No waves or bubbles...just a nice smooth straight transition to the guard, then another smooth transition to the butt.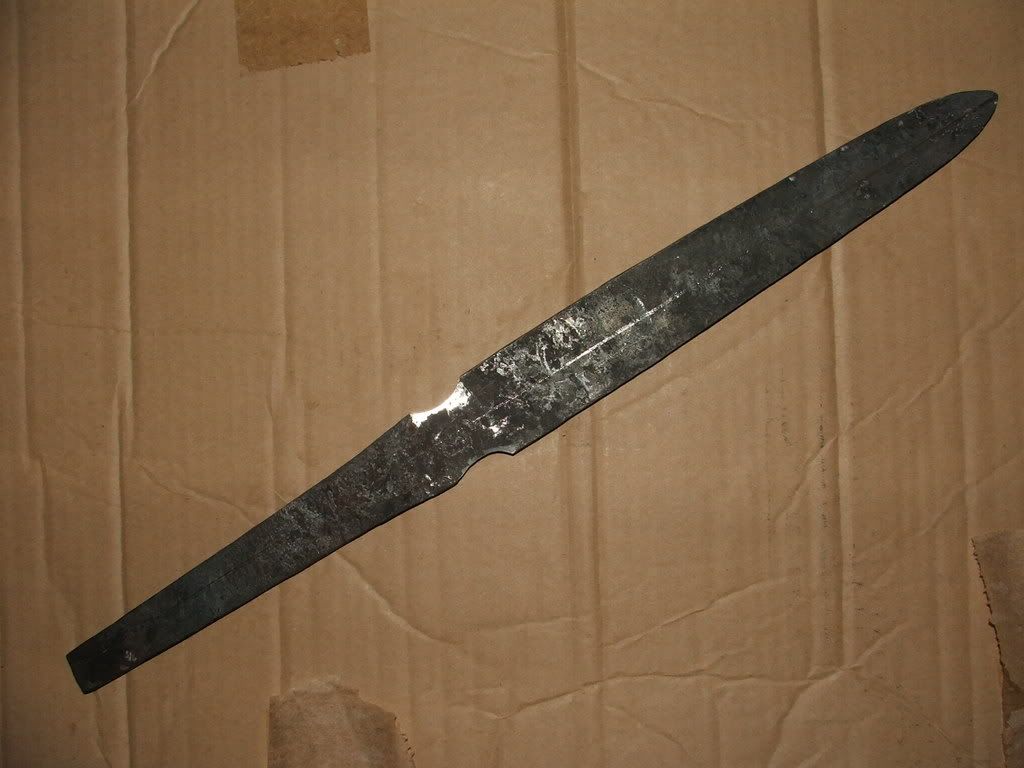 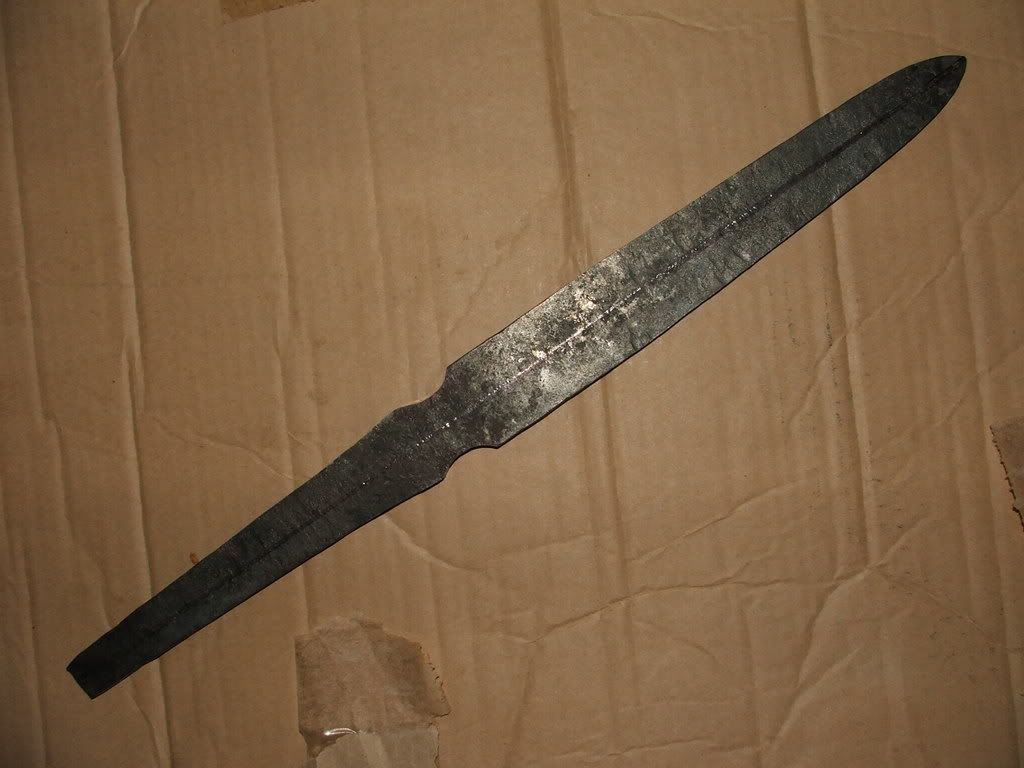 Profile after a trip to the bench grinder to clean things up just a tiny bit. 99% of the work was grinding in the shoulders. This is where I decided to set the blade length half an inch or so shorter than I'd originally planned. This should also make forging in the bevels a bit easier. In the first picture you can see my scribed centerline, and the relative evenness of the overall profile. I'm pretty happy with this so far. Profile after a trip to the bench grinder to clean things up just a tiny bit. 99% of the work was grinding in the shoulders. This is where I decided to set the blade length half an inch or so shorter than I'd originally planned. This should also make forging in the bevels a bit easier. In the first picture you can see my scribed centerline, and the relative evenness of the overall profile. I'm pretty happy with this so far. 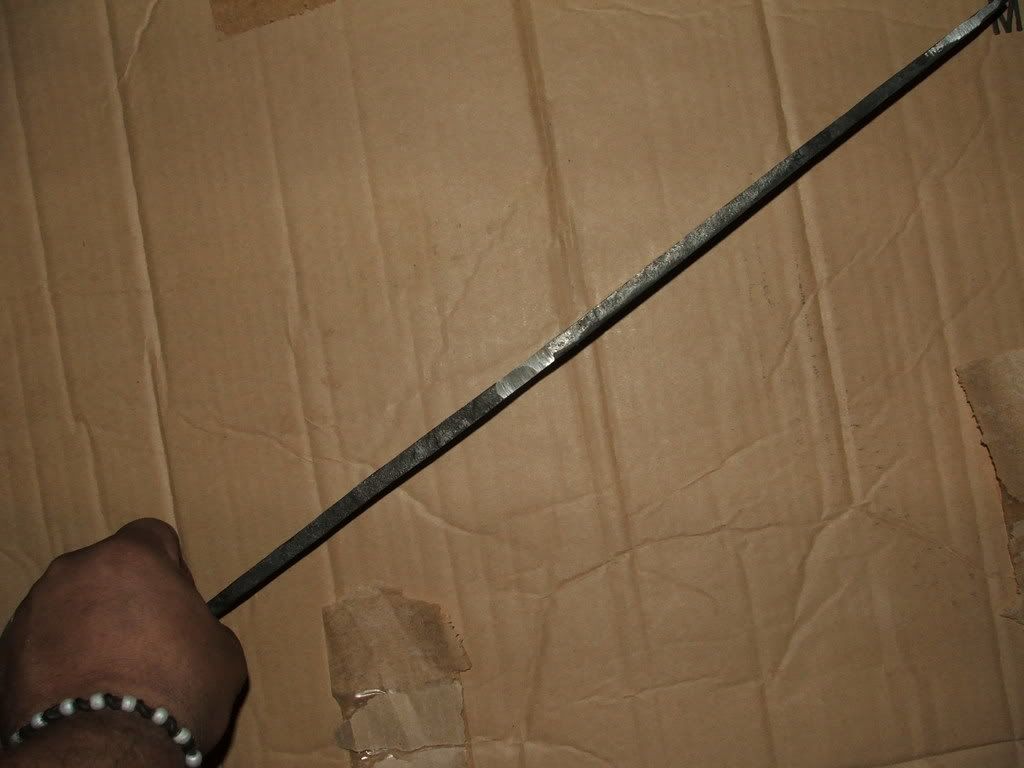 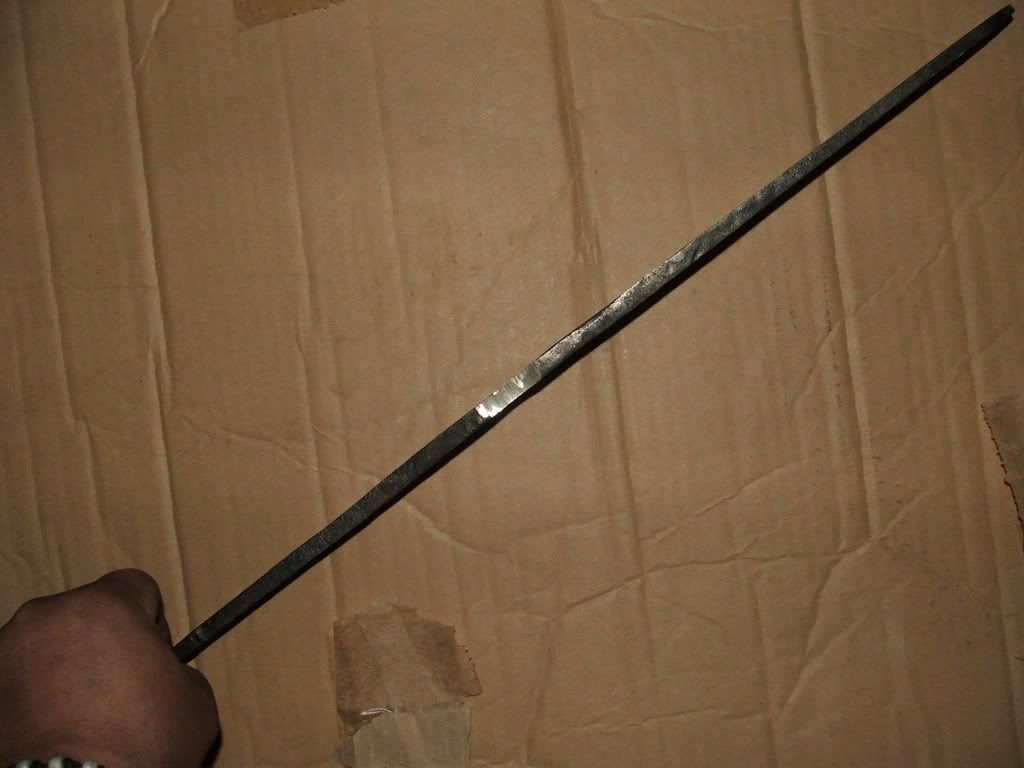 Here you see my distal profile. I think it's MUCH better than the previous pictures. The balance is just 'right' so to speak...for me anyhow. I left it a hair thick from what I'd originally planned, but it still seems thinner overall than it did before. Balance is 1 1/2" in front of the guard. Beveling and overall cleanup will bring that back to centered on the guard I think. Should give it a nice feel in the hand. You can see the tiniest bit of profile grinding in the second picture near the tip. Basically I had to square the edge up is all...no shaping was necessary. Here you see my distal profile. I think it's MUCH better than the previous pictures. The balance is just 'right' so to speak...for me anyhow. I left it a hair thick from what I'd originally planned, but it still seems thinner overall than it did before. Balance is 1 1/2" in front of the guard. Beveling and overall cleanup will bring that back to centered on the guard I think. Should give it a nice feel in the hand. You can see the tiniest bit of profile grinding in the second picture near the tip. Basically I had to square the edge up is all...no shaping was necessary.So what do you guys think? Once my new anvils are setup and I get the pieces of rail track and leaf springs for making hardy tools and guilloteine fullers...my forging in shoulders will improve 100 fold lol. All in all, I'm hoping that by this weekend I've got a nicely filed blade that's ready for heat treat! Wish me luck lol. Cris |
|
|
|
Post by brotherbanzai on Oct 24, 2008 15:17:34 GMT
That's looking pretty sweet Cris! Good luck with pounding out the bevels.
|
|
|
|
Post by Matt993f.o.d on Oct 24, 2008 22:41:11 GMT
Facina; don't work in daylight, you underestimate the temperature of the workpiece, thinking it is at a normal working temperature when it is in fact much higher. This is often the cause of most people's "inexplicable" scaling problems.
Thats some nice grinding there, Cris.
|
|
Deleted
Deleted Member
Posts: 0
|
Post by Deleted on Oct 24, 2008 22:47:07 GMT
Thats some nice grinding there, Cris. Thanks Matt. The only real grinding is in the shoulders of the blade near the tang. The rest of it is as forged. Well, that and the tiny bit of squaring near the point. I was pretty happy with the forging on this one =). On another note, I'm not going to forge in the bevels until I get the forklift anvils setup. I want a good, hard anvil surface with a nice clean edge on it for forging the bevels in...and this Harbor Freight 55lb piece of crap is anything but hard, flat, and with clean edges lol. I'll get some more pictures up once I get moving forward again =). Cris |
|
Deleted
Deleted Member
Posts: 0
|
Post by Deleted on Oct 24, 2008 23:06:04 GMT
I'd say grind it the rest of the way.
|
|
Deleted
Deleted Member
Posts: 0
|
Post by Deleted on Oct 24, 2008 23:10:11 GMT
I'd say grind it the rest of the way. That wouldn't be a bad idea other than two things. First, it's not wide enough for my design. Second, I'm eventually going to have to learn to forge in bevels regardless lol. While I'd like to finish this quickly...and I could probably do it with a grinder, the first problem requires an anvil to get the bevels which will make it wider. Now I'm just waiting on the freakin' anvils lol. Cris |
|


 Unfortunately I'm an edge-perfectionist. Also one wrong move when unsheathing and the throat nicks the edge on either side.