

New Handle for an XVIIIe 90%+ Finished
Sept 20, 2014 20:31:30 GMT
Post by Dapper Blades on Sept 20, 2014 20:31:30 GMT
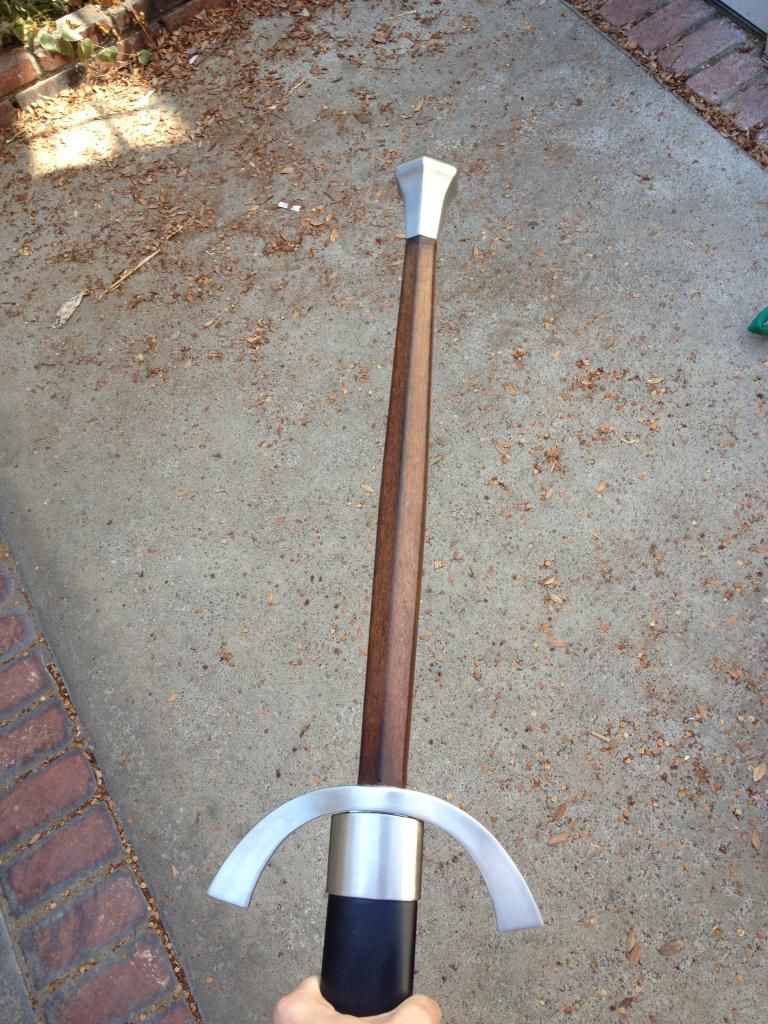
I received my Krom Killer sword last week, and for anyone who missed the review, that can be found Here.
I stated that I would be interested in creating a new handle for this piece, to give it the banded style of handle generally associated with this type of sword.
Instead of doing a traditional wire banded handle though, I decided to approach it a little bit differently, and I think that when I've finished, the extra effort will be worth it.
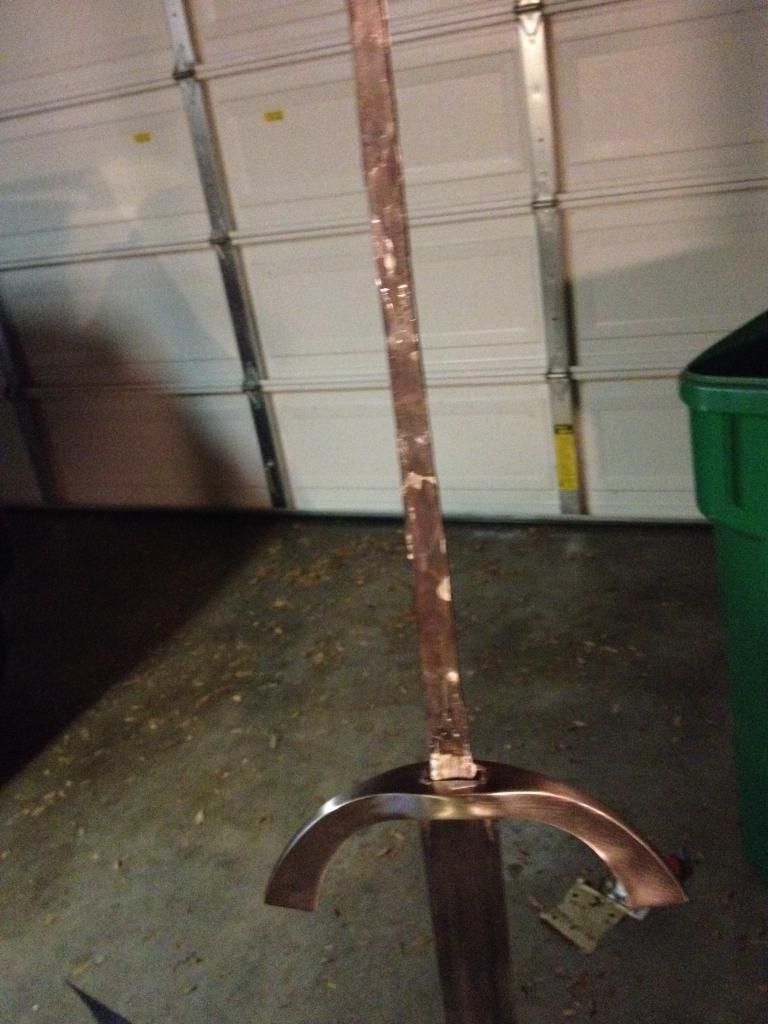
The first step in removing the old handle of the sword was removing the old wire wrapping. This sounds pretty easy, but I must say on a 20" handle, there is a LOT of wire to remove.
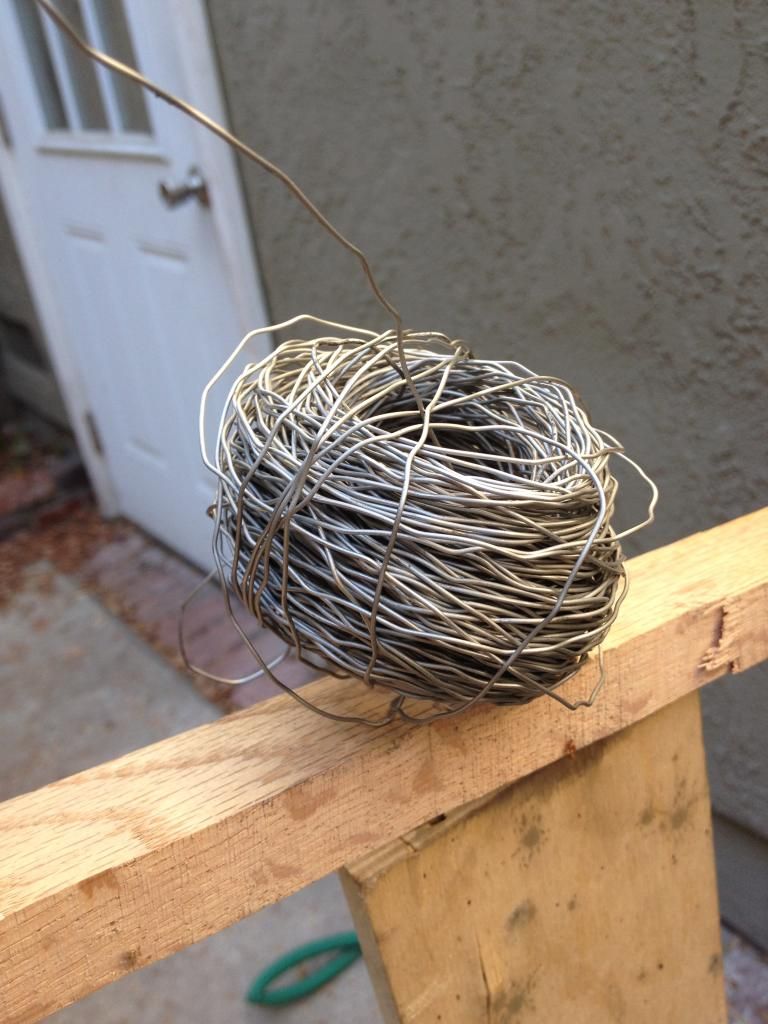
Removing all that wire revealed an actually fairly pleasant looking wood handle below that. I was so shocked by how pleasant the wood looked that I was almost tempted to keep it, and just work with that, adding banding to the wood that is already there.
But then I thought considering the state of the handle, and all the visible resin in the guard, that it would probably be appropriate for me to just start from scratch.
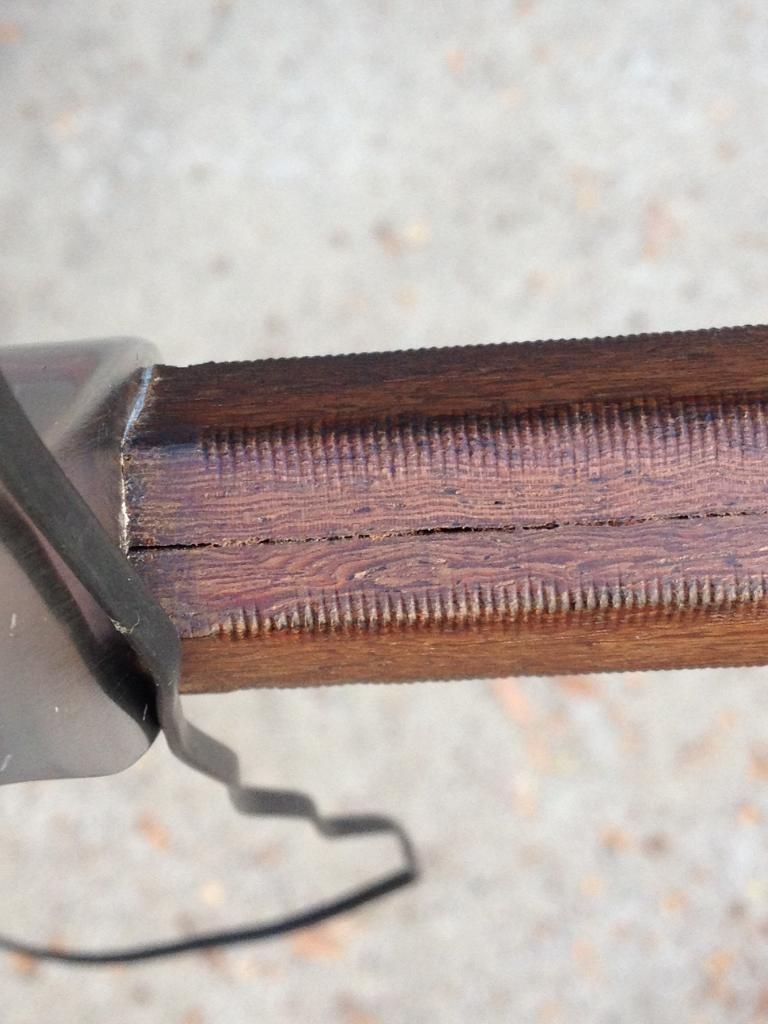
The next step I took was to remove the old wood as carefully as I could in an attempt to preserve the essence of the geometry. It mostly worked out.
What I found underneath though surprised me a bit.
There was a VAST amount of resin in place. The tang is reasonably sized for this sword, but the wood of the handle was not a good fit for the tang, so it was pumped with absurd amounts of resin to keep the fit snug.
So the next step I took was to remove the old resin to get a good feel for how the tang looks, and get some measurements to cut the new wood.
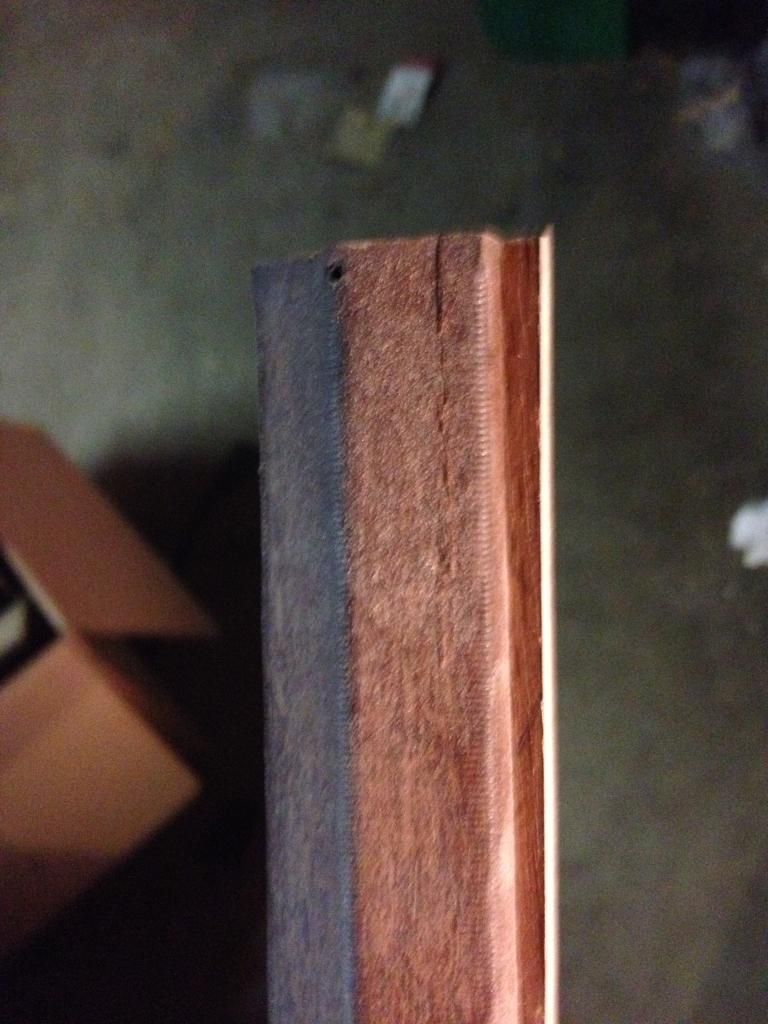
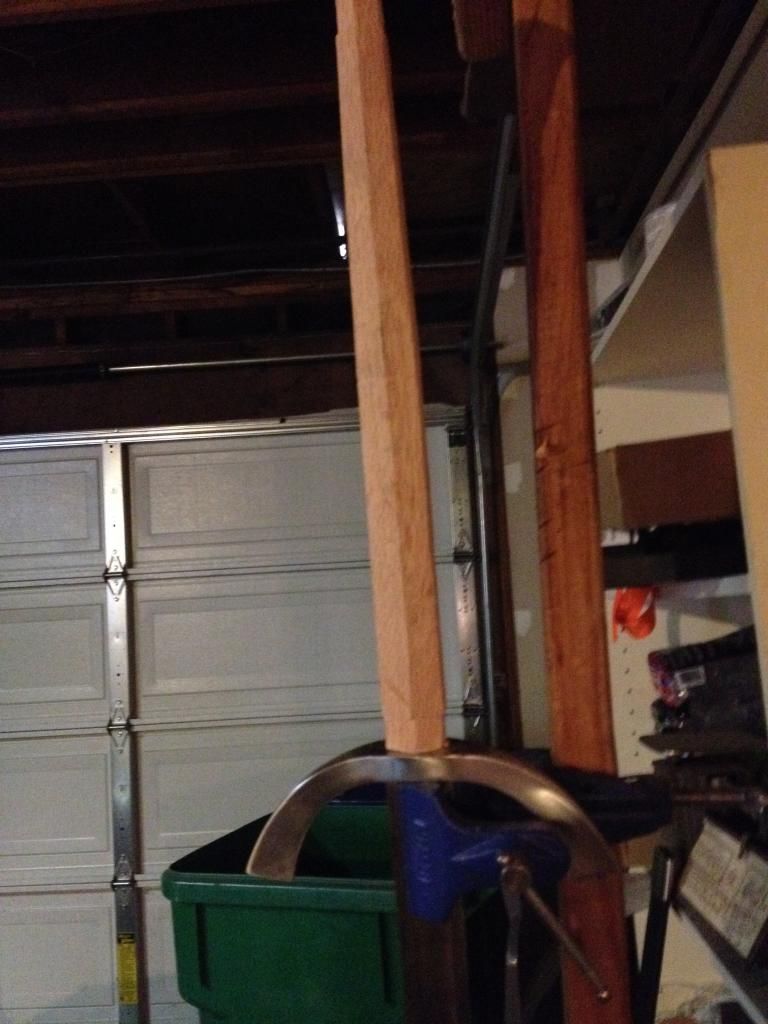
I also decided to make my new handle a little bit wider since it would not have the wire wrapping over it to compensate for a slightly thinner handle.
This image is the old handle laid over the wood of the new.The difference is probably only around 1/8 inch.
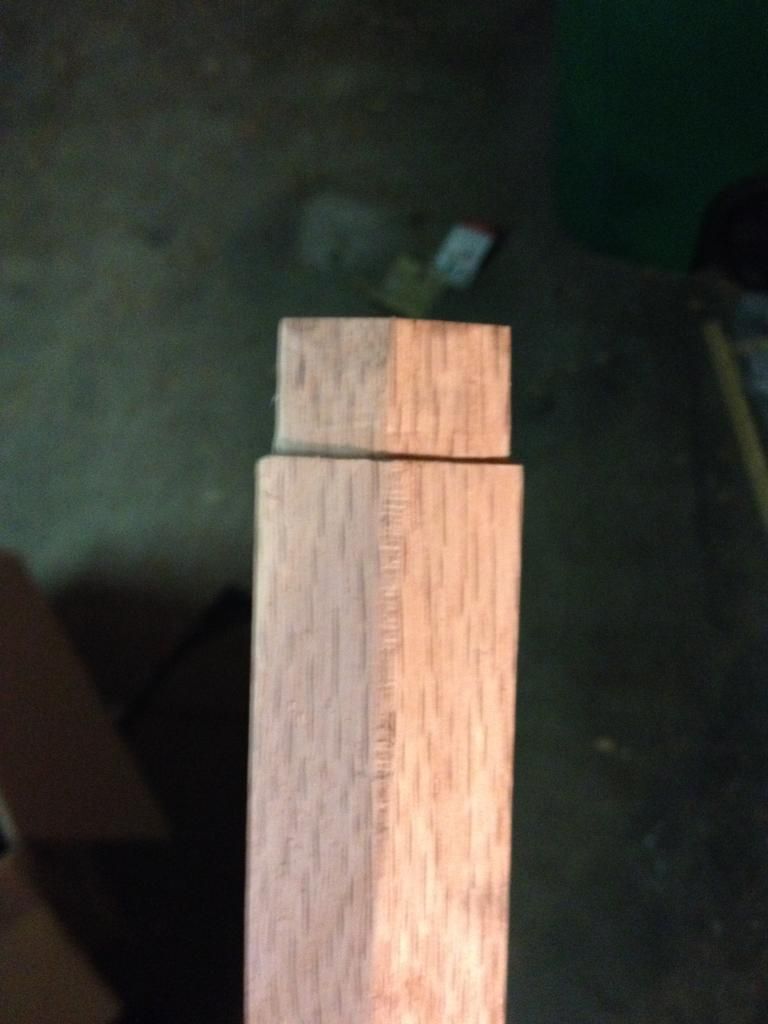
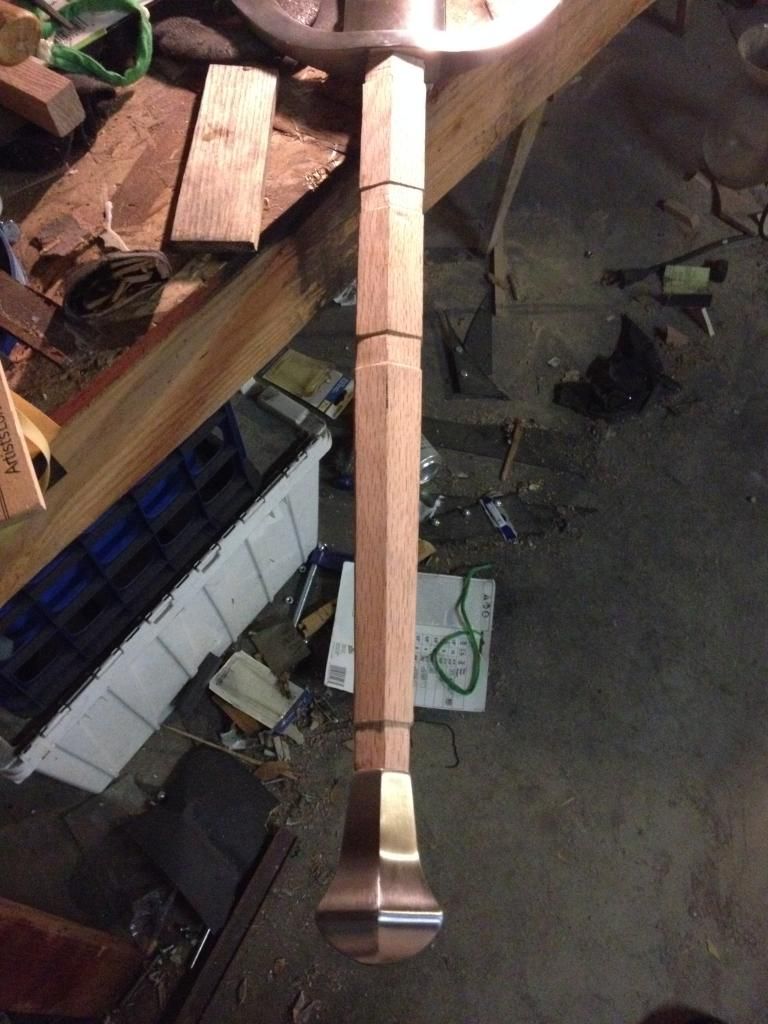
Sanding down the hexagonal geometry of the handle was not too difficult with a belt sander, but all of the filing was done by hand. I'm creating five 3/4 inch bands along the handle to inlay a 16 gauge nickel alloy to generate the banding appearance without the awkward feel of banded wire.
I started with the ends so that I would have to do minimal filing once the handle was over the tang, ensuring that I don't accidentally file the fittings of the sword.
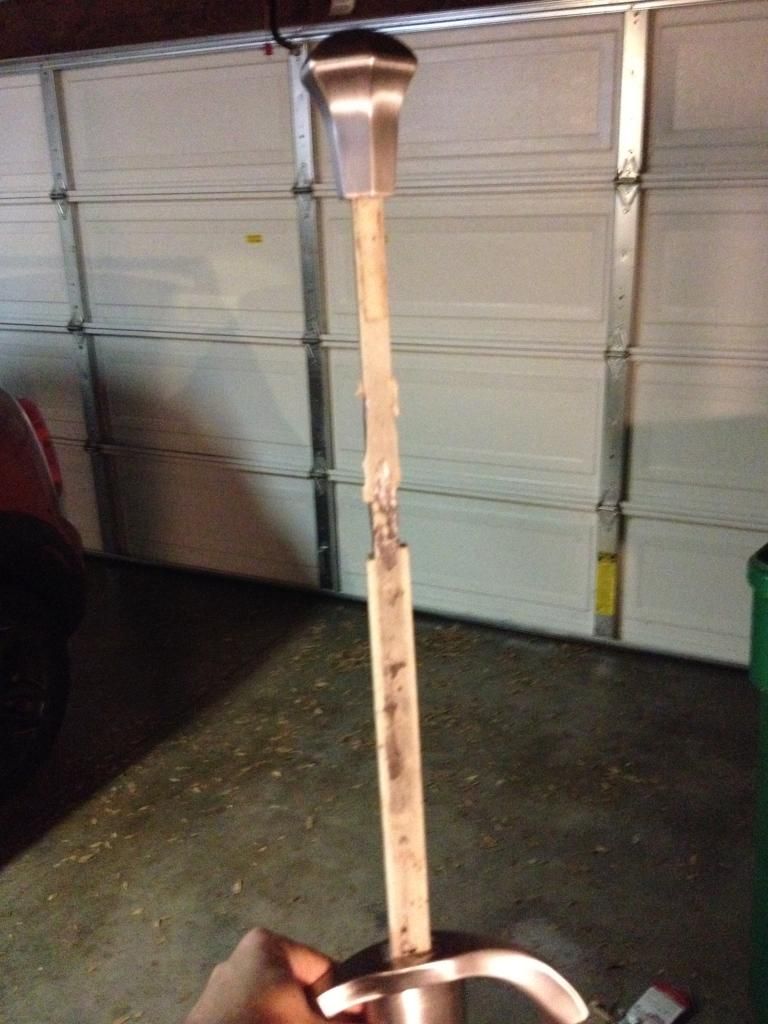
With some adhesive and a vice, I let the handle set on the tang overnight.
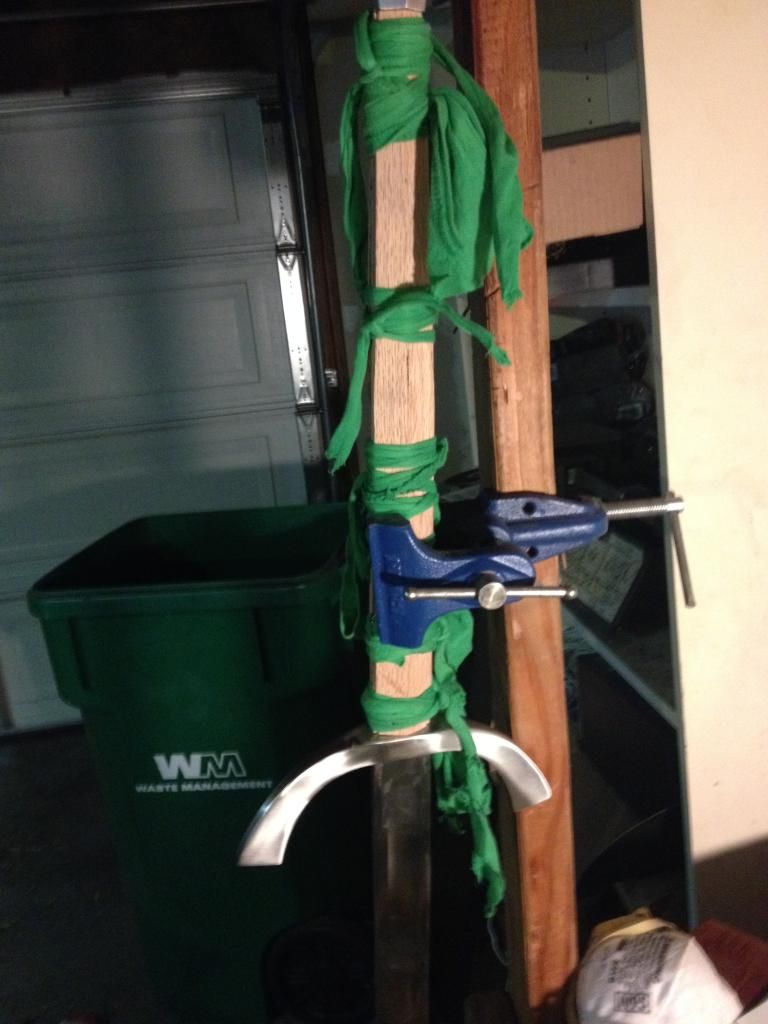
Come the next day, the handle was secure, and starting to look pretty nice.
Then came time for more filing to get all of those bands the right shape and depth.
I did manage to finish filing all five bands yesterday.
Unfortunately, while I was working on cutting out the strips of the nickel, I happened to take a notch out of my thumb with a cut-off disc on my angle grinder, and had to cease work. I was foolishly not wearing my gloves, and now it's going to be a couple of days at least before I get back in there. Have to give the thumb enough time to heal so that I don't have to worry about ripping the wound open while I'm working.
Hopefully I'll be able to share more photos of the project later this week after I've had the opportunity to finish fine sanding, stain the wood (going with a dark brown), and apply sealant and the nickel bands.
EDIT/CONTINUE
My thumb is... "healed."
Or, at the very least healed enough for me to put in a bit more work on the handle, and I'd estimate I'm around 90% done.
So, the next step after filing out the bands in the handle, was cutting the strips of nickel. I did not photograph that part. Let's face it, strips of nickel are boring.
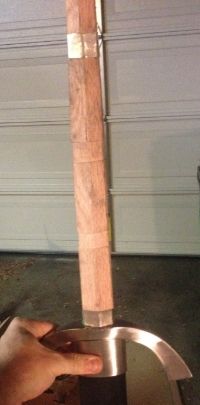
I had to affix the nickel in a different manner than I had originally planned. Because I was working with 16ga. nickel, it was actually too stiff to do in one piece with the equipment that I have. So each band of nickel is 2 strips with 3 bends, and there are two seams at the side where the nickel comes together.
Picture in of affixing the nickel in progress:
The handle after affixing all of the nickel:
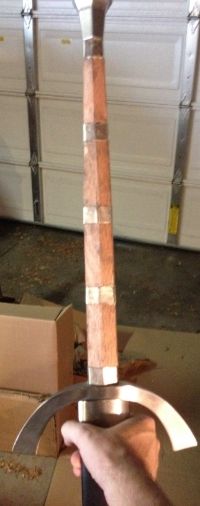
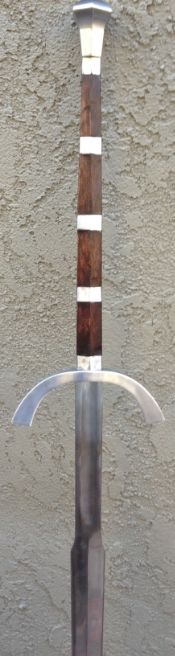
After all of the nickel was attached, I went back over the handle with my belt sander so that the nickel was smooth and flush with the wood. After everything was smooth, I applied the stain, and when the stain dried, some sealant to the wood. After letting the handle dried, I went back over the nickel with some sandpaper, and that's where we are now. I do plan on going over the nickel with a couple of higher grits of sandpaper to ensure that all of the stain and sealant are removed, and to give a slightly higher shine on the matte finish. I'll post another picture in better lighting after the finishing sanding is done, but as it stands, I'm quite pleased with the result.
The 90% finished handle:
Once all of this is said and done, I do also plan on re-finishing the scabbard to match the handle.
I stated that I would be interested in creating a new handle for this piece, to give it the banded style of handle generally associated with this type of sword.
Instead of doing a traditional wire banded handle though, I decided to approach it a little bit differently, and I think that when I've finished, the extra effort will be worth it.
The first step in removing the old handle of the sword was removing the old wire wrapping. This sounds pretty easy, but I must say on a 20" handle, there is a LOT of wire to remove.
Removing all that wire revealed an actually fairly pleasant looking wood handle below that. I was so shocked by how pleasant the wood looked that I was almost tempted to keep it, and just work with that, adding banding to the wood that is already there.
But then I thought considering the state of the handle, and all the visible resin in the guard, that it would probably be appropriate for me to just start from scratch.
The next step I took was to remove the old wood as carefully as I could in an attempt to preserve the essence of the geometry. It mostly worked out.
What I found underneath though surprised me a bit.
There was a VAST amount of resin in place. The tang is reasonably sized for this sword, but the wood of the handle was not a good fit for the tang, so it was pumped with absurd amounts of resin to keep the fit snug.
So the next step I took was to remove the old resin to get a good feel for how the tang looks, and get some measurements to cut the new wood.
I also decided to make my new handle a little bit wider since it would not have the wire wrapping over it to compensate for a slightly thinner handle.
This image is the old handle laid over the wood of the new.The difference is probably only around 1/8 inch.
Sanding down the hexagonal geometry of the handle was not too difficult with a belt sander, but all of the filing was done by hand. I'm creating five 3/4 inch bands along the handle to inlay a 16 gauge nickel alloy to generate the banding appearance without the awkward feel of banded wire.
I started with the ends so that I would have to do minimal filing once the handle was over the tang, ensuring that I don't accidentally file the fittings of the sword.
With some adhesive and a vice, I let the handle set on the tang overnight.
Come the next day, the handle was secure, and starting to look pretty nice.
Then came time for more filing to get all of those bands the right shape and depth.
I did manage to finish filing all five bands yesterday.
Unfortunately, while I was working on cutting out the strips of the nickel, I happened to take a notch out of my thumb with a cut-off disc on my angle grinder, and had to cease work. I was foolishly not wearing my gloves, and now it's going to be a couple of days at least before I get back in there. Have to give the thumb enough time to heal so that I don't have to worry about ripping the wound open while I'm working.
Hopefully I'll be able to share more photos of the project later this week after I've had the opportunity to finish fine sanding, stain the wood (going with a dark brown), and apply sealant and the nickel bands.
EDIT/CONTINUE
My thumb is... "healed."
Or, at the very least healed enough for me to put in a bit more work on the handle, and I'd estimate I'm around 90% done.
So, the next step after filing out the bands in the handle, was cutting the strips of nickel. I did not photograph that part. Let's face it, strips of nickel are boring.
I had to affix the nickel in a different manner than I had originally planned. Because I was working with 16ga. nickel, it was actually too stiff to do in one piece with the equipment that I have. So each band of nickel is 2 strips with 3 bends, and there are two seams at the side where the nickel comes together.
Picture in of affixing the nickel in progress:
The handle after affixing all of the nickel:
After all of the nickel was attached, I went back over the handle with my belt sander so that the nickel was smooth and flush with the wood. After everything was smooth, I applied the stain, and when the stain dried, some sealant to the wood. After letting the handle dried, I went back over the nickel with some sandpaper, and that's where we are now. I do plan on going over the nickel with a couple of higher grits of sandpaper to ensure that all of the stain and sealant are removed, and to give a slightly higher shine on the matte finish. I'll post another picture in better lighting after the finishing sanding is done, but as it stands, I'm quite pleased with the result.
The 90% finished handle:
Once all of this is said and done, I do also plan on re-finishing the scabbard to match the handle.


 Unfortunately I'm an edge-perfectionist. Also one wrong move when unsheathing and the throat nicks the edge on either side.
