George
Member
Banned
Posts: 1,899
|
Post by George on Jan 17, 2012 23:25:59 GMT
|
|
|
|
Post by Lonely Wolf Forge on Jan 18, 2012 0:08:03 GMT
id make my own b4 id buy one ike that, ud have a harder time geting it to fit than u would making a new one....i thought i did a tsuka build tutorial by the way
|
|
George
Member
Banned
Posts: 1,899
|
Post by George on Jan 18, 2012 1:40:21 GMT
You have a link for the tutorial?
Im prefer to make one, is there somewhere you can buy tsuka blanks? Im sure i saw it somewhere, sorta like the one linked but without channels or anything like that...
|
|
|
|
Post by Lonely Wolf Forge on Jan 18, 2012 1:41:10 GMT
let me do some digging....i know i made one
|
|
|
|
Post by Adrian Jordan on Jan 18, 2012 1:52:32 GMT
You can try to find some of the Thomas Buck tutorials. Here is a video of Pavel Bolf making a tsuka. It is the first of several videos on making katana koshirae. They are not so much tutorials as much as him simply making them, but they give a good reference. You have to watch it with those prefabricated tsukas. Cheness makes them, but they only fit Cheness correctly. You may be better off learning to make your own. In the end, this will save you time and money in the future. I'm attempting to learn myself, but I am about as far as "naturally gifted" when it comes to wood-working as a person can get. Tools you'd need are some wood chisels; probably 1/4" and 1/8", for nakago channel carving. Regular wood chisels are okay, or you can drop the $150ish bucks for a saya chisel, which works better but costs about 10 times as much as a standard wood chisel. Some sand-paper; 80 and 220 grit, for final shaping. A rough wood rasp for rough shaping. A Dremel or Drill, with 1/4" and 3/16" bits for mekugi-ana. A hand saw, for rough shape cutting. A hand-plane, for rough shaping. You should be able to get saya blanks from either Nihonzashi, www.nihonzashi.com/diy_supplies.aspx#Price_List or Namikawa, Good: www.namikawa-ltd.co.jp/cgi-bin/item_e.cgi?cate=15&no=10. Better: www.namikawa-ltd.co.jp/cgi-bin/item_e.cgi?cate=15&no=8 These should work well for tsukas. If you get it from a shop, look for yellow poplar. A straight, tight grain is desirable. Avoid knots like the plague. Also, SwordLord used to make them for about $45-$50. His work is top-flight, but I'm not sure of he is taking commissions at the moment. You can also look up frankthebunny. I know he does a lot of tsuka customizations, he may make cores. I'm not sure though, Lastly, Slav also does very good work, so you may want to ask him as well. I hope this helps a little. |
|
|
|
Post by drdata on Jan 18, 2012 2:38:10 GMT
use poplar, which is a form of magnolia like the ho wood that should ideally be used. Soft and easy to carve, and no acids or sap to leak onto blade, and at home-depot for cheap. win-win.
You want a tight fit, with as much contact as possible between nakago and tsuka. Custom is only way to go. Use candle black as you get close to see where the high spot are and go slow.
Hths
|
|
|
|
Post by lamebmx on Jan 18, 2012 3:10:34 GMT
2 cents, buy untreated wood and let it air dry for a while. you can plane a warped board flat, but cannot unwarp the finished tsuka. alternating the grain as seen in the tutorial around here will help with future warp.
|
|
George
Member
Banned
Posts: 1,899
|
Post by George on Jan 18, 2012 4:16:43 GMT
Thanks for the advice guys  Might watch a few vids n things first before i take the plunge myself Doesnt sound as hard as i imagined. Im just worried about the chiselling bit to get a perfect fit of the blade... |
|
|
|
Post by Lonely Wolf Forge on Jan 18, 2012 12:34:02 GMT
Tools i use
Belt sander 1X30
Dremmel tool with sanding wheels
Drill with proper size bit to match nakago holes
Low grit sandpaper for rough finishing
Medium grit paper for final finish
Electric saw capable of making strait cuts
Hickory axe handle from lowes, or pice of poplar from lowes
(i like the axe handles because theyre almost already to shape, just cut it in half, carve nakago ana, glue together and do final shaping with the belt sander/dremmel/sandpaper
Ive done tsukas and euro hilts using both the dremmel/sander method, and the chissel/plane method....i now exclusively use the dremmel/sander method LOL
|
|
|
|
Post by lamebmx on Jan 18, 2012 16:16:51 GMT
I saw advice somewhere, after my first failed attempt, to make depth marks using a drill where you plan to chisel. ie drill bit with req depth marked off with tape so you only drill down to that certain depth. drill a bunch of holes where you are to chisel, then you can chisel away really quickly until you get close. then of course slow down and check often.
|
|
avery
Senior Forumite
Manufacturer/Vendor
Posts: 1,530
|
Post by avery on Jan 19, 2012 1:06:52 GMT
Moved to the appropriate section.
|
|
|
|
Post by sceraxn on Jan 19, 2012 15:33:18 GMT
I did a write up on the old forum but its gone now for some reason(along with my old account lol). Dont have time to do another detailed DIY right now, but ill post some pics and give a few pointers. First of all, you should alternate the grain of the core , with the grain on both sides going towards the mune. The next thing to keep in mind, and one of the most important IMO, is that you must recess the nakago more on one side of the wood than the other. You do this so that when you strike something and force is put on the mune side if the nakago then it wont all go directly onto the joint of the tsuka, and will instead be absorbed by solid wood. After that its pretty straight forward and the videos that have already been posted will explain better than i ever can. Just keep in mind that since the nakago is recessed more on one side of the tsuka you cant go by the joints when forming the final shape. Heres my broken tsuka(from an $80 Musashi) and the aged white poplar i made the new one from 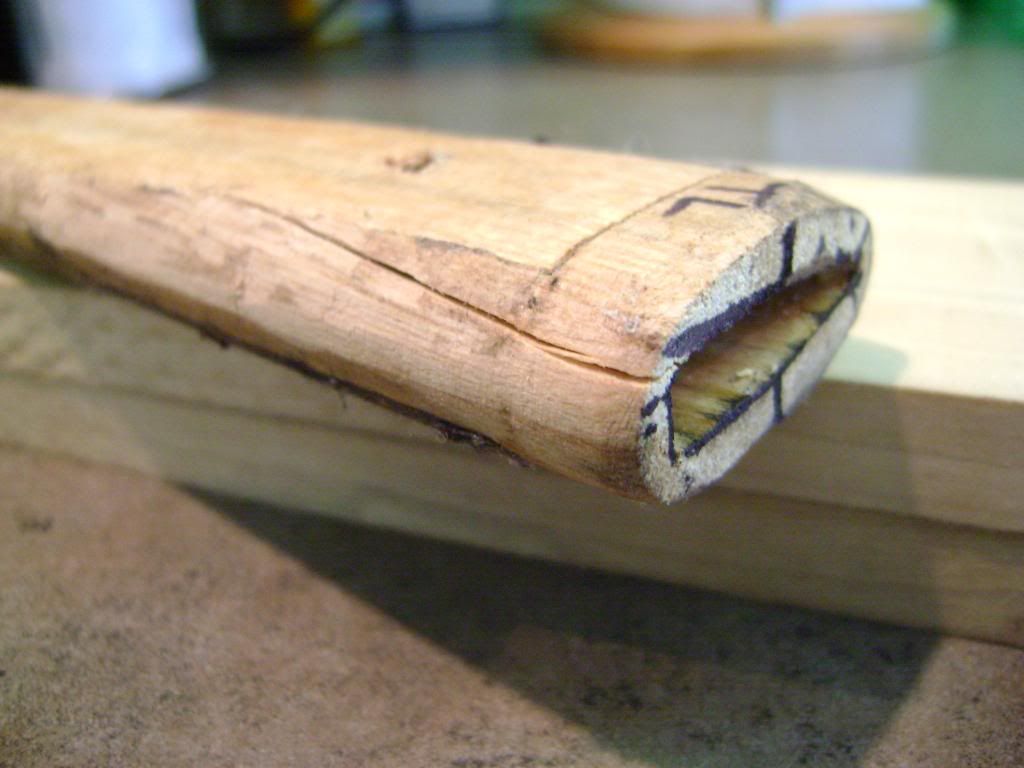 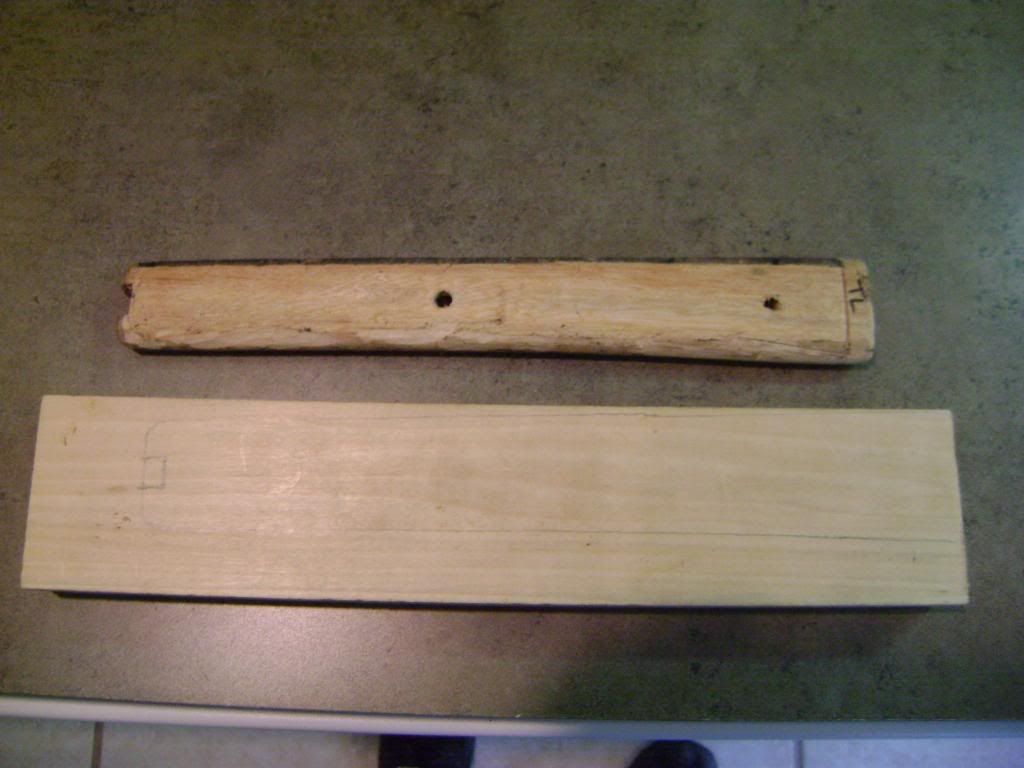 Heres a good picture showing the correct grain pattern angles and how its recessed more on one side than the other 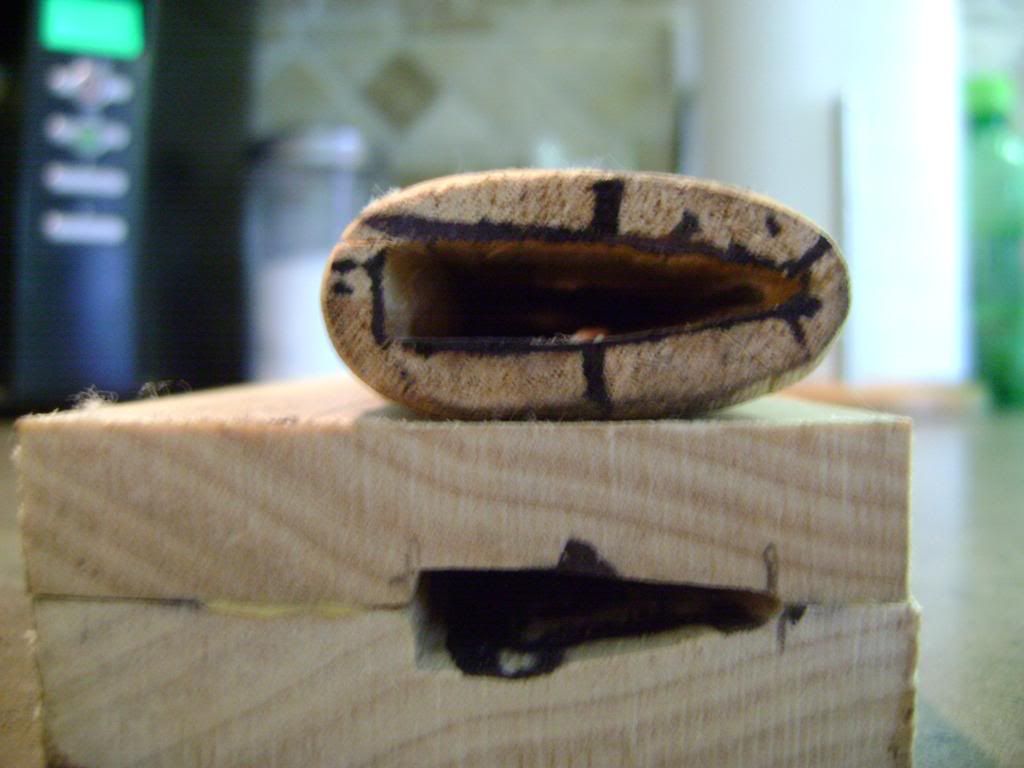 This is it after rough shaping and fitting of the fuchi and kashira. It will need more shaping, but ill wait until i get the samegawa and ito so that i can check the thickness before i do that. 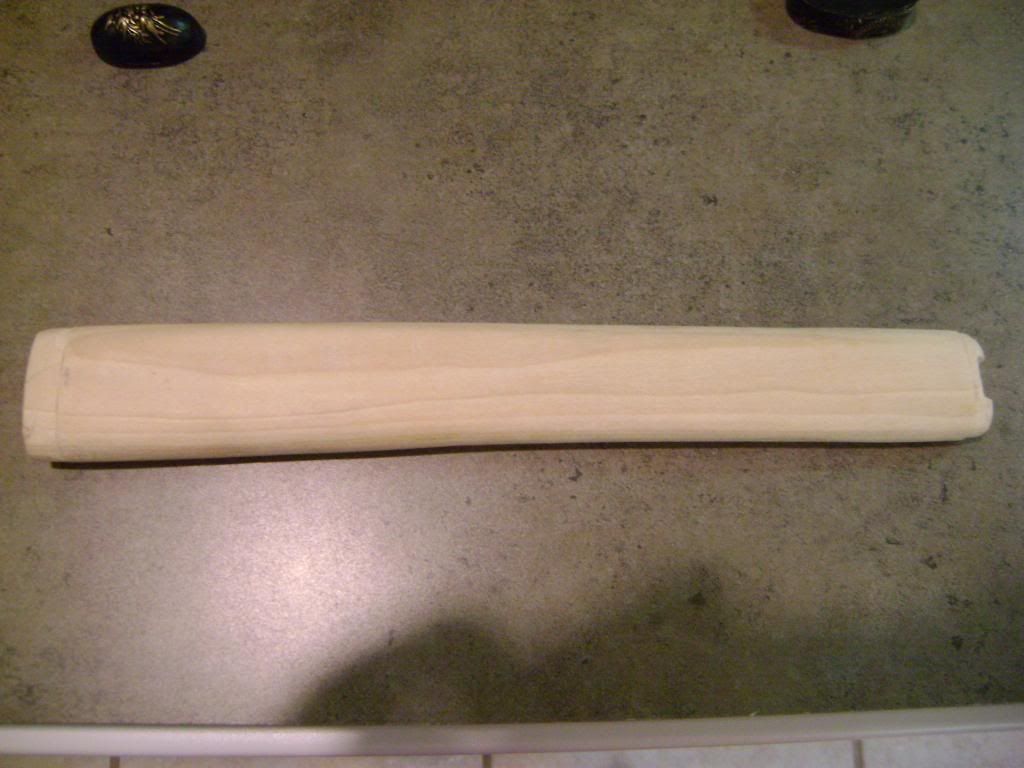 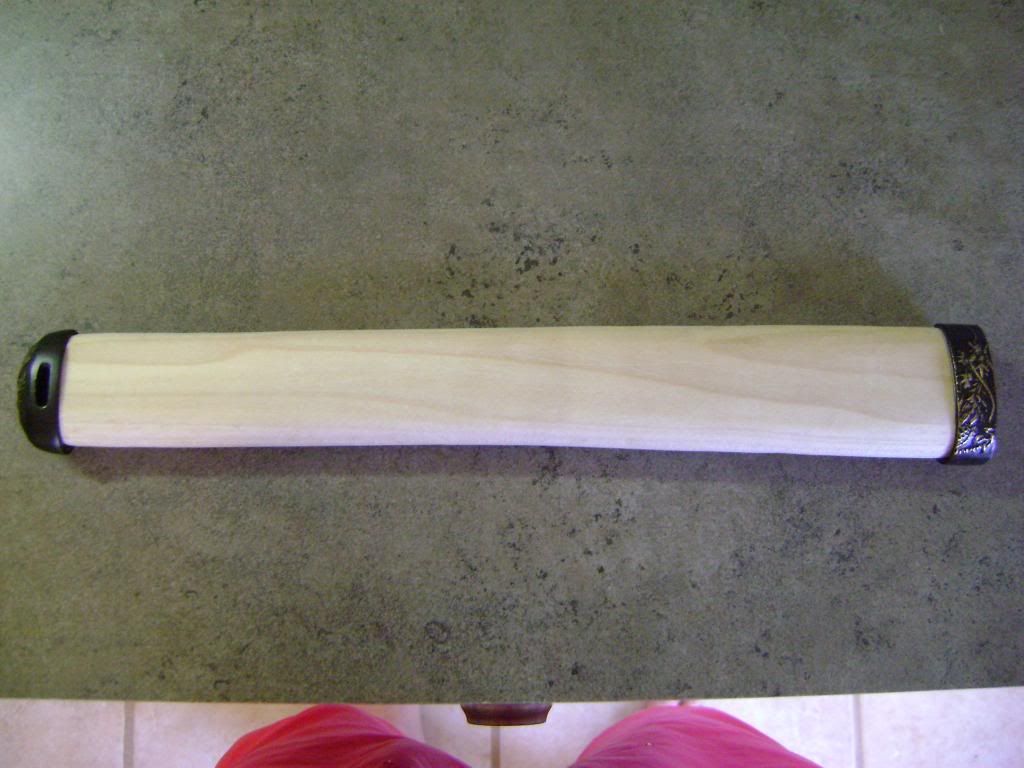 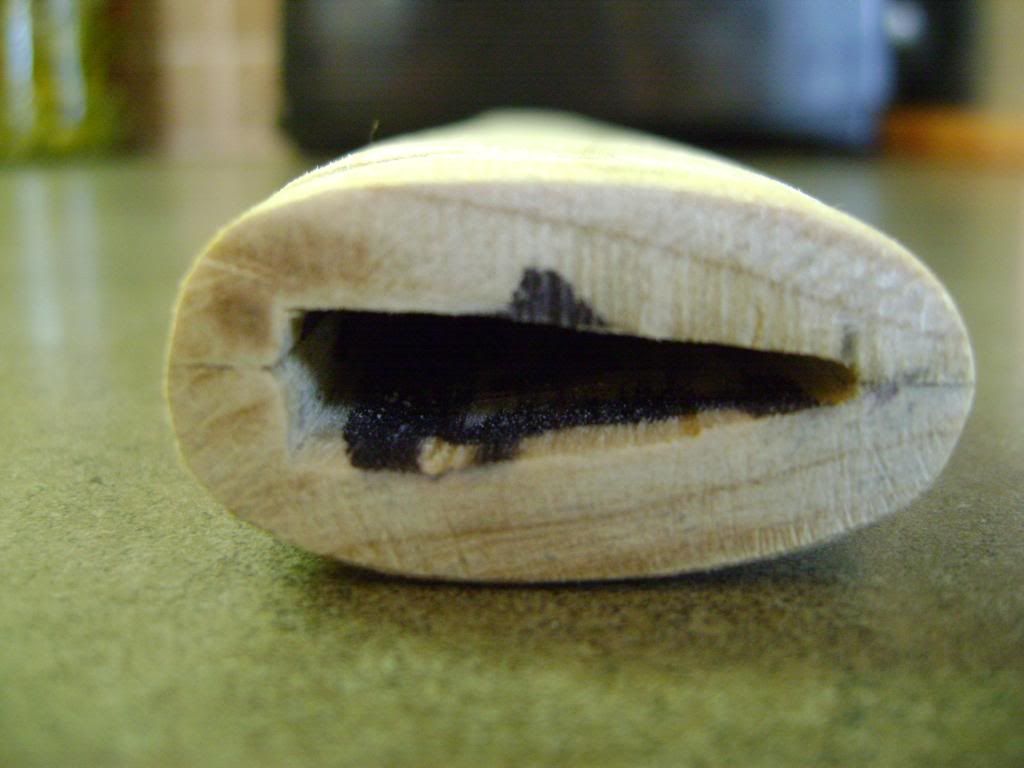 Rough tsuka mounted. Nice and tight friction fit so im only using one mekugi 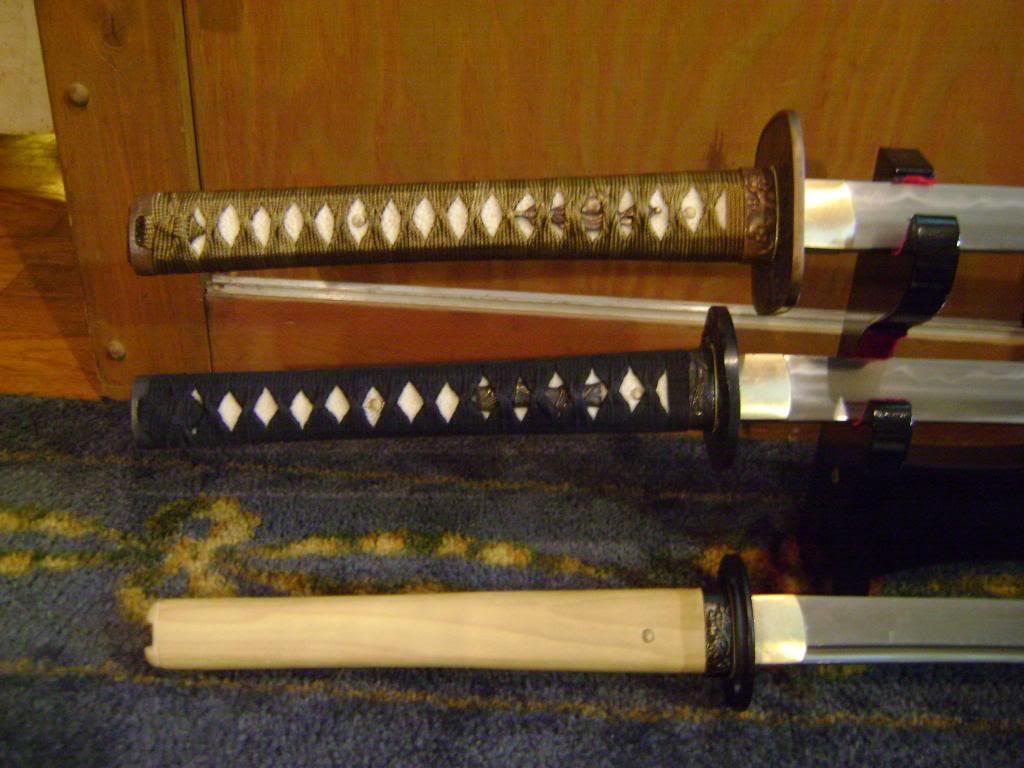 And for semprinis and giggles, this is the modified habaki and seppa that ill be using with it. 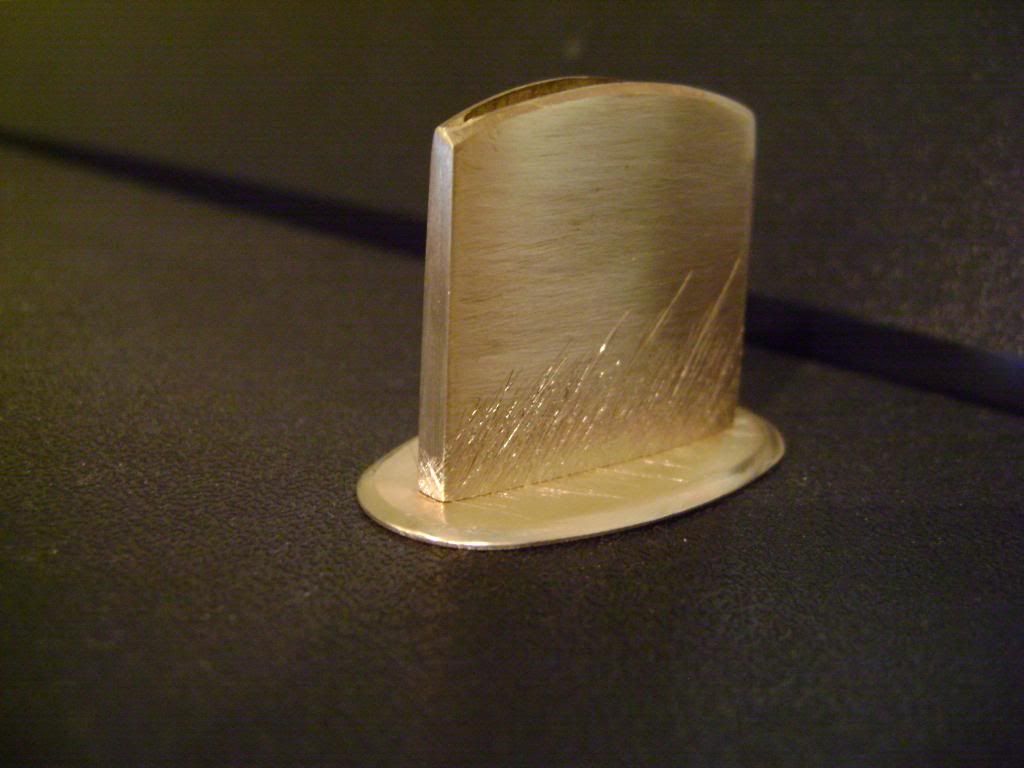 Hope this helps man, and good luck with the project :thumbup: |
|
|
|
Post by Lonely Wolf Forge on Jan 19, 2012 15:57:06 GMT
how did you do that to the habaki?
|
|
|
|
Post by sceraxn on Jan 19, 2012 16:16:48 GMT
Hardened steel chisels and a lot of patience :lol: I saw a habaki like that in The Craft of the Japanese Sword(great book btw) and decided to try it on my own. I think they said it depicts rice blowing in the wind or something like that. Either way, im really happy with the way it turned out. Heres a pic of a few hibaki from that book. This isnt the one that inspired me, but the one on the top right uses the same style, its just a little fancier than the one i did lol 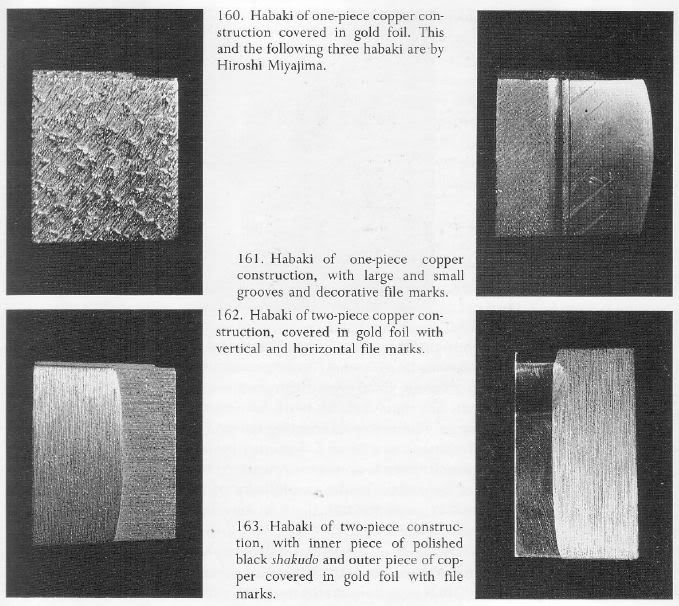 |
|
|
|
Post by lamebmx on Jan 19, 2012 17:36:44 GMT
Hey, I did the exact same thing to the exact same fittings. It is definately a huge improvement!
|
|
|
|
Post by sceraxn on Jan 19, 2012 17:53:05 GMT
You mean removing some of the black coating to give it an antiqued look? Yea man it really changed the look of the fittings. I was going to order some other ones, but this is just a cheap cutter so i think the modifications made them look good enough to keep around. Is it just me or does this dragon look awfully sad? :lol: 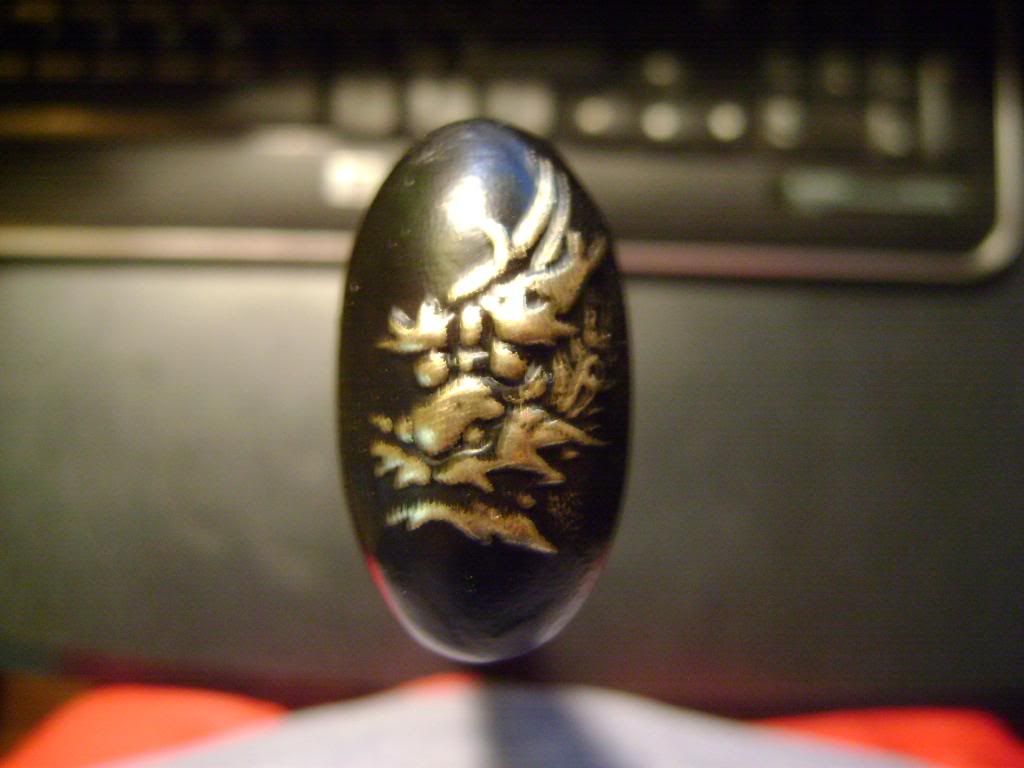 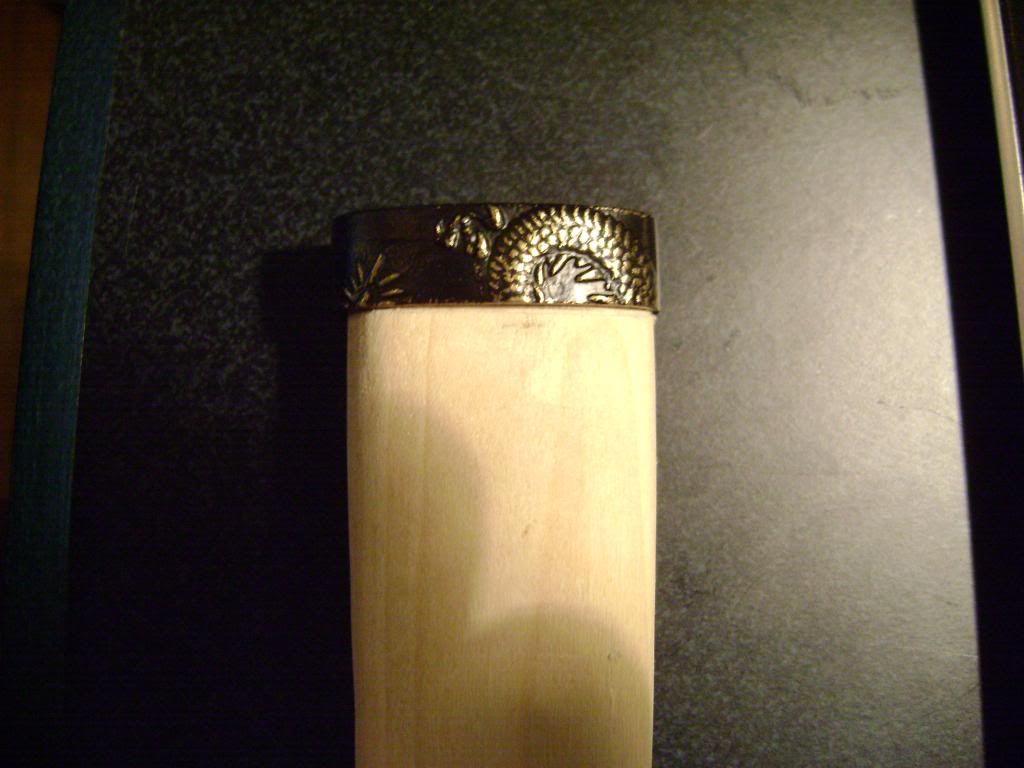 |
|
|
|
Post by lamebmx on Jan 19, 2012 18:07:10 GMT
exactly what I was talking about. Mine looks crazy pissed, i think i cleaned the eye brows less at the bottom and the eye balls more. kinda makes them look buggin out.
|
|
|
|
Post by sceraxn on Jan 19, 2012 18:41:26 GMT
I guess im still a newb at eye ball polishing. Probably why hes so sad :lol:
|
|
|
|
Post by Lonely Wolf Forge on Jan 19, 2012 19:51:43 GMT
|
|
|
|
Post by lamebmx on Jan 19, 2012 21:25:17 GMT
it was pure luck, or i was angry at the old lady and it manifested itself in my koshirae
|
|


 Unfortunately I'm an edge-perfectionist. Also one wrong move when unsheathing and the throat nicks the edge on either side.