
Post by Verity on Dec 16, 2017 17:27:54 GMT
Alright... so I’ve been talking in a few threads about a polishing project and so I figured I’d make a dedicated and persistent thread talking about my journey. I’ll have meandering thoughts and I guarantee some trial and error here as I try stuff that doesn’t work.
This will capture the blade polishing process and full remount of a blade, and I’ll also catalogue expenses as I go as best as I can. Some equipment such as stones I already have so those will not be included unless I burn through stuff completely and need to replace.
It is my hope that I can share in my successes, and hopefully some tidbit will be interesting to you all as well as maybe some secrets some are unaware of may emerge (this is NOT my first polishing project and I have picked up a few tricks from togi friends of mine as well as other sources over the years). I’d love comments from others who have tread similar paths and I am hoping I can learn something through this journey too...
So let’s begin...
First some background. I am working with a one-off custom blade made from 1095 steel, differentially hardened, with a truly geometric o-kissaki and koshi-sori. For me, the blade has a Nambokucho feel. Its length would give the impression of some grand Nambokucho blade that was cut down and made suriage...
Stats are:
Nagasa (properly measured as a straight line measure from munemachi to tip): 70cm (27.56”).
Motohaba (width at machi): 31.5mm (1.24”)
Sakihaba (width at yakote): 22.5mm (0.88”)
Motokasane (thickness at machi): 7mm (0.27”)
Sakikasane (thickness at yakote): 5mm (0.19”)
Sori: 15mm (0.59”)
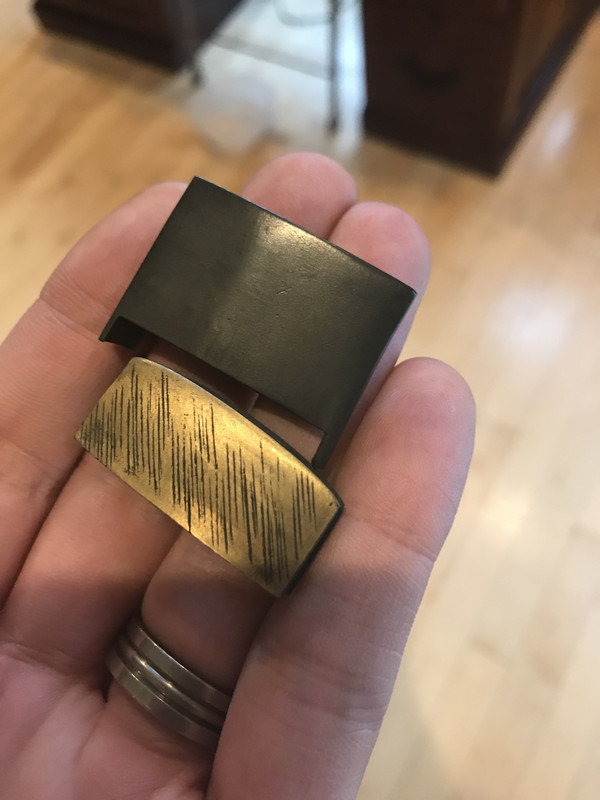
When I first acquired the blade, it was only rough ground. It was sold as a project blade because NONE of the polish was placed on it. It was shaped and geometry was set, but even the uniformity of a “foundation polish” would be a stretch. It had some pretty rough grind marks moving parallel to the edge present and the hamon was not visible at all. The blade had good shape though and I did some cutting with it before I began. I really like the way it handles and cuts. It came with mounts but aside from the tsuka and copper habaki which were well-fit, everything else was ill-fitting. I did acquire the blade knowing all this and it DID come with a (not super valuable) edo period iron tsuba. I figured the blade and tsuba alone made the price worth it. Net cost: $100.
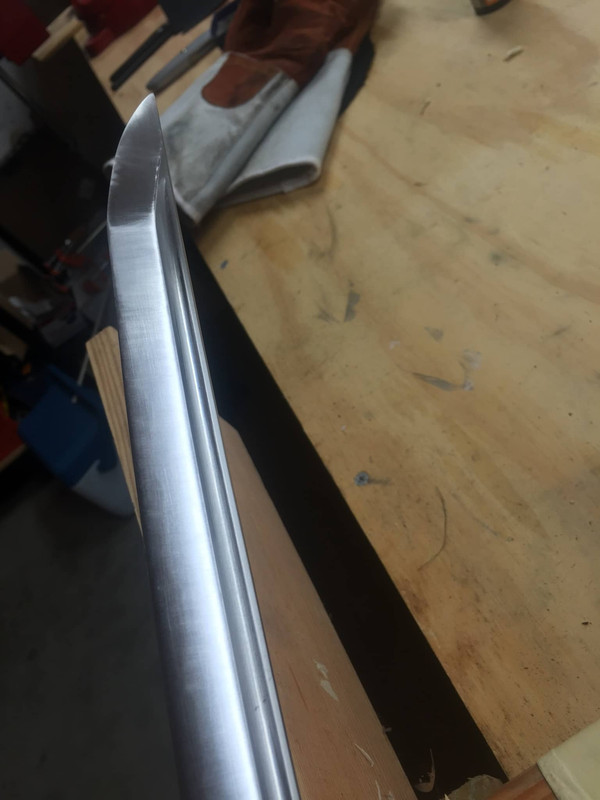
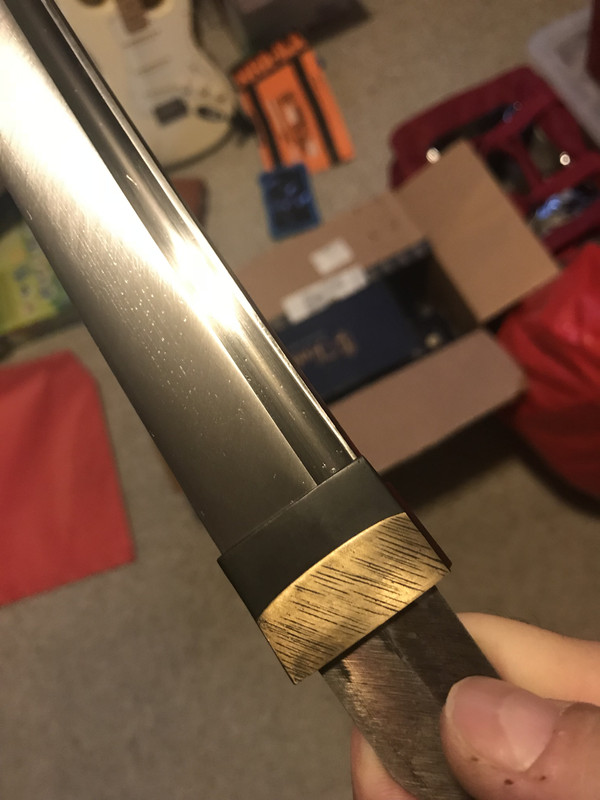
Here’s what it looked like when I started:
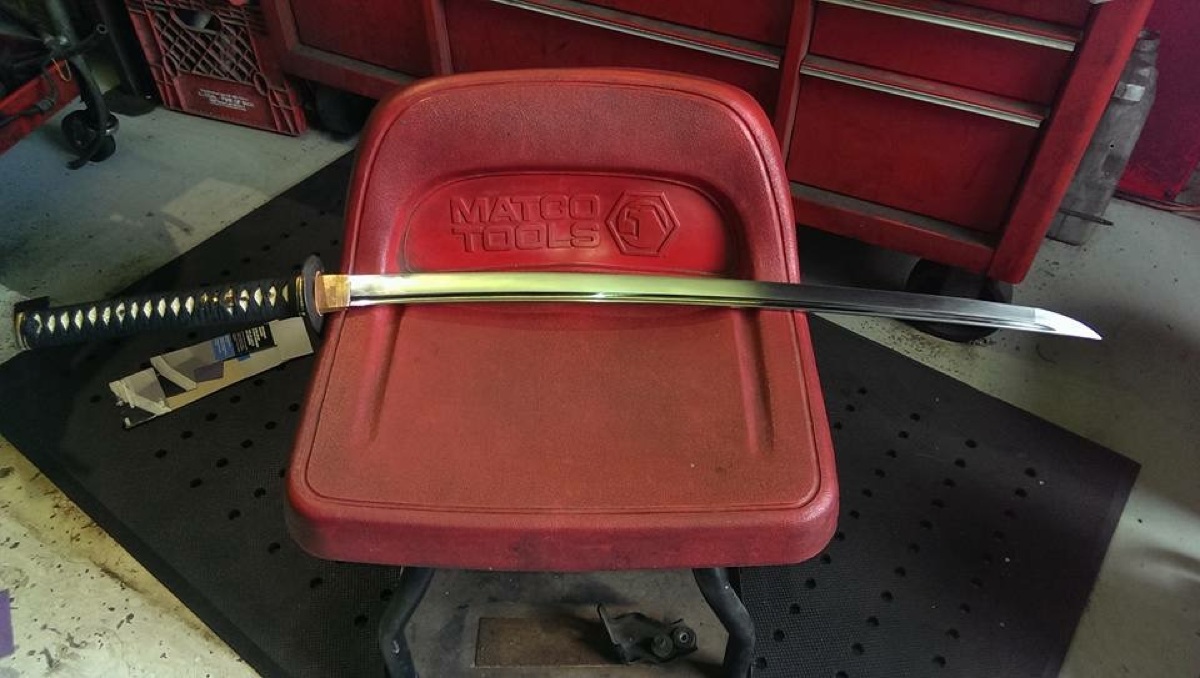
As you can tell from the above photos. No hamon visible. The bo-hi termination is pretty good though. I will have to clean that up a bit but not much.
But a great cutter, love the shape, and before I began I also took my HRC files and tested things. We have a spine around 50, and an edge between 60 and 65. I’d guess right over 60... maybe 62?
Punchline is a beautiful spring temper on the core and spine but a nice hard edge. I also think bringing out the hamon is gonna be hard given the difference between spine and core is not the wide gap we see in most DH swords (usually a 40/60ish).
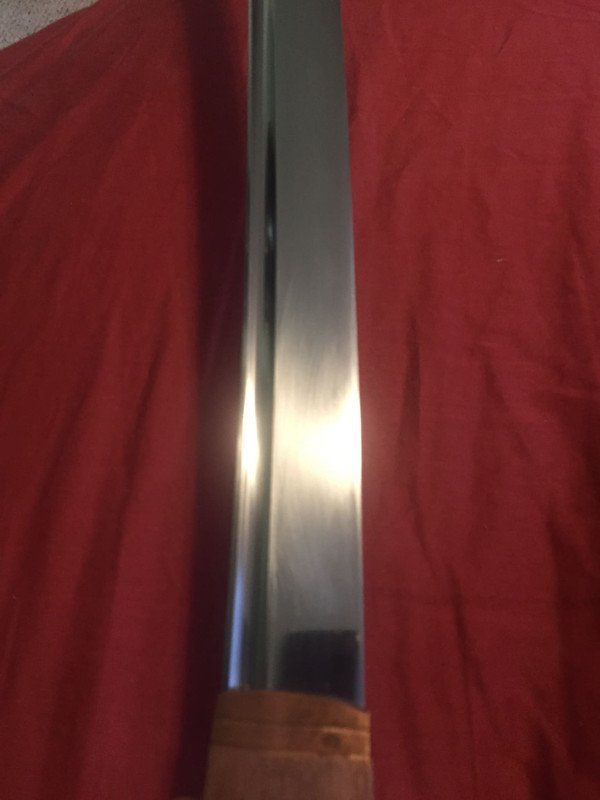
When I began, I assumed kaisei would be sufficient to begin taking out the rough grind (kaisei stone is roughly the equivalent of around 220-320 grit paper). So I began... and immediately results started looking good. I worked the blade over the stone in a perpendicular direction to the edge as kaisei would be. the hamon started popping and becoming visible immediately, which was a total shock to me personally as usually I don’t see hamon emerge in my work until the chu-nagura stone. I became excited...
here is what it looked like:
Then I found the first problem. A geometric issue about 4” from the yakote line. I worked this area for about 2-3 days and carefully corrected it as much as possible. I now have the “trouble” are down to about an inch, but any further attempt will disrupt the yakote because of proximity to it. Gonna have to let it go.
Maybe you can even see it... note the blade surface and edge around 3-4” from the kissaki... right around where you see part of my workbench board behind the blade in the background:
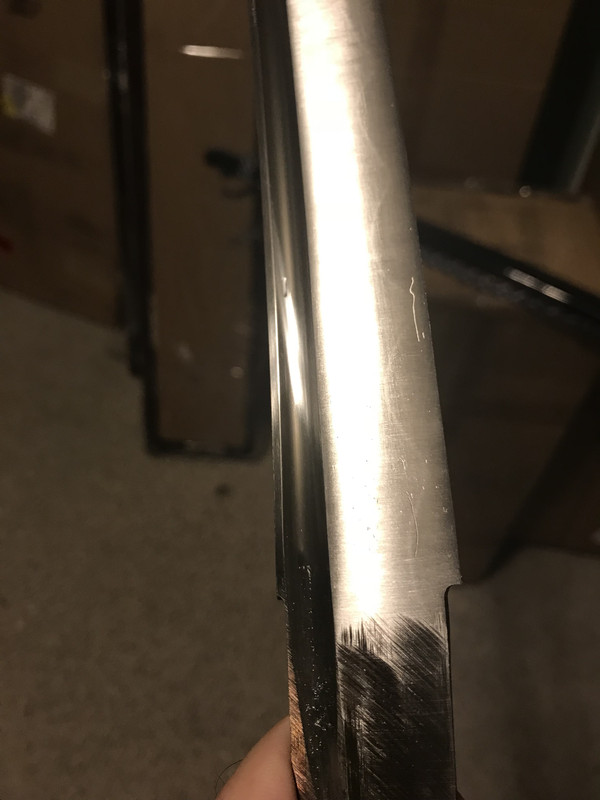
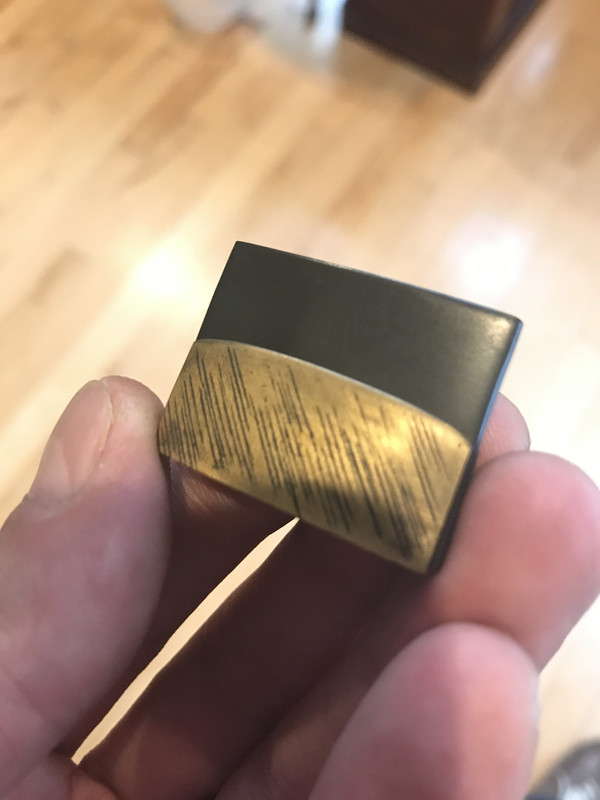
I continued on and have now encountered my second (and current) issue: a couple persistent grind marks from original shaping.
Kaisei would just not touch it... so... I posted my “aaaaargh” thread:
sbg-sword-forum.forums.net/thread/52848/aaaargh
Now I am dropping to a courser grit. But have to use paper. I don’t own an arato stone. So... 100-grit wet/dry paper it is. I took an old gift card and cut paper to fit. I started working carefully paper over blade (since I’ve stepped away from stones) at first with mineral oil. Still nothing.... after 2 hrs (one side of a 27.5” nagasa), the grinds were still there. So... I switched out paper and moved to water slurry... 2 more hours... they are SLOWLY getting shallower but still present. How frustrating because this is careful work as I am trying to avoid unintentional geometry changes....
I will continue capturing progress as I go... but I am currently in the process of trying to carefully remove the grinds without horking the geometry and/or spending too much time in one place.
This will capture the blade polishing process and full remount of a blade, and I’ll also catalogue expenses as I go as best as I can. Some equipment such as stones I already have so those will not be included unless I burn through stuff completely and need to replace.
It is my hope that I can share in my successes, and hopefully some tidbit will be interesting to you all as well as maybe some secrets some are unaware of may emerge (this is NOT my first polishing project and I have picked up a few tricks from togi friends of mine as well as other sources over the years). I’d love comments from others who have tread similar paths and I am hoping I can learn something through this journey too...
So let’s begin...
First some background. I am working with a one-off custom blade made from 1095 steel, differentially hardened, with a truly geometric o-kissaki and koshi-sori. For me, the blade has a Nambokucho feel. Its length would give the impression of some grand Nambokucho blade that was cut down and made suriage...
Stats are:
Nagasa (properly measured as a straight line measure from munemachi to tip): 70cm (27.56”).
Motohaba (width at machi): 31.5mm (1.24”)
Sakihaba (width at yakote): 22.5mm (0.88”)
Motokasane (thickness at machi): 7mm (0.27”)
Sakikasane (thickness at yakote): 5mm (0.19”)
Sori: 15mm (0.59”)
When I first acquired the blade, it was only rough ground. It was sold as a project blade because NONE of the polish was placed on it. It was shaped and geometry was set, but even the uniformity of a “foundation polish” would be a stretch. It had some pretty rough grind marks moving parallel to the edge present and the hamon was not visible at all. The blade had good shape though and I did some cutting with it before I began. I really like the way it handles and cuts. It came with mounts but aside from the tsuka and copper habaki which were well-fit, everything else was ill-fitting. I did acquire the blade knowing all this and it DID come with a (not super valuable) edo period iron tsuba. I figured the blade and tsuba alone made the price worth it. Net cost: $100.
Here’s what it looked like when I started:
As you can tell from the above photos. No hamon visible. The bo-hi termination is pretty good though. I will have to clean that up a bit but not much.
But a great cutter, love the shape, and before I began I also took my HRC files and tested things. We have a spine around 50, and an edge between 60 and 65. I’d guess right over 60... maybe 62?
Punchline is a beautiful spring temper on the core and spine but a nice hard edge. I also think bringing out the hamon is gonna be hard given the difference between spine and core is not the wide gap we see in most DH swords (usually a 40/60ish).
When I began, I assumed kaisei would be sufficient to begin taking out the rough grind (kaisei stone is roughly the equivalent of around 220-320 grit paper). So I began... and immediately results started looking good. I worked the blade over the stone in a perpendicular direction to the edge as kaisei would be. the hamon started popping and becoming visible immediately, which was a total shock to me personally as usually I don’t see hamon emerge in my work until the chu-nagura stone. I became excited...
here is what it looked like:
Then I found the first problem. A geometric issue about 4” from the yakote line. I worked this area for about 2-3 days and carefully corrected it as much as possible. I now have the “trouble” are down to about an inch, but any further attempt will disrupt the yakote because of proximity to it. Gonna have to let it go.
Maybe you can even see it... note the blade surface and edge around 3-4” from the kissaki... right around where you see part of my workbench board behind the blade in the background:
I continued on and have now encountered my second (and current) issue: a couple persistent grind marks from original shaping.
Kaisei would just not touch it... so... I posted my “aaaaargh” thread:
sbg-sword-forum.forums.net/thread/52848/aaaargh
Now I am dropping to a courser grit. But have to use paper. I don’t own an arato stone. So... 100-grit wet/dry paper it is. I took an old gift card and cut paper to fit. I started working carefully paper over blade (since I’ve stepped away from stones) at first with mineral oil. Still nothing.... after 2 hrs (one side of a 27.5” nagasa), the grinds were still there. So... I switched out paper and moved to water slurry... 2 more hours... they are SLOWLY getting shallower but still present. How frustrating because this is careful work as I am trying to avoid unintentional geometry changes....
I will continue capturing progress as I go... but I am currently in the process of trying to carefully remove the grinds without horking the geometry and/or spending too much time in one place.


 Unfortunately I'm an edge-perfectionist. Also one wrong move when unsheathing and the throat nicks the edge on either side.
