FENCING DUMMY... portable version.
Oct 8, 2010 2:36:10 GMT
Post by Sir Tre on Oct 8, 2010 2:36:10 GMT
Fencing Dummy
« Thread Started on Jun 7, 2010, 18:46 »
I realize that this is not really a training weapon, per say, but it is for weapon training. This is to be based on a wing tsun dummy. The dummy pegs will be replaced with fiberglass whips. (like the ones that hold bicycle flags. I had a crappy version of this before, just the whip stuck in a tree knot hole. The trick is, that when you parry, and lunge, if you do it wrong, you get the sxxt slapped out of you by the whip. When I finish making my new one, and it will look nice, I will shoot some pick and post them here.
when you need some functional sparring practice, and your partners are not as good as you, this is a good substitute. The first time I used one, I had welts on my arms from the whip. The great part of it, is that it showed I needed improvement. In a real sword match, it would have been cuts.
OK, I finally got around to making one of these things. Trueswordsman, Slactitude, Liam, Deejay, and Gryndar have been waiting for pics. I am out of town on a EMS job, and have been practically living at the station. Well after so much time watching the same old movies on HULU, it got boring. so, since I have a blunt jian in my truck, I went to the hardware store and picked up a few supplies... pic of supplies.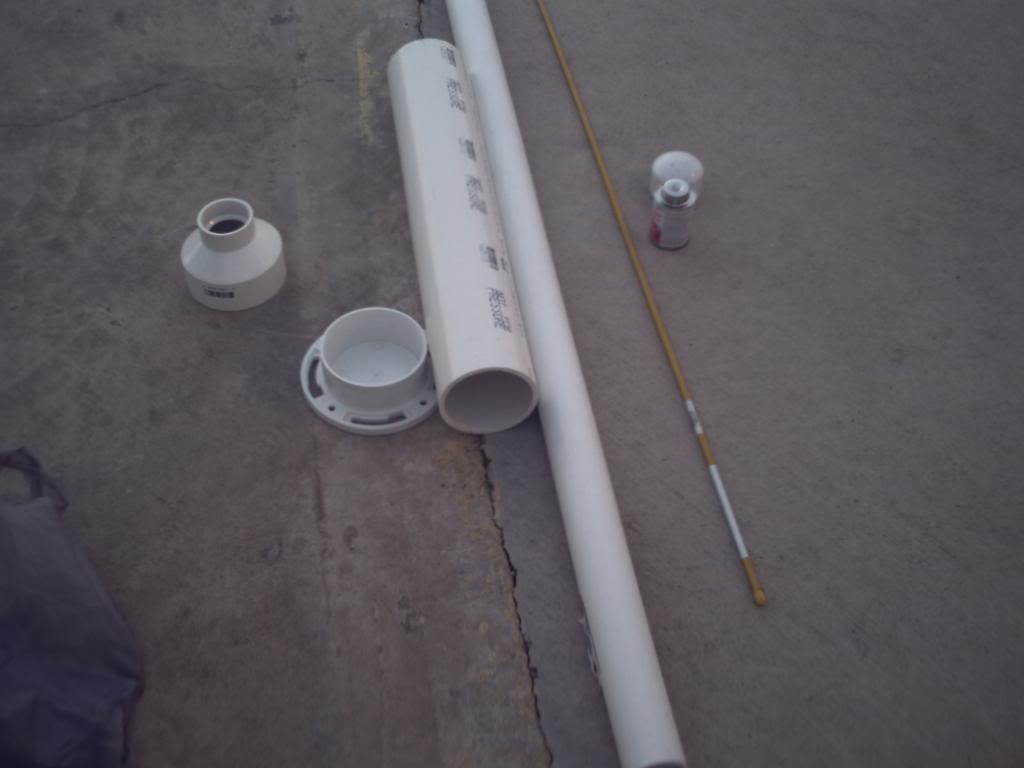
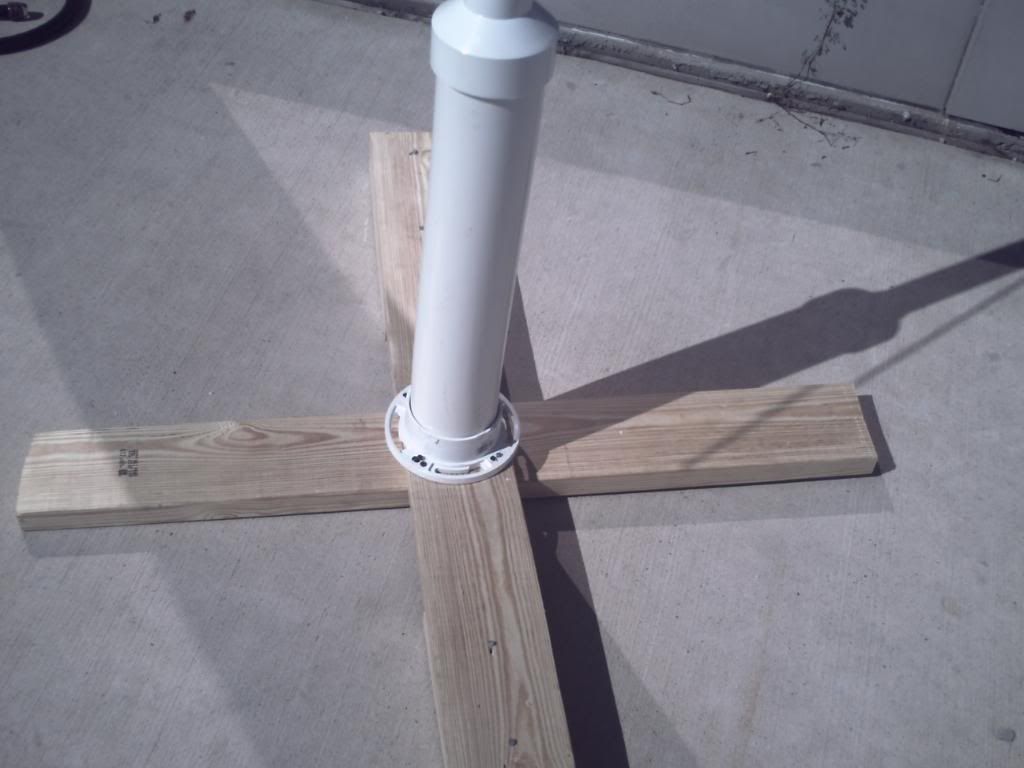
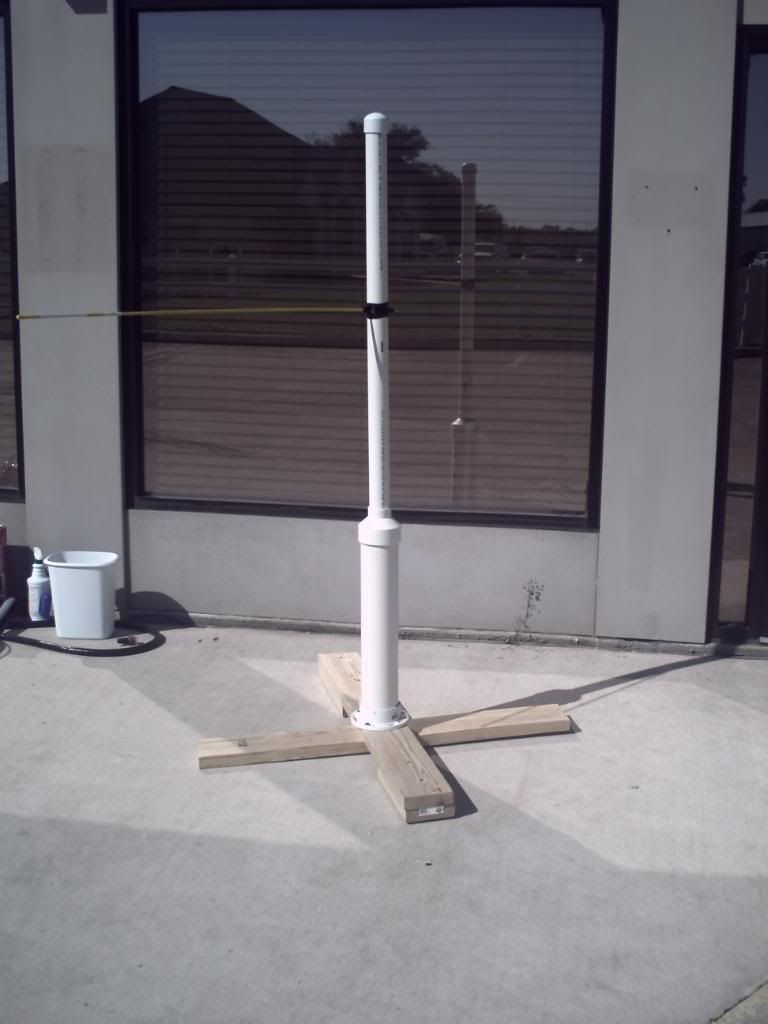
In the pic you will see a base plate flange. That will be for mounting to base. Two things you do not see is a bag of sand, and a 2x6. the 2x6 gets cut in two 4 ft sections, and additional 1 ft sections. the 2 4 ft'rs get nailed cross each other flat. then the two 1 ft sections are to be stabilizers for the 4 ft'r that is on top. take the flange and glue it to one end of the 2 ft 4 in pipe. fill pipe with sand while in upright position. then glue 4x2 adapter on other end. Then you will want to take the 2 in pipe and measure it so the whole assembly is 6 ft tal, which will be actually 68 in before adding wood base. When you have done this, glue the 2in pipe into the adapter, keeping upright, and finish off with pipe cap on top.
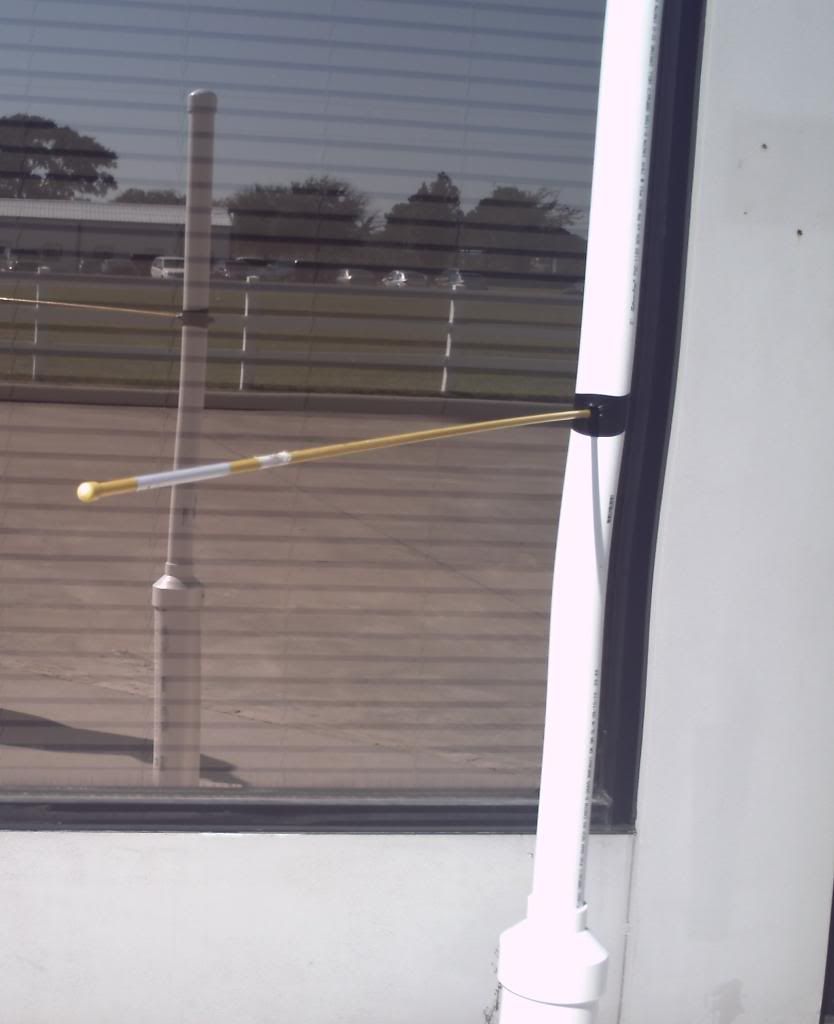
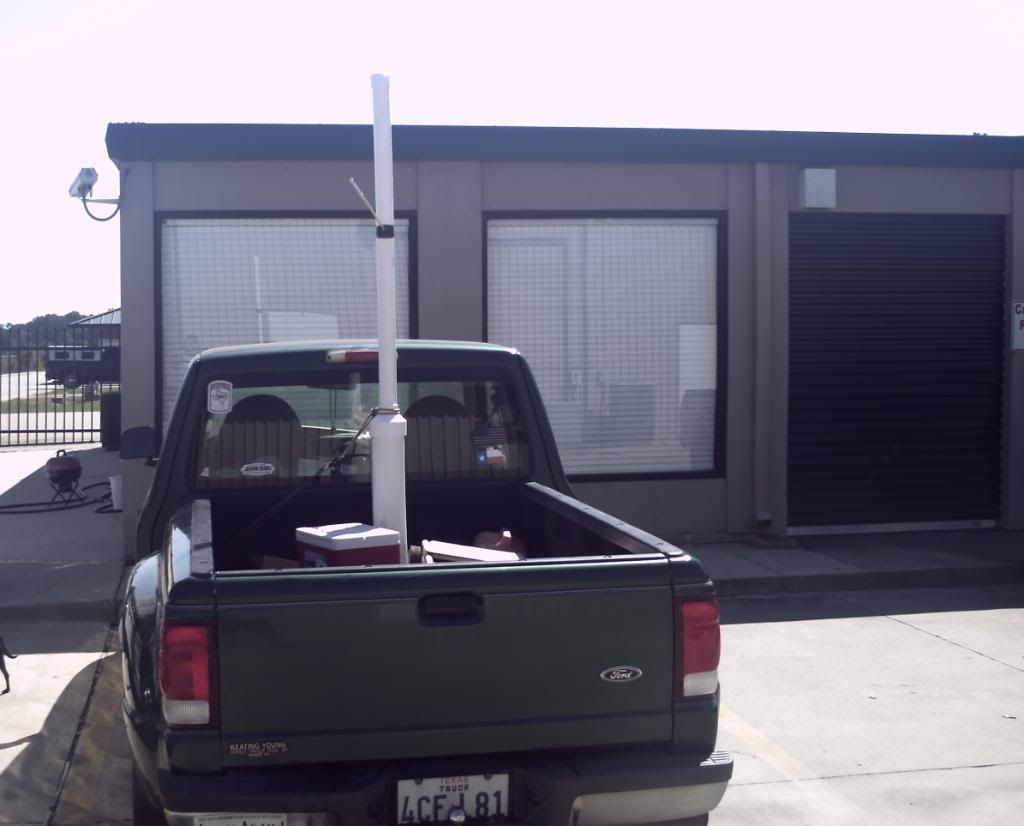
Now you will want to mount the assembly to the center of your wood base for stability. Once you have done that and decided which side you want to face toward you... doesn't really matter, since it is round... drill a hole at the same height of the center of your chest. use a bit just right size so as you almost have to force the fiberglass rod into it. I used electrical tape to make a seal so as sand will not spill out should i transport it on its side.
I will post the rest of the pics in a little while.
« Thread Started on Jun 7, 2010, 18:46 »
I realize that this is not really a training weapon, per say, but it is for weapon training. This is to be based on a wing tsun dummy. The dummy pegs will be replaced with fiberglass whips. (like the ones that hold bicycle flags. I had a crappy version of this before, just the whip stuck in a tree knot hole. The trick is, that when you parry, and lunge, if you do it wrong, you get the sxxt slapped out of you by the whip. When I finish making my new one, and it will look nice, I will shoot some pick and post them here.
when you need some functional sparring practice, and your partners are not as good as you, this is a good substitute. The first time I used one, I had welts on my arms from the whip. The great part of it, is that it showed I needed improvement. In a real sword match, it would have been cuts.
OK, I finally got around to making one of these things. Trueswordsman, Slactitude, Liam, Deejay, and Gryndar have been waiting for pics. I am out of town on a EMS job, and have been practically living at the station. Well after so much time watching the same old movies on HULU, it got boring. so, since I have a blunt jian in my truck, I went to the hardware store and picked up a few supplies... pic of supplies.

In the pic you will see a base plate flange. That will be for mounting to base. Two things you do not see is a bag of sand, and a 2x6. the 2x6 gets cut in two 4 ft sections, and additional 1 ft sections. the 2 4 ft'rs get nailed cross each other flat. then the two 1 ft sections are to be stabilizers for the 4 ft'r that is on top. take the flange and glue it to one end of the 2 ft 4 in pipe. fill pipe with sand while in upright position. then glue 4x2 adapter on other end. Then you will want to take the 2 in pipe and measure it so the whole assembly is 6 ft tal, which will be actually 68 in before adding wood base. When you have done this, glue the 2in pipe into the adapter, keeping upright, and finish off with pipe cap on top.
Now you will want to mount the assembly to the center of your wood base for stability. Once you have done that and decided which side you want to face toward you... doesn't really matter, since it is round... drill a hole at the same height of the center of your chest. use a bit just right size so as you almost have to force the fiberglass rod into it. I used electrical tape to make a seal so as sand will not spill out should i transport it on its side.
I will post the rest of the pics in a little while.


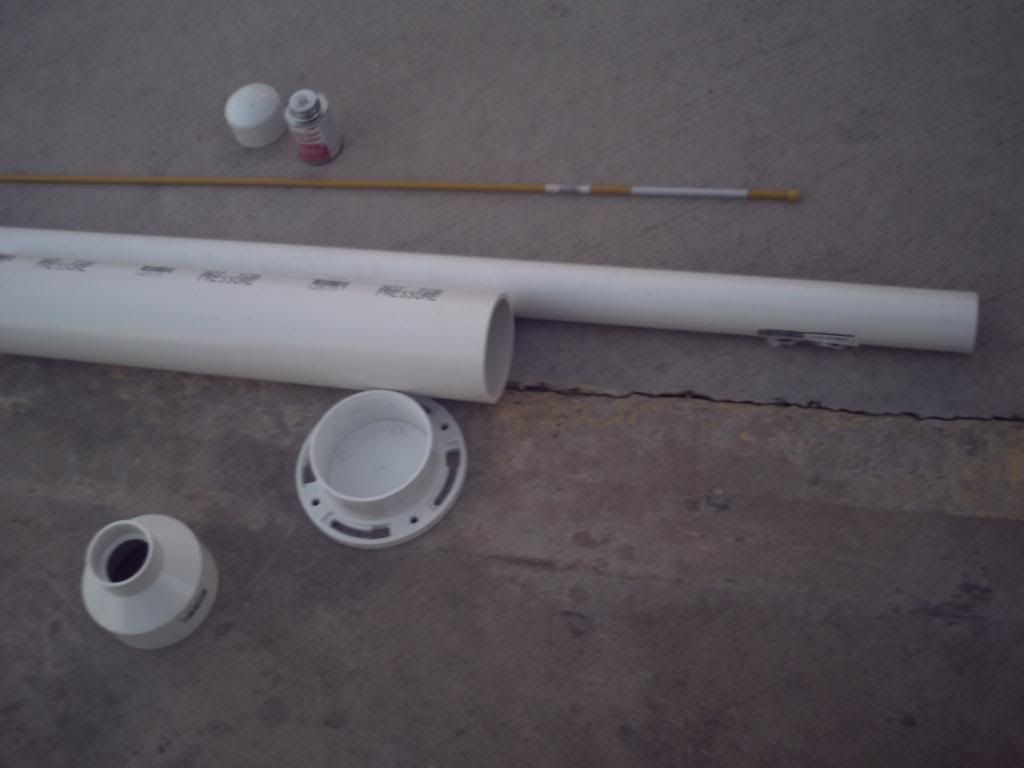 supplies
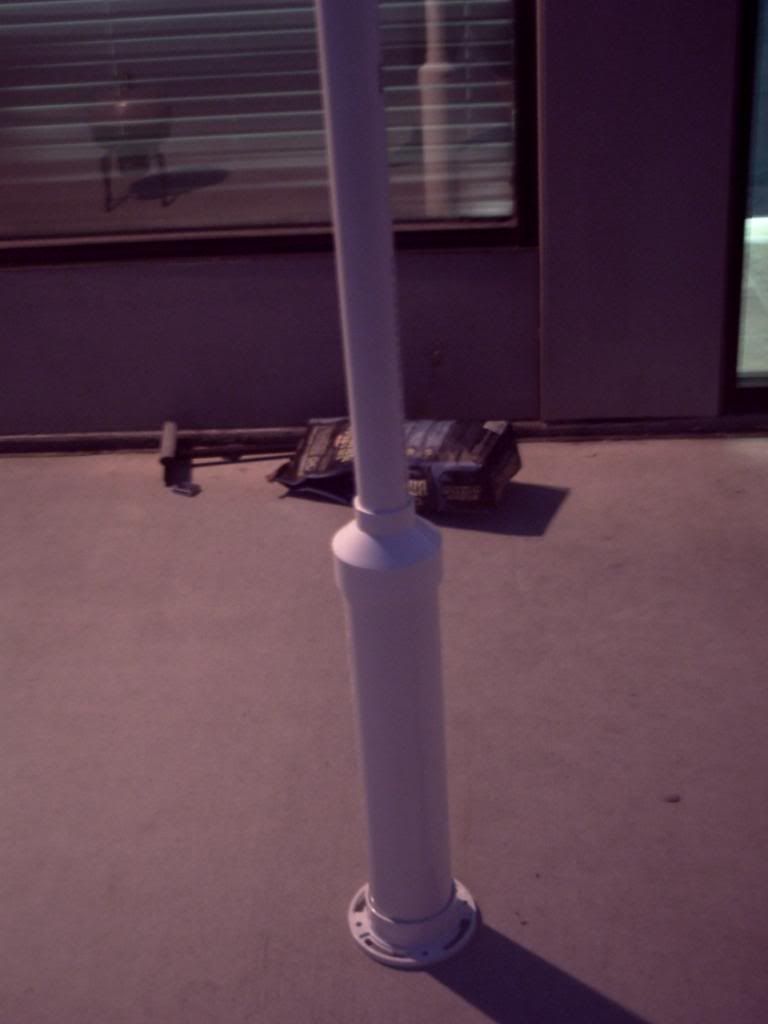 assembly
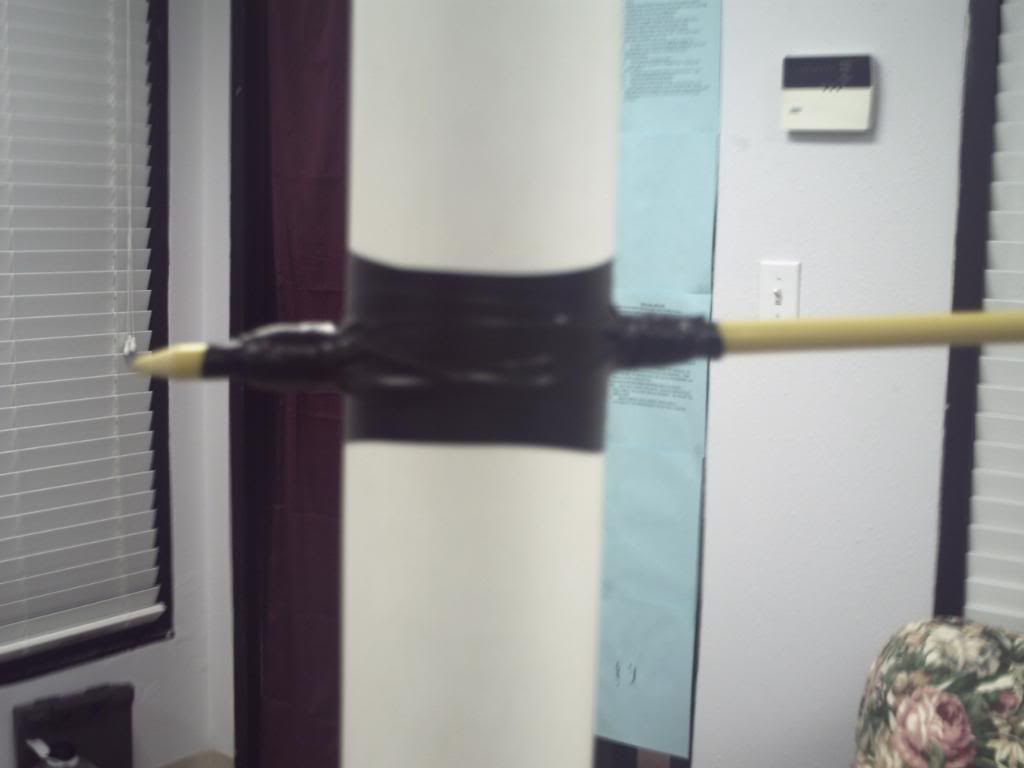 taped seal for rod
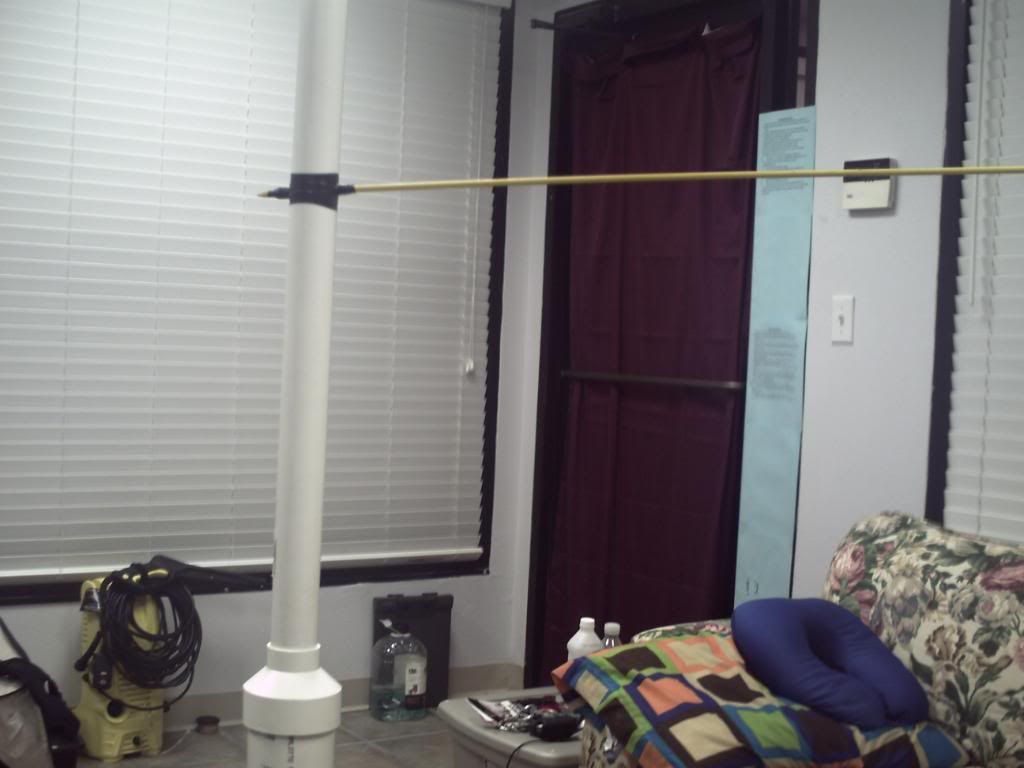 VOiLA!!!
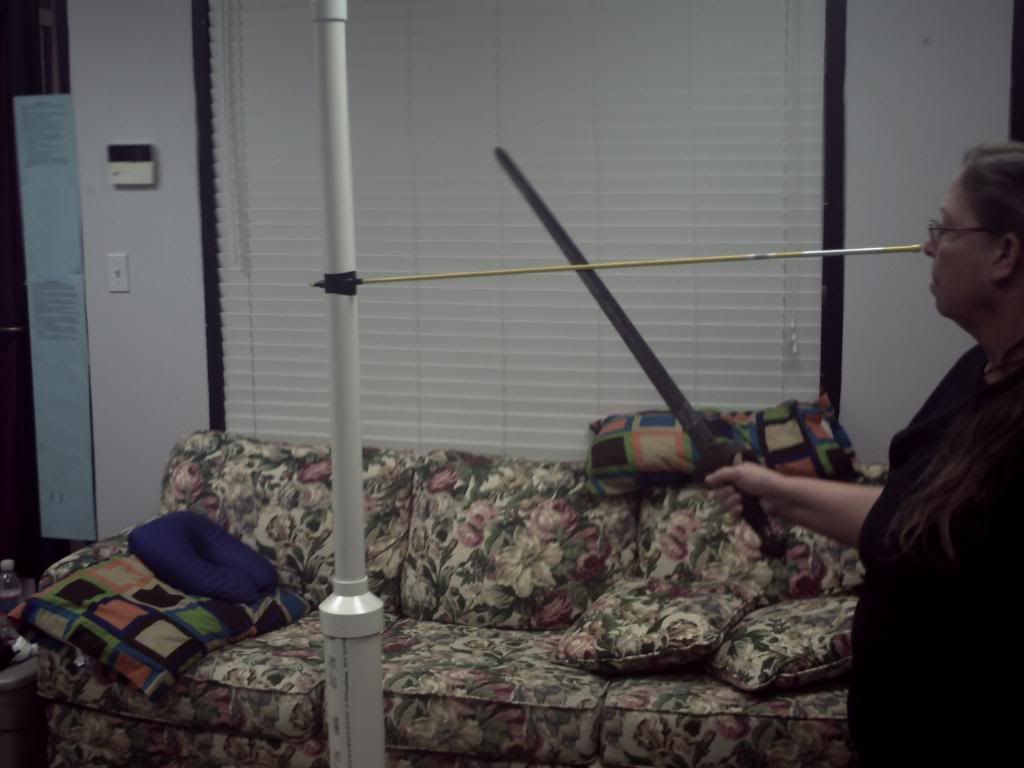 student can use it
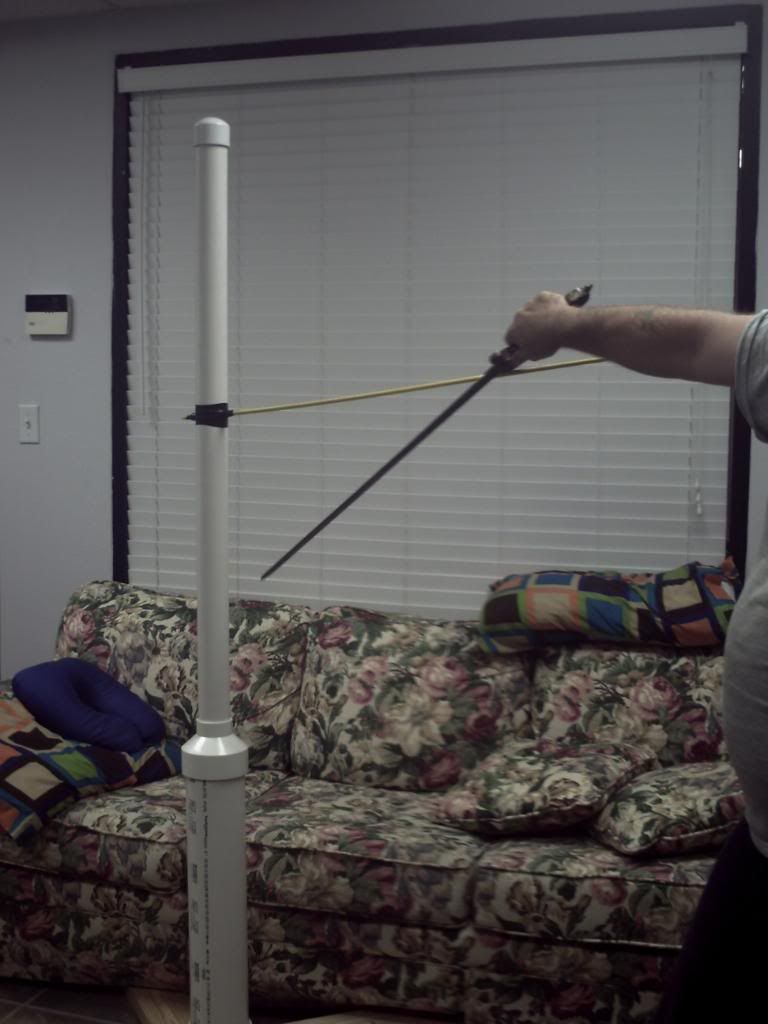 catching with guard
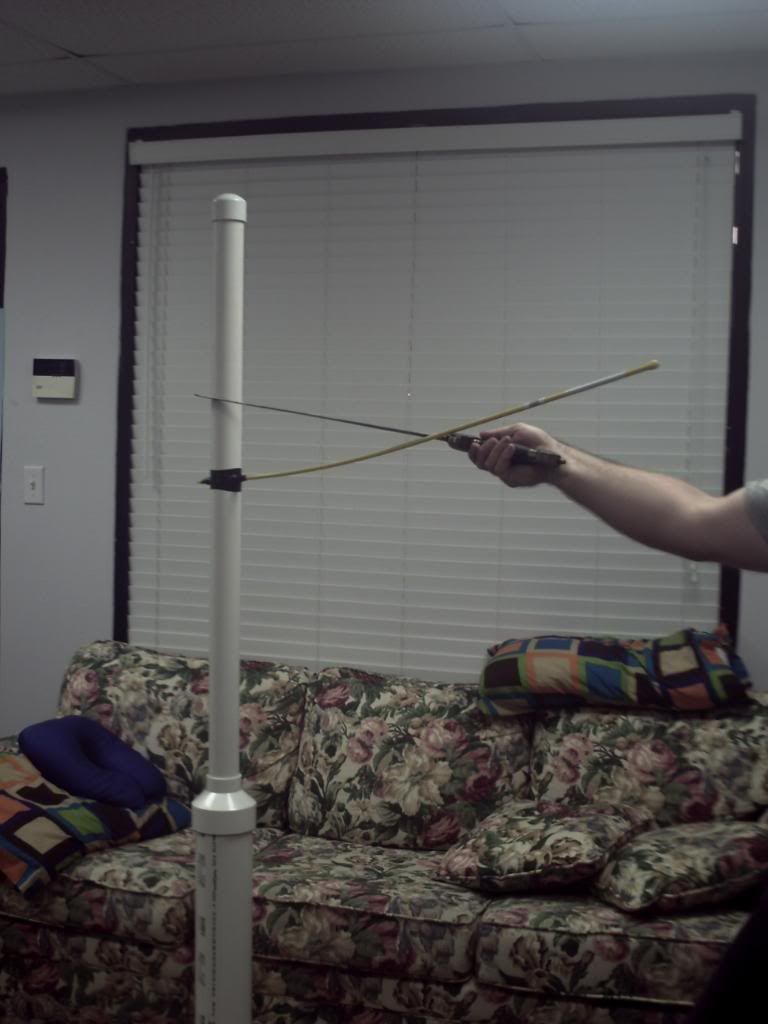 catch with guard and slice